The Raspberry Pi can be used for almost anything. From home media centers to custom retro gaming setups, it's safe to say that the Pi and similar single-board computers are becoming ubiquitous.
When you start experimenting with the GPIO pins on Raspberry Pi, things get even more interesting. We've already covered what all those pins do, so now let's look at how to enable the SPI and I2C protocols on your Pi and why you might want to.
What Is SPI on Raspberry Pi?
Before diving in, let's briefly cover what these two protocols do.
SPI (or Serial Peripheral Interface) allows a microcontroller such as the Pi to communicate with over 100 peripheral components at once. The microcontroller acts as a "master" to all of the "slave" components, and can communicate with them at a high speed. This diagram outlines a simple SPI connection:

If this is your first time reading about SPI it can seem quite intimidating, but stick with it! SCLK is the clock speed set by the master which determines the speed that information is shared between the devices.
At each cycle (or "tick") of the clock, both master and slave send and receive one bit of information. This is what the MOSI (Master Out Slave In) and MISO (Master In Slave Out) pins are for.
The SS or Slave Select pin (marked CE0 or CE1 on the Pi) is used to tell a slave device to communicate with the master---or not---at any given time. In most cases, each slave device requires its own SS pin, but can share the SCLK, MOSI and MISO pins.
Some devices can be "daisy chained" to share an SS pin, keeping the total pins used down to four, plus two for power and ground. SPI is known for being incredibly fast and is commonly used in shift registers or ADCs (Analogue to Digital converters) to pass data between devices.
Augmented Startups YouTube channel has an easy to follow primer for SPI explaining the protocol further:
How to Enable SPI on Raspberry Pi
To enable SPI on your Raspberry Pi, open raspi-config from the terminal by entering:
sudo raspi-config
Navigate to Interfacing Options, and on the following menu select P4 SPI Enable/Disable automatic loading of SPI kernel module. Select Yes at the window prompt. SPI is now enabled!

Alternatively, you can enable SPI from the /boot/config.txt file. Open a terminal window and enter:
sudo nano /boot/config.txt
Look for a line that reads #dtparam=spi=on and remove the # symbol. Whichever way you enable SPI, reboot your Pi and SPI will be enabled.
What Can You Do With SPI on Raspberry Pi?
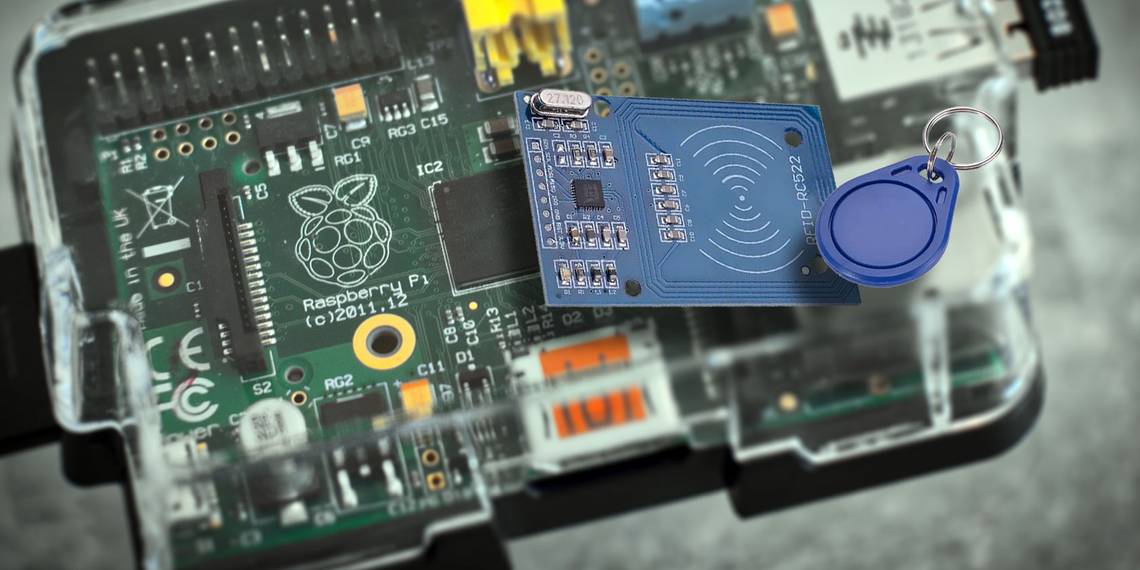
While there are hundreds of different projects utilizing many different SPI peripherals, a good starter project is programming your own RFID reader.
We used the MFRC-522 reader in our DIY Smart Lock with Arduino and RFID tutorial. For a Raspberry Pi-flavored introduction to RFID, check out piddlerintheroot's in-depth Instructable.
This kind of setup isn't just for hobby electronics either. In our collection of best Raspberry Pi projects, we featured a full-scale MES system that runs using Raspberry Pi and RFID, as part of a large-scale factory operation in Europe.
What Is I2C on Raspberry Pi?
I2C is communication protocol created by Phillips Electronics, which has seen a surge of use in microcontroller based hobby projects. The reason for this is obvious---it uses only two wires instead of SPI's minimum four. It is also well supported by user-made libraries. There are many components designed to be used with I2C on Raspberry Pi. While it is slower than SPI, it still works fast enough for most day to day uses.
Much like SPI, the protocol has a master device, such as the Pi, and a slave device, such as a screen, shift register, or motor driver.
The first connection between the devices is the SCL (Serial Clock) which is set by the master to synchronize the transfer of data. The second line is the SDA (Serial Data) which transfers the data back and forth between all devices on the I2C bus.
The master device begins communication with a start bit, and a seven-bit hex address. This must match the slave device in order for them to communicate. This is how so many devices can be used with only two wires.
The master device then specifies whether it wants to read or write (R/W) the slave, before receiving an acknowledgment or ACK back.
An easy to follow and in-depth look at I2C is provided once again by YouTuber Augmented Startups:
How to Enable I2C on Raspberry Pi
I2C is also enabled on the Pi via the raspi-config menu. Open the terminal and enter:
sudo raspi-config
Use the arrow keys to select Interfacing Options, followed by P5 I2C Enable/Disable automatic loading of I2C kernel module. Confirm you want to enable the protocol, and you should see a confirmation screen.

As with SPI, you can also enable I2C by modifying your config.txt file. Open a terminal and enter:
sudo nano /boot/config.txt
Modify #dtparam=i2c_arm=on, removing the # symbol.

Reboot your Pi, and I2C is ready to go!
What Can You Do With I2C on Raspberry Pi?
I2C is great for any project which requires a large number of outputs. A typical use is for LCD screens, which require up to 16 pins to use. I2C brings this down to only two for communication and two for power and ground.
Many LCD screens come with an I2C "backpack" attached, making them much simpler to set up, and freeing up the rest of your Pi pins for other sensors and peripherals.
TheRaspberryPiGuy has a detailed YouTube tutorial on setting up and using an LCD screen with I2C on Raspberry Pi
Using SPI and I2C Saves Pins!
SPI and I2C on Raspberry Pi are certainly not for complete hobby electronics beginners, but they are also nothing to be scared of.
Before diving in, it would be a good idea to follow our beginner's guide to Raspberry Pi to learn the basics.
Working through some example projects is the best way to learn, and we look forward to seeing what you come up with! Who knows what weird and wonderful Raspberry Pi creations you'll make?