I'm sure that more than a few of you readers have a half-written book or useful guide you've put together to help people learn something. You've probably wondered if it would be possible to make money off of your book, or at least gain some exposure, by selling it as an eBook on Amazon.
Well, the idea isn't as far-fetched as you might imagine. As long as you have already created something worth reading, the process of getting it into Amazon as an eBook isn't that onerous. We'll take you through the basic steps of how to make your own ebook today and you can be selling your eBook in a few days. It's easy!
Download Sigil And Kindle Previewer
Sigil and Kindle Previewer are two free programs you'll need to create eBooks, so grab them now. You'll be working mainly in Sigil, but you'll need the Kindle Previewer to convert to MOBI for Amazon later. Note, there are plenty of other ways to do this - even converting directly from your blog to ePub. This is the process we use at MakeUseOf to convert our Manuals for Amazon, because it's free and allows us enough control to create exactly what we want.
Use Sigil To Create An ePub File
You'll need to use Sigil to create an ePub file. This is by far the most technically difficult part of the process and could be explained thoroughly in a short novel if required. The good news is, it's not that hard. It's just that if you want to do very technical things with Sigil it is certainly possible. If you know HTML and can get the hang of Sigil's methods, you'll quite happily get your ePub file made in a short while. I'll go through the basics for you.
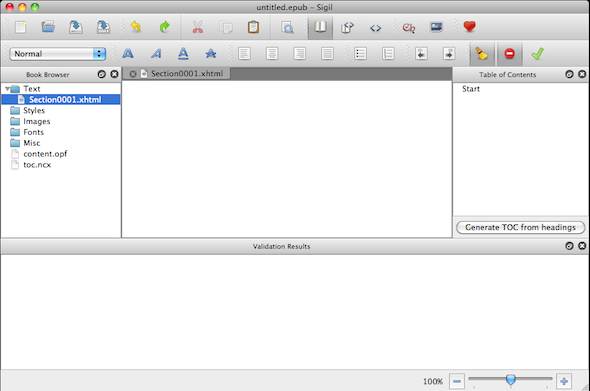
On the left you'll see the book browser. To add items to any section of it, right click on the folders and do so. Text contains your book chapters, Styles contains your CSS (but there's no need to add your own), and Images contains your image files - including a 900px wide copy of your cover image.
For each chapter, you can paste your text in using the book view and adjust the text styles using the toolbar. To add a chapter, go to the Text folder, right click and choose "Add Blank Section".
To get images into the document, first head to the Images folder, right click and choose "Add Existing Files". To add images to the text, you can use Edit > Insert > Image once your pictures are in the Images folder, but it's also possible to switch to code view and add them using HTML with the format below. Inserting the image is less likely to give you code errors.
<img src="../Images/MyImage.png" />
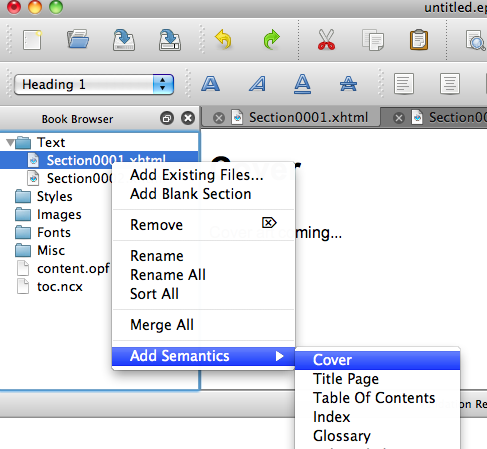
You'll also want to add a cover, which will need its own section in the Text folder. Add your cover image using whichever method you prefer from above. Then right-click the cover section within the text folder and choose "Add Semantics" and "Cover".
After all your headings are formatted correctly, to add a table of contents you need to click on the button marked "Generate TOC from headings". If you also want to see a table of contents within the book, you can create that yourself in another Text section by manually linking to each heading ID individually, which will involve reading the code for each chapter to find them. You'll also want to right click on your home-made TOC section, choose "Add Semantics" and "Table Of Contents".
Using File > Validate ePub or the big green tick in the toolbar, check to see if your code is good. The errors that may pop up will need fixing before you move on. If you see errors, check the following things before re-verifying:
- Are all of your pictures entered with the correct links, including capitalisation?
- Did you use all the pictures you added to the Images folder?
- Did you link to pictures which you forgot to add to the Images folder?
- Did you accidentally paste some text into a title and therefore create many entries with the same header ID (check the code to see)? If so, either edit the header IDs out of the code along with any stray heading formatting or delete that whole section, write something in "Normal" formatting and re-paste from your original text onto that.
Keep re-verifying until you have no errors. As you can see, these instructions could go on forever, but what I've told you should be enough to get a simple book ready. Save the ePub file and save a copy for converting.
Convert ePub To MOBI using Kindle Previewer
Ensuring you are using a copy of your ePub file and not the original, open the Kindle Previewer application. Then drag the file into the main area and wait for it to convert. After a minute or so, in a sub folder of the location of the file you just converted, you'll find the new MOBI file. Check over it and see exactly how your new eBook will look on the Kindle. If you want to change anything, go back to Sigil and do so.
Upload eBook to Amazon
Head to Kindle Direct Publishing on Amazon and log in using your Amazon account. You may need to add contact information and choose a currency to receive cheques or direct transfers in for your royalties before you can upload an eBook.
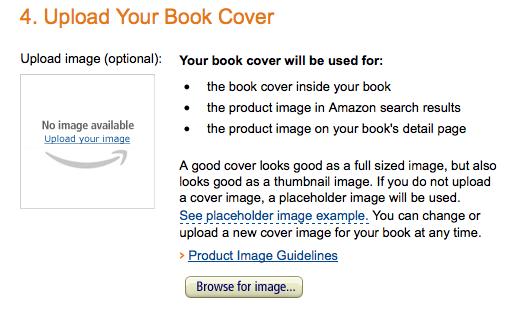
In your bookshelf, click on "Add A New Title" and fill out all the details required. You get to choose if the work is to be public domain, DRM controlled, what percentage of commission you'd like and how much you want to sell it for. Upload your MOBI file, high-resolution cover file and save it for publishing. Your submission will be checked over within a few days (normally) and then you'll be in business!
Do you have an eBook publishing secret to share? Have you found success with your eBook? Tell us...I am sure newbie authors would love all observations they get to read in the comments.


