A good backup application is essential, and the developers of Hyper-V backup should know a thing or two about it. Based on their experience with virtual machine backups for SMBs, comes Altaro Oops!Backup ($37) -- a particularly slick, full-featured one backup solution for home PC users. Billing itself as “Time Machine for Windows,” Oops!Backup makes it easy to restore previous versions of existing files or entirely deleted files.
With my current backup solution, I have to plug in a drive, launch a program, and scan for changes before copying the changes to the drive. With Altaro Oops!Backup, all you have to do is plug in the drive. Oops!Backup is entirely automatic – it’s been watching for changes to your files (no long scan needed) and starts the backup process when you connect the drive.
If you’re using an internal or network drive, it can automatically back up after a period of time (one hour by default). And if you don’t like any of these options, don’t worry – they’re all fully configurable.
Setup
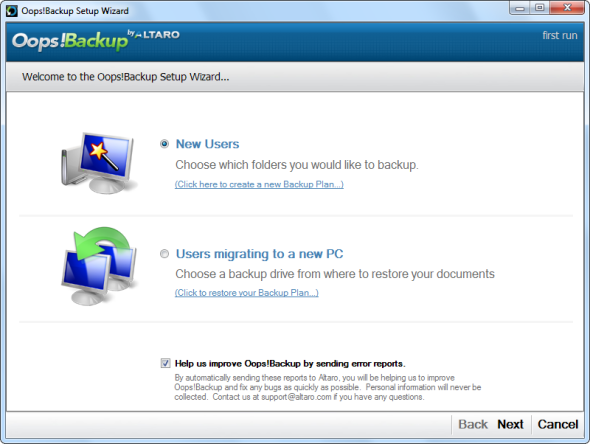
Oops!Backup's setup wizard will walk you through creating a backup plan and performing your first backup. If you’re already a user, you can select the “Users migrating to a new PC” option to restore an existing backup to your new system.
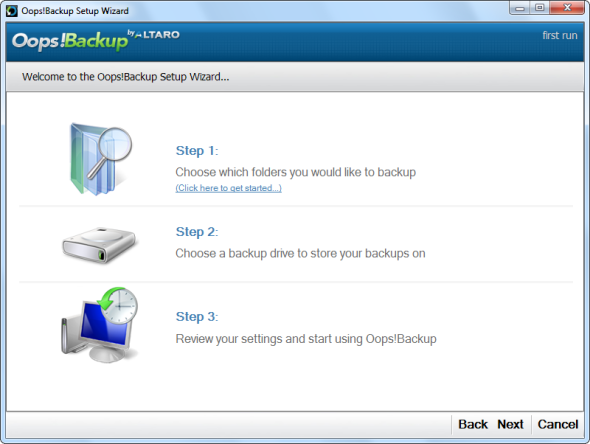
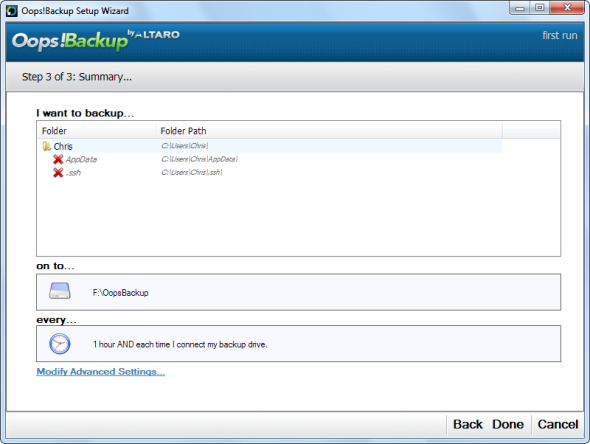
The setup process is simple and requires three steps – selecting the folders you want to back up, selecting a backup drive, and reviewing your settings.
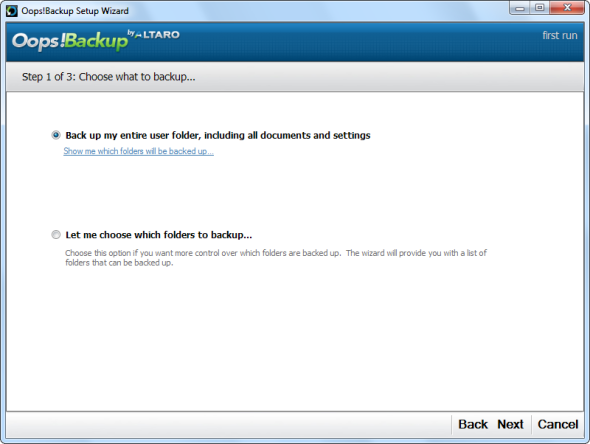
Oops!Backup backs up your Windows user folder by default, but you can easily add more folders or select different folders.
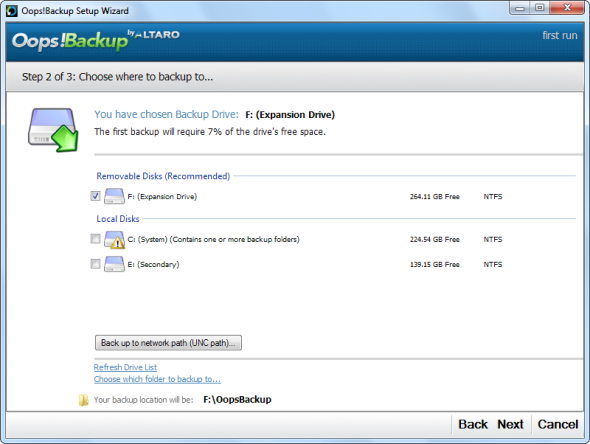
Altaro Oops!Backup recommends you back up to a removable drive, but you can also back up to another internal drive or a network drive.
Once you’ve set everything up, you can review your settings and optionally modify the program’s advanced settings.
Oops!Backup will perform the first backup as soon as you create your backup plan. The first backup will take the longest – Altaro will perform incremental backups with its ReverseDelta technology in the future, so future backups will be much faster.
Advanced Features
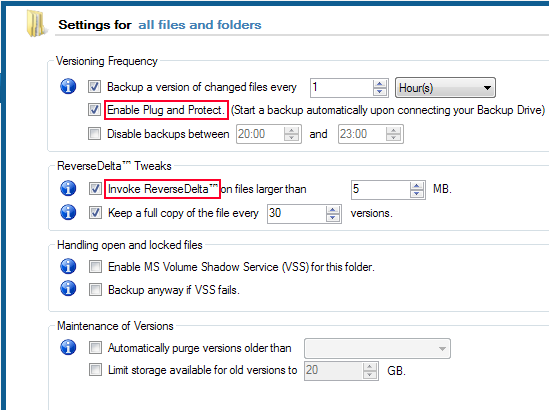
You’ll find a variety of options on the Advanced Settings screen.
- Plug and Protect – Automatically starts a backup when you connect your external drive. It's simple, but it's a big time saver.
- ReverseDelta – Performs incremental backups, only keeping the differences (“delta”) between different versions of a file instead of keeping full copies of each file. This saves space and makes the backup process faster. It’s called “ReverseDelta” because it works differently from other incremental backup systems – instead of keeping a full copy of the original file and saving the delta of each change, Oops!Backup keeps a full copy of the latest file version and stores the old versions as deltas. This ensures you always have a full copy of the latest versions of your files, even if the older versions are deleted.
- File Version Options – Controls when Altaro Oops!Backup automatically deletes old versions of files to free up space.
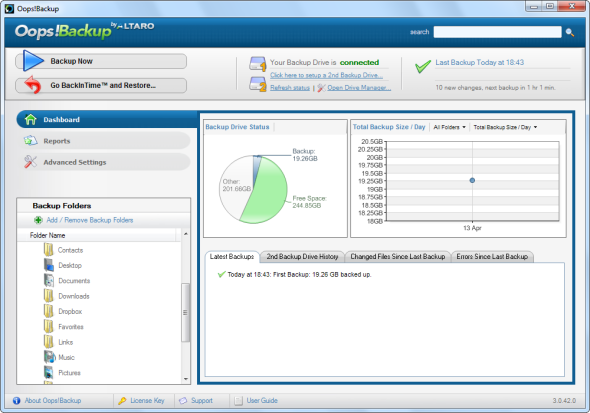
- Continuous Data Protection – Oops!Backup runs in the background and watches for changes, so the next backup process takes place quickly. Click the Reports tab in the main window and select “Changed Files Since the Last Backup” to see the changes that will be made in the next backup.
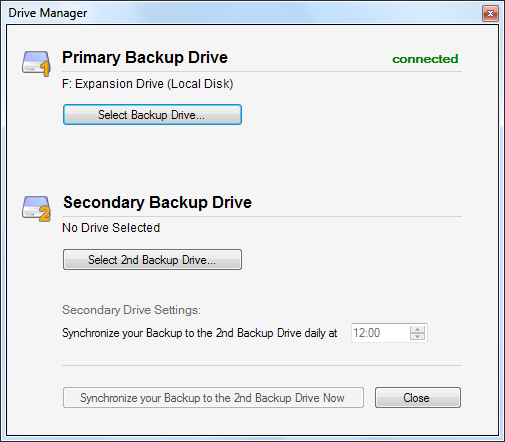
- Backup Drive Redundancy - You can use the Drive Manager to set up a secondary backup drive. This protects you if your primary backup drive fails. Altaro Oops!Backup will perform a daily sync to the second drive, so it won’t add additional time to every backup operation.
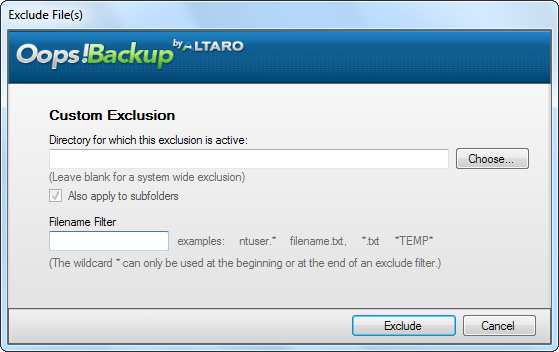
- Custom Exclusions - Click the "Add / Remove Backup Folders" button in the main window and select "Exclude a File Type" to set custom exclusions. For example, you could filter all files with a specific extension or with certain words in their names.
Restoring Files
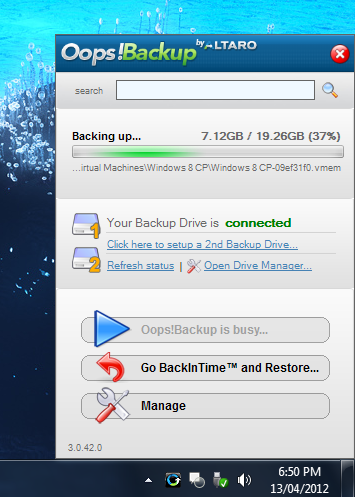
The main program window offers a variety of statistics, but most of the options are also available from the system tray popup window.
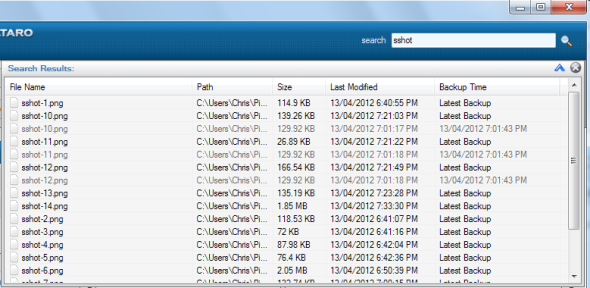
The search box in the main window (or system tray popup window) allows you to quickly search your backups for files.
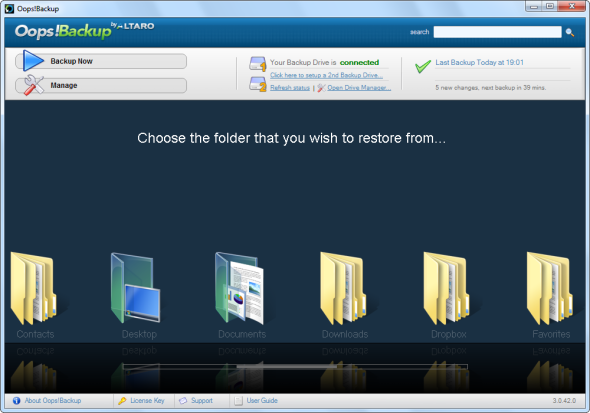
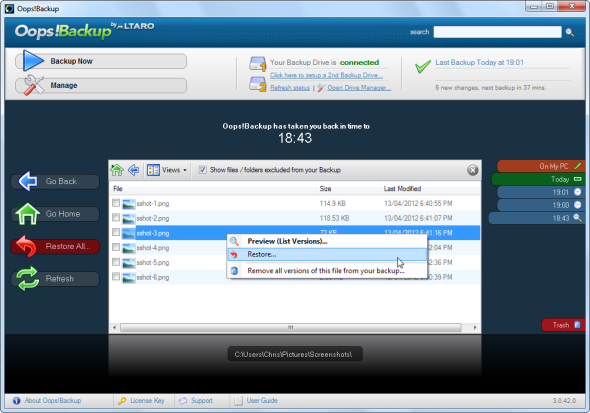
Oops!Backup also has a graphical backup browser, which you can access by clicking the “Go BackInTime and Restore” button in the main window or from the system tray popup.
Use the graphical backup browser to select the folder containing the files you want to restore. You can select a time period to restore from with the options at the right side of the window. Once you’ve found the file, right-click it and click the Restore option. If you’re not sure if you’ve found the version you want to restore, use the Preview option to view a read-only version of the file.
Altaro offers a free, 30-day trial with all the features of the full version, so go ahead and give it a spin.


