When you're trying to stay anonymous online, a VPN is the simplest solution. With a click or two, your IP address, service provider, and location will be masked from any site that you go to and anyone trying to spy on your connection.
But a DNS leak can totally undermine the purpose of a VPN, putting your privacy at risk. Here's how to keep that from happening.
What Is a DNS Leak?
The domain name system (DNS) is a system for linking URLs and IP addresses. When you use your browser to go to a website, it sends a request to a DNS server with the URL that you typed in, and it's pointed to the correct IP address.
Usually, DNS servers are assigned by your internet service provider (ISP), which means that they can monitor and record your online activities whenever you send a request to the server. When you use a virtual private network (VPN), the DNS request should be directed to an anonymous DNS server through your VPN, and not directly from your browser; this keeps your ISP from monitoring your connection.
Unfortunately, sometimes your browser will just ignore that you have a VPN set up and will send the DNS request straight to your ISP. That's called a DNS leak. This can lead to you think that you've stayed anonymous and that you're safe from online surveillance, but you won't be protected.
A DNS leak is only a privacy concern if you're worried about your ISP monitoring your browsing. It has nothing to do with NSA surveillance or other forms of digital snooping.
Obviously, this is far from ideal. So let's take a look at diagnosing and stopping it.
How to Diagnose a DNS Leak
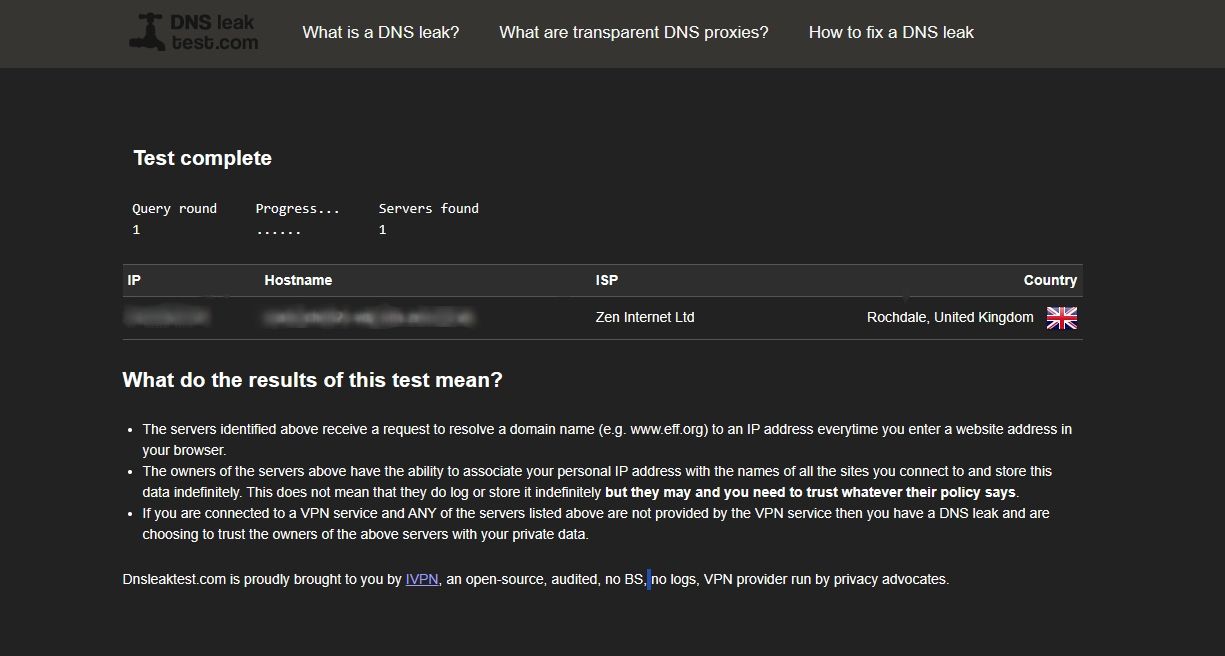
If your computer is using its default settings and not routing DNS requests through the VPN's DNS server, it's not going to be obvious; you'll need to use a leak test. Fortunately, there's an easy one to remember: www.dnsleaktest.com.
Just go to the site and click the Standard test button. If you're really concerned about surveillance, you can click Extended test—it's slightly more comprehensive, but takes a bit longer.
If you see your own country and ISP listed on the results page, you'll know that your ISP can monitor your connection. That's not good.
How to Stop a DNS Leak
There are a few steps you can take to stop your DNS leak and prevent future occurrences.
1. Change DNS Servers
If your default DNS server is one that was assigned by your ISP, one of the easiest ways to keep them from seeing what you're doing online is to change your DNS server. Even if you aren't worried about DNS leaks, changing your default DNS server might be a good idea, as it might result in faster internet speeds.
The following DNS servers are well-maintained and will provide you with high performance and security:
- Open DNS (preferred: 208.67.222.222, alternate: 208.67.222.220)
- Comodo Secure DNS (preferred: 8.26.56.26, alternate: 8.20.247.20)
- Google Public DNS (preferred: 8.8.8.8, alternate: 8.8.4.4)
Check out our guide to changing your DNS settings on Windows 11 if you want to switch server.
2. Use a VPN with DNS Leak Protection
Some VPNs come with a feature that will monitor your DNS requests to make sure that they're going through the VPN instead of directly to your ISP (i.e. you're using the VPN's DNS servers instead of the ISP's).
To see if your VPN has this protection, open the settings; you should see an option that will check for and prevent DNS leaks.
The following VPN providers offer DNS leak protection and/or leak tests:
- NordVPN.
- ExpressVPN.
- SurfShark.
- PureVPN.
- Astrill VPN.
- IPVanish.
If you're using one of these VPNs, make sure your settings are set correctly. If you're not, and you're concerned about ISP surveillance, you might want to consider switching.
3. Using VPN Monitoring Software
Some VPN monitoring software also includes support for fixing DNS leaks. The pro version of VPNCheck will do this for you, as will OpenVPN Watchdog (if you're using OpenVPN).
Because the options for fixing a leak this way are only with premium software, this likely won't be the go-to strategy for many people, unless you're already using VPN monitoring software to make sure your VPN connection is totally secure.
4. Disable Teredo Tunneling
Teredo is a Windows-based technology that, in essence, allows communication across two IP protocols: IPv4 and IPv6. Both are present on the internet, and in some cases, you'll need to use something like Teredo to allow them to communicate. However, Teredo can sometimes cause DNS leaks, so you may want to disable it.
To disable Teredo, open the command line and type the following command:
netsh interface teredo set state disabled
If you need to re-enable Teredo at some point, you can use this command:
netsh interface teredo set state type=default
With Teredo now disabled, the chance of DNS leaks on your device will be considerably lower.
5. Use a Privacy-Focused Web Browser
While many of us use Chrome, Firefox, or Safari when surfing the web, there are certain browsers that are designed to keep you anonymous, such as Tor. Tor uses onion routing to mask your IP address and online activity. This includes masking your DNS requests, which lowers the chance of DNS leaks.
Note that privacy browsers like Tor are not completely immune to DNS leaks. Rather, they make them less of a likelihood. To drastically lower the chance of DNS leaks, consider using a privacy browser and a VPN simultaneously.
Plug Those Leaks
If you're using a VPN, a DNS leak could be revealing more information than you're aware of. So, take the steps above to make sure that you're not leaking information and, if you are, plug the leak to keep your sensitive information and activity private.


