If you didn't compose an image you took correctly in-camera, you can easily use Adobe Photoshop to crop your picture. While it's easy to do basic cropping, Photoshop also gives you a selection of other options.
In this article, you'll learn how to crop your images in Photoshop. Let's get started.
1. How to Do a Basic Crop in Photoshop
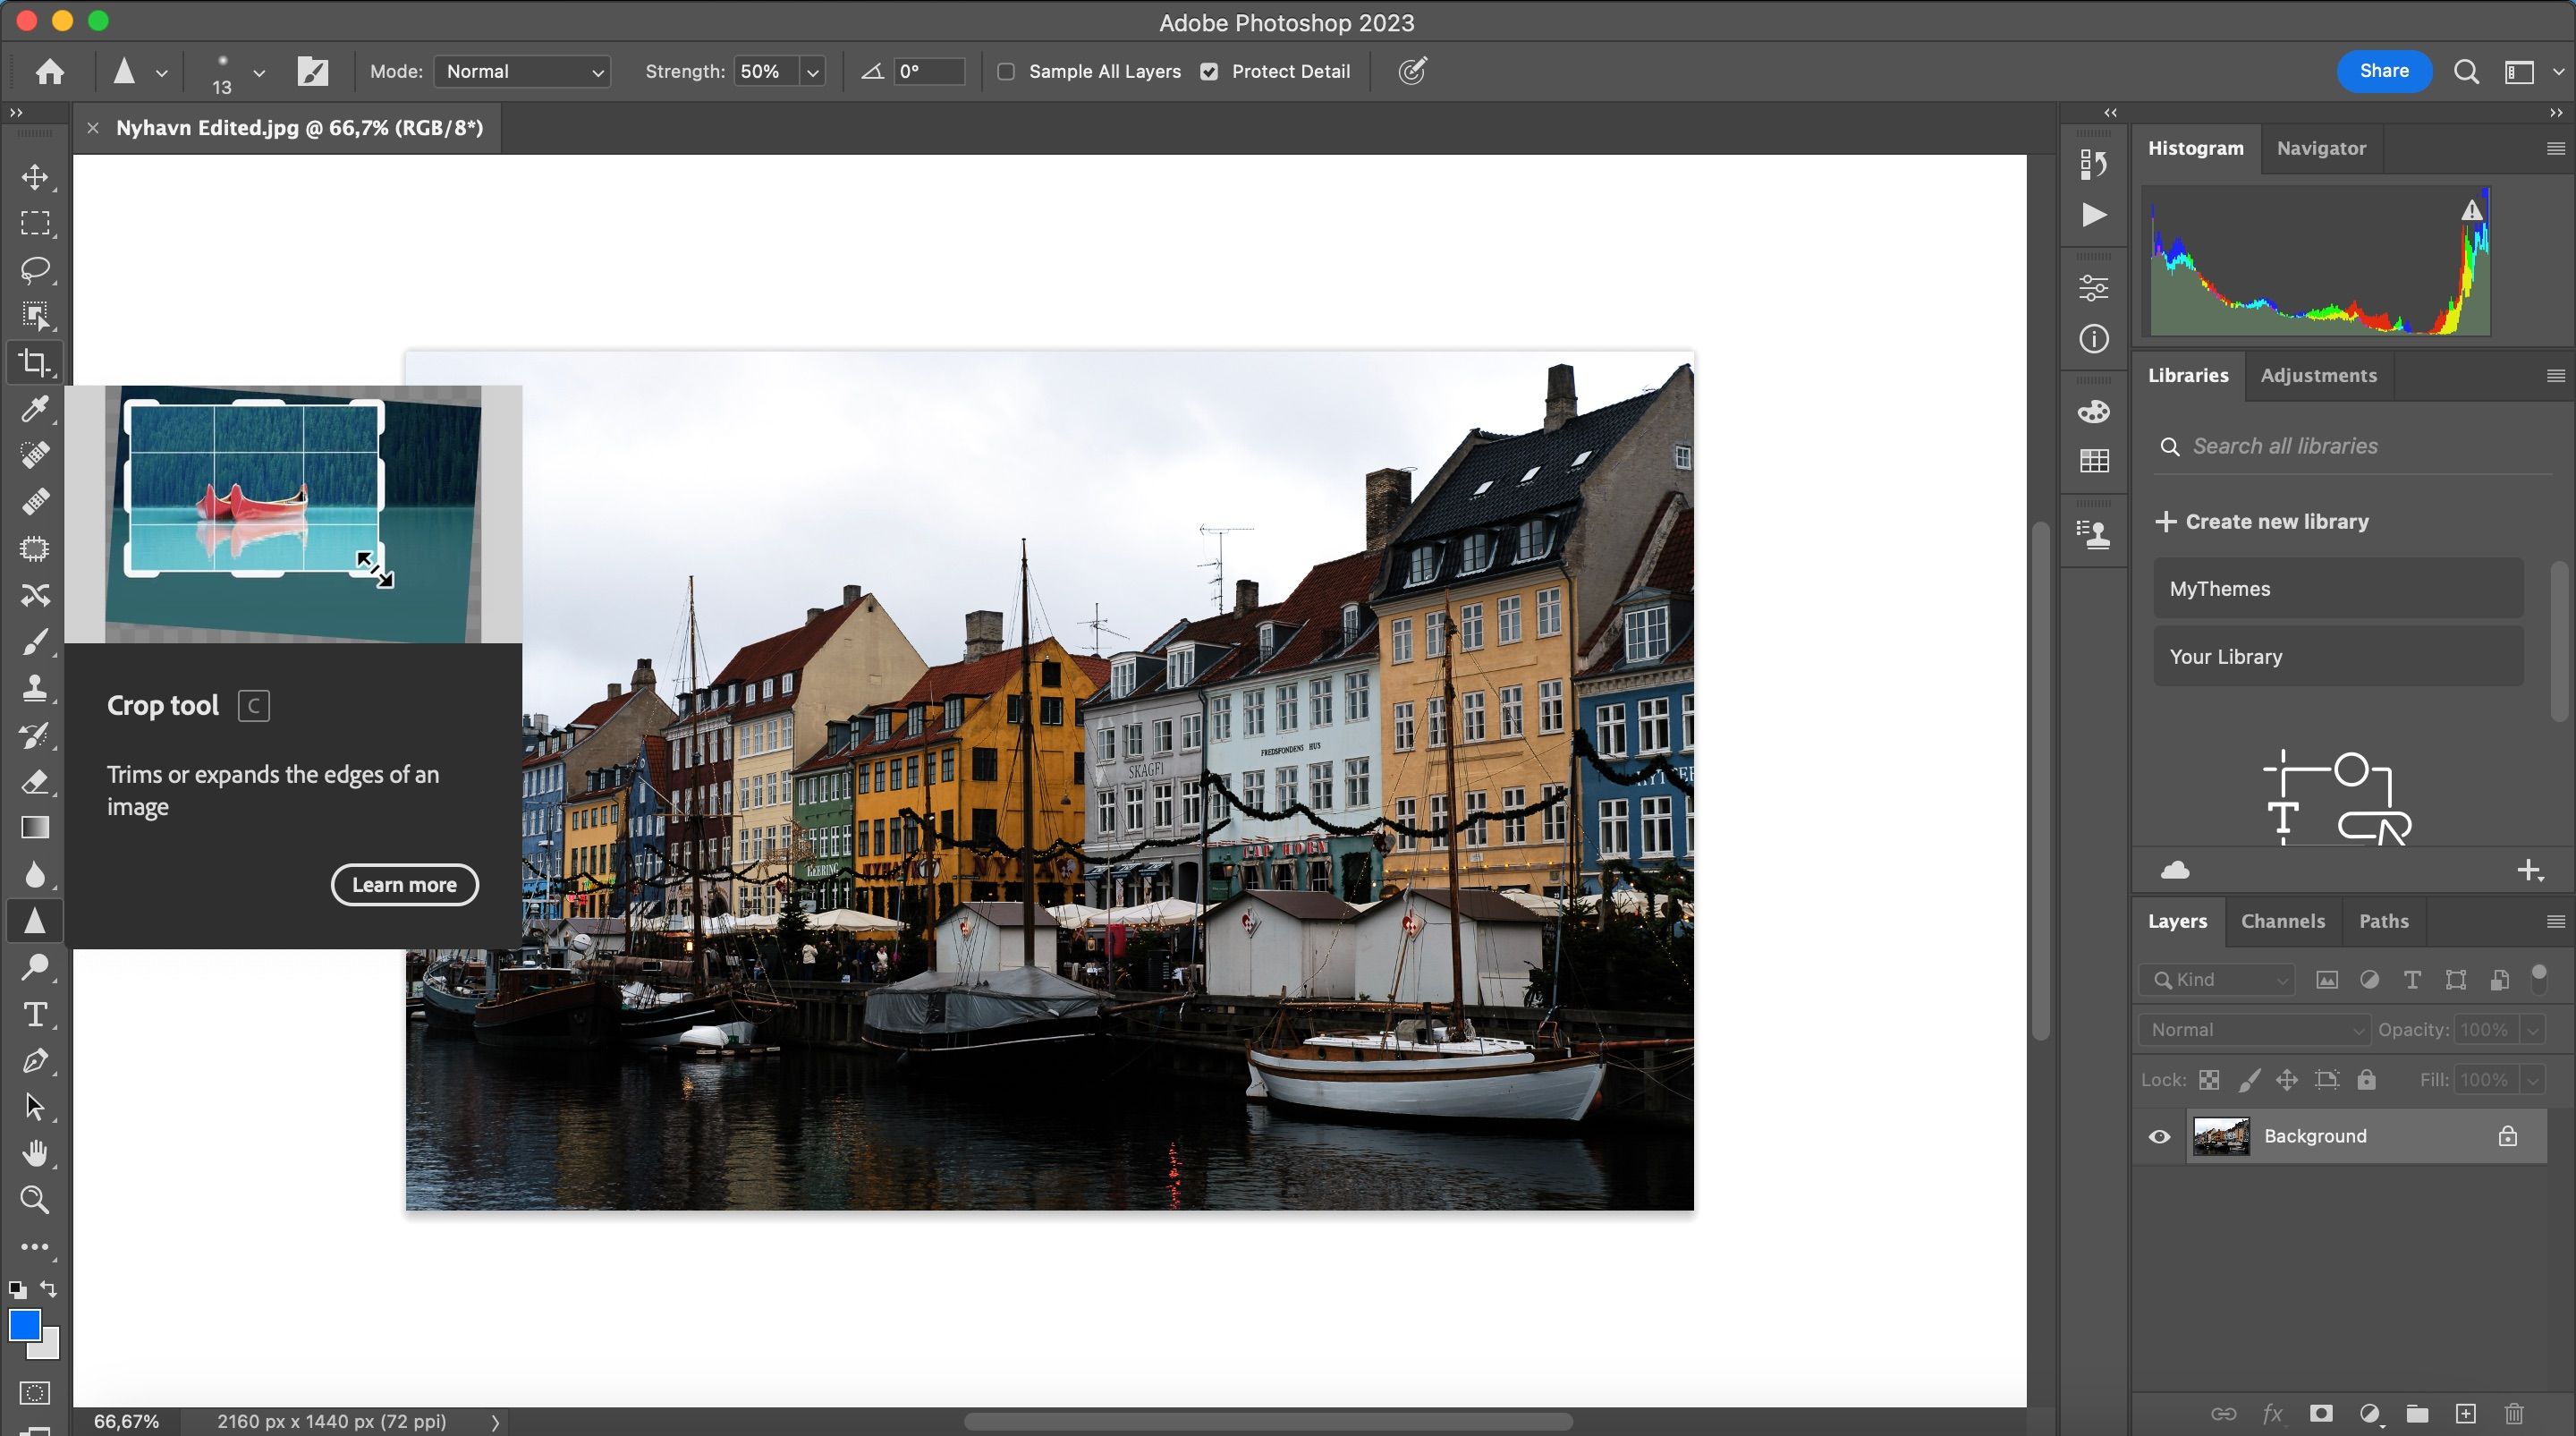
To perform a basic crop in Photoshop, you'll need to go to the left-hand toolbar. Clicking on the fourth icon down will allow you to start using the Crop tool; you can also press C on your keyboard.
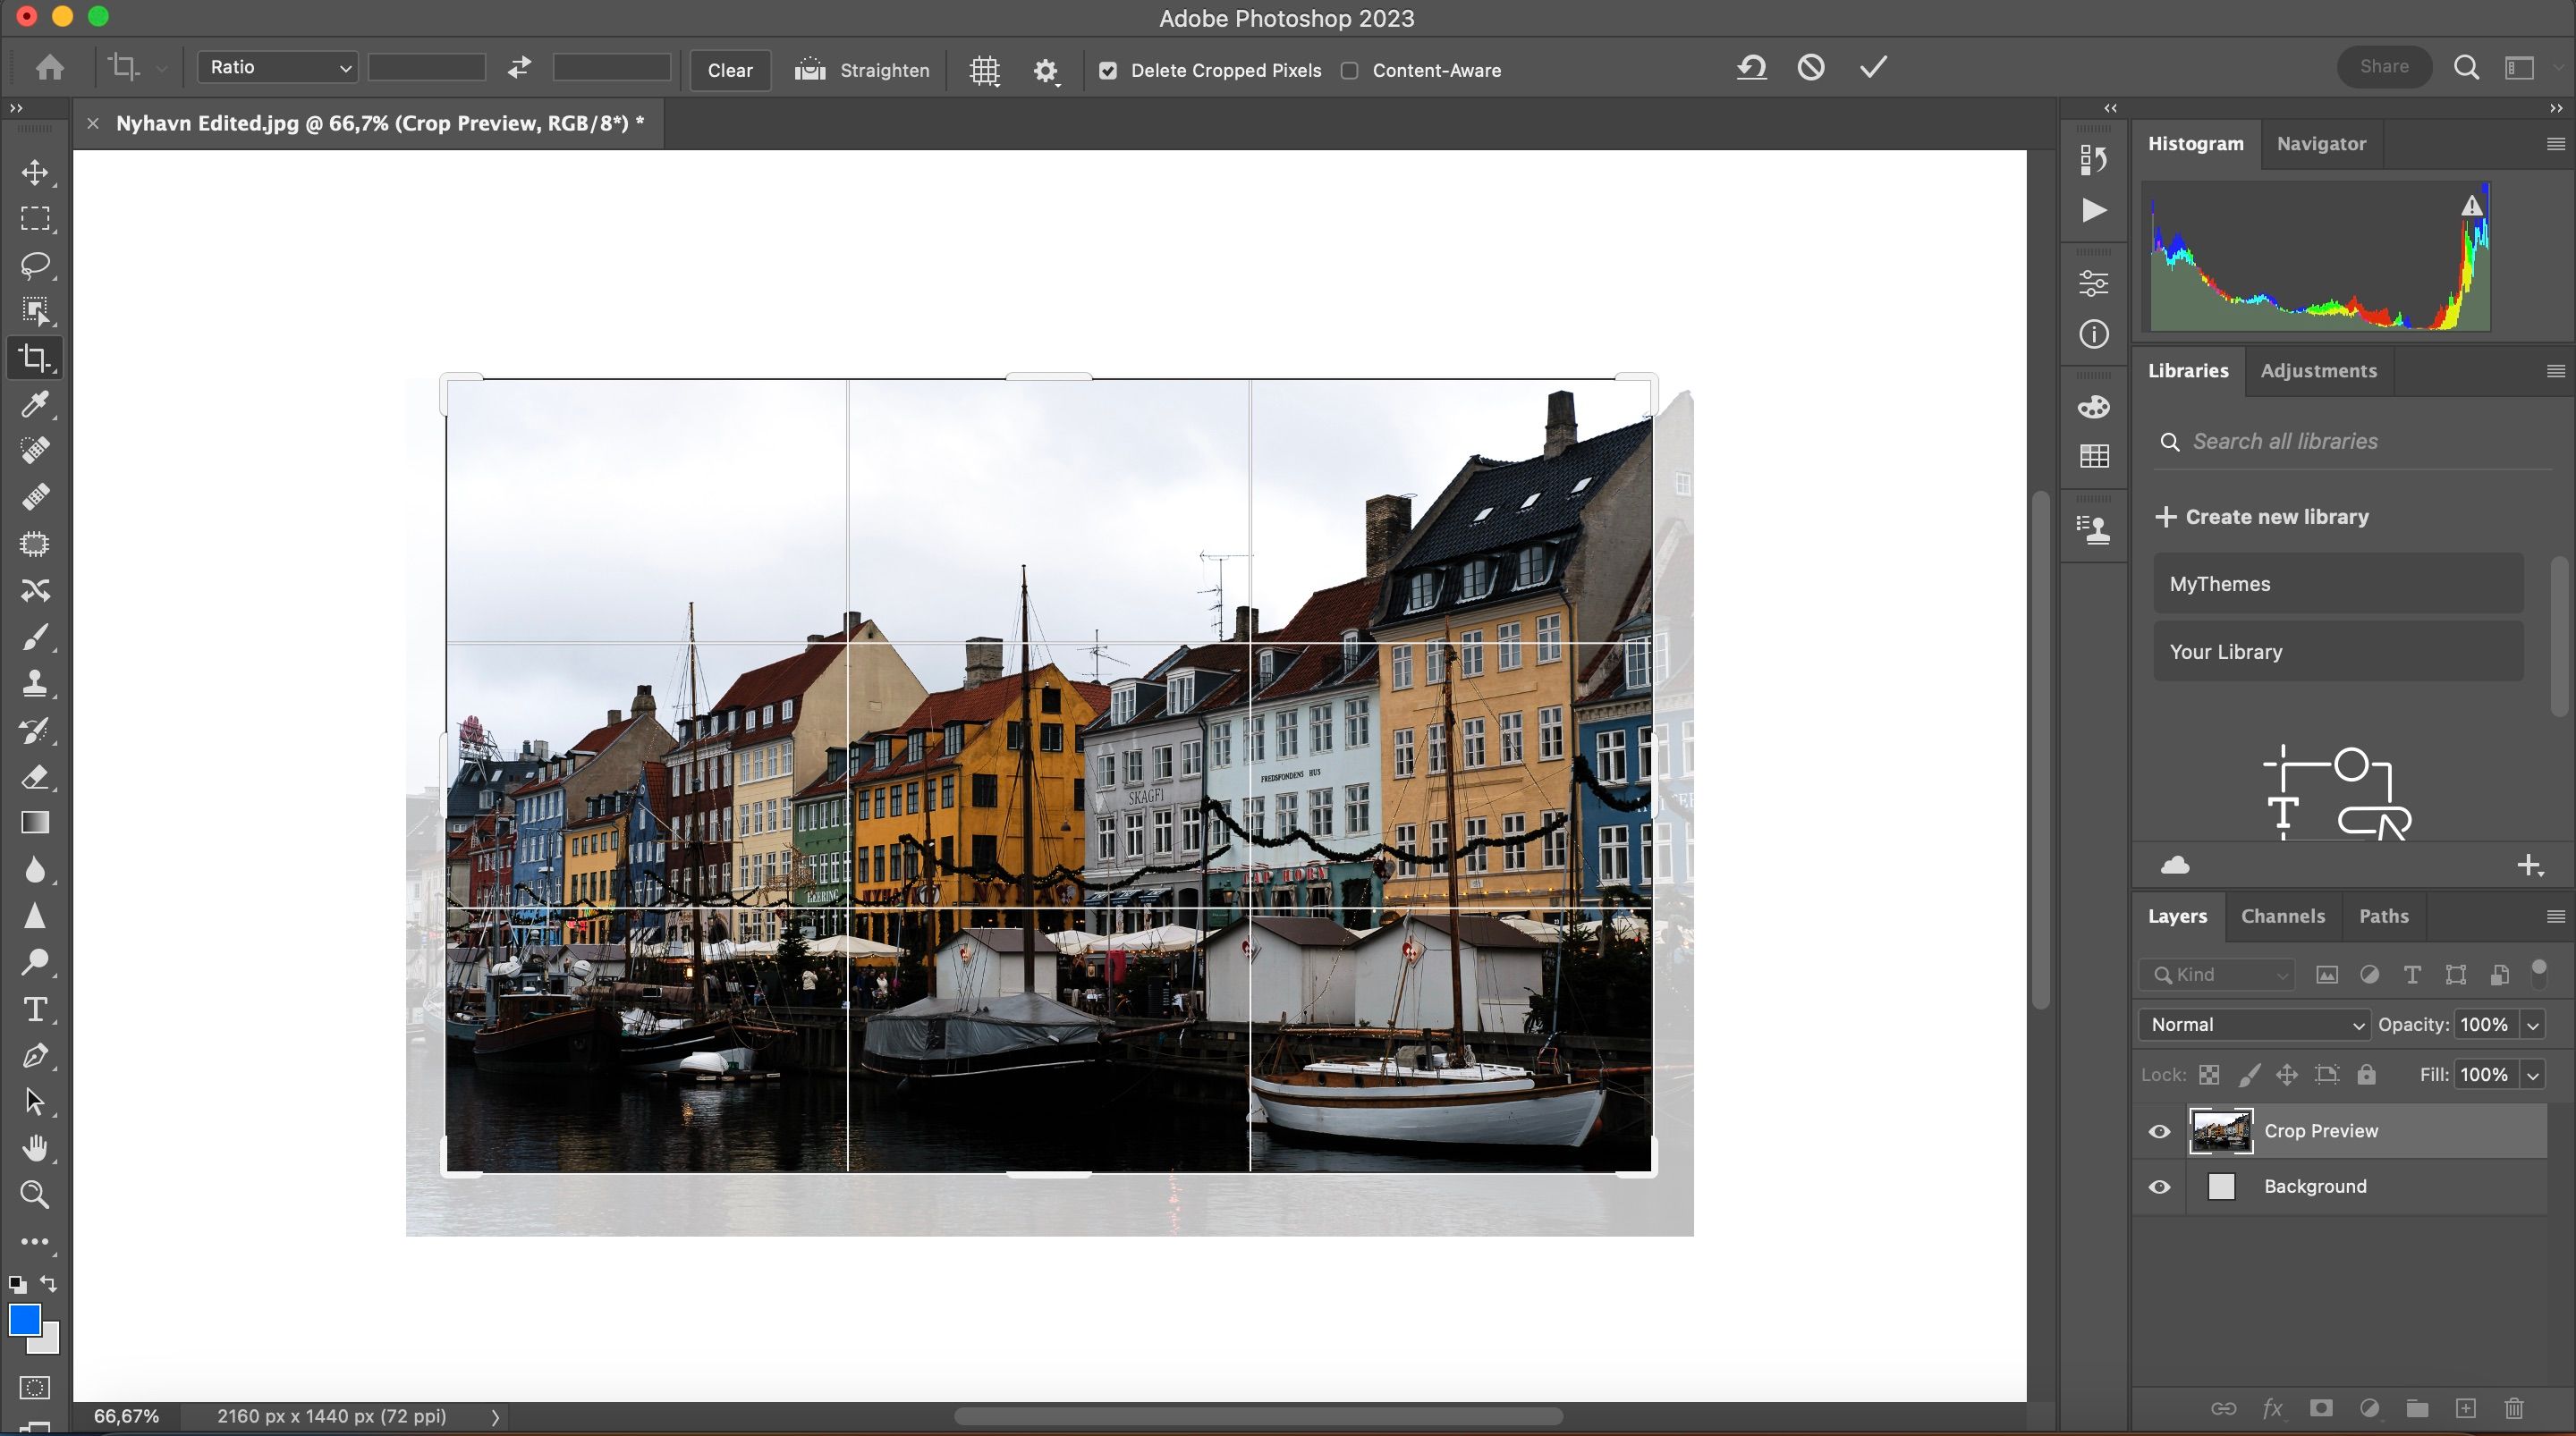
Once you've selected the Crop tool, you can drag each corner of the picture to change the dimensions. To include and remove certain aspects, you can also move the photo up, down, and across.
When you're happy with your cropped picture, hit the Enter key and your changes will come into effect. If you wish to revert your image later, make sure that you've unticked the Delete Cropped Pixels box.
There are some techniques you can employ to ensure you crop your pictures like a pro.
2. How to Straighten a Photo With Content-Aware
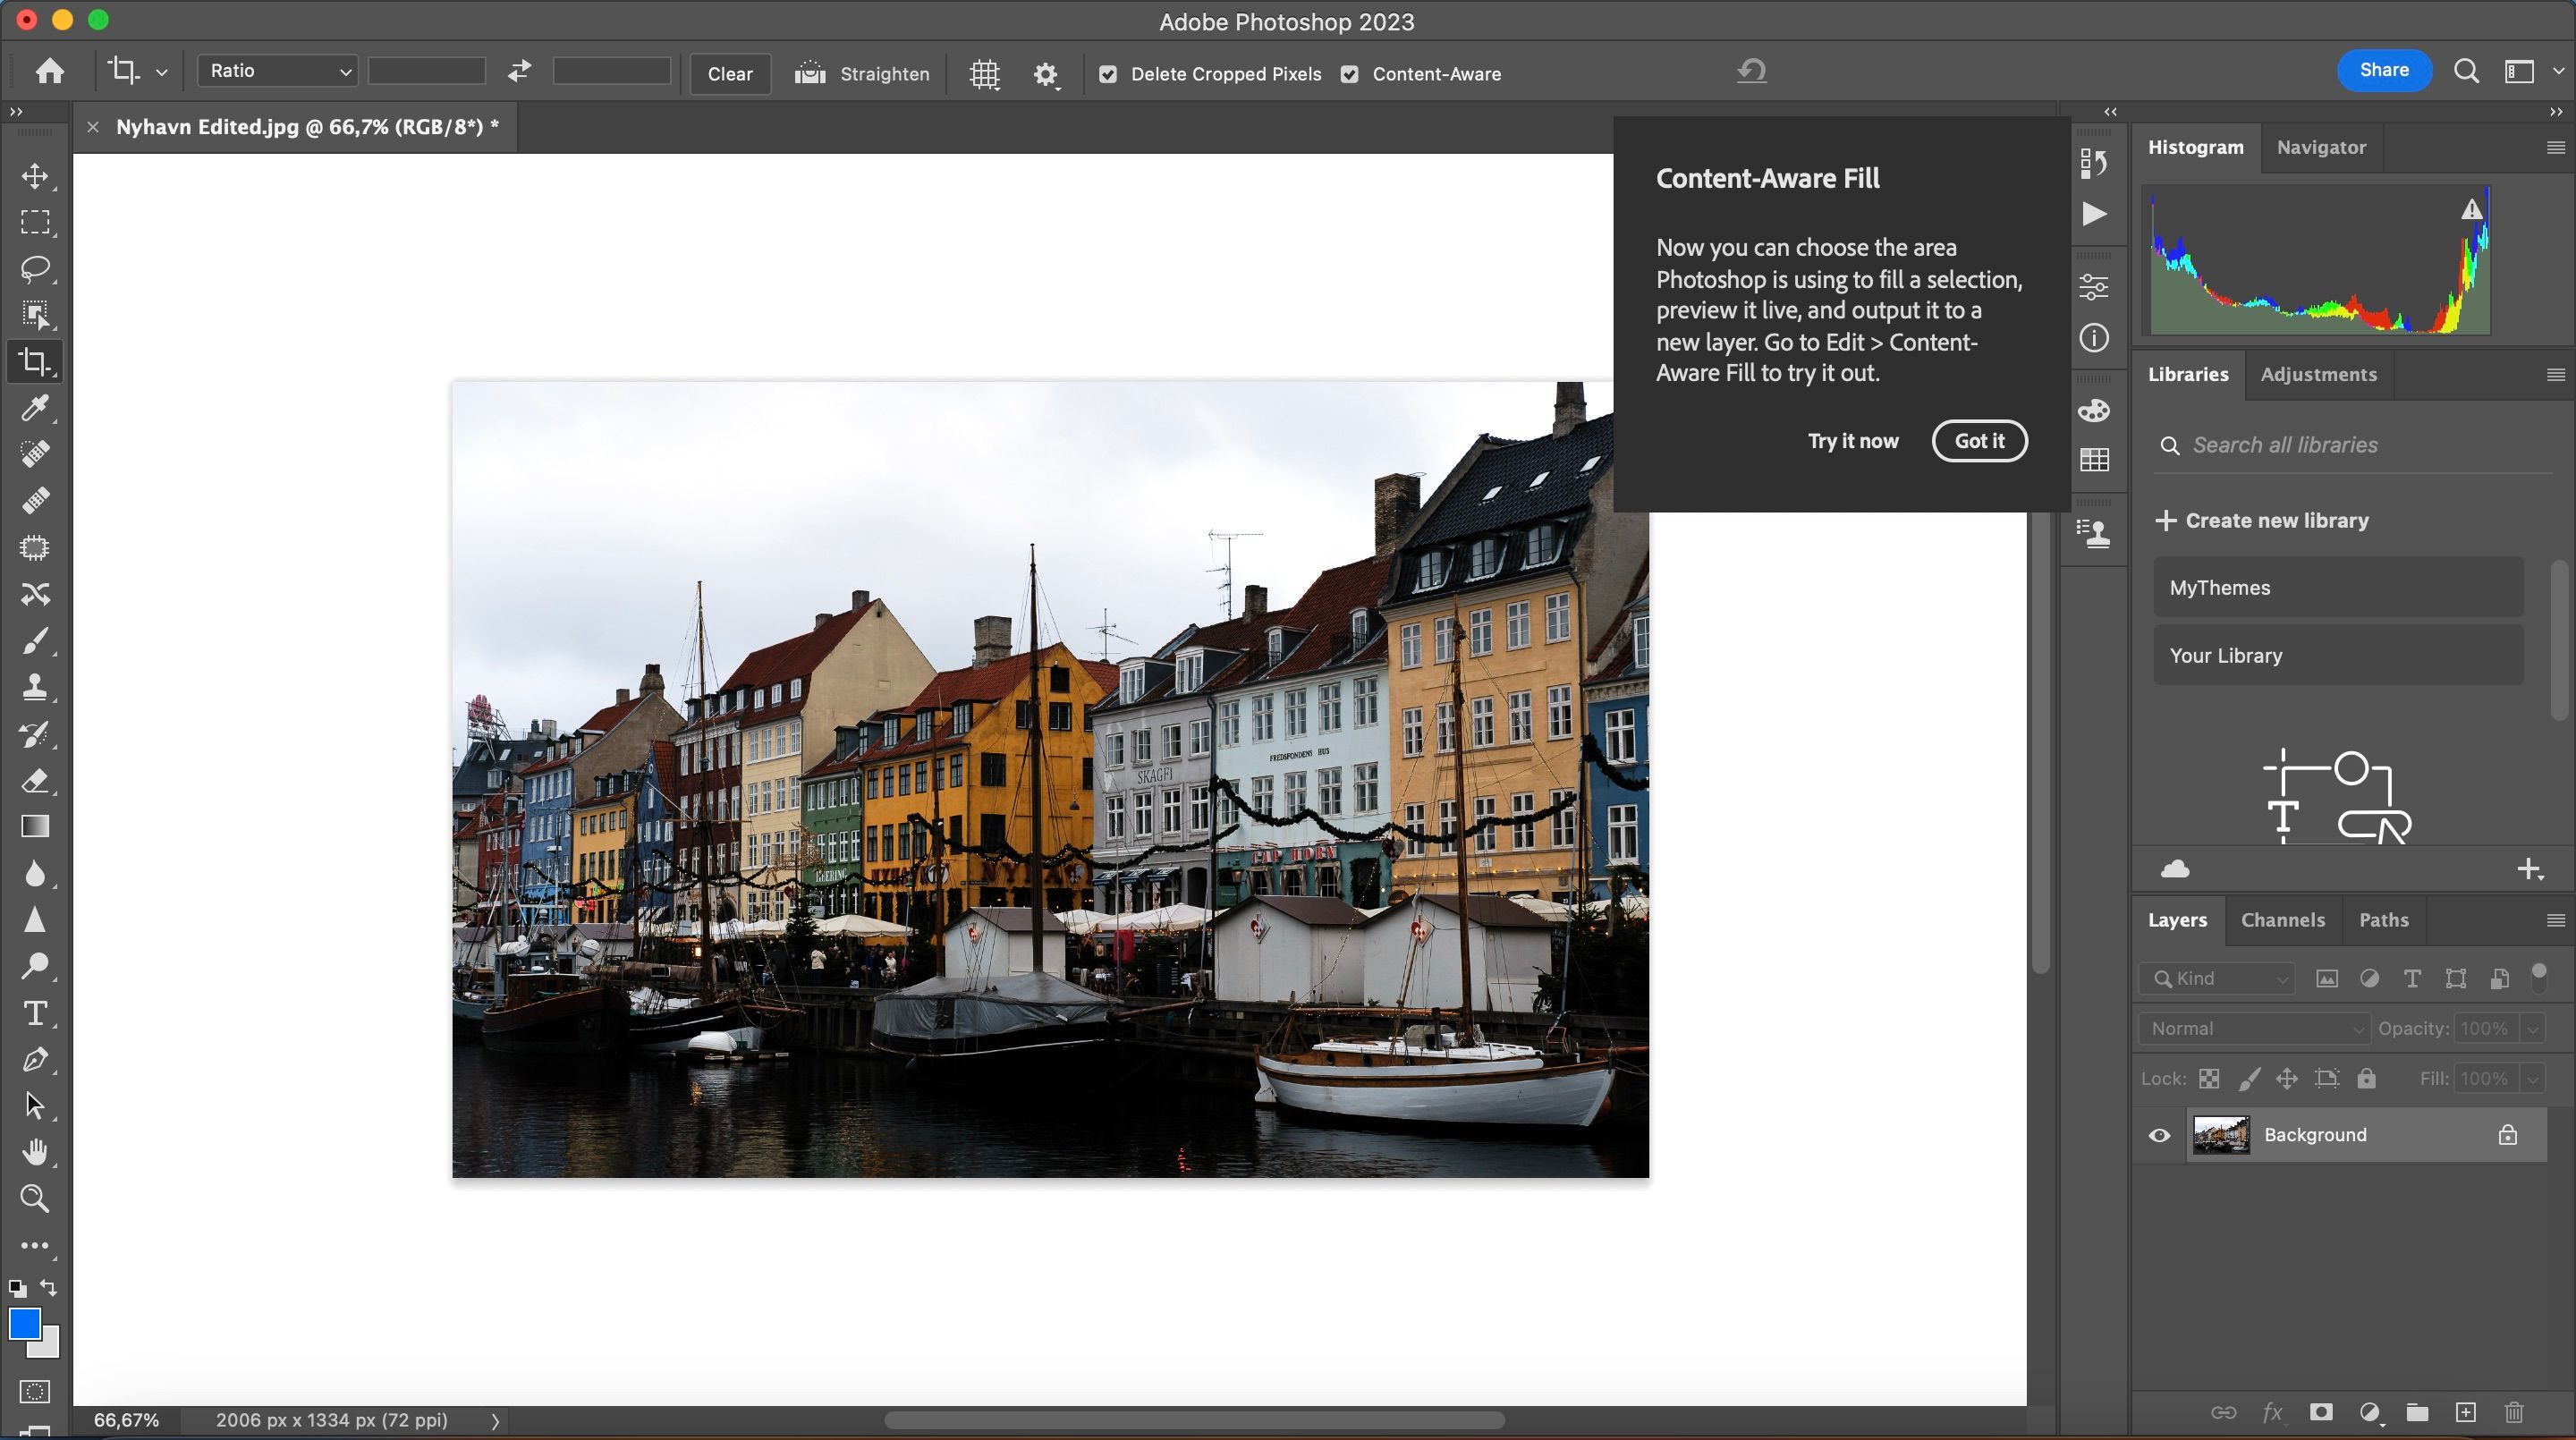
While you can crop photos normally in Photoshop, the platform also gives you extra tools to customize your edit—such as Content-Aware Fill. This feature will help you fill in the missing gaps when you straighten a photo, expand a photo beyond its normal size, or slightly rotate an image.
After selecting the Crop tool, go to the toolbar at the top and tick the Content-Aware box.
3. How to Crop Two Images to the Same Size
You can crop two pictures with different aspect ratios to the same size quickly with the Crop tool.
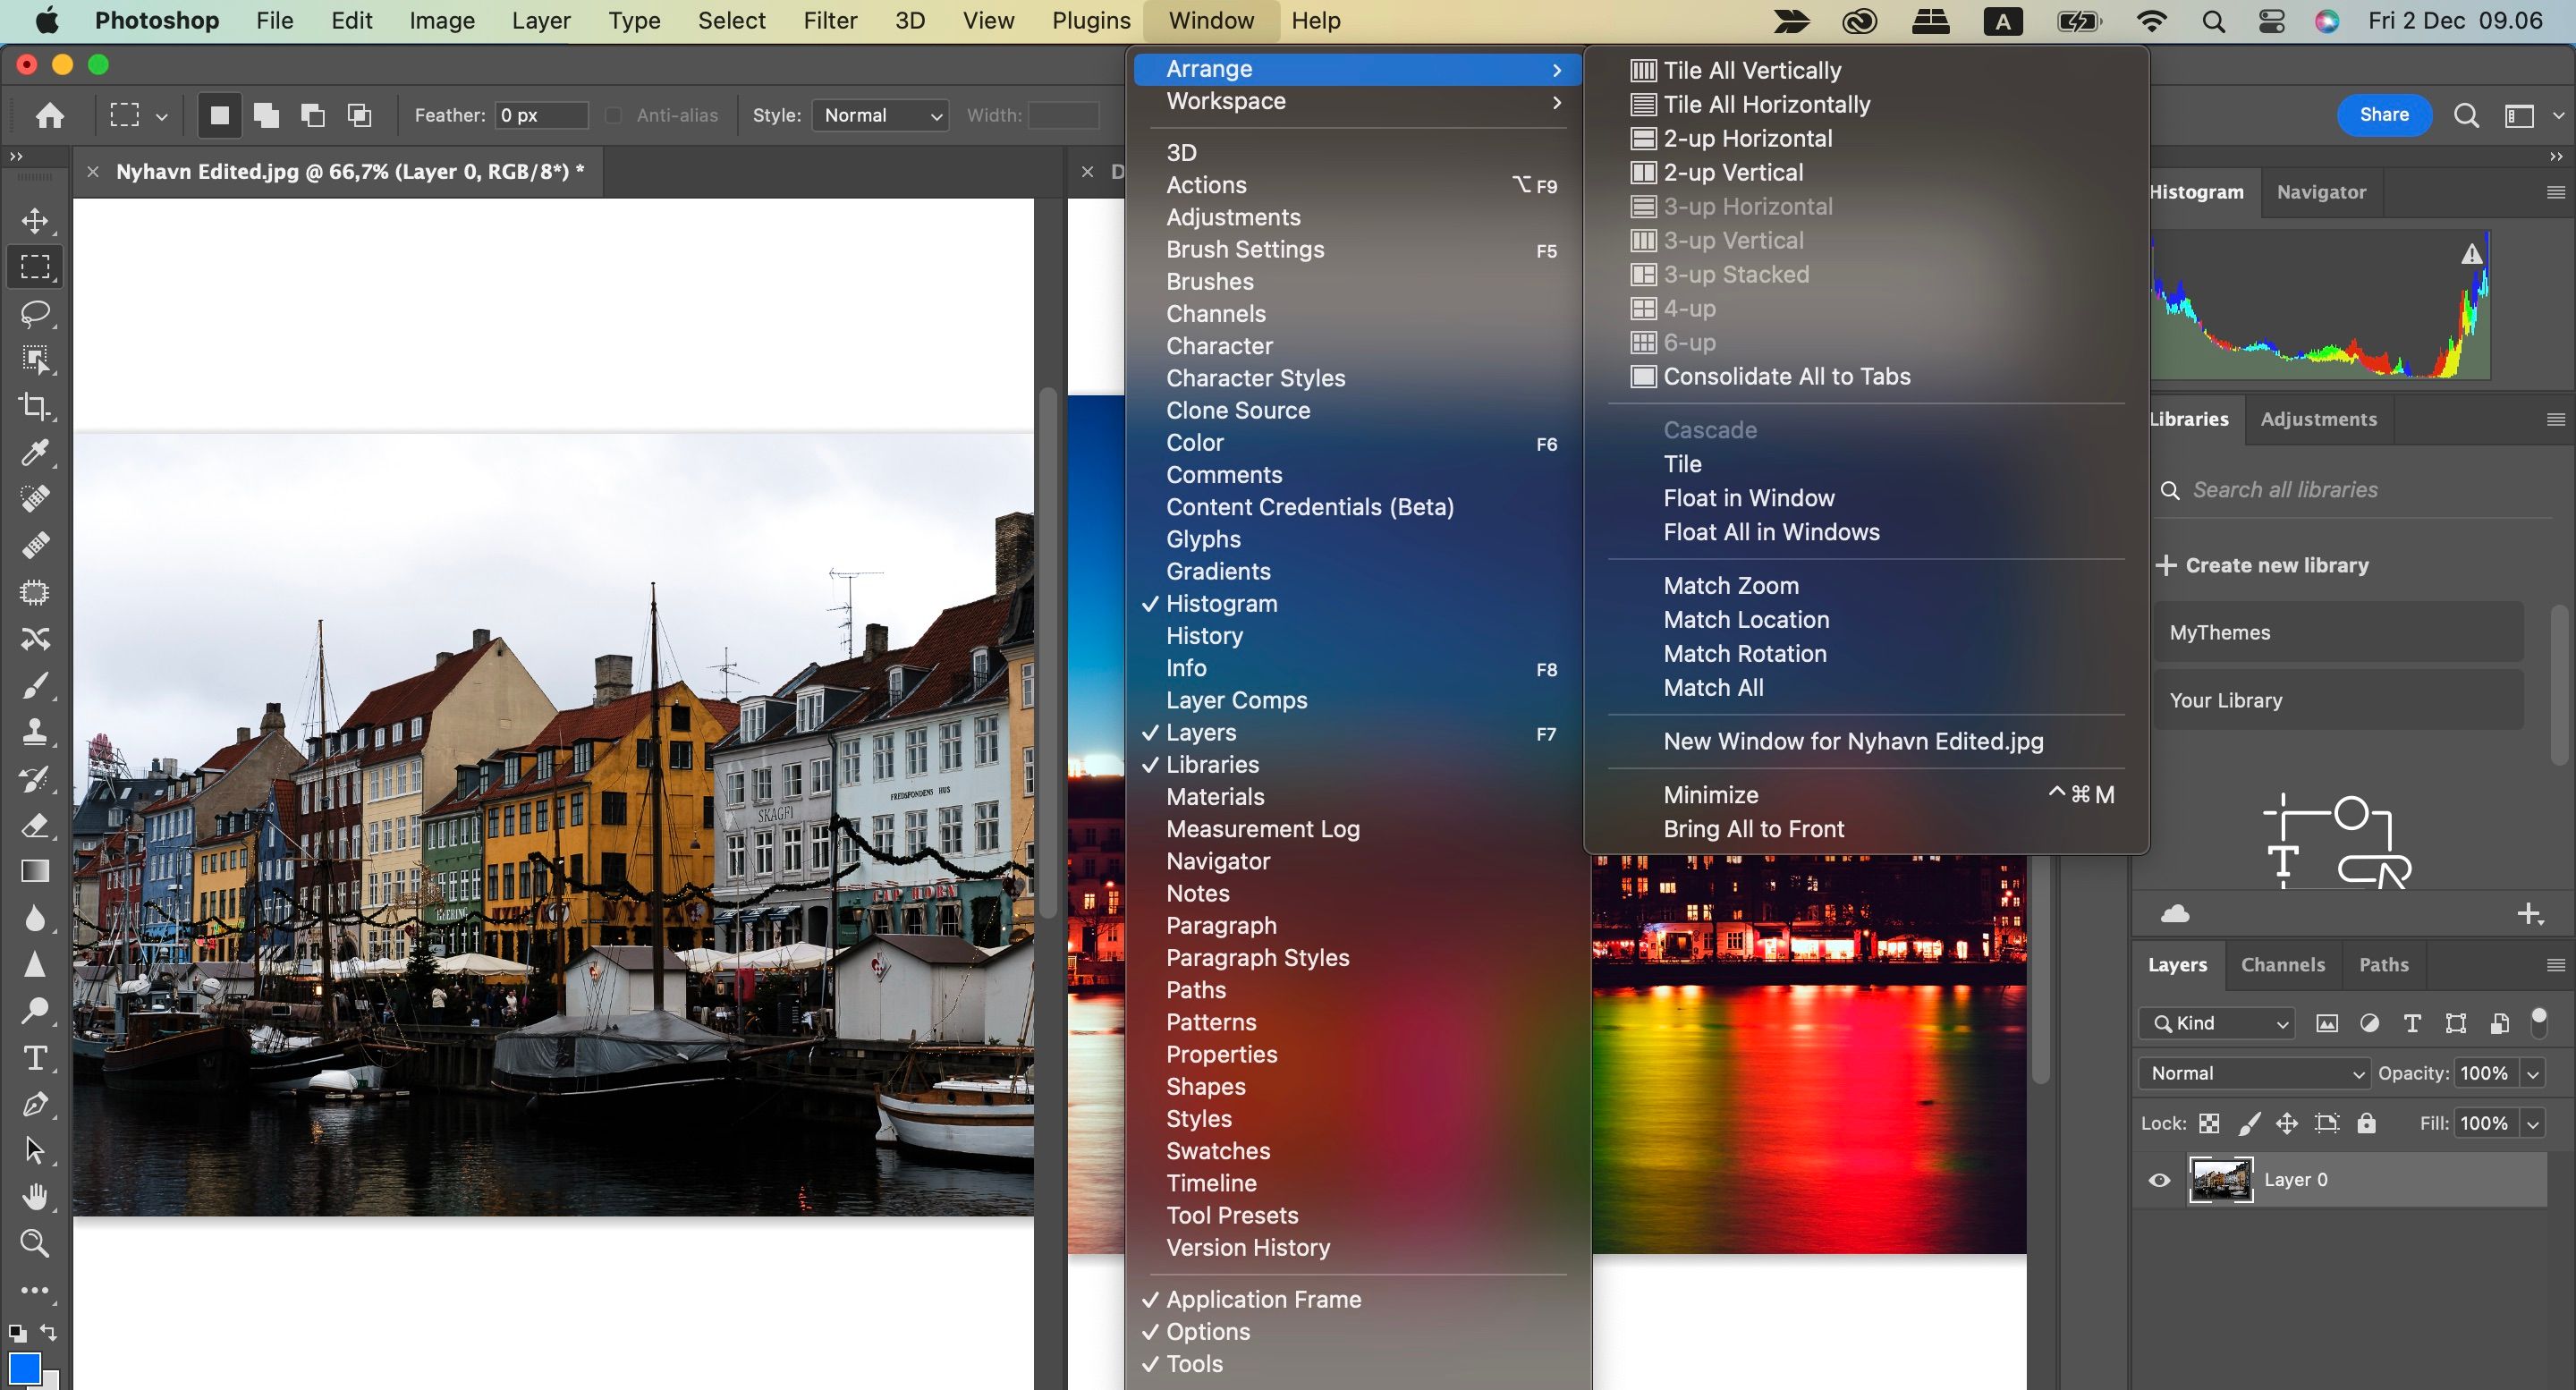
First, open the two images side-by-side. You can do this by going to the Window tab, before hovering your cursor over Arrange and choosing the viewing format.
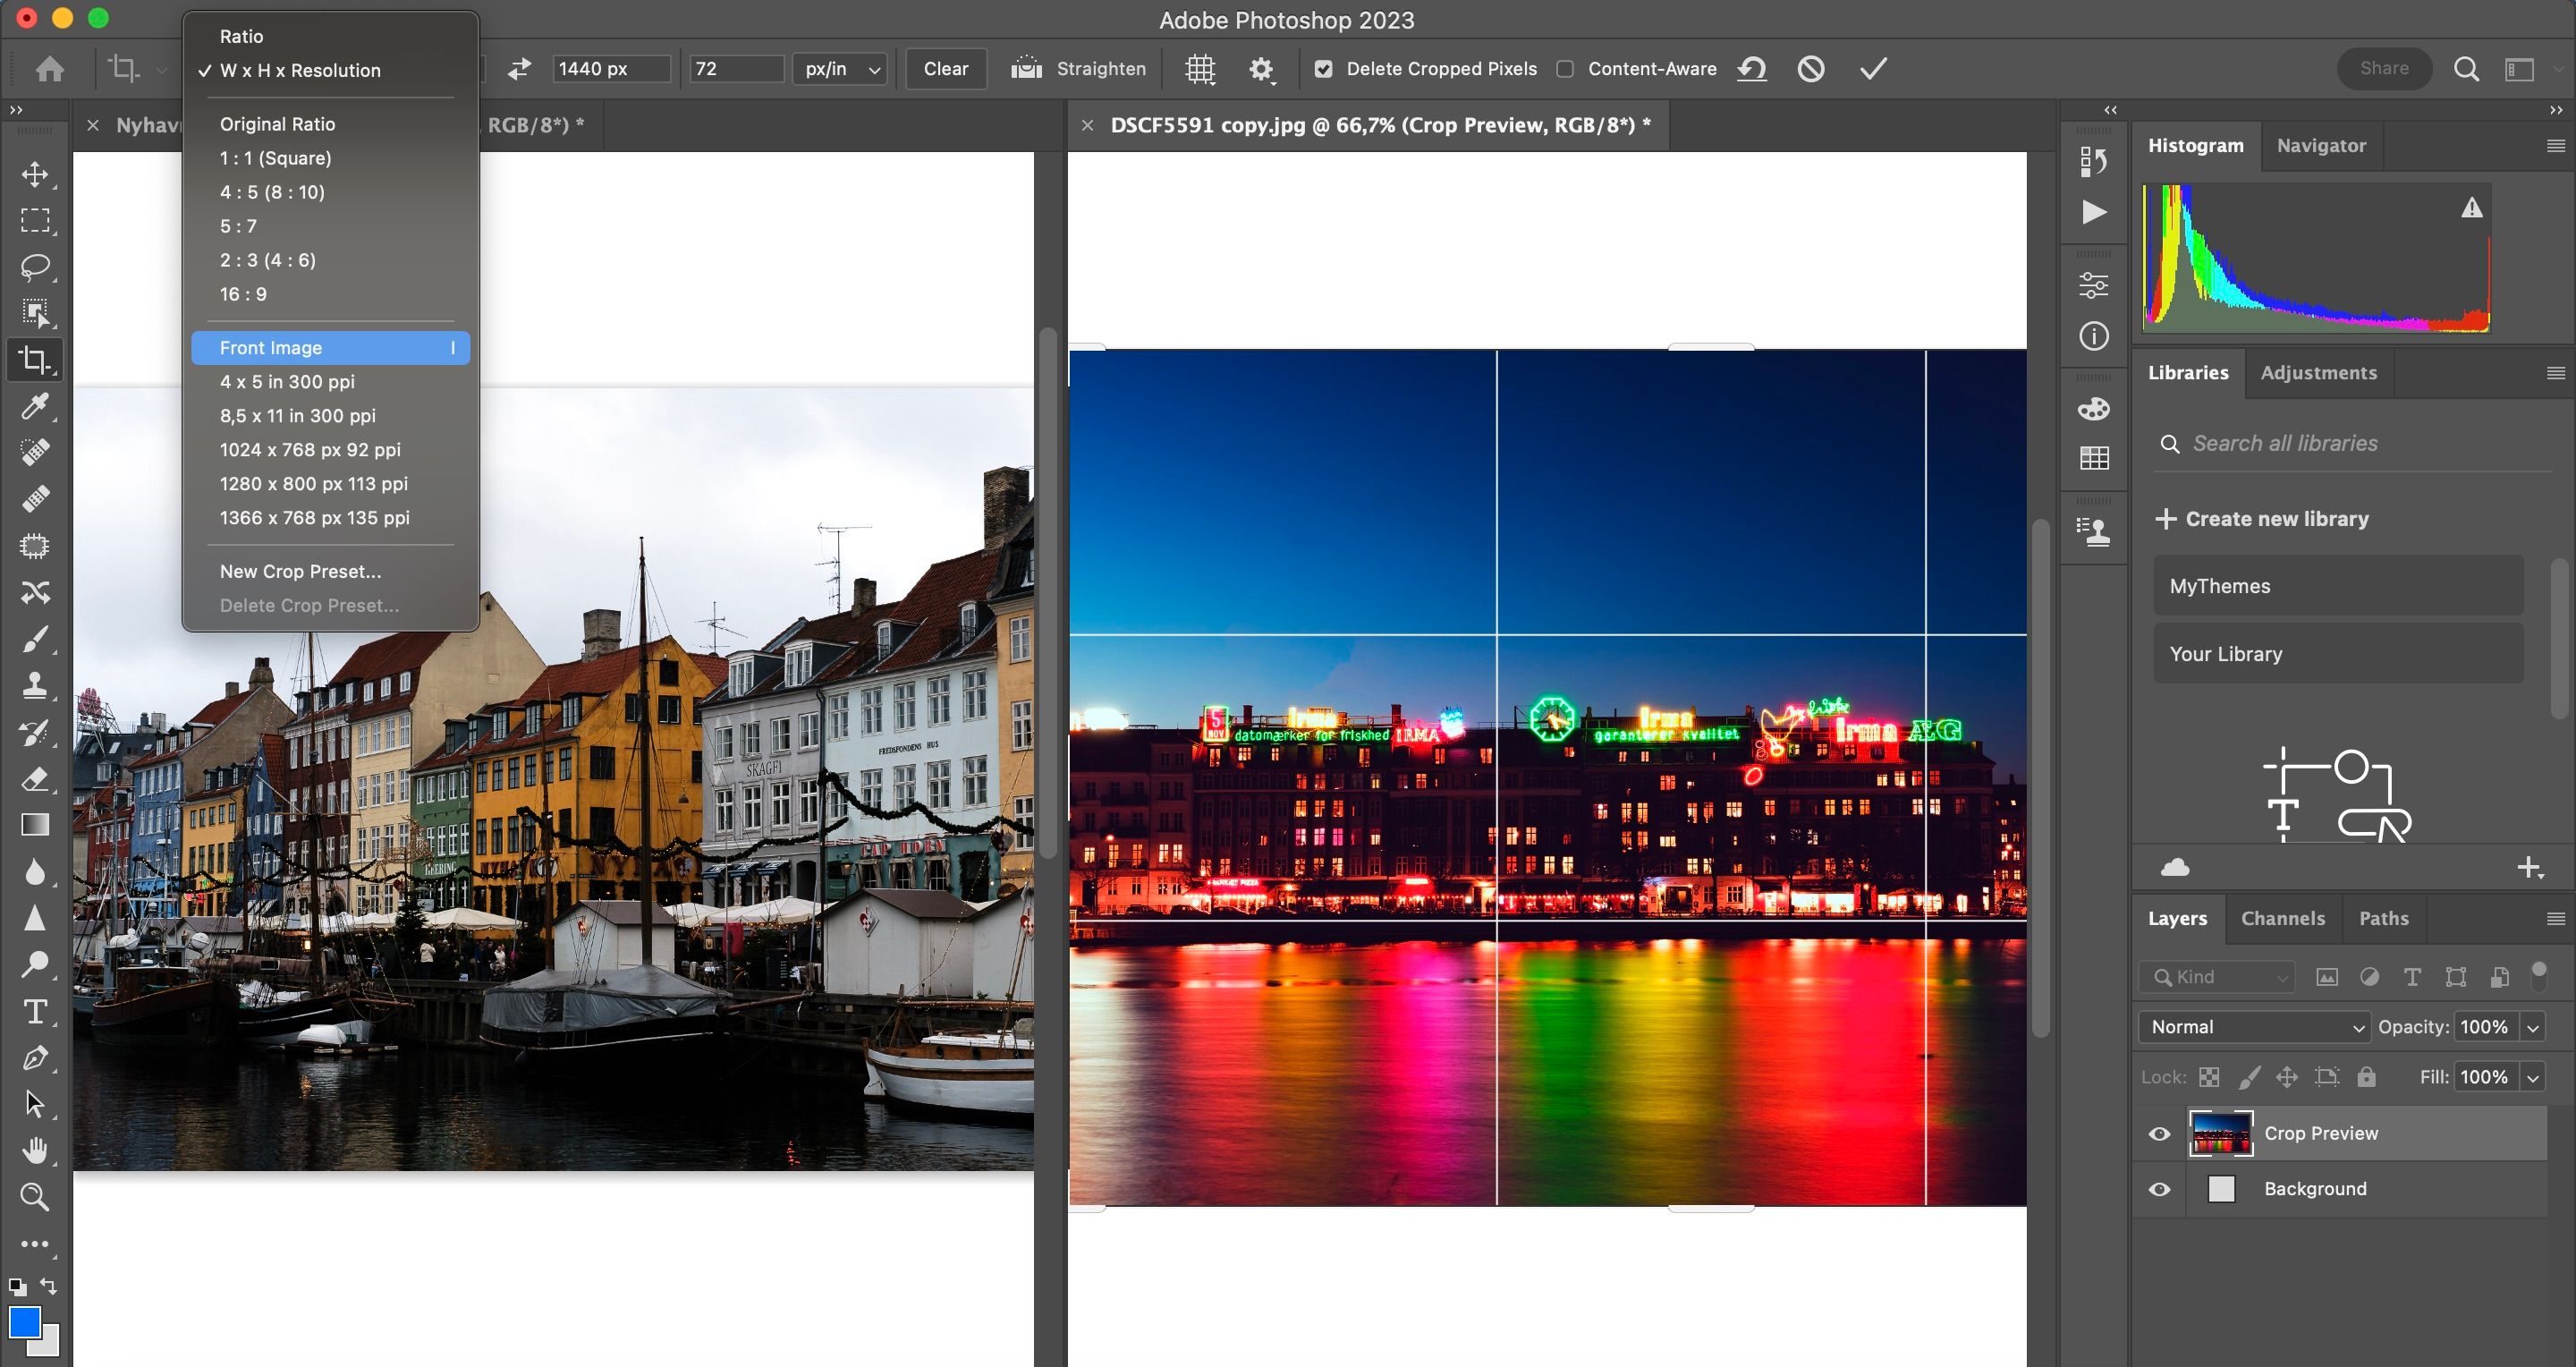
After grouping your images like such, zoom into the same percentage.
Select the second image and hit the Crop tool. Choose Front Image from the list under W x H x Resolution. This places the width and height and resolution of the image into the options bar.
4. How to Crop Images to a Preset Ratio
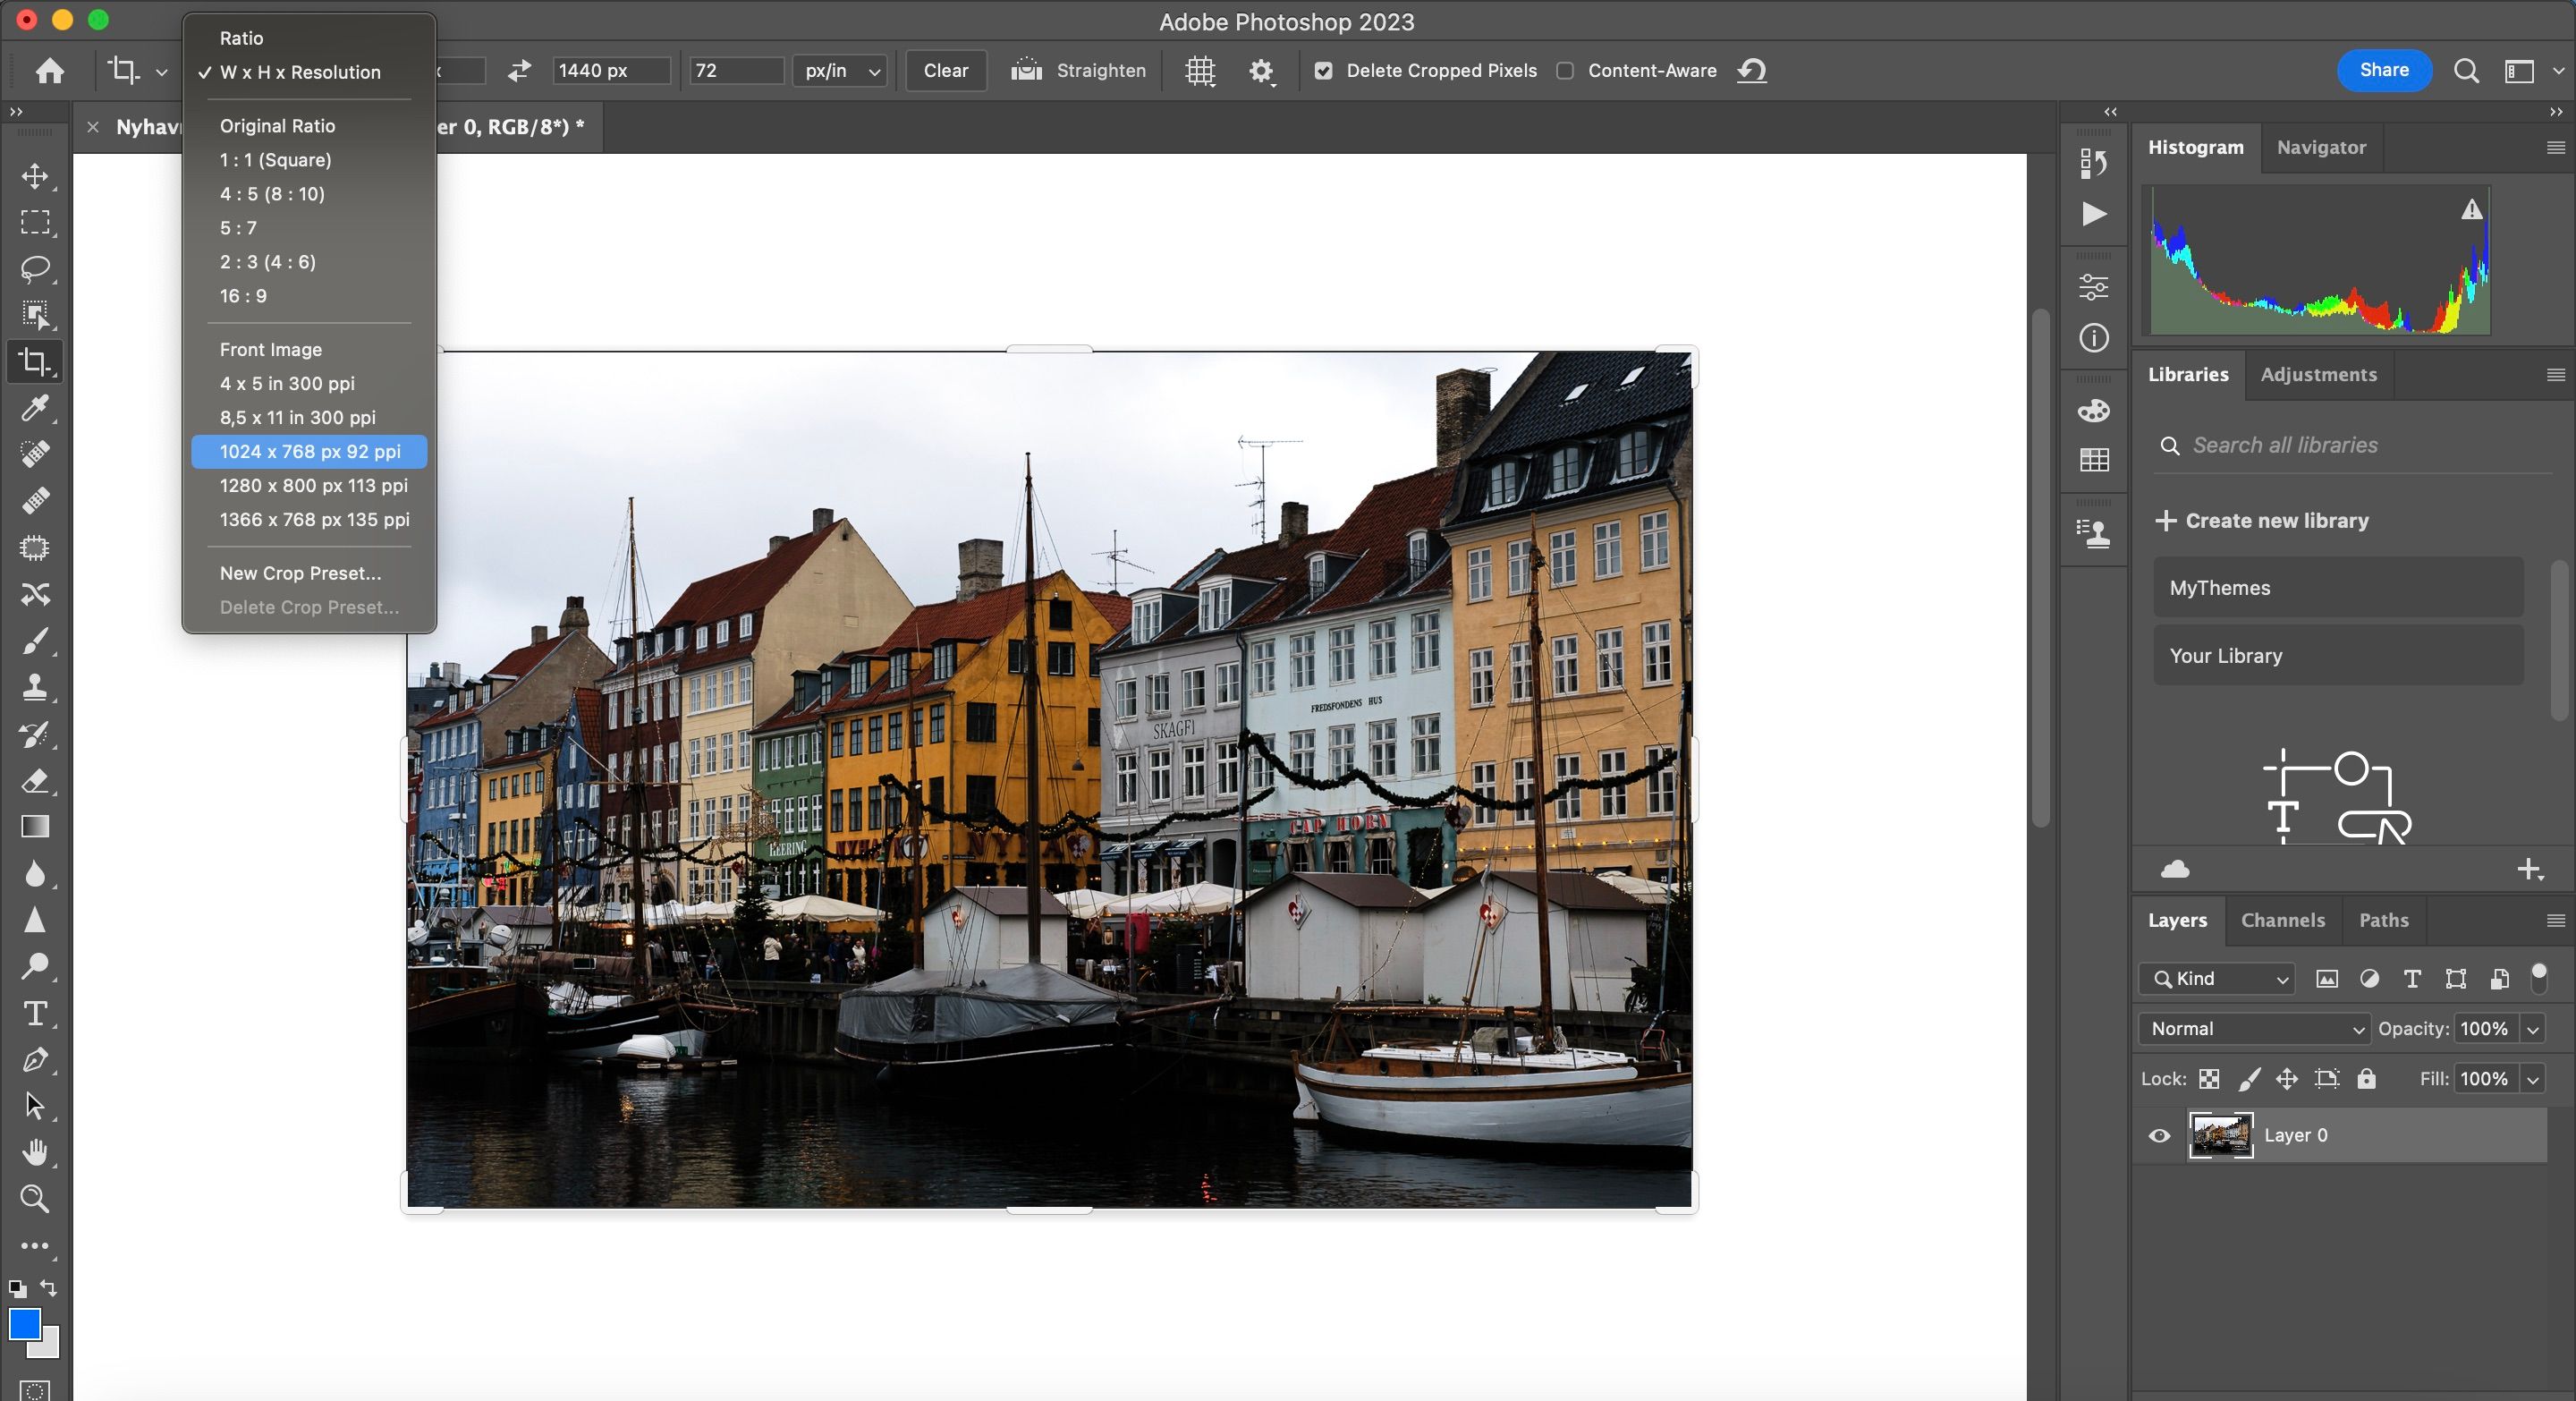
If you don't want to crop single images freehand, you can easily use ready-set dimensions instead. To access these, select the Crop tool and click on the cropping icon at the top of your screen.
When the dropdown menu appears, you'll see a list of options with which you can crop your image. Select whichever is relevant to your photo. You can also use preset dimensions to crop and resize photos in Lightroom.
Crop Your Pictures in Photoshop
Cropping your images in Photoshop is a pretty simple process, and you'll find a selection of handy tools that will allow you to limit the amount of damage you cause to your photo. Using the simple cropping feature is simple, but you can also change the size to make two images the same.
Photoshop also allows you to automatically crop your images to a preset dimension, which you will find handy if you're going to share your pictures on a particular platform.

