<firstimage="https://www.makeuseof.com/wp-content/uploads/2010/10/citytour.jpg" />
It isn't always easy to show people how amazing a location is. Maybe you've visited an awesome theme park or a zoo and you'd like to show them how cool it was. Or maybe you're trying to sell your home, but pictures or words just don't reveal the beauty of the land and the house itself. Sometimes, the best way to show people a location is through a real video tour. This lets people feel as though they, themselves, are walking through the area. Providing an online video of an area is like providing web visitors with a virtual tour.
One of the best solutions I've found to offer virtual tours like this is YouVR. There are lots of ways that you can integrate photos into Google Maps, like Mark's approach of geotagging Flickr photos on Google Maps, or using apps like HistoryPin to pin photos to certain Google Maps locations. But if you want to attach an actual video tour of a location on Google Maps, then YouVR is the place to do it.
Creating a Virtual Tour
Once you sign up at YouVR, you'll find that creating your own location-based virtual tours are as easy as filling out forms. The process is a very simple three step procedure, and probably the part that requires the most work is actually shooting your digital video to upload. That's actually the first thing you should do - just shoot a 1 to 2 minute video capture, touring the area and showing everything that you'd like to highlight. Ideally, the video shouldn't be a huge file. For example, I shot a 2 minute video and saved it in windows media player format in a file that was under 3 MB.
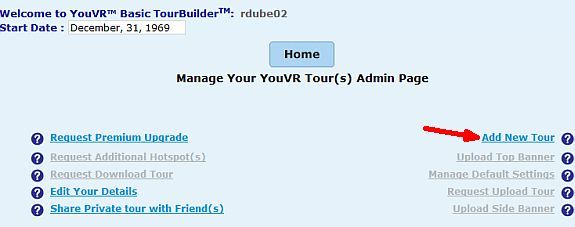
Once you've shot your video and have it ready on your computer, go to your YouVR admin panel and click on "Add New Tour."
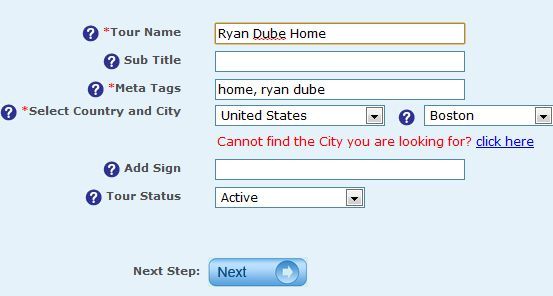
The first step is simple, just provide the title and search details that best describe the video. In my case I'm making it a public video, so search Meta Tags are important. Choose tags that are descriptive so that people will be able to find your video without much effort. If you want to keep your video tour private and only share it out to friends, that's an option as well.
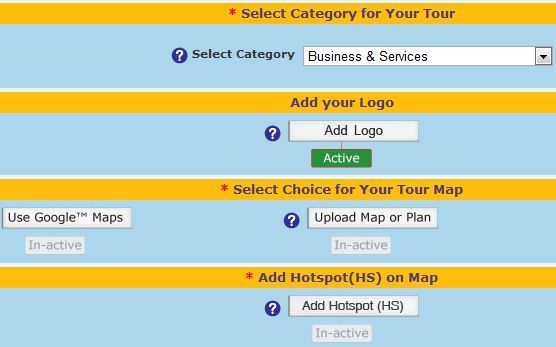
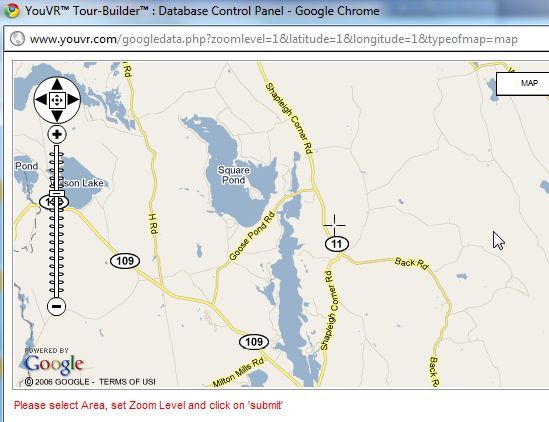
On the next window, you'll see the remainder of the tour creation process broken down into sections. The critical sections at the top of the screen include choosing an accurate category for your video, and of course selecting a spot on Google Maps where the video was shot. To add this, just click on "Use Google Maps". If you'd actually rather upload your own map that you drew or created on your computer, those are available options as well.
To specify the area for your virtual tour, just zoom into the spot on the world map that identifies the general location of the video. Now, keep in mind that you can have several hotspots as part of one tour, so make sure you don't zoom in so close that some of the hotspots aren't in the map. For example, if you're shooting cool locations in a National Park, make sure you zoom the map out enough so the entire area fits in the map view.
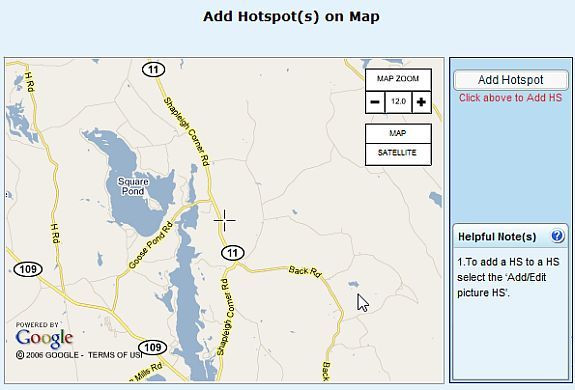
Next, click on the "Add Hotspot (HS) on Map" and click the "Add Hotspot" button to add important sites to that map that you'd like to include as part of your virtual tour.
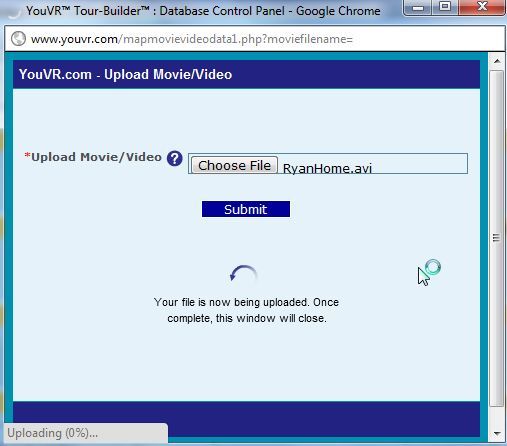
Once that's done, scroll down and click on the link to Upload a Movie/Video. YouVR also gives you the option of uploading pictures instead of video, but if you can take digital video, that's the best way to go. Video is the clearest way to show someone what it's like to explore a certain site. Just click "Choose File", browse to and select the digital video stored on your PC, and then click Submit. When the file is done uploading, the popup window will disappear.
Now, I ran into an issue here where if the file is too big, it'll just disappear and go back to saying no file is selected. If this happens to you, it's a good indication that the video file is too big - so choose a different format and then try again.
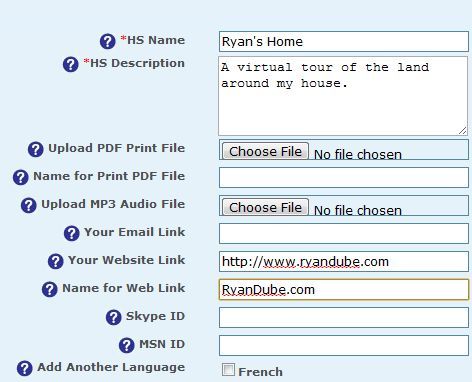
Finally, the next step in the process is just to add descriptions to each HotSpot that you selected. This is helpful for visitors who are viewing your tour, because it offers important information about each "stop" - sort of like you're a tour guide offering information about each location.
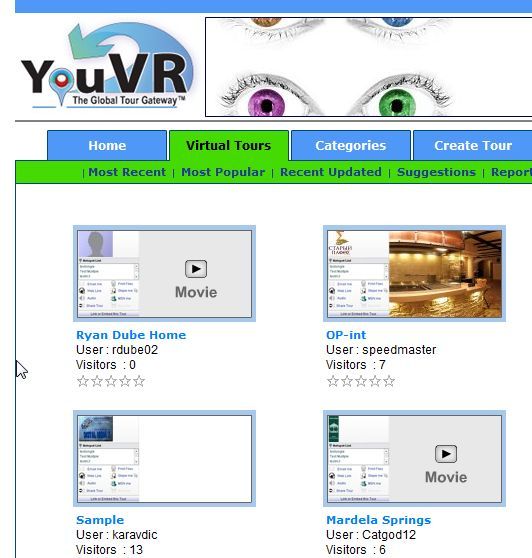
Once you're done, you'll find yourself back at your admin page. If you want to see what your new video looks like, just go to the YouVR public area (click on Virtual Tours), and if you just created your virtual tour, you'll see it under "Most Recent." Here you can see mine titled "Ryan Dube Home".
Every tour you create looks like the window above. The cool part is that you can create up to 4 hotspots in your list under the free account. Each hotspot can have an associated video, so that when your visitor clicks on a hotspot in your list, they can watch the video that you created for it. As you can see, I've only added one hotspot on the Google Map area I selected, a tour of the land around my house.
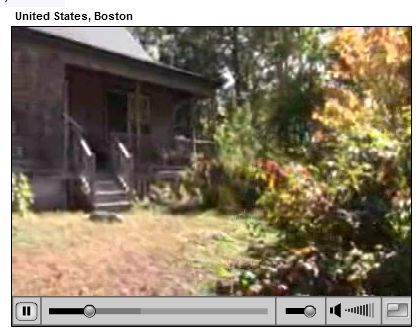
Clicking play - the video immediately loads. I found that the upload speed was just as good or better than you'd experience on YouTube. Here's what my captured video looked like in action on the YouVR site.
This is an awesome service for all kinds of uses. I could imaging real estate agents could make good use of such a service, providing a virtual video tour of properties that are for sale, including hotspot virtual tours of the house and the property. Field guides could use the service to advertise the outdoor adventures they offer, or colleges could use the service to provide students with virtual tours of certain locations on campus.
Can you think of any cool uses for such a virtual tour service? Have you ever used this service, or any others similar to it? Share your thoughts in the comments section below.
Image credit: Patrick Nijhuis

