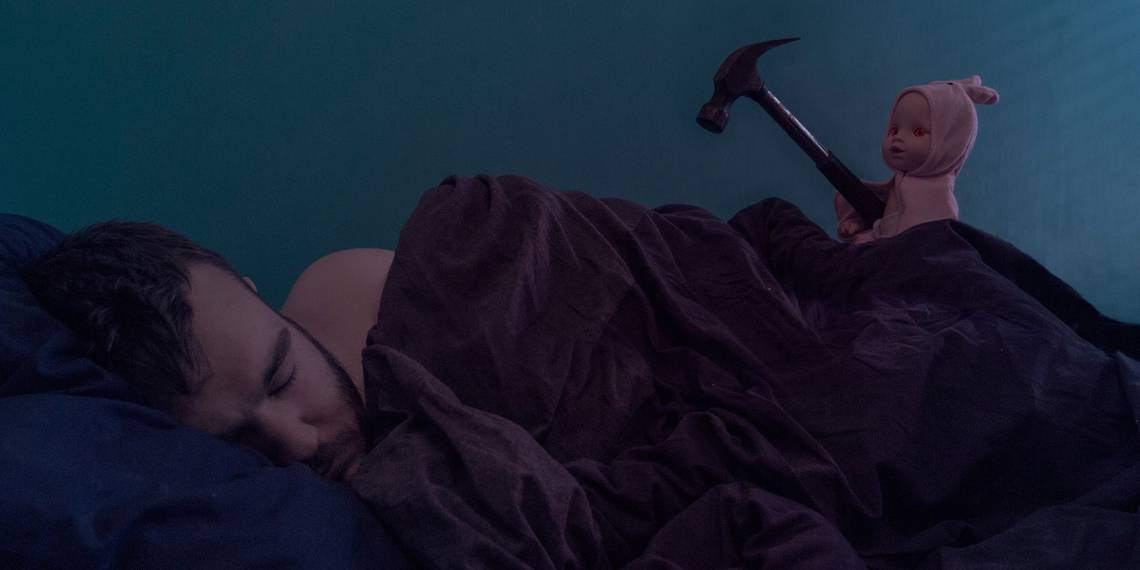
So far in this little series of Halloween Photoshop articles, I've shown how to add a ghost to your Facebook profile picture, how to make a creepy profile picture with a free template I provided, and how to add ghosts to a spooky graveyard scene. In this article, I'm going to create this scene with a crazy killer doll.

Like with the graveyard shot, the hardest part of creating this spooky scene is capturing the photos to use. If you get that right, the Photoshop work becomes a lot easier. Included with this article are all the files I used (including the final TIFF file) so if you want to practice the Photoshop work without shooting your own images you can. There's also a screencast showing my full editing process. You can download the resource pack here [No Longer Available].
This project is slightly more advanced than the others in the series. If you're new to Photoshop, it may take a couple of tries to get the effect perfect. If you're already a Photoshop pro, there's loads of things that can be done to my image to make it better. Don't just do the base effect, build on it.
Prerequisites
For this project, you need a good image editing app. I use Photoshop but you can modify my process to any other program.
For PC users, Paint.NET is the best, free option. Mac users should check out Pixelmator. We've looked at some of the alternatives for Linux before although I've never tried any of them.
If you're using Photoshop you should check out our four part Idiot's Guide to Photoshop to get up to speed:
- An Idiot's Guide to Photoshop, Part 1: Easy Photoshop
- An Idiot's Guide to Photoshop, Part 2: Useful Tools & Tips
- An Idiot's Guide to Photoshop, Part 3: Pro Tips
- An Idiot's Guide to Photoshop, Part 4: Advanced Features and Fun Photo Effects
I'm also using some of the same techniques as in the two previous articles, so you should work through them first.
Shooting the Photos
The final photo is made up of three separate images: one of me asleep in the bed holding the doll, one of me just asleep in the bed, and one of me holding the doll and hammer from behind.
For at least two, and ideally all three, of the photos you want the camera to stay as stationary as possible so that you can easily blend between them. For that, you need to lock your camera down on a tripod.

You also need to keep your exposure the same between shots. Use a camera — or camera app — that you can manually set the aperture, shutter speed, and ISO on.
For this sort of shot, you want an aperture of between 8 and 11. Shutter speed and ISO will depend on what gives you a good exposure. I shot mine by bad window light so my ISO was 1000 and my shutter speed 1/50th of a second but different values will work for you depending on when and where you do it. If you can, I'd recommend doing this with a friend. It makes everything a little easier.

With the camera set up, capture the photos you need. It's always good to take a few extra. I shot about ten frames and used the best three.
The Photoshop Process
In the screencast above, you'll see me work through the full Photoshop process. The steps are simple, there's just a lot of tweaking to get everything looking right. I could easily have spent another hour adjusting the layer masks. As a refresher, the basic steps are:
- Import the images into a stack and auto-align them. Rearrange them so they're in the order you want to work on.
- Use Layer Masks to blend in the parts of each image you want. This step requires a lot of work. You need to switch back and forth between concealing and revealing the mask. Use the natural edges in the image to blend everything together so it looks good.
- Add a Hue/Saturation adjustment layer and lower the Saturation of the Reds.
- Add a Color Lookup adjustment layer and select Moonlight.3DL for the preset. Lower the Opacity of the layer to a value that looks good.
- Add a Gradient Overlay adjustment layer that goes between navy blue and cream. Change its blend mode to Color and lower its Opacity as well.
- Add a Curves adjustment layer to brighten the midtones of the image.
- To create the glowing red eyes effect, add a Hue/Saturation adjustment layer and mask it so it just affects the doll's eyes. Select Colorize and increase the Saturation, Lightness and Hue. Change the blend mode to Color.
- Fill a new Layer with red, change its blend mode to Soft Light, lower its Opacity and mask it so it only shows in areas that would be lit by the doll's eyes.
- For the black eyes, duplicate the Hue/Saturation layer, turn off Colorize, and lower the Saturation and Lightness values.
With that, your done. Share the image on your social media accounts and scare your friends.
Show Us Your Work
I'd love to see what you put together with the resources in this article. It's a lot of fun playing around with Photoshop and it's always good to be inspired by other people. If you follow this article, please share your final image in the comments below.
If you need help or feedback, you can ask in the comments below too.