A while ago while I was looking for a self-hosted alternative to create an online survey, I came across a great open-source and free script called Lime Survey. I tried a few online survey alternatives and I found LimeSurvey the best way to create self hosted surveys and questionnaires. While I have been using LimeSurvey as a self-hosted solution, they recently launched LimeService which is a hosted solution. Today, I will be focusing on using the self-hosted version and teach you to install and create your first free online survey.
Before I get started, I would suggest that everyone to take a read of their documentation. If you ever run into a problem or not sure what option to select or how to do something, the documentation wiki will help you out.
Installation
Installation of LimeSurvey is pretty similar to installing any other web script. Just download the latest version, upload the files to your web server, open config.php, enter your database information, set the relevant directory permissions and then run the installer located at http://yourdomain.com/limesurvey/admin/install to populate your database. That's it. If you run into problems, simple read the installation instructions.
Creating Your First Survey
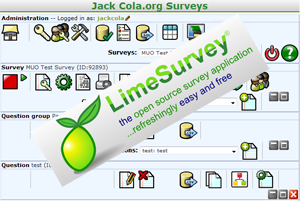
Once you have successfully installed your LimeSurvey self hosted survey, you can log in to your admin panel by going to your installation directory /admin.

To create your first survey, click on the image that's next to the Survey drop-down box. The drop-down box lists all your surveys that you have.

You will then be presented with the setup screen for you to enter information about the survey such as why you are conducting it and the messages you want the participants to read. In the relevant tabs, you can also set who has access to complete the survey, when the survey is active, whether the survey is anonymous and many more features. It's important that you carefully read this information as you may not be able to change it once you publish the survey.

Once you have made all your settings, hit the "Save Survey" button. It's now time to add groups to your survey.
Adding Groups
LimeSurvey is organised in a hierarchical manner. The top level is the survey which survey's have groups and inside these groups are the questions. So when you add questions to the survey, you first have to have a group. Groups are a great way to organise your survey, and get certain participants to answer questions in a particular group only by adding conditions. It is also a great way to break your survey up into pages or sections.
So to add a group, simple click on the plus sign that is next to "Question Groups" and fill in the form.

Adding Questions
Now we are up to the part where we add questions to our groups. To do this, press the plus sign in the question group toolbar. As you can see, as you move down the hierarchical levels, you get another row of options.

Right here is where you enter your question. First of all, chose a unique code for your question. For example, it could be just q1 or your_name if you just ask for the participant's name.
Next, add the question's text and help text to provide the user with a guideline to answer the question. The help box doesn't have to include anything, but if the question is a bit vague, it's always good to include it.
Now we are at the important step - choosing your question type. There is a long list of question types that you can select from:

Most of them are self explanatory, but if you don't understand what a question type is, visit the documentation page for help. Once you filled out all the required fields, press "Save Question" to save the survey. Depending on the question type, you may have to add attributes to the question. This can be done by clicking on the image next to the warning message. From here, you can add options or conditions on a particular question. As you can see, LimeSurvey is quite powerful.
Just Follow The Process
Now you know the basics, you just have to follow the steps above to create your self hosted survey. If you run into trouble, please ask in the comments below and I will try my best to help you, or you can read the documentation which is really thorough.
Once you have activated your new survey, hand the link out if your survey is open to everyone. Then all you have to do is check your results by clicking on the "Browse responses to this survey button". If you want to see the results of my recent survey, you can download the zip file which contains the raw PDF output from LimeSurvey at my blog.
Just so you know, MakeUseOf's polls are powered by PollDaddy. What is your favourite survey solution?