Sending emails to a group is more common in both our business and personal lives. You may use groups for your project team at work and your immediate family members at home. Creating an email group for a distribution list in Microsoft Outlook can save you a lot of time.
Once the group is set up, you can just pop it into the email and contact several people with a single message. If you've never done this before, we're here to help. Here's how to create a group in Outlook for both Windows and Mac.
Differences Between Contact Group, Contact List, Email Group, and Distribution Lists
There really is no difference between a contact group, contact list, email group, or distribution list when talking about Microsoft Outlook. The terms are used interchangeably.
As a matter of fact, the Microsoft Office support site now offers up the term "Contact Group" as opposed to "Distribution List":
Use a contact group (formerly called a "distribution list") to send an email to multiple people…
The Outlook application itself uses the terms Contact Group (Windows) and Contact List (Mac) on its ribbon, in its menus, and in its support documents. So, as we move through the steps below, those are the phrases you'll see most often.
How to Create a Contact Group in Outlook on Windows
Open Outlook on your Windows computer and prepare to create your contact group. If Outlook is stuck on loading profile, check out our linked troubleshooting guide and apply the fixes mentioned in it to proceed.
-
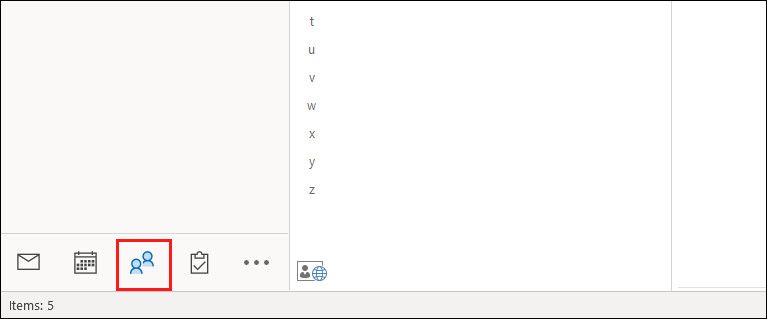
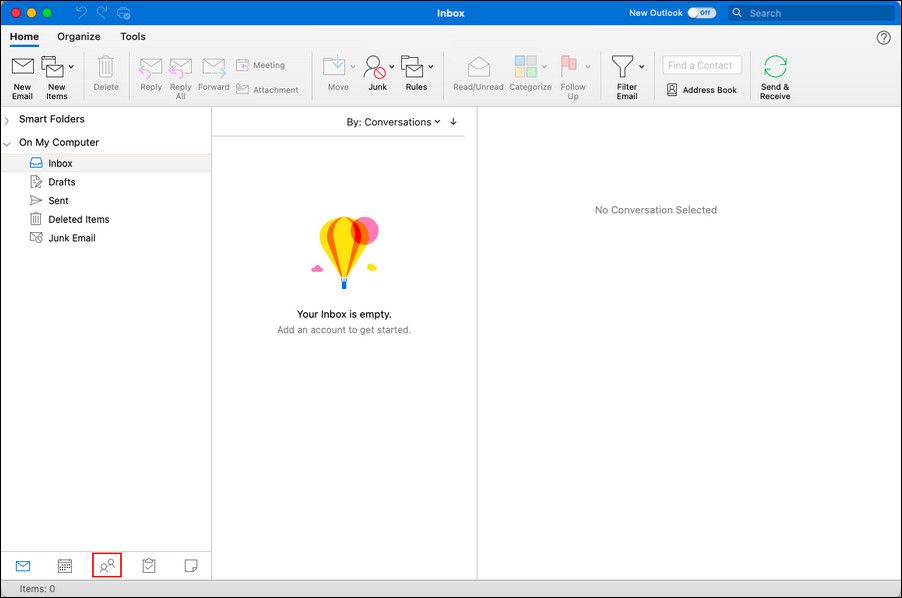
Launch Outlook and select People from the bottom left of the Outlook window.
-
Click New Contact > Contact Group from the ribbon.

-
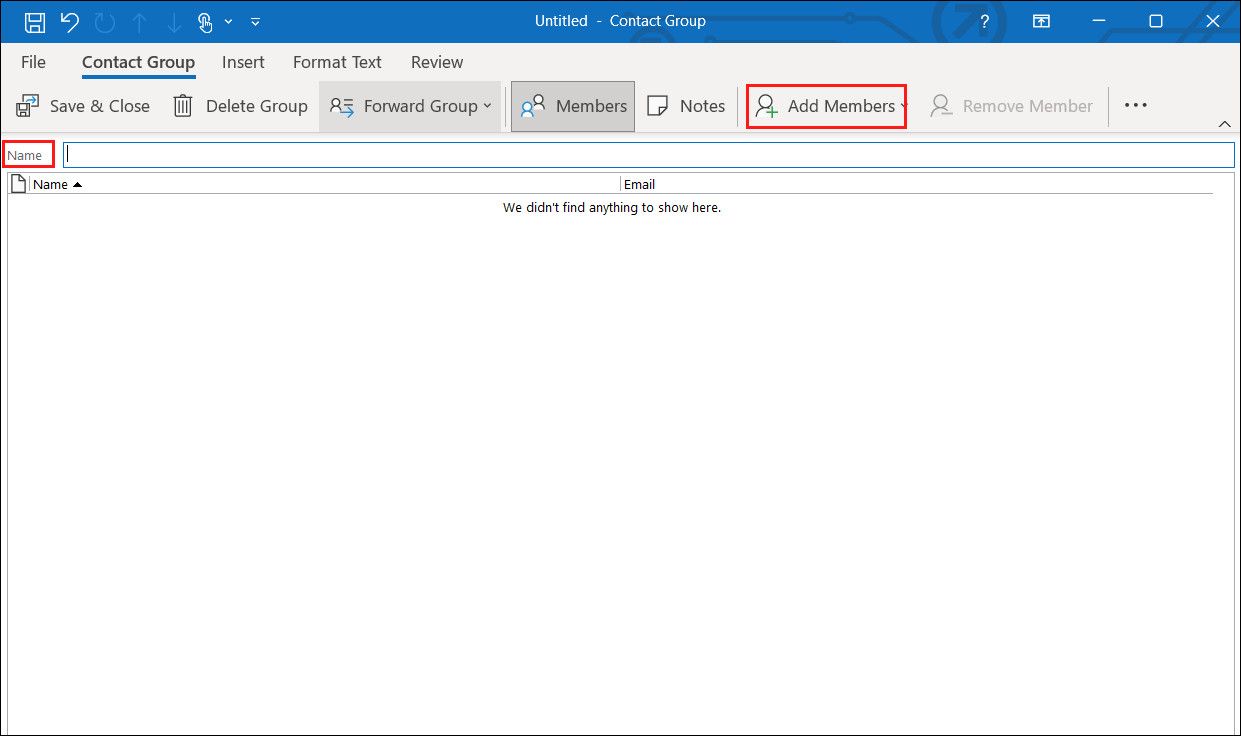
Give your group a name and click on Add Members to add recipients.
- To add members from your Outlook contacts or address book, just double-click their name in the popup window, and it will be added to the Members area at the bottom. When you finish, click OK.
-
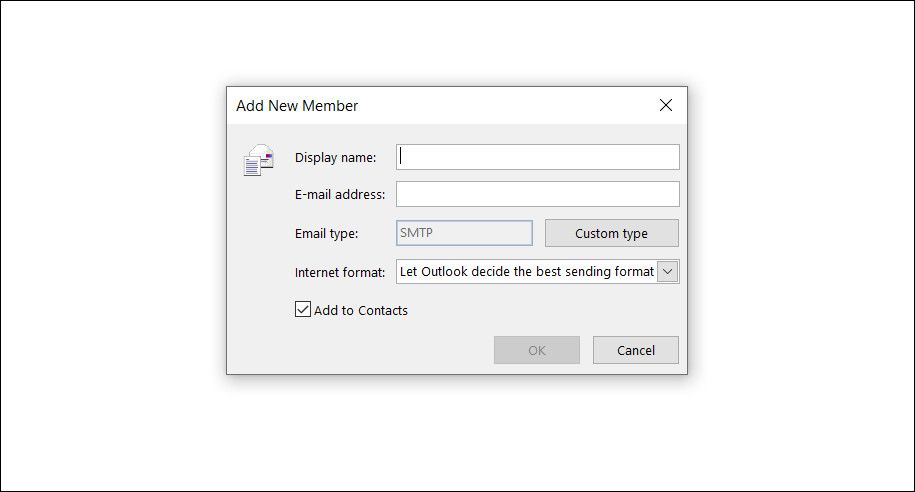
To add new members, type their name and email address in the following dialog.


When you're done adding members to the group, click Save & Close from the ribbon.
Compose an Outlook Group Email on Windows
After you create your email group in Outlook, you have a couple of methods for sending the members a message. You can send out emails directly from the Mail section, or you can access the People section, select the specific group and then send the email. We have outlined both the methods below. Proceed with the one you prefer.
1, Compose an Email From the Mail Section
In the Mail section of Outlook, you can email that contact group you created by doing the following.
- Click New Email.
-
In the To field, begin typing the name you gave to the contact group. Or, you can click the To button and search for the group or select the group name from the list.

- When you see the group, select it and click OK.

2. Compose an Email From the People Section
If you are in the People section of Outlook, click the contact group in your list. Then, select the Mail icon and a new email will open with the group populated in the To field for you.
From here, you can also take a step further and configure Microsoft Outlook for project management if you use Outlook for work on a daily basis.
How to Create a Contact List in Outlook on Mac
Open Outlook on your Mac and get ready to create your contact list.
-
Select People from the bottom left of the Outlook window.
-
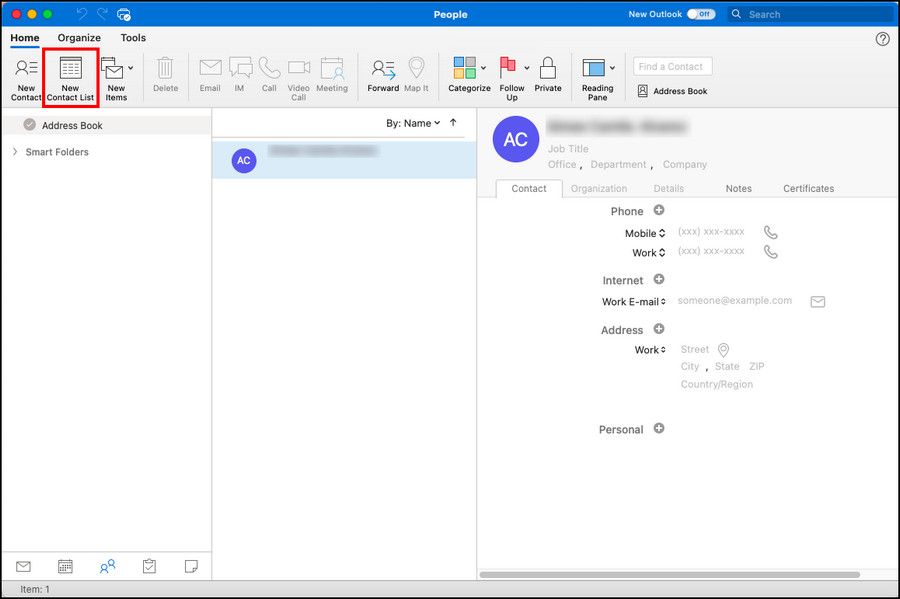
Click New Contact List from the ribbon.
-
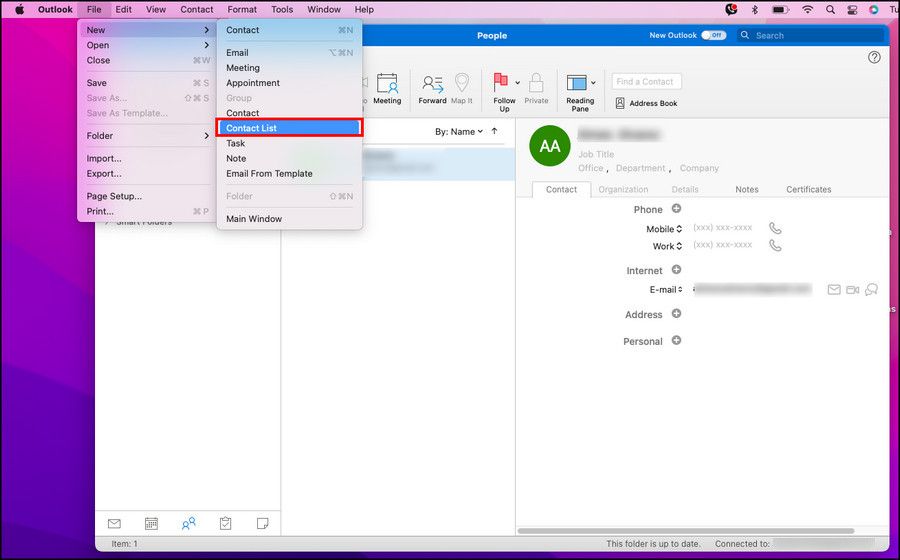
Give your list a name. You can also select File > New > Contact List from the menu bar.
-
To add contacts to your list, just begin typing in the Name and E-mail fields in the popup window. If you add a name that's recognized as an existing contact, you'll see the suggestion for that contact display. Then you can just select it to add that contact to the list.
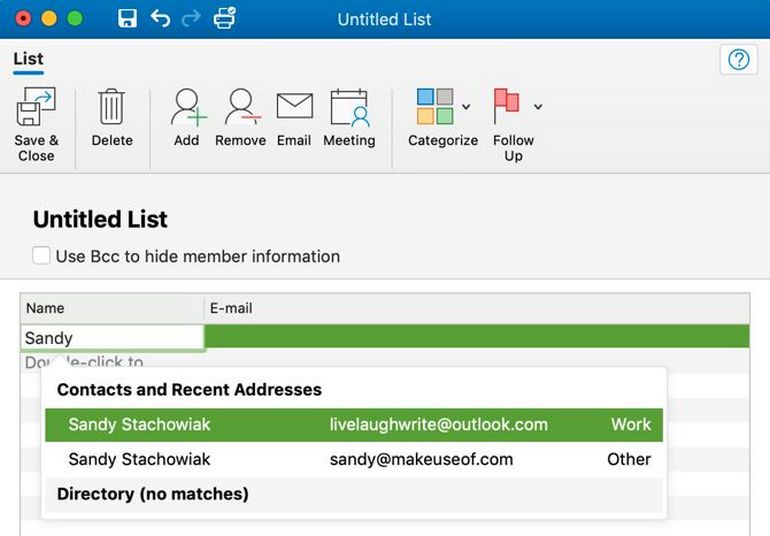
- If you are adding new contacts, just enter their names and email addresses. Before you exit, you can also assign a Category to the group from the ribbon. You'll see options like family, friends, and team.
- When you finish adding members to the list, click Save & Close from the ribbon.


New Contact List Button Grayed Out on Mac?
If you are unable to click the New Contact List button in the ribbon of the People section, this is a simple fix.
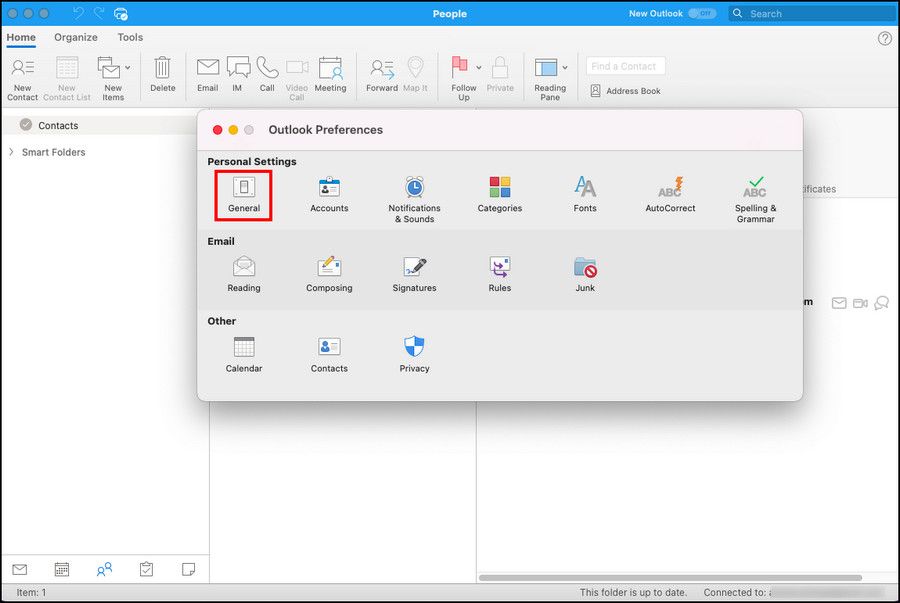
- Click Outlook > Preferences from the menu bar.
-
Select General.
-
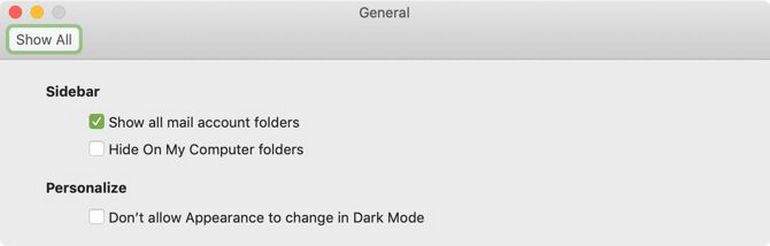
Uncheck the box next to Hide On My Computer.


Compose an Outlook Group Email on Mac
After you create your email group in Outlook, you have a couple of ways to send a message to them.
1. Compose an Email From the Mail Section
You'll probably be in the Mail section of Outlook most often, so to email that distribution list you created, follow these steps.
-
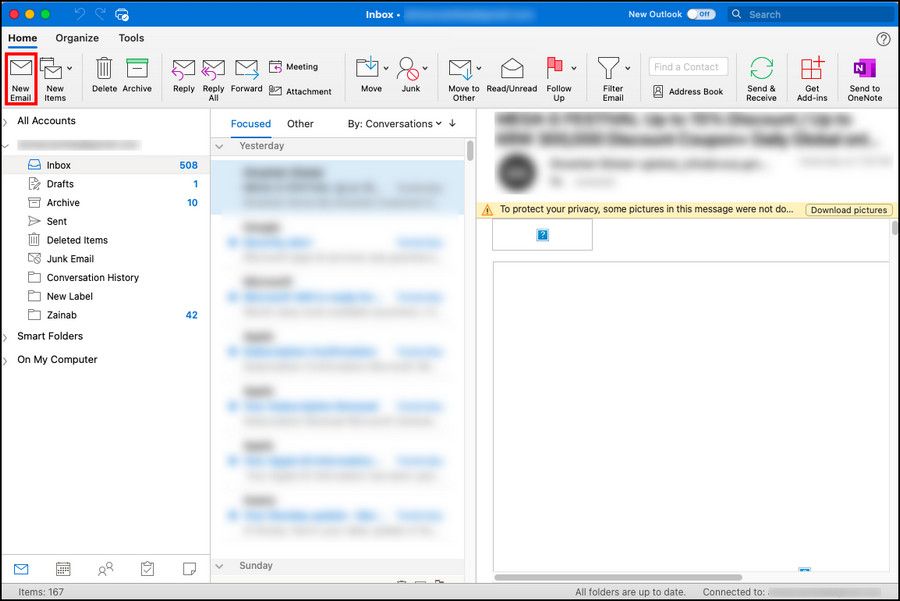
Click New Email.
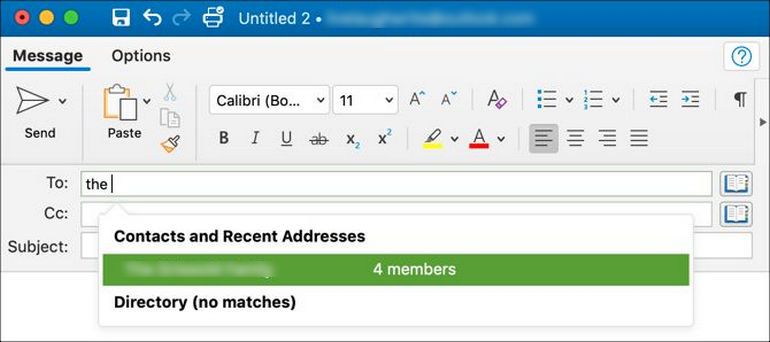
- In the To field, begin typing the name you assigned to the contact list. Alternatively, you can click the Search button on the right side of the field. Search for the list in the box at the top.
-
When the list displays, select it, and it will pop right in.


2. Compose an Email From the People Section
If you happen to be in the People section of Outlook, simply hover the mouse over the contact list and when you see the Email icon display, click it.
A new email will open with that contact list in the To line, ready for you to compose your message.

Speed Things Up With Outlook Groups
If you send emails to the exact same people on a regular basis, creating a group can help you send messages in just a few clicks, saving quite a lot of time as a result. Creating a customized group might sound overwhelming at first, but once you create it by following the steps we have outlined above, you can spend your valuable time doing something more productive than sending out emails!