A letter, official or otherwise, is visually beautified with a letterhead. A letterhead is the decoration that goes at the top of the sheet of paper. It commonly consists of an official name, address and other contact details. In business letterheads, more embellishment comes in the form of a logo that occupies pride of place.
With the logo, a letterhead also becomes part of the branding process. Beyond its visual appeal, letterheads can also be treated as legally binding documents. Correspondence on paper imprinted with the official letterhead gets bona fide recognition by the rules of law and business.
Designing beautiful letterheads is important because it's the first detail that catches our eye. For bulk uses, it's best to invest in a graphic designer who knows a thing or two about page layouts. And a good printing house that will churn out reams of letterhead pads for office supplies. Home office guys and those who don't need it in bulk can fall back on other custom stationary letterhead alternatives.
The trusty Microsoft Word is one such alternative to design a neat professional looking letterhead. You can also save your letterhead design as a template for reuse. This is a short tutorial on how to design custom stationary letterhead using just the tools that Microsoft Word carries in its Ribbon.
Step 1: What Is The Letterhead Going To Carry?
A typical letterhead carries data like a logo, name, contact details, fax numbers, website address etc. Jot down what your letterhead's going to reflect and prepare the data. For example, you can prepare the logo and keep it as an image file on your hard drive.
Step 2: Save A New Word Document As A Template File
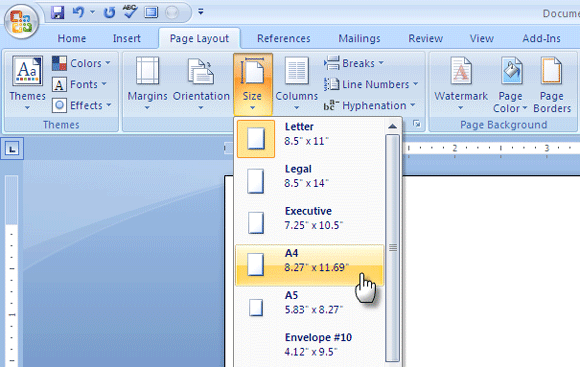
Open a new blank document in Word in the Print Layout. The Print Layout view shows exactly how your document will look when printed. Also, from the Page Layout tab, set the Size to A4 which is usually the standard letterhead size. Click on Margins and select an appropriate setting for your letterhead document.
Save it as a template, with the .dotx extension for Word 2007 in your templates folder so it will be readily available and reusable whenever you need to draft a new document.
Step 3: Fill Up The Document Header With The Content
In this step, we will insert our custom stationary letterhead text and picture in the topmost section of the document called the header.
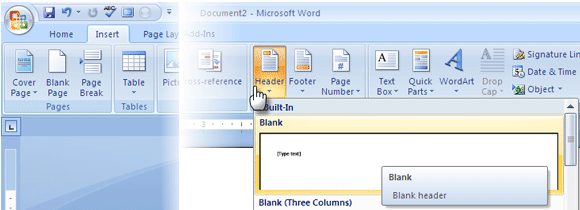
Click on the Insert Tab on the Ribbon and select Header - Blank.
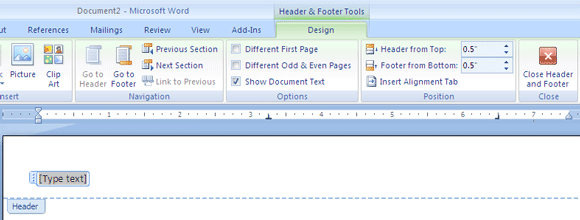
This creates the Header section and opens up the Header & Footer Design tools tab.
Type in the text that you want for the letterhead; a name, address, website URL, telephone number, etc are some of the details that can be included. You can be creative with fonts and symbols to dress up the text. For instance, I have inserted Wingdings characters from the Insert - Symbols tab to separate the text information.
From the Design tab, click on Picture to add an image or a logo to the header. You can use an image editor like Paint to size the picture beforehand or fallback on the Picture Tools available on the Ribbon.
Step 4: Designing The Layout Of The Header
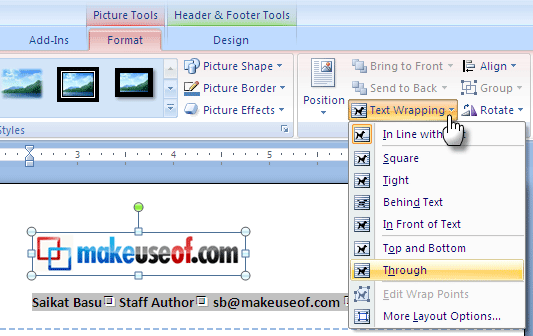
To arrange the image around the text, click on the Text Wrapping command given in the Arrange group. Choose a wrapping style other than "˜In Line with Text'. Drag the image to the desired location and position it in the desired location. You can use the image control handles to resize the image by some degrees and make it proportionate to the page.
You can indent the text to the right using the CTRL+M shortcut key. If you go too far across, press SHIFT+CTRL+M to correct it to the left. The Decrease/Increase Indent buttons on the Home tab do the same job.
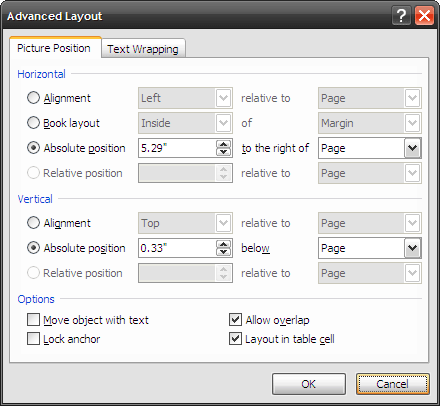
You can further fine tune the image position from the Advanced Layout box. Select the image, right click on the image and go to Text Wrapping - More Layout Options.
As shown in the screenshot above, you can set an absolute position of the image relative to the page.
Step 5: Close & Use
That's it! Click on the close button to close the edit view. To return to the edit mode, you can double click the header area. Your letterhead saved as a template can be loaded as a new document from Office Button - New - (Templates) New from existing"¦
You can print it out or use the soft copy for your online document jobs.
Even though this is a quick way to print out a letterhead, you can painstakingly use elements like tables in the header area to further design the look. MS Word also has many graphic aids like Shapes and Clip-arts which again can be creatively arranged around the text to create neat letterheads.
This is just a simple and quick way to create some customized stationery. Professional letterheads are of course, designed in page layout software.
Have you put together a quick letterhead using MS Word? Maybe you can also drop a hint or two in the comments.

