You may have enjoyed a cinemagraph recently on your social media feed without knowing it. They're those GIF images which never seem to end, stuck on a constant, perfect loop.
Don't let its complexity fool you. You can easily recreate this effect on your own computer. The method used to create the effect is basic but it will allow for a large range of uses; you can use it on most video clips, movie clips, or stock footage.
Cinemagraph Examples
Here's a prime example from Reddit user orbojunglist of the subtle and impressive nature of a cinemagraph. In one part of the image, it seems as still as a photograph. In another, it seems to moves indefinitely.

Cinemagraphs are some of the calmest images you'll find on the internet. Their creation is also simple, requiring little more than a moving image and a layer mask.
Best of all, your clip only needs to be a few seconds long to achieve the impressive effect.

All you need is Photoshop, a clip of subtle movement, and a few minutes to create one of these timeless works of art.
Proper Footage for a Cinemagraph
Getting stock or raw footage shouldn't be an issue. Your clip must only meet two criteria: a relatively still part of your frame, and a repeatedly moving part.
Although the footage doesn't have to be absolutely still -- in other words, you can replicate the effect with just about any stock footage -- the best results are those with juxtaposed motion and stillness. I will be using the following clip from Louis C.K.'s short film Tomorrow Night to provide an example.

Note the rain movement through the window in the background. It will be focal point of the effect. To begin your effect, simply drag and drop your video file into Photoshop. Clip trimming will occur throughout this process, so ensure that you use a couple of seconds of footage before editing to achieve your effect.
1. Same Beginning & Ending Frame
Our video footage should display for a second or two. We only need to capture the movement present in our clip. It means we can shrink our clip by a lot and still retain a seamless cinemagraph. Remember, it will loop indefinitely so length is not an issue.
First, click on the setting cog and ensure Loop Playback is checked. It will ensure that your video plays repeatedly during editing, ensuring that your video is seamless.

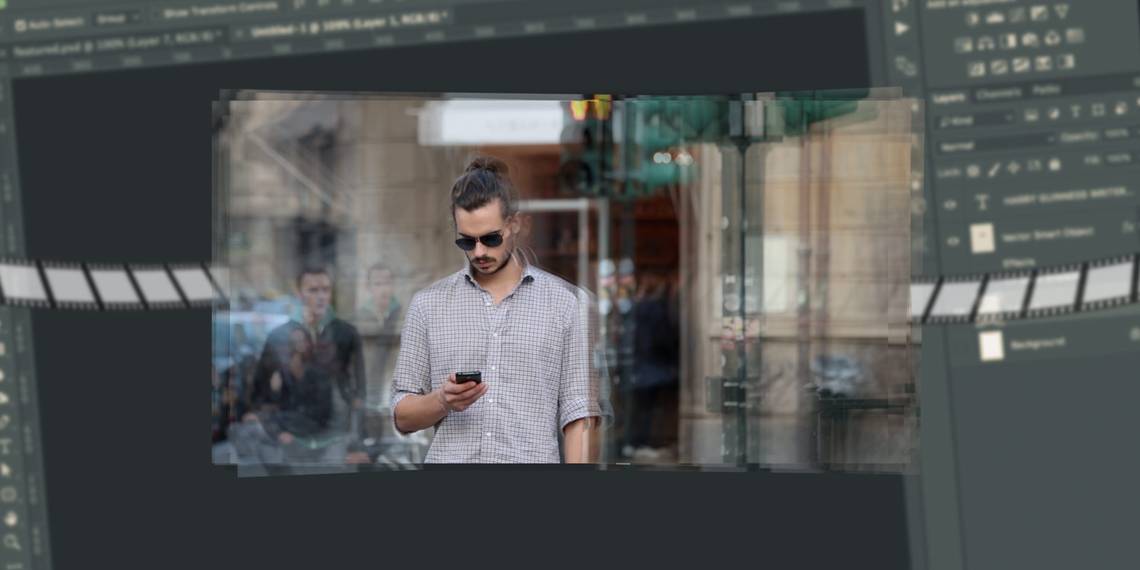
Put your principal clip in Photoshop, and note the amount of movement you will have to crop in the foreground. When shooting a scene, actors will casually move back and forth during speaking, walking, and the like. Our foreground may end up corrupting our moving background.
The best way to rectify the issue is crop your whole clip so the foreground of the first frame occupies the most background space of a frame. The example below displays the logic behind trimming the clip, and thereby choosing the first frame.

Use the Scissor tool to separate your previous clip from the new one. Delete the previous clip. Although trimming will shorten your video, the footage before your trim will prove useful later.
Then drag your video group, labelled Video Group 1 in the example below, to duplicate your clip. You can also press Ctrl + Alt + J to create a duplicate of your selected layer.

Now that I've created two exact video clips, I can achieve the desired effect. The process will end your footage with the same frame it begins with, creating a loop we will use to achieve our the effect.
Take your second layer and drag it to the end of your first layer. Then, click and drag to the left the first frame of your second layer. It will bring back the previous, cropped footage from your original layer.
There should be some overlap between the first and second clips. The amount of overlap is up to you, but shouldn't extend past the halfway mark of your original footage. Finally, drag the end of the second clip to the end of the first. Both clips should now begin at different times, but end at the same time.

Play it back. You'll notice that only one clip plays. It isn't an error, and is crucial for your effect.
2. Clip Transition
In a Photoshop window, the amount a visual appears or fades depends on its opacity. A casual example of differing opacities in a single image would be a watermark. We will need to smoothly phase out the opacity of the first layer of our project in order to transition to the second.
Click on the drop-down menu beside the topmost clip of your Timeline panel. It will show your video options. Click on the Opacity timer, and keyframe in the form of a yellow diamond will appear alongside your footage. Ensure the keyframe is placed at the beginning of your shorter clip by clicking and dragging to your desired location.

The keyframe stores opacity information at a certain part of your video. Drag your timeline cursor to the end of your clip, and click on the small diamond next to your Opacity setting to create another keyframe.

Then, lower your opacity from 100% to 0%. The option is in your Layers panel.

Keep in mind, the new keyframe should appear at the very end of your video.
3. Layer Mask
Your video should have a notable transition. It's due to fixing the first clip's opacity.

Now, set your timeline cursor to the beginning of the video. Once done, press Ctrl + Alt + Shift + E. The keyboard command will create a still frame of your video.
Drag the picture layer to the topmost portion of the Layers tab, and trim so it ends in the same place as our video clips. If you play your video, you will only see the still image.

Now we can create the layer mask to only allow for the window's movement. With the image layer selected, create a layer mask by clicking the third icon at the bottom of your Layers panel.

Once you've selected a layer mask, a white background image will appear beside the layer.

Click on the white image beside your picture, and select your Brush tool. Ensure that your foreground brush is set to Black and adjust brush size. Set your size to whatever works with your image, then set your Brush's Hardness to 0%. It will create a smooth brush border.Finally, begin brushing over your motion.
To ease the process, press the \ key of your keyboard (above the Enter key). It will allow you to view your overlay mask in red. Take your time to brush only over the movement you want to add. The brush tool will delete the still image's contents from the video, revealing the video beneath.
Likewise, brushing your video using white will erase your mask and preserve your still image. Repeatedly brush and play your video to see what pesky unwanted motion is still present.

Once you've finished the masking process, you can continue on to saving your work.
4. Saving Your Cinemagraphs
Now that you've cropped out the action from the inaction, save your work as a GIF. Since GIFs have the ability to play continually, you will be able to enjoy the limitless action of your video through the format. Yet, it requires a bit more effort than saving your file as a normal video or picture.
Head to File > Export > Save for Web (Legacy) to get started. In the drop-down menu beside Present, select GIF 128 Dithered. Then, make four principal changes to the registered settings:
- Selective to Perceptual -- Dictates the color palette of your GIF.
- Colors: 128 to 256 -- Adds a larger color palette to your GIF, bettering overall image quality.
- Diffusion to Noise -- Affects how colors transition from frame to frame. Since we want the colors in our image to blend seamlessly, it's better to tweak Noise rather than Diffusion. Your results may vary, so feel free to test the different options.
- Dither: 88% to 100% -- Dictates the amount of color information necessary to affect shadow and frame transition. A high dither rate will allow for smoother color transition than otherwise.
The final edit you must make is changing your Looping Options settings from Once to Forever. It's vital for the repetitive effect of motion.

Feel free to play around with these settings. Some will work better with color images, while others won't. The only way to pick the absolutely best settings is to find them yourself.
Final Products
Here are a few of the final products I came up with, using only this method and C.K.'s Tomorrow Night as source footage. The following is the final product from our above explanation.

There are several things one could do to refine the image, such as adding visual effects or adjusting mask size. All of these were created, however, with only the methods illustrated.

Clips with a moving camera prove more difficult to achieve the effect than with still one's as is the case with the following example.

While there are some blatant byproducts using the method -- for example, blurriness when transitioning clips -- the overall product is quick to achieve and looks great.

Movements like smoking or pouring water are the easiest to use with the effect given their random, repetitive motion.

You can even stray from the method proposed above. The following example involves our masking method, but uses a simple hand motion instead of two transitioned clips to create movement.

A perfect clip for this effect would be one with subtle movement and a still camera, as the following example shows.

Here's another example that meets the near perfect conditions required to create a calm, everlasting GIF.

As you can see, we found a surplus of film clips to create cinemagraphs. You'll find the same applies with your footage.
Going and Going and Going...
This Photoshop effect creates lasting videos in more than one way. Not only do they loop indefinitely, they also have the ability to create simple, cinematic videos in a few minutes.
Although the process may prove difficult in the beginning, a few of these projects will turn you from a novice to seasoned cinemagraph professional in no time!
Like cinemagraphs? What others would you enjoy seeing? Let us know in the comments below!