
Background blur is a subtle way of bringing the subject in your photo to focus. Of course, this blur has more value if you achieve it through depth of field on your camera, but if your camera can't do that, you can compensate by artificially creating a blur effect.
There are many tools and methods for blurring a background in Photoshop and the more effort you pour into this task, the better results you'll achieve. In this article, we're going to cover a fast and easy method to blur the background of a photo in Photoshop.
How to Create a Blurred Background in Photoshop
The Blur Gallery in Photoshop offers a variety of blur effects that you can use on your photos. There are many types of blur in photography and each of them is achieved through different phenomenons. As such, the different blur filters in Photoshop's Blur Gallery are intended to mimic those photographic effects.
One filter that allows you to mimic depth of field in Photoshop is Iris Blur. Unlike some other blur filters, Iris Blur is not a blanket filter that covers the entire layer in one click. This filter allows you to control the extent of the blur, its strength, and its focal point to simulate blur more precisely.
Simply adding Iris Blur to your photo won't give you a super-realistic depth of field effect as it is achieved on cameras. You'll need to further modify the image to receive such a result. However, compared to the effort it requires, Iris Blur is a reliable tool for blurring the background on your photo.

As an example, here we have a stock photo of a stylish man posing for the camera. We intend to use Iris Blur to bring the face into focus and blur out the rest of the photo. Without further ado, let's jump into Photoshop and see how you can quickly blur the background of your photo:
- Open your photo in Photoshop.
-
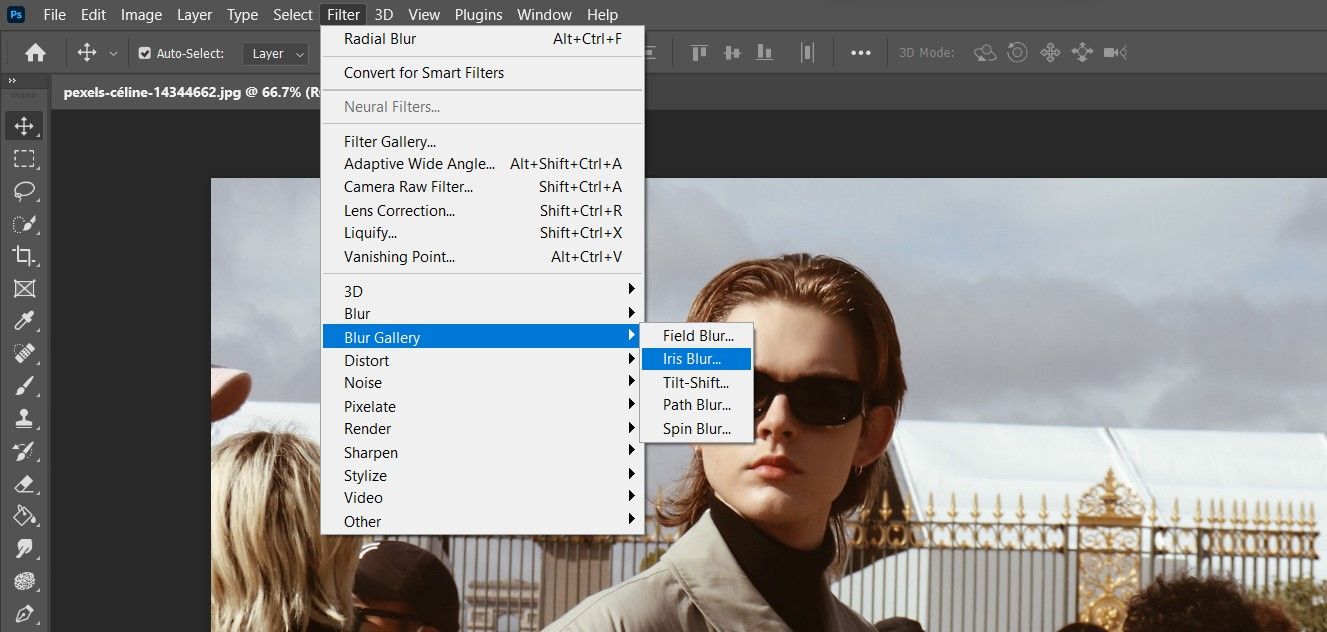
From the top menu, click on Filter and select Blur Gallery.
-
Select Iris Blur. This will take you to the Iris Blur preview.
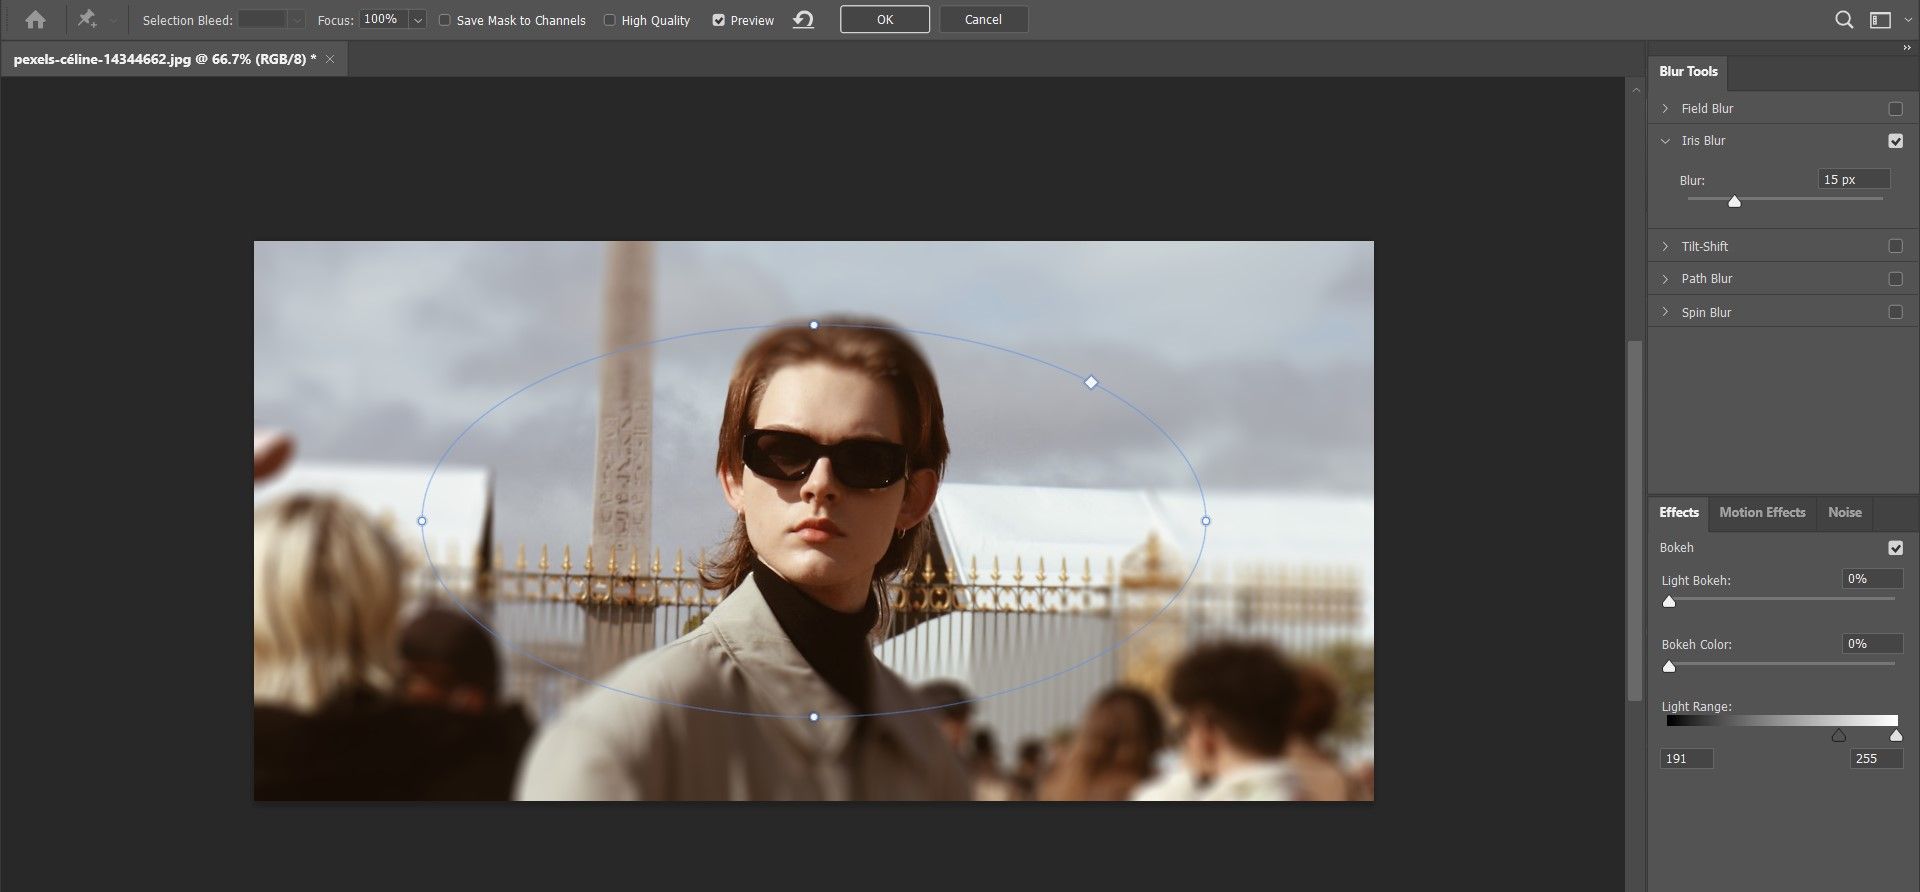


Iris Blur is displayed as an elliptical ring with four tiny dots on it and another middle ring surrounded by four larger dots in the center. You can alter the blur settings by dragging these pins and dots with your mouse.

- The Pin: The middle ring has a pin at the center. This pin defines the focal point in the photo where you want the image to be sharp and clear. Move the pin around to the place where you want to focus on.
- The Blur Dial: This is the smaller circle that surrounds the pin. Click and drag the blur dial clockwise to increase the blur, or, drag the blur dial counterclockwise to reduce the blur. You can also control the blur from the Blur slider in the Blur Tools panel on the right.
- The Elliptical Ring: This controls the blur shape across the rest of the image. The blur effect reaches 100% as you move from the center to the outside ring. Everything outside the ring has the maximum blur density applied.
- The Four Dots on the Elliptical Ring: Hover your mouse over one of the small dots until your cursor changes to a curved double-ended arrow. Click and drag on them to elongate the blur ellipse or rotate it. Use the square handle to change the shape of the entire ring. Drag the line of the ellipse (not the dots) if you want to keep the shape while tweaking the size.
- The Four Larger Dots Inside the Elliptical Ring: These four dots control the area from where the blur starts. Click and drag the white dots to adjust the size of the blur area. Move the dots closer to the pin to make the blur transition smoother or move the dots away from the pin to make the blur transition sharper.
Apply the blur by clicking on the OK button at the top of the blur bar. That's it! You just artificially added some depth of field to your photograph, and with almost zero effort. It's best to be subtle with Iris Blur to keep things natural looking. Going overboard with blur density might ruin your photo.
If you want a more advanced blur effect, see how to create background blur in Photoshop with Luminar's Portrait Bokeh AI.

Shifting Focus With Iris Blur
Naturally acquiring depth of field in your photos through photography physics is a great skill, but if you don't have the tools for that then you can try mimicking it on your computer with Photoshop.
Although creating a super realistic depth of field effect takes effort, you can settle for a simple yet substantive blur effect with Iris Blur in Photoshop. Now that you know how to quickly add blur using Iris Blur in Photoshop, it's time to go on ahead and experiment with it in Photoshop.