<firstimage="https://www.makeuseof.com/wp-content/uploads/2010/03/7Head1.png" />
You are running Windows 7 and you have already looked at some of our previous posts on Windows 7 such as here and here. Now you want to know how to install and run Windows XP Mode on your Windows 7 machine. Windows 7 XP Mode is really a virtual machine running Windows XP that lets you run applications that do not run on Windows 7.
This application can help a company with legacy applications and still upgrade to the latest and greatest iteration of Windows. If this is your situation you can follow this post to see how to get Windows 7 XP Mode and running.
First things first you need to make sure your machine is capable or running XP Mode. You need to have a minimum of 2 Gigabytes of memory and a processor capable of handling virtualization (with AMD-Vâ„¢ or Intel® VT turned on in the BIOS) and at least 15 gigabytes free to install your fully functioning XP environment.
If you do not know if your processor can handle it, check out this site to check your Intel processor over here and you can check your AMD processor with this site called Securable. You can also run this application from Microsoft to check your processor and BIOS settings.
OK now that we know that we CAN run XP mode lets see what we need to do next. We will need to download two packages from the Internet. The first download is called Windows XP mode for Windows 7. You can download that here from Microsoft. This is a 500MB download.
The next download is called Windows Virtual PC that allows us to run the XP virtual machine which was downloaded above. There the instructions provided by Microsoft state clearly:
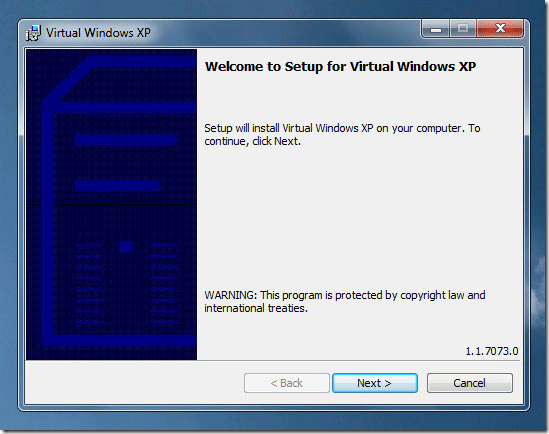
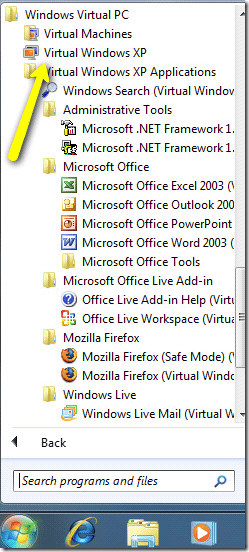
Once you have installed Windows 7 XP Mode, click the Windows 7 Start,then select All Programs > Windows Virtual PC > Windows XP Mode to begin setup. For information on how to set up Windows Virtual PC and Windows XP Mode, check out "Running Windows XP Mode with Windows Virtual PC" on the Support and Videos page.
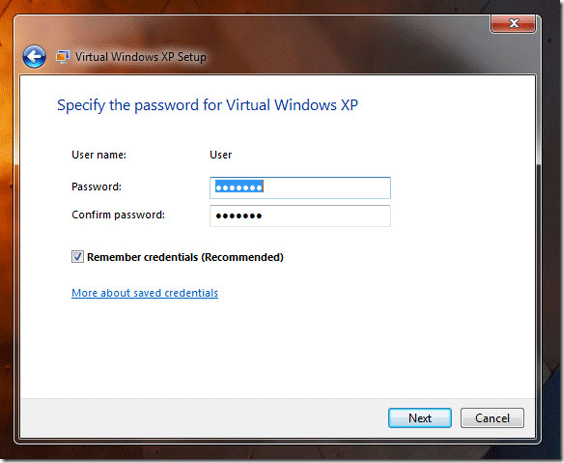
You will need to specify your username and password for your XP installation as you can see below:
After you have installed both components, click on Virtual Windows XP for it to complete the installation.
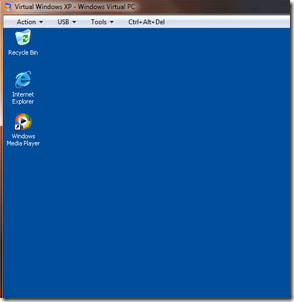
You will see a bunch of dialogues as Windows 7 installs your Virtual Windows XP Environment. When it is complete you will have a real Windows XP installation in your virtual machine as you can see below:
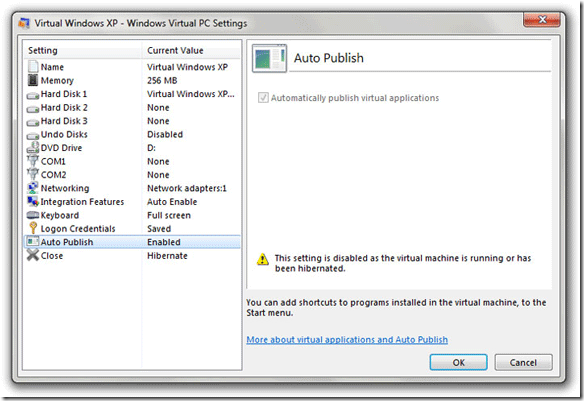
You can check your virtual machine settings by right clicking on the file, choosing properties and you will see the following:
You can change your memory allocation and other virtual machine settings here. You should have Auto Publish turned to enable so when you set up a application to work with your XP VM the shortcut can be published to the start menu.
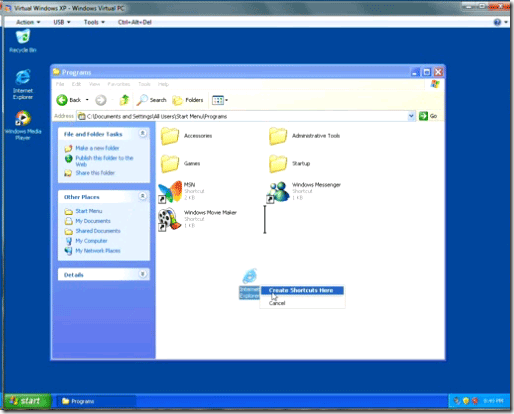
To add items to your XP virtual machine, simply drag shortcuts into the start menu under Programs or install them within the XP VM. They will be auto-magically published to your Windows 7 start menu (if Auto-Publish is enabled) under the XP virtual machine shortcut so you can launch them with a single click.
What do you use your XP virtual machine for? Leave us a note in the comments!


