"Say cheese" takes on a new meaning with Apple's Live Photos. Originally introduced with the iPhone 6s in 2015, this feature combines a still image with 1.5 seconds of moving video with sound before and after the shot.
The end result brings a new look to the usual photograph and something reminiscent of Harry Potter, as you can see a brief moment before and after the shot.
While you can capture and view a Live Photo with any modern iPhone or iPad, you can view the results on a number of different devices, including a Mac. We're taking a closer look at Live Photos and are highlighting how you can use them, how to edit them, how to turn the feature off, and much more.
Taking a Live Photo With an iPhone
To capture a Live Photo with an iPhone, or even an iPad, just start up the built-in Camera app.
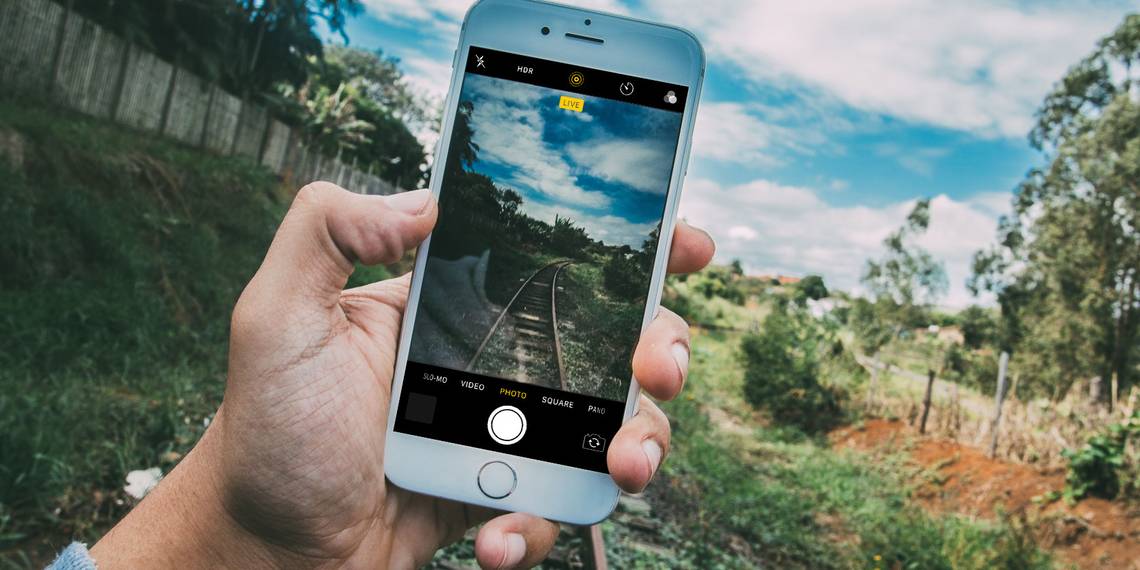
After making sure that it's set to photo mode, you'll need to confirm that you have Live Photos turned on. To do that, look at the top bar above the main photo viewfinder. The Live Photos icon is two solid circles surrounded by a dotted circle and appears in yellow.

To turn Live Photos off and just capture a normal image, hit that icon and it will turn white with a circle through it.
If you want your device to remember your Live Photos preference, go to Settings > Camera > Preserve Settings. You can toggle Live Photo on or off and the camera app will remember your preference instead of enabling it every time.
When you're ready to take a Live Photo, just tap the shutter button like a normal photo. Live will appear above the image viewfinder when capturing.
To take the best Live Photo possible, make sure to keep your device steady for approximately three seconds. While it might take a bit of practice and some coordination with the subject of the photo, you should be able to capture a great Live Photo in no time.
Viewing and Using Live Photos on iPhone
On the iPhone and iPad, viewing Live Photos is easy. You can head to the Live Photos album in the Photos app. Select the photo you want to view and then 3D Touch it (press firmly) to see it come to life.
When using the Photos app on a Mac, there's a specific Live Photos folder available to view. Double-click a photo to bring it up on your screen, then hover your cursor over the Live text and icon in the bottom-left corner to view the video portion.
If you'd like to share a Live Photo with someone from your iPhone or iPad, just hit the Share icon at the bottom-left of the Photos screen. That will bring up the Share Sheet with a number of different options.

The best way to preserve the image and video is to share it with other iOS or Mac users via Messages. As long as they're running iOS 9 or later, they can see the Live Photo by simply pressing the thumbnail. As a word of warning, if you email a Live Photo, it will only send the still image.
A great way to show off a Live Photo is to set it as your lock screen wallpaper. From the Share Sheet of an image, select Use as Wallpaper and then select Set Lock Screen. Now on your lock screen, 3D Touch the image and it will come to life.
Anyone with an Apple Watch can make a Live Photo into their watch face and fully customize the complications and other information for quick viewing. Watch wearers can simply raise their wrist to see the Live Photo face animate.
Sharing Live Photos With Non-Apple Devices
The situation gets a bit tricky when you're ready to share a Live Photo to social networks or to non-Apple users.
Most social networks offer limited compatibility for the format. For example, any Live Photo you upload to Facebook can only be viewed by other iOS users in the app. On Instagram, Live Photos convert to the social network's Boomerang format.
As another option, there are a wide variety of apps that can easily convert a Live Photo into a GIF. The major downside of that format is that you'll lose both the still image and any sound, but you should be able to share the results almost anywhere.
A great choice is Google's Motion Stills. The free app can easily convert Live Photos into GIFs and even video collages.
Download: Motion Stills (Free)
Add Effects and Edit Live Photos on iPhone
Just like any photo or video, you can also edit and add fun effects to Live Photos on your iPhone or iPad.
You can select the Live Photo from your photo gallery to begin. To start editing, select Edit on the top- right portion of the screen. From there, you can crop, add filters, adjust the brightness, trim the video portion of the Live Photo, and more.
In the Edit screen, it's also easy to change the key photo---the frame that appears in your photo library. Move the slider near the bottom of the page to select your key photo. Once your finger moves off the screen, select Make Key Photo.
Select the Live text and icon near the top of the edit screen to turn off the Live Photo effect or just disable the sound.
Starting with iOS 11, Apple has added a trio of fun effects specifically for Live Photos. After opening up a Live Photo, swipe up to see the Effects menu. You have three different options to try out.
As you could probably guess by the name, Loop can turn a Live Photo into a video loop that keeps playing. With Bounce, a Live Photo will play forward and then in reverse for a fun rocking effect. And perfect for situations like fireworks, the Long Exposure option creates an interesting and unique blur effect that you might have seen with DSLR cameras.
Live Photos: A New Way to Capture the Moment
As you can see, Live Photos help bring a fun spark of life to iPhone photography. By just adding a few seconds of video and sound to a still image, the result is something more than just a photo, and an amazing keepsake of a moment in time.
And if you're inspired to keep improving your photography skills, take a look at our complete guide to digital photography.