The Arduino IDE has been the first coding experience for many people. While it gets the job done, it is missing key features that most modern code editors have.
Visual Studio Code (VS Code) has quickly become one of the most popular code editors but doesn't support Arduino development as standard.
Enter PlatformIO, an open source tool for programming Arduino boards (and much more)! Learn how to get PlatformIO and use it to create a simple Arduino sketch in VS Code.
Project Requirements
You will need:
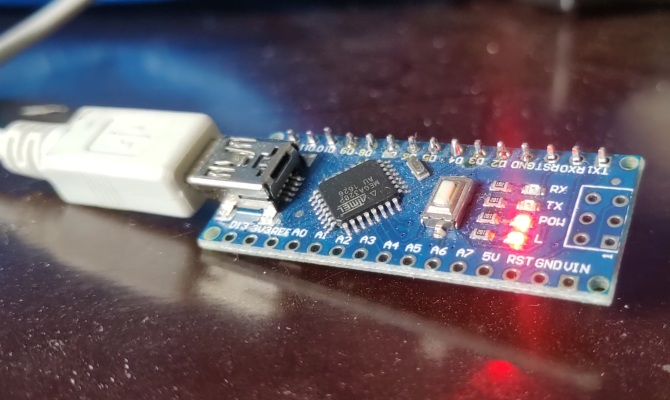
- An Arduino Compatible Board. This tutorial uses a Nano clone.
- The Arduino IDE available from the Arduino Website (Free).
- Visual Studio Code, available from Microsoft (Free).
Today's guide is for Windows 10, but this should work on Linux and Mac too.
Note: The Windows 10 App version of the Arduino IDE will not work with this tutorial.
How to Install PlatformIO
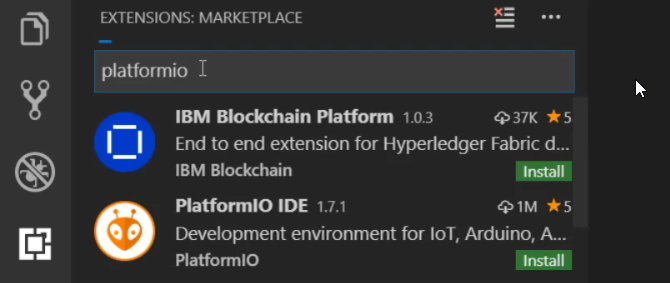
VS Code has many extensions to help programmers, and PlatformIO is no different. Open the VS Code Extensions Marketplace from the left panel, and search for PlatformIO IDE. Click install, and be prepared for a short wait.
Note: Do not close VS Code during this process as it can cause errors with the installation.
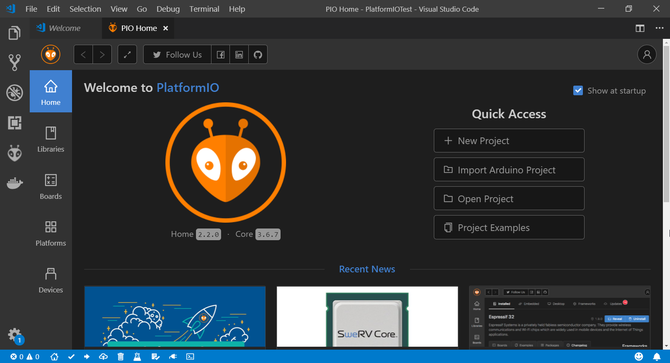
Once the installation is complete, a prompt will appear in the bottom right corner to reload VS Code. Click it, and the program will restart, showing the PlatformIO extension home page.
Setting Up a Project
The PlatformIO home page gives you several options, including opening existing Arduino projects and links to project ideas. Today you'll be starting fresh, so click New Project.
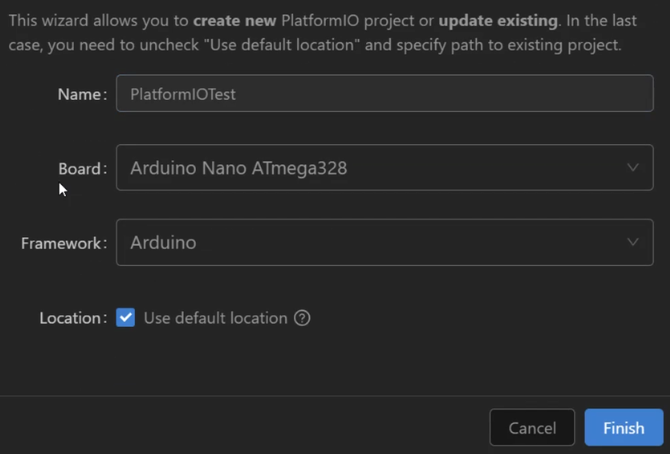
You'll be prompted to enter a name for your project and the board you'll be using. This tutorial uses an Arduino Nano; PlatformIO supports over 650 boards, so you'll likely find yours in the list.
The Framework tab should auto-fill as Arduino if you are using an Arduino compatible board. Leave the Location checkbox filled to use the default installation location. You'll only need to uncheck this if you are working with a previously made Arduino project.
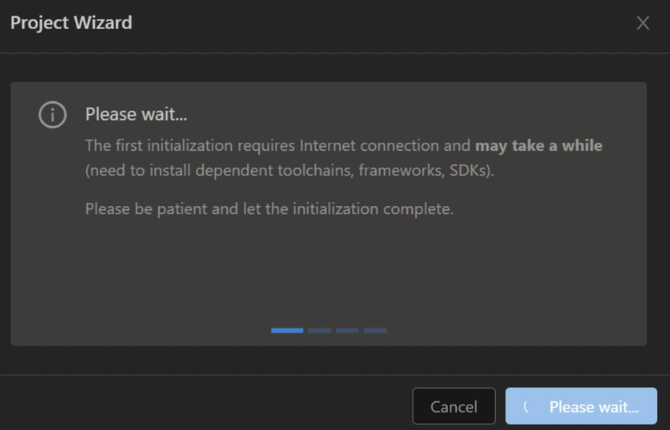
Click Finish and be prepared for a short wait. PlatformIO will download and install any dependencies needed for the project, and restart the IDE once it finishes.
The PlatformIO Workflow
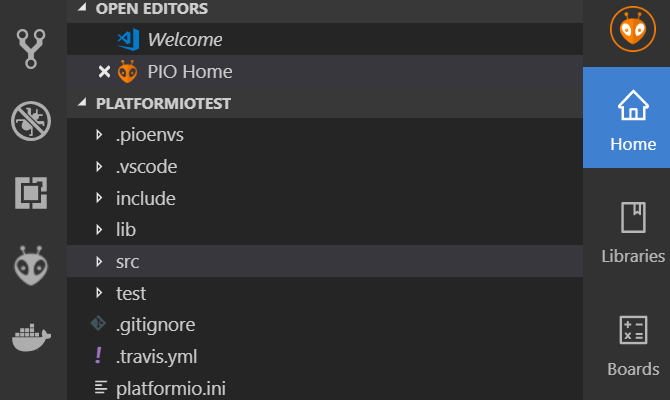
Once VS Code restarts you'll notice a new project folder open in the Explorer panel. At this stage it isn't essential that you know what each file in this directory does, you'll only be using the SRC directory for your Arduino sketches.
You'll also notice a couple of new icons on the bottom bar of VS Code. These are the equivalent of the buttons in the Arduino IDE - a tick for compile, an arrow for upload, and a plug for the Serial monitor.
Now that everything is set up let's get coding!
A Blank Program
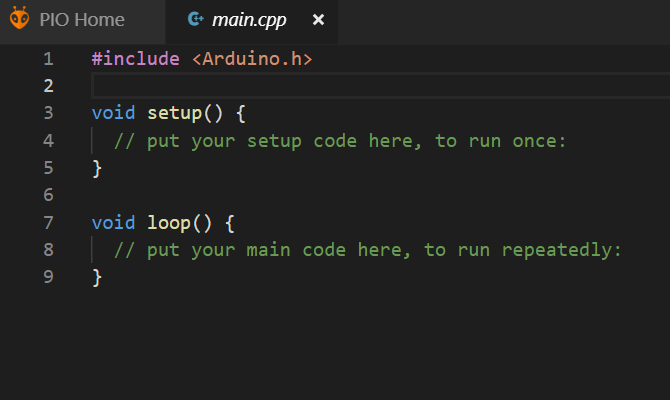
PlatformIO creates a blank sketch with each new project.
Open it in the Explorer tab by navigating to SRC/main.cpp which will open the sketch. You'll notice that the file has a different extension to normal Arduino sketches. CPP stands for C Plus Plus (C++), the programming language the Arduino language and IDE uses.
Note: This tutorial uses the work sketch as it is familiar to those with an Arduino IDE background. However, C++ sketches are commonly referred to as programs.
You'll see some familiarity here---the sketch has setup and loop functions like a regular Arduino sketch. The main difference is found at the top of the program. The #include <Arduino.h> header must be present in every PlatformIO project for it to work.
Now, lets set up the Hello World of hardware---a blinking LED sketch.
Blinking LEDs
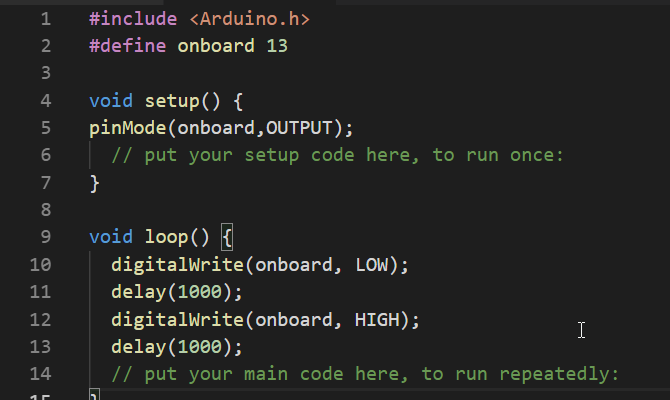
You'll be creating this Blink sketch, we'll go through each line below.
Start by defining your onboard LED pin. If you are using a board which doesn't use pin 13 for the onboard LED, change it accordingly:
#define onboard 13
Use your setup function to set up the pin mode.
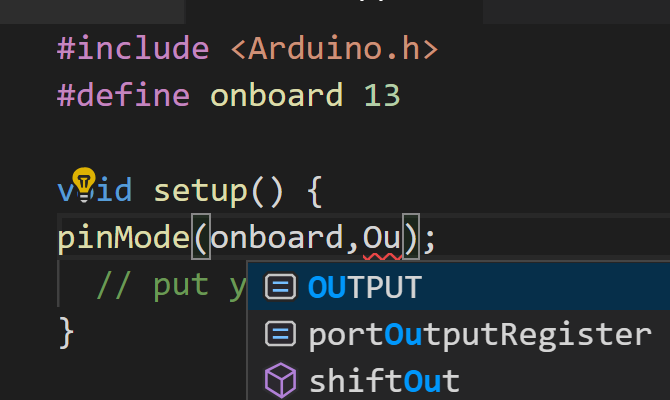
pinMode(onboard,OUTPUT);
Notice how VS Code will suggest code to you, and complete it when the press the Enter key!
Finally, create the blink LED logic in the loop function by setting the pin HIGH and LOW with a delay.
         digitalWrite(onboard, LOW);
 delay(1000);
 digitalWrite(onboard, HIGH);
 delay(1000);
If you have any errors, VS Code will tell you while coding, rather than having to wait until you compile or upload your code. Live error checking and completion make coding less frustrating, and faster!
Next, you'll learn how to upload your sketch to your board.
Uploading to the Board
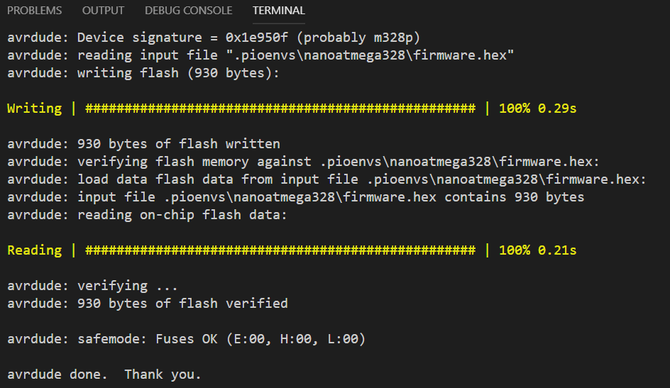
If you haven't already, plug in your board to a USB port. Save your sketch, and click the tick icon on the bottom bar to compile it, or click the arrow button to compile and upload the sketch in one go. After a brief wait, your LED should be blinking!
You may have noticed a step missing from the usual Arduino workflow. Usually, you need to specify which COM port your Arduino is attached to. If you scroll through the output when you upload a sketch to the board, you'll notice that PlatformIO automatically detects the board for you.
Serial Monitor
Finally, add one more line of code to each function to test the serial monitor. In setup add:
Serial.begin(9600);
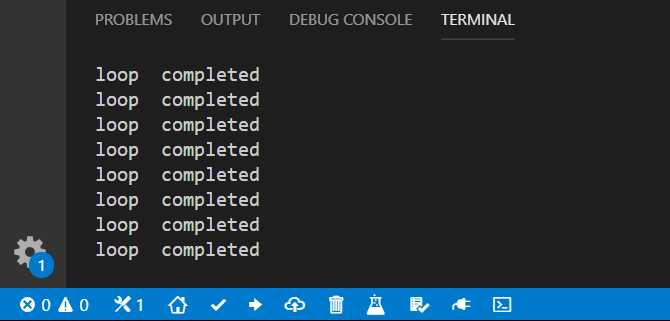
And in your loop function add a message to be printed to the serial monitor ever time the loop completes:
Serial.println("loop completed");
Upload the sketch, and click on the plug icon on the bottom bar to open the serial monitor and see your message.
A New World of Arduino Coding
Using VS Code and PlatformIO brings a breath of fresh air to Arduino coding. It also makes it much easier to collaborate remotely due to Visual Studio's Live Share feature.
This tutorial only covers the basics, but everything you can do in the Arduino IDE is possible through PlatformIO, so pick an awesome project and get coding!

