Photoshop patterns are easy to create, yet a seamless pattern can produce wonderful art all by itself. There are several different Photoshop tools you can use to create seamless patterns, whether starting from scratch with a blank canvas, or with an icon you've found online.
Creating patterns in Photoshop will allow you to add a unique and creative touch to your work. Let's look at the basics of creating patterns in Photoshop—including how to create your own custom patterns and how to apply them to your designs.
How to Create Patterns With the Pencil Tool
By creating your own patterns, you can create custom pattern papers and take your designs to the next level. You can use any drawing tool to create patterns in Photoshop, but if you're clueless, the Pencil tool is a good starting point.
1. Create a New Photoshop Document
The first step is to create a new, small Photoshop document. A square image around 8 to 10 pixels wide is a good place to start.
When creating your document, make sure you select Transparent for the Background Contents. This will ensure that you can use your pattern on any colored background once it's finished.
2. Set Up the Pencil Tool
Select the color you want to use for your pattern, and then select the Pencil tool from the toolbar. You can also select the Pencil tool by pressing B on your keyboard.
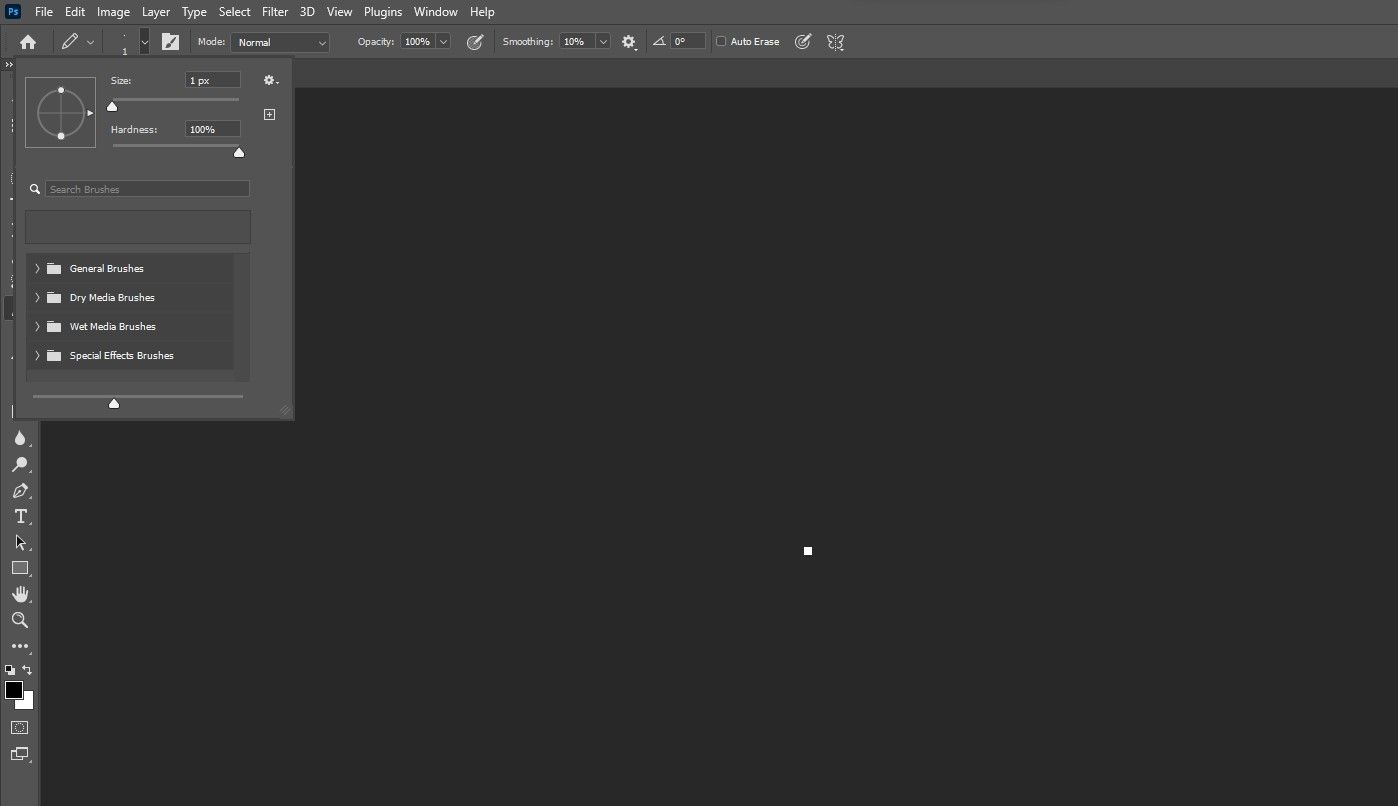
Since you're working on a small document, you'll want to set the Pencil size to around 1 to 2 pixels. Zoom in anywhere from 3,200 to 6,400% to get a good view of your document.
3. Enable Gridlines
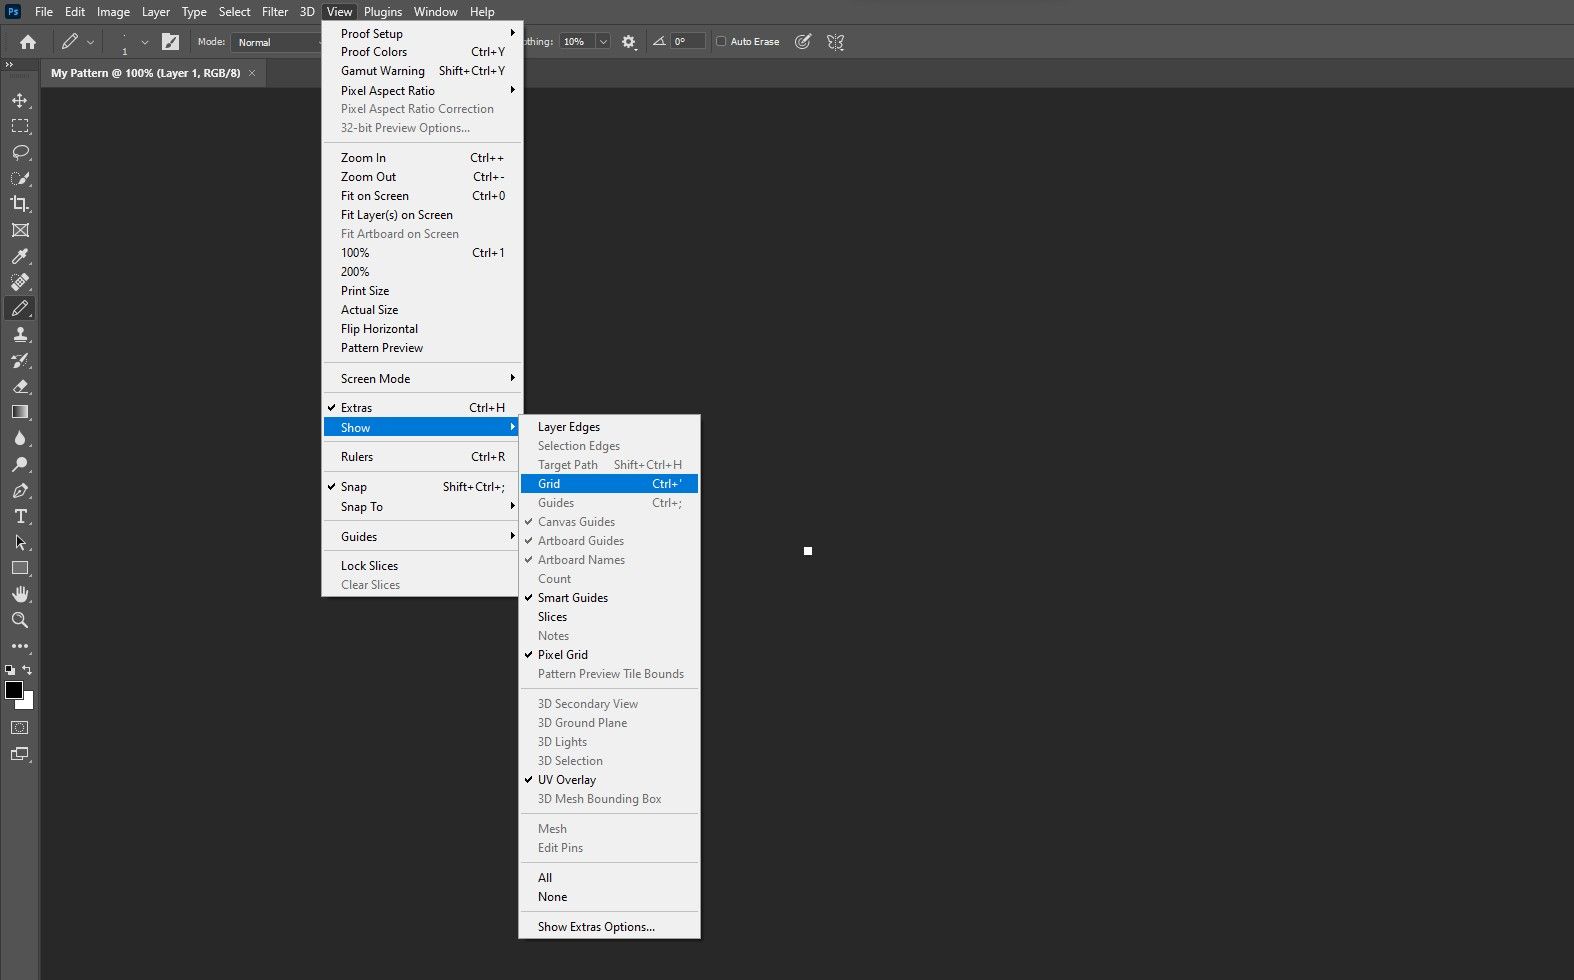
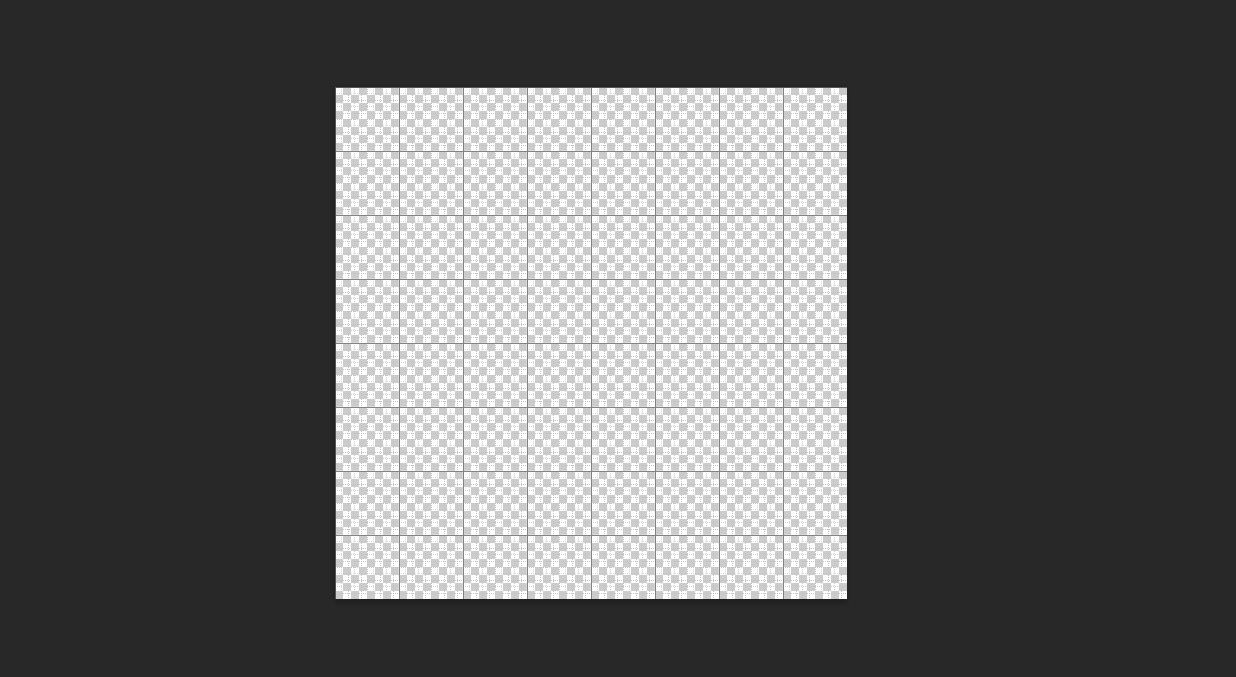
It's a good idea to turn on your gridlines, so you can better distinguish the pixels on your pattern. You can enable this by going to View > Show and selecting Grid. You can also use the Ctrl/Cmd + ' keyboard shortcut.
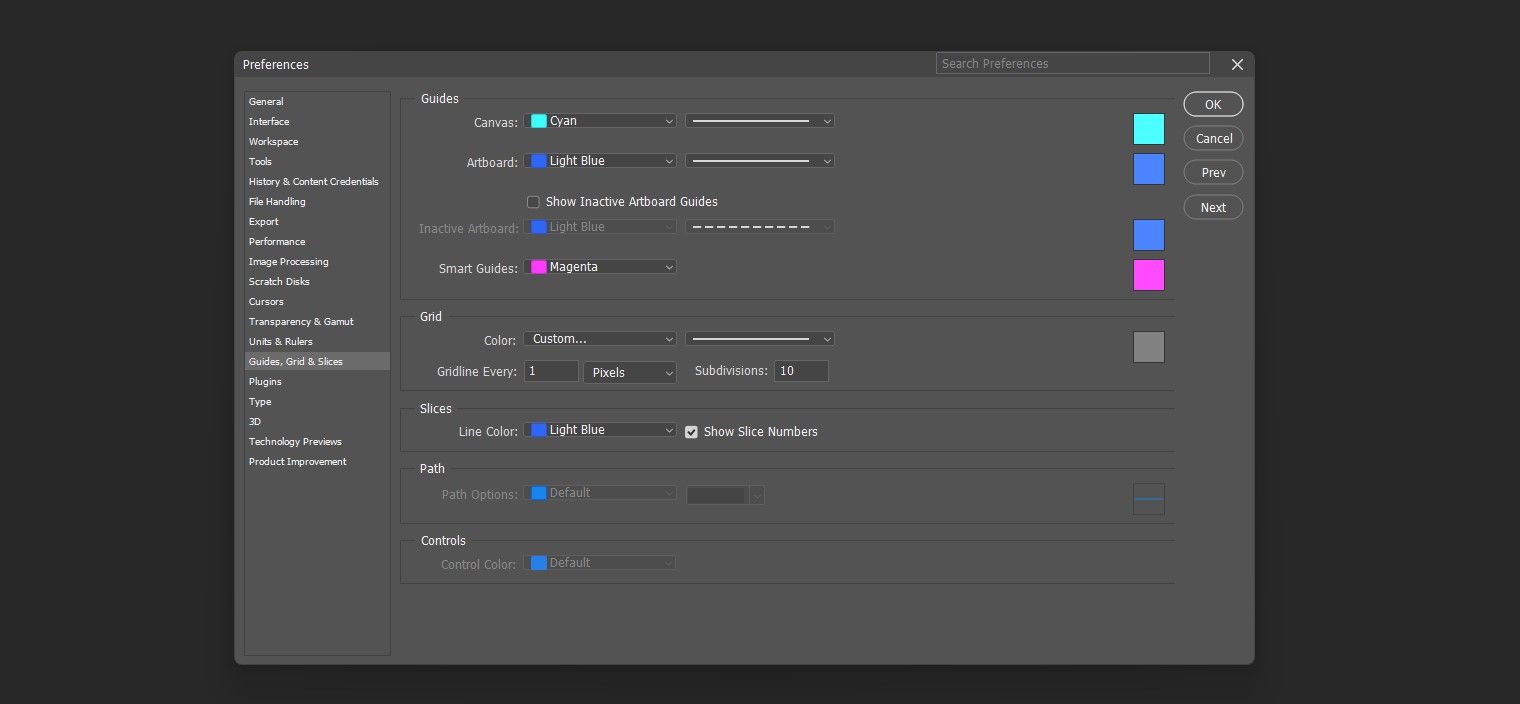
The grids might not show up if you haven't properly adjusted them. To adjust your grid settings go to Edit > Preferences > Guides, Grids, and Slices. Under Grid, make sure Gridline is set to pixels. Set up the gridlines so that they appear every 1 pixel with 10 subdivisions.
The keyboard shortcut for the Preferences window in Photoshop is Cmd/Ctrl + K.
Once you've adjusted the gridlines, you should end up with something like the above.
4. Draw Your Pattern
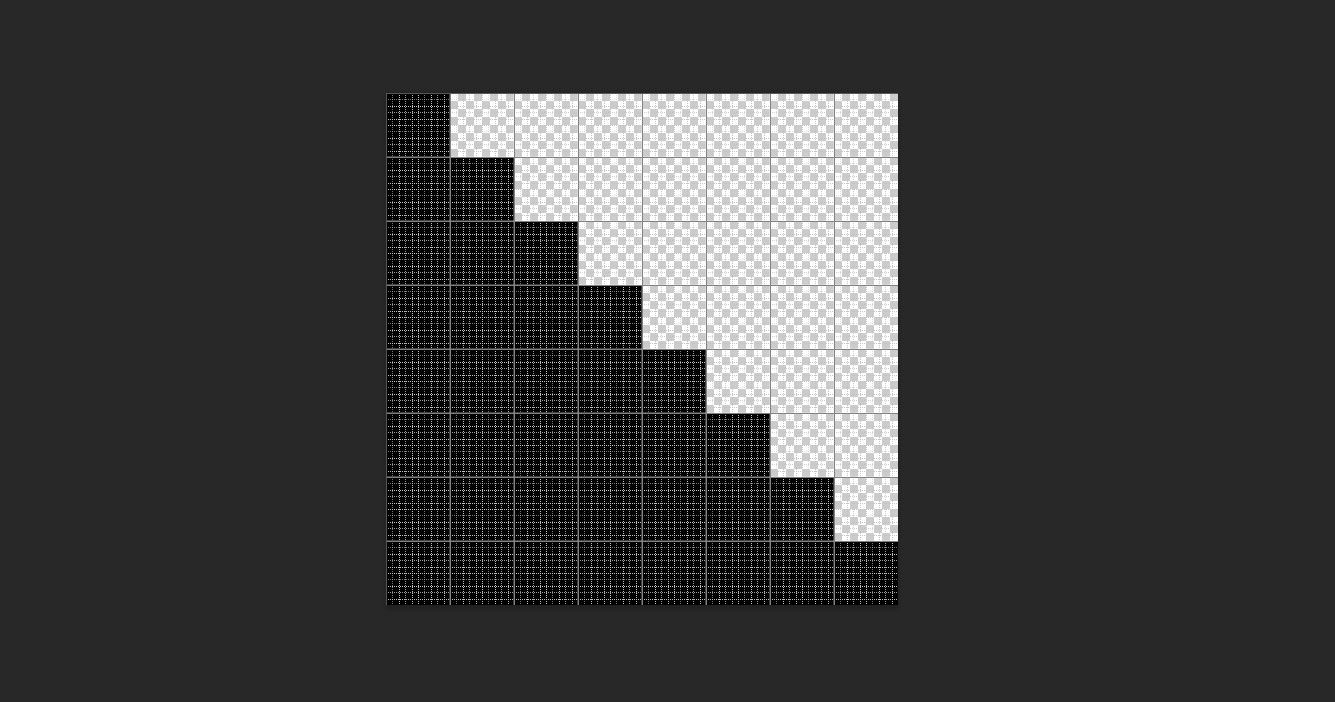
When you've zoomed in enough, you can view the individual pixels as you start to use the pencil. You can then draw your pattern into that small square.
You can fill in that tiny little canvas with any tool you want—you don't have to use the Pencil. It just happens to be an easy way to fill in pixels very precisely.
5. Define the Pattern
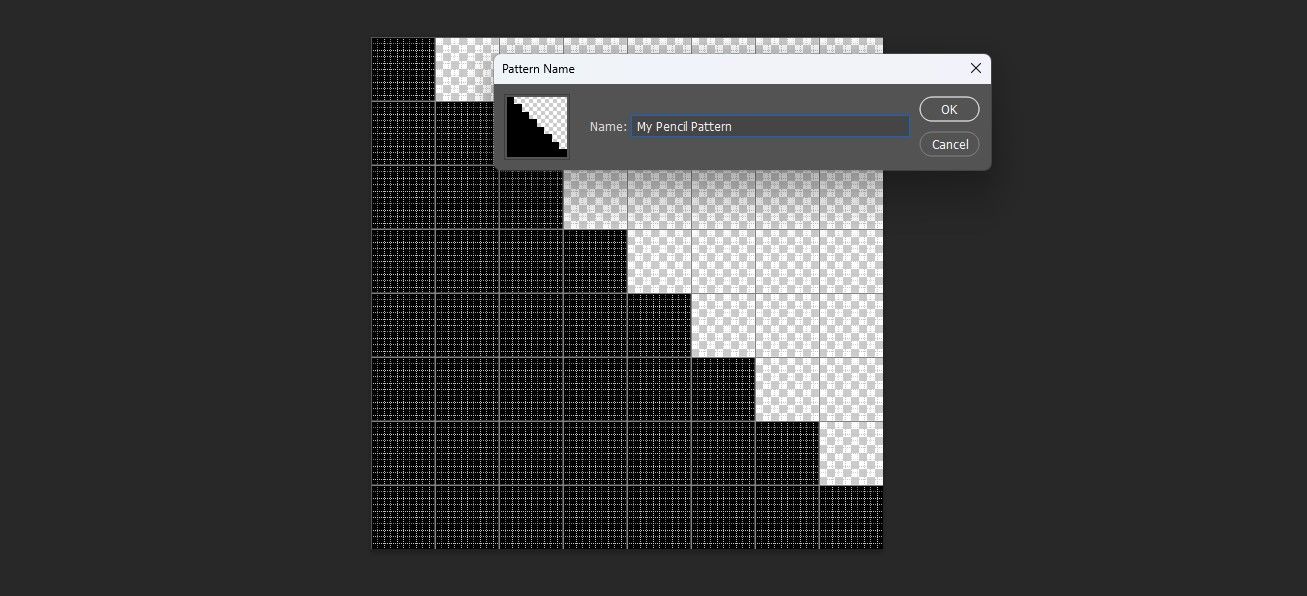
Once you're done drawing your pattern, go to the Edit menu and select Define Pattern. A window will open up where you can name the pattern. Once you click OK it will be saved to your Patterns Library.
6. Use Your New Pattern
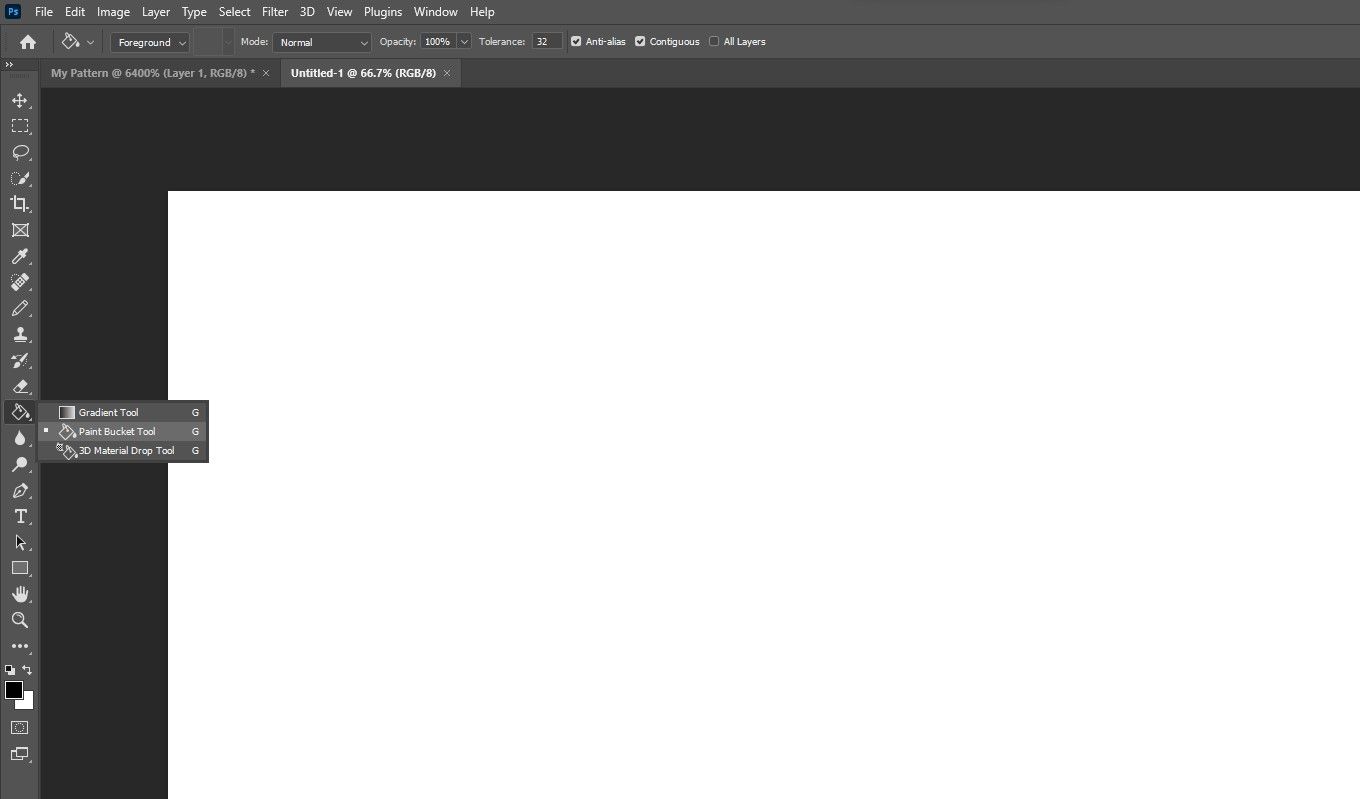
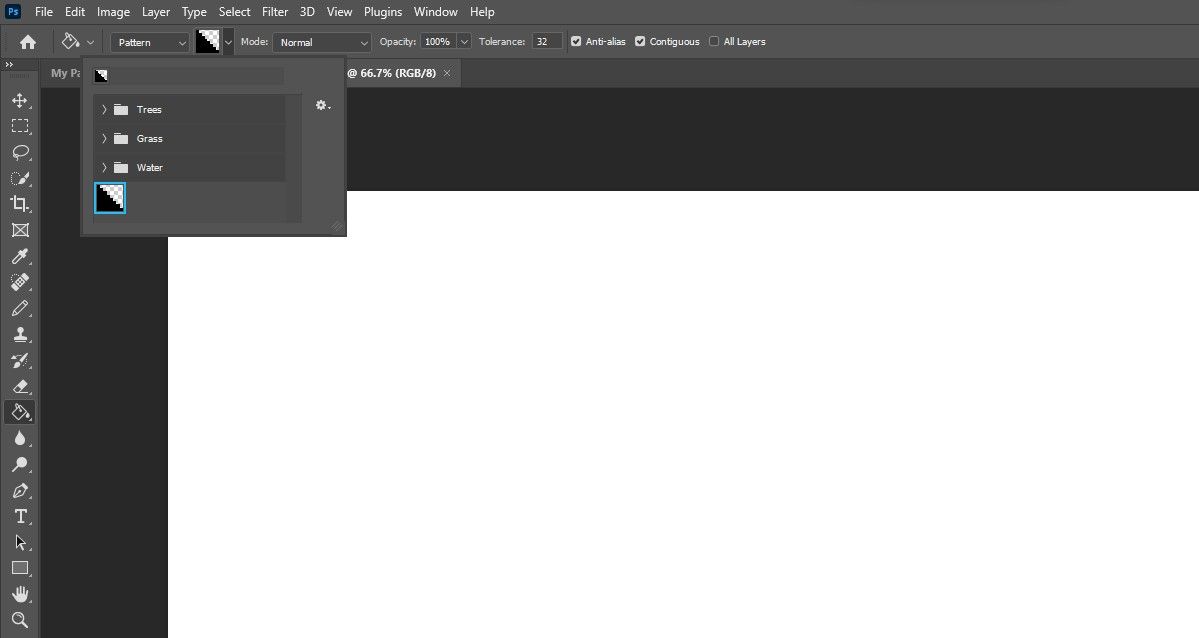
Create a new document with whatever size you want the pattern to take up and try out your pattern. You can paint over a canvas with your new pattern (or any other patterns you have in Photoshop), with the Paint Bucket tool. You can select this tool by pressing G on your keyboard.
In the tool options menu for Paint Bucket, make sure you have Pattern selected, rather than Foreground. Right next to that, you can select the pattern you want to use.
Click the bucket icon on the canvas. You will find your pattern has been tiled across the canvas!
How to Create Patterns With the Shape Tool
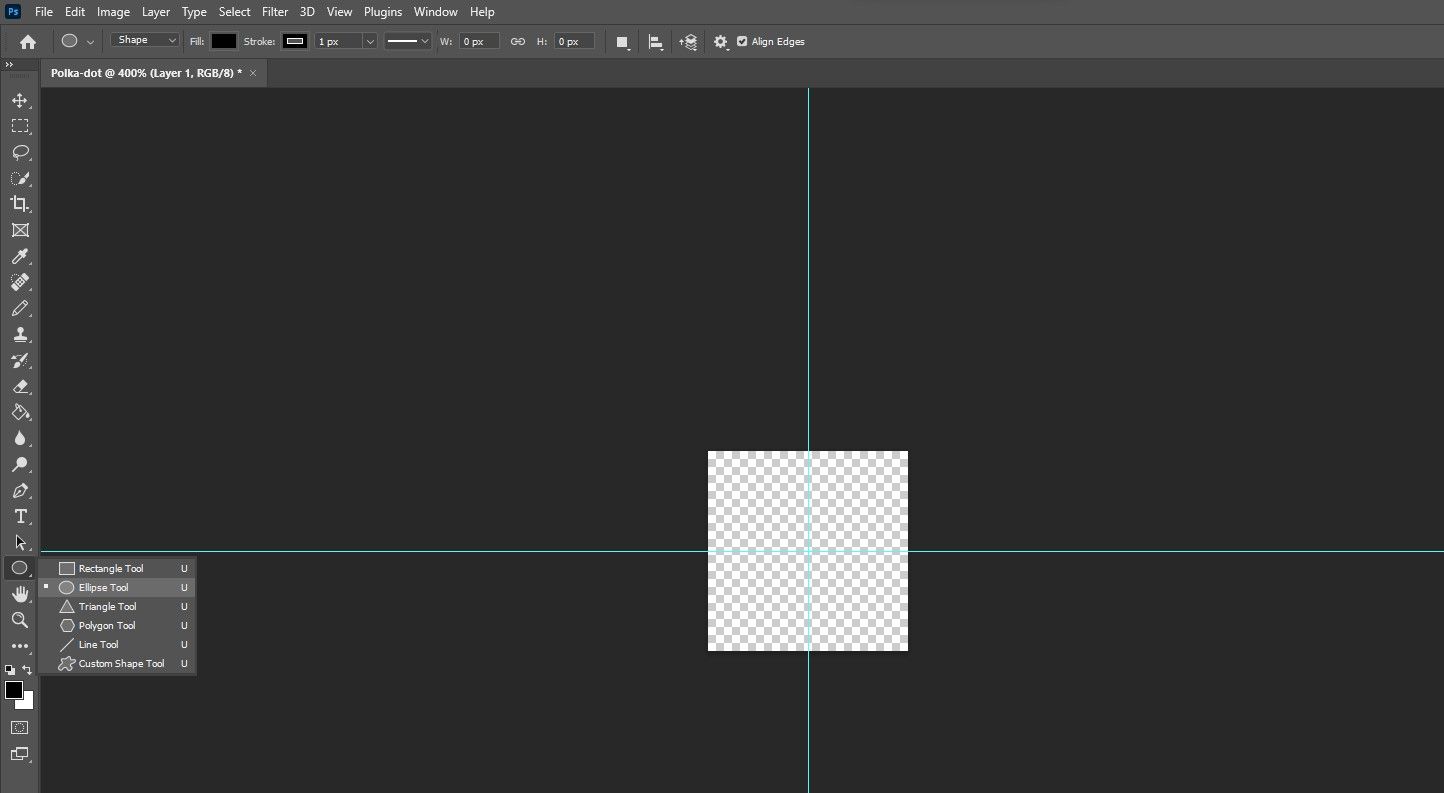
You can use the same method listed above to create a pattern using the Shape tool in Photoshop. Let's say you want to create a polka-dot pattern...
1. Create a New Photoshop Document
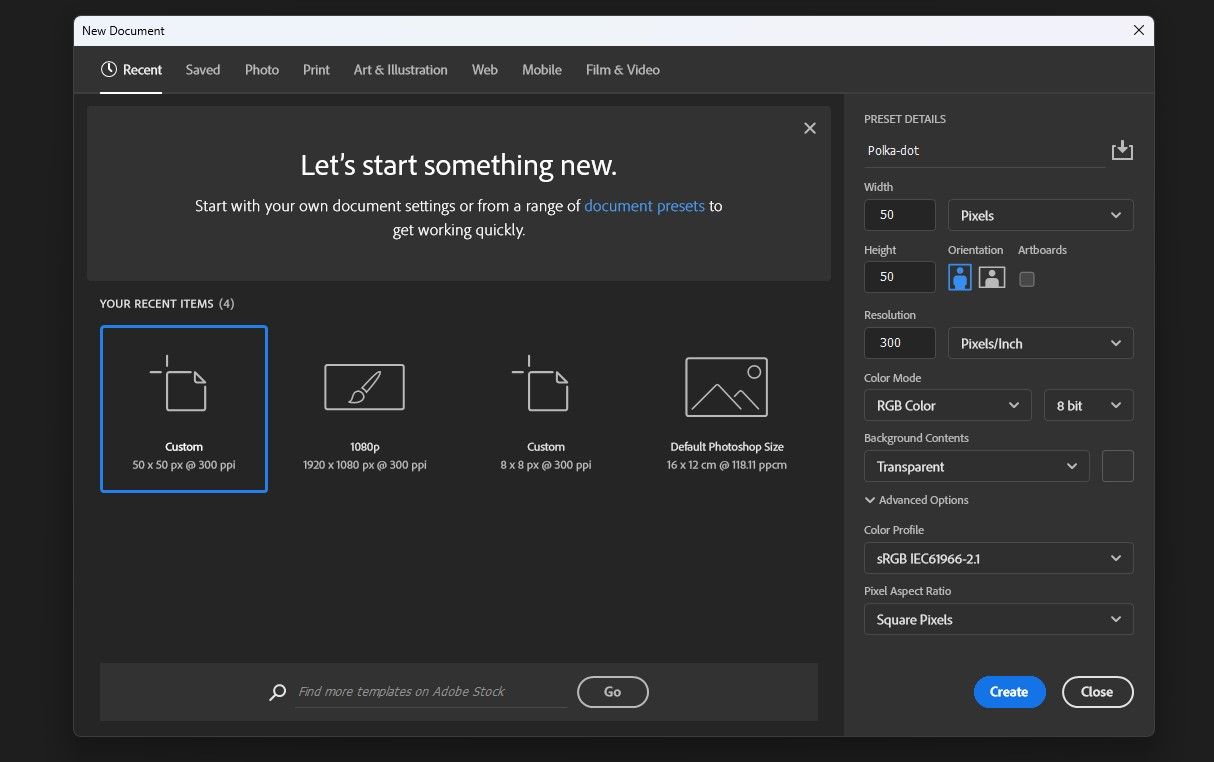
Create a new document the same way as if you were using the Pencil tool but make it slightly bigger. A new document that is 50 by 50 pixels with a transparent background will do. Remember to set Background Contents to Transparent.
2. Create Guides
Rather than gridlines, you can use guidelines to ensure that you place the first ellipse in the center of the document.
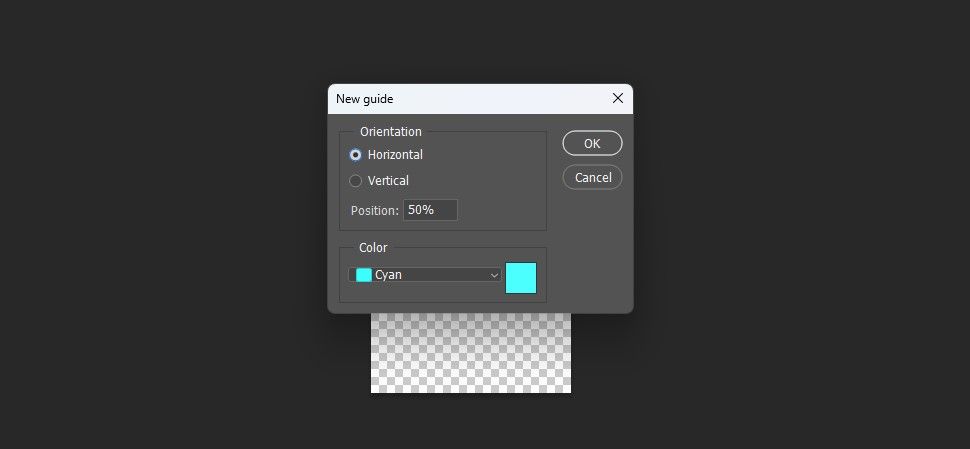
Go to View and click New Guide. Select Horizontal for the orientation and enter 50% for the position. Repeat the same step with the orientation selected as Vertical.
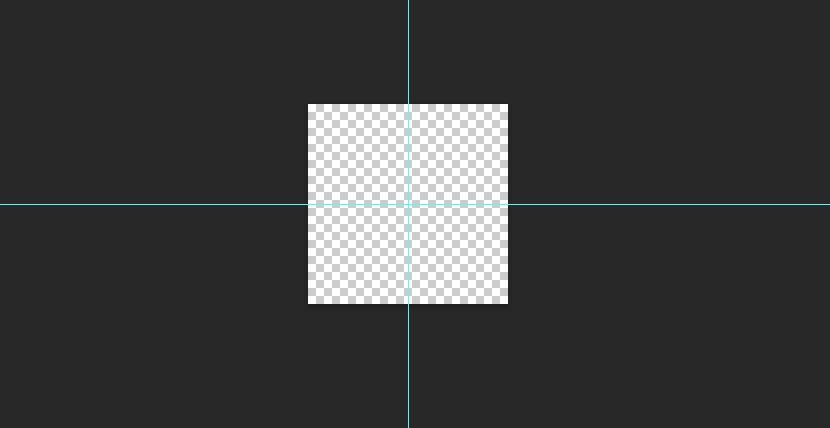
You should see two cyan gridlines dividing the document.
3. Create Your Pattern
Select the Ellipse tool (or the shape of your choice) and hover over the center of the document where the guidelines meet.
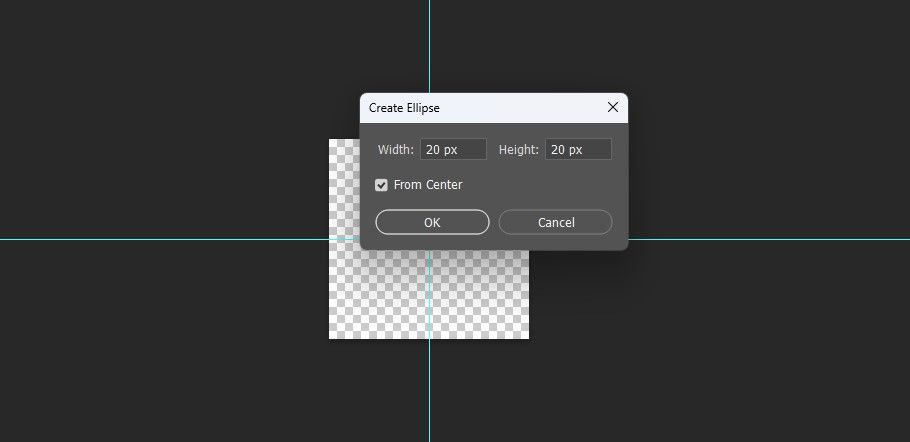
Click the center of the document and create a circle that is 20 pixels by 20 pixels. Make sure that From Center is checked so that the circle is created in the center of the document.
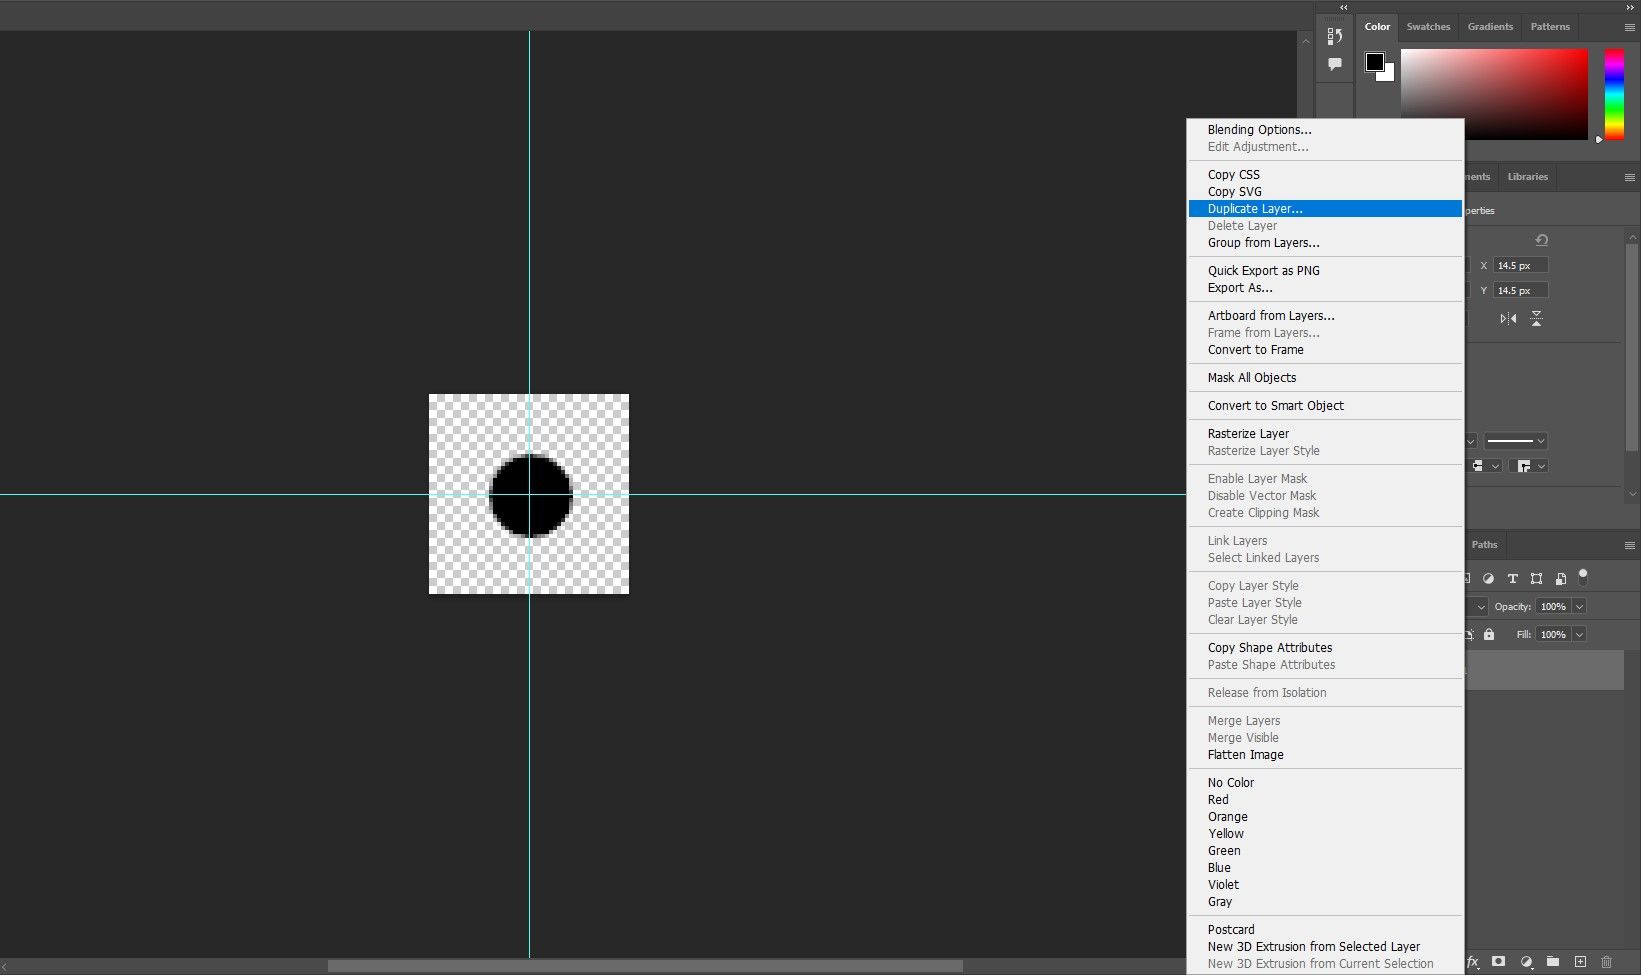
You need to duplicate the circle in order to create a polka-dot pattern. You can do this by right-clicking the layer and selecting Duplicate Layer or pressing Ctrl/Cmd + J on your keyboard.
Now it's time to precisely position the duplicate circles in the canvas. You can do this with the Offset filter.
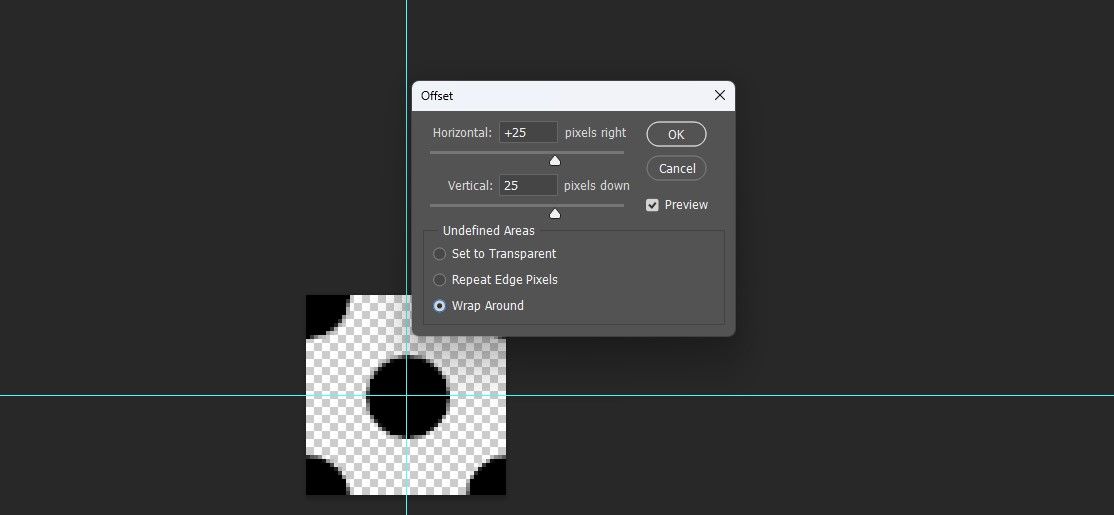
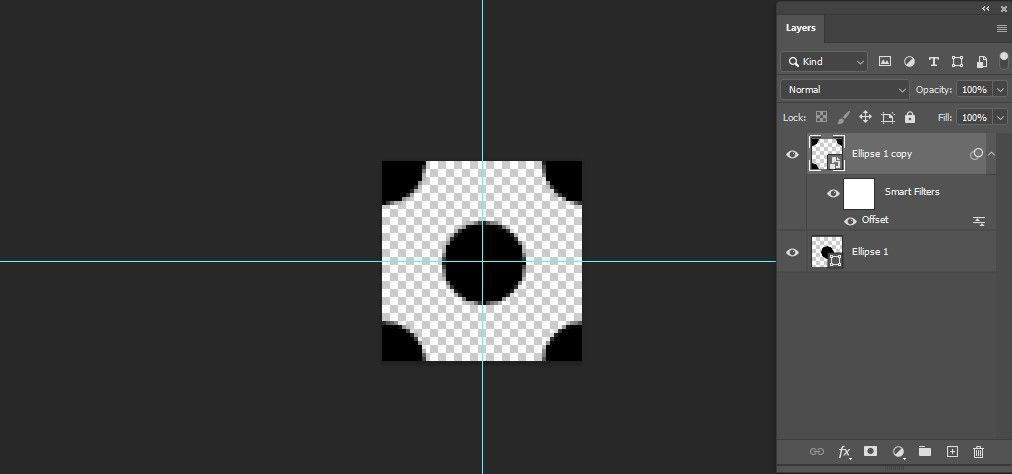
Go to Filter > Other and select Offset. The settings here should be +25 for the horizontal and +25 for the vertical option. Also, make sure Wrap Around is selected (depending on the shape you use, the offset tends to be half of the canvas size).
Photoshop may prompt you to rasterize or convert the image to a smart object, in which case you should rasterize it.
The offset divides the circle into four quarters that will appear at the edge of the document. Just like before, you can define your drawing as a pattern from the Edit menu.
The offset is necessary in order to make a seamless pattern like the above.
You could alternatively just use the one circle for the entire pattern, but you will end up with a different pattern like the above instead.
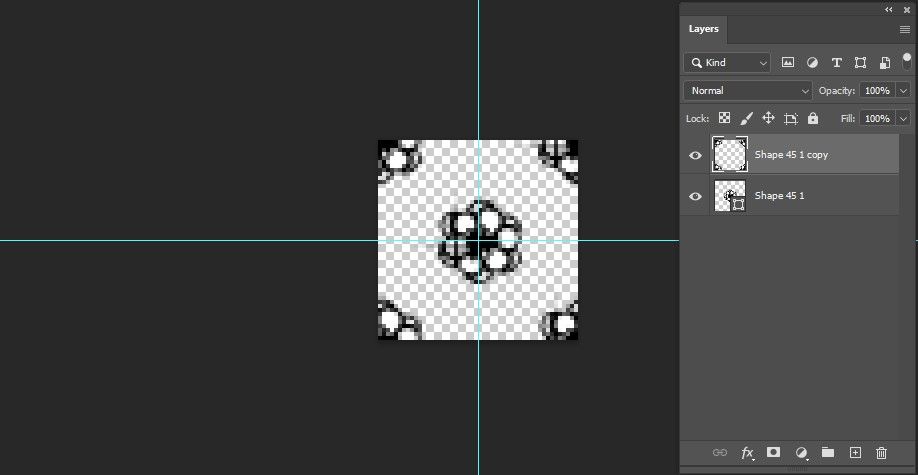
You can repeat this method with more complex shapes, for example, a flower. Try the settings as before but with a flower shape from the built-in Photoshop Custom Shapes.
This will get you the above pattern. Pretty nice, eh? The methods here will also work with some Photoshop brushes. Symmetry is key when you're creating seamless patterns in Photoshop.
Explore and Experiment
Now that you have the basics for creating patterns in Photoshop, you can try more complex shapes and patterns. Watch the video above to learn how to create a much more intricate, seamless pattern.
And while there are quite a few things that Photoshop can do that GIMP can't, this isn't one of them. This method should be transferrable. Watch the video above to see how it works in GIMP.
How to Delete or Rename Patterns
You can delete and rename patterns from the Pattern Gallery in Photoshop. A quick way to access the Pattern Gallery is through the Paint Bucket tool.
To delete a pattern, go to the Paint Bucket tool, and make sure you have Pattern selected from the drop-down menu. When you open up your patterns, right-click on any given pattern to rename or delete it.
How to Create Patterns With Adobe Capture
If you aren't comfortable using Photoshop, there is an extremely easy way you can create patterns from photos, icons, and more using nothing more than your iOS or Android phone or tablet. Adobe Capture makes it possible to create an intricate pattern in minutes.
While Adobe Capture is a free download, you will have to sign up for a free Adobe Creative Cloud account. You can then take a photo with your device, or import an image you found online and create a pattern using it. If you have an iPad Pro, you could even draw an image yourself to use as a pattern.
The really great thing about Adobe Capture CC is you can create different kinds of patterns with a single tap—including triangles, hexagons, and squares.
The Art of Making Something From Nothing in Photoshop
On the technical side, creating a seamless pattern in Photoshop is a relatively simple task. What matters most is your creativity and the technique to properly realize your visions. With the right tools and some experience, you can swiftly become an expert at creating patterns in Photoshop.
Once you've got an idea of the pattern you want to create, you can use different tools and filters to create an instance of it and then use the Paint Bucket tool to paint your pattern on the canvas. Even if you're not comfortable using Photoshop, you can use Adobe Capture to create patterns with your smartphone. So get out there and start creating!

