If you are looking to start your own website, beautiful looking animations can make it shine. There are multiple ways to achieve this, from simply making an animated GIF from a piece of existing film, to learning to make your own from scratch with software like Blender or Maya.
There are also libraries available to create animations programmatically. Historically, web coders used jQuery to create simple animations, but as the web developed and HTML5 became the new standard, fresh options appeared. CSS libraries for animation became incredibly powerful under the new framework, along with JavaScript libraries designed specifically for vector animation in the browser.
Today we will be looking at mo.js, one of the newer kids on the block for creating beautiful imagery from code. We'll cover a few basic functions, before creating a user reactive animation series that creates beautiful patterns.
Enter Mo.js
Mo.js is a library for creating motion graphics for the web with ease. It is designed to make creating beautiful things simple for those who are not too code savvy, while allowing veteran programmers to discover an artistic side they never knew they had. As its name suggests, it's based on the popular JavaScript programming language, though it is implemented in such a way that anyone can pick up the basics easily.
Before we go any further, let's take a look at what we are going to create today:

We'll be using CodePen for today's project, since it allows us to work on everything in the same browser window. If you would prefer, you can work in an editor of your choice instead. If you want to skip the step by step tutorial, the full code is available here.
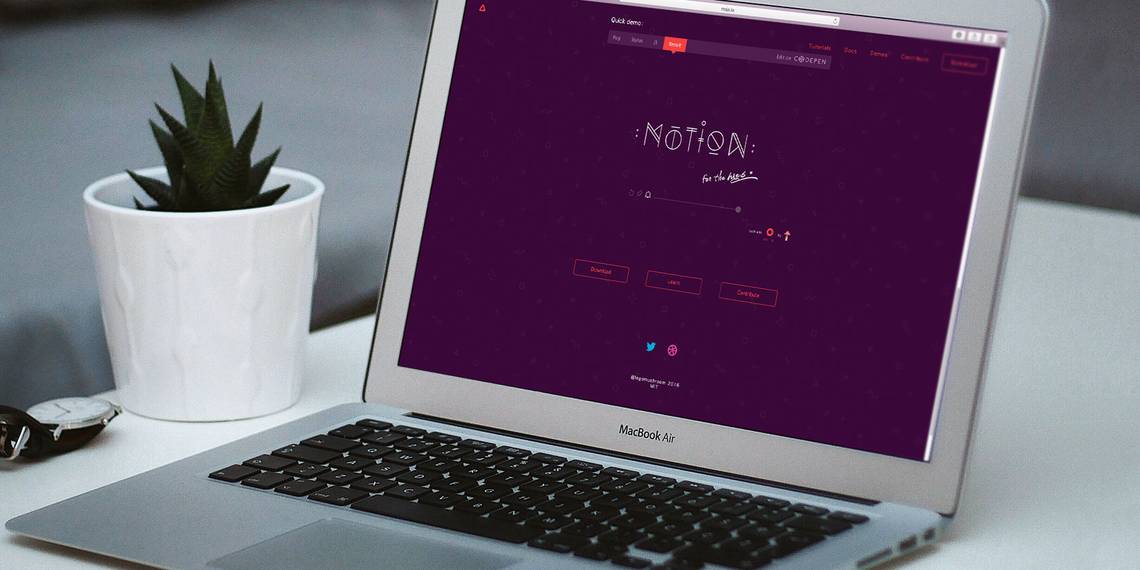
Set up a new Pen, and you'll be greeted with this screen:

Before we get started, you'll need to make a couple of changes. Click on the Settings icon in the top right, and navigate to the JavaScript tab.
We are going to be using Babel as our code pre-processor, so select this from the drop down menu. Babel makes JavaScript a little easier to understand, along with providing ECMAScript 6 support for older browsers. If you don't know what that means, don't worry, it's just going to make our lives a little easier here.
We also need to import the mo.js library into the project. Do this by searching for mo.js in the Add External Scripts/Pens text prompt, and selecting it.

With these two things in place, click Save and Close. We are ready to get started!
Basic Shapes With Mo.js
Before we get started with the graphics, let's do something about that blinding white background in the view pane. Change the background color property by writing this code in the CSS pane.
        body{
  background: rgba(11,11,11,1);
}
Creating a shape is a simple process, and the concept behind it drives the whole library. Let's set up a default circle shape. Enter this code into the JS pane:
        const redCirc = new mojs.Shape({
  isShowStart:true
});
Here, we have created a const value with the name redCirc and assigned it to a new mojs.Shape. If you are totally new to coding, pay attention to the bracket order here, and don't forget the semicolon at the end!
So far we have passed in no parameters except isShowStart:true, meaning it will appear on screen even before we have assigned it any motion. You will see that it has placed a pink circle in the center of the screen:

This circle is the default Shape for mo.js. We can change this shape easily by adding a line to our code:
        const redCirc = new mojs.Shape({
  isShowStart:true,
  shape:'rect'
});
To add more properties to an object, we use a comma to separate it. Here, we have added a shape property, and defined it as a 'rect'. Save your pen, and you'll see the default shape changes into a square instead.

This process of passing in values to the Shape object is how we customize them. Right now we have a square that doesn't really do a lot. Let's try animating something.
Basics of Motion
To get something that looks a little more impressive let's set up a circle, with a red stroke around it and no fill inside.
        const redCirc = new mojs.Shape({
  isShowStart:true,
  stroke:'red',
  strokeWidth:5,
  fill:'none',
  radius:15
});
As you can see, we have also assigned a width value to the stroke, and a radius for the circle. Things are already starting to look a little different. If your shape is not updating, make sure you haven't missed any commas or single quotation marks around 'red' or 'none', and make sure you have clicked save at the top of the page.

Let's add an animation to this. In the example above, this red circle appears where the user clicks, before fading outwards. One way we could make this happen is by changing the radius and opacity over time. Let's modify the code:
          radius: {15:30},
  opacity: {1:0},
  duration:1000
By changing the radius property, and adding opacity and duration properties, we have given the shape instructions to carry out over time. These are Delta objects, holding start and end information for these properties.
You will notice that nothing is happening yet. This is because we haven't added the .play() function to tell it to carry out our instructions. Add it between the end brackets and the semicolon, and you should see your circle come to life.

Now we are getting somewhere, but to make it really special, let's look at a few more in-depth possibilities.
Ordering and Easing With Mo.js
Right now, as soon as the circle appears it starts to fade out. This will work perfectly fine, but it would be nice to have a little more control.
We can do this with the .then() function. Rather than having our radius or opacity change, let's make our shape stay where it starts, before changing after a set amount of time.
        const redCirc = new mojs.Shape({
  isShowStart:true,
  stroke:'red',
  strokeWidth:5,
  fill:'none',
  radius: 15,
  duration:1000
}).then({
  //do more stuff here
}).play();
Now, our shape will appear with the values we have assigned it, wait for 1000 ms, before carrying out anything we put in the .then() function. Let's add some instructions between the brackets:
          //do more stuff here
  strokeWidth: 0,
  scale: { 1: 2, easing: 'sin.in' },
  duration: 500
This code introduces another important part of animation. Where we have instructed the scale to change from 1 to 2, we have also assigned sine wave based easing with sin.in. Mo.js has a variety of easing curves built in, with the ability for advanced users to add their own. In this case, the scale over time happens according to a sine wave curving upwards.
For a visual run down of different curves, check out easings.net. Combine this with the strokeWidth changing to 0 over our set duration, and you have a much more dynamic disappearing effect.

Shapes are the basis for everything in Mo.js, but they are only the start of the story. Let's look at Bursts.
Bursting With Potential in Mo.js
A Burst in Mo.js is a collection of shapes emanating from a central point. We are going to make these the basis of our finished animation. You can call a default burst the same way you do a shape. Let's make some sparks:
        const sparks = new mojs.Burst({

}).play();
You can see, just by adding an empty Burst object and telling it to play, we get the default burst effect. We can affect the size and rotation of the burst by animating its radius and angle properties:
        const sparks = new mojs.Burst({
  radius: {0:30, easing:'cubic.out'},
  angle:{0: 90,easing:'quad.out'},
}).play();
Already, we have added a custom radius and spin to our burst:

To make them look more like sparks, let's change the shapes the burst uses, and how many shapes the burst generates. You do this by addressing the properties of the burst's children.
        const sparks = new mojs.Burst({
  radius: {0:30, easing:'cubic.out'},
  angle:{0: 90,easing:'quad.out'},
  count:50,
  children:{
    shape: 'cross',
    stroke: 'white',
    points: 12,
    radius:10,
    fill:'none',
    angle:{0:360},
    duration:300
  }
}).play();
You will notice that the child properties are the same as the shape properties we have already worked with. This time we have chosen a cross as the shape. All 50 of these shapes now hold the same properties. It's beginning to look quite good! This is the first thing the user will see when they click the mouse.
Already though we can see that the red stroke of our initial redCirc shape is staying around too long. Try changing its duration so that both animations fit together. It should end up looking something like this:

We are far from finished with our animation, but let's take a moment to make it user-reactive.
The Main Event
We will be using an event handler to trigger our animations at the position the user clicks. At the end of your block of code, add this:
        document.addEventListener( 'click', function(e) {

});
This piece of code listens for mouse clicks, and carries out whatever instructions are in the brackets for us. We can add our redCirc and sparks objects to this listener.
        document.addEventListener( 'click', function(e) {
  redCirc
  .tune({ x: e.pageX, y: e.pageY, })
  .replay();

  sparks
  .tune({ x: e.pageX, y: e.pageY })
  .replay();
});
The two functions we call here are .tune() and .replay(). The replay function is similar to the play function, though it specifies that the animation should begin again from the start every time it is clicked.
The tune function passes in values to our object so you can change things when it is triggered. In this case we are passing in the page coordinates where the mouse was clicked, and assigning the x and y position of our animation accordingly. Save your code, and try clicking on the screen. You'll notice a couple of problems.

Firstly, our initial animation still shows up in the middle of the screen, even if the user doesn't click anything. Secondly, the animation is not triggered at the mouse point, but offset down and to the right. We can fix both of these things easily.
Our shape and burst have the .play() at the end of their respective code blocks. We don't need this any more as .replay() is being called in the event handler. You can remove .play() from both blocks of code. For the same reason, you can remove isShowStart: true too, as we no longer need it to show at the start.
To fix the positioning problem we will need to set position values for our objects. As you will remember from our very first shape, mo.js puts them in the center of the page by default. When these values are combined with the mouse position, it creates the offset. To get rid of this offset, simply add these lines to both the redCirc and sparks objects:
        left: 0,
top: 0,
Now the only position values our objects take on are the mouse position values passed in by the event listener. Now things should work much better.

This process of adding objects into the event handler is how we will trigger all of our animations, so remember to add every new object to it from now on! Now that we have the basics working how we want them, let's add some bigger and brighter bursts.
Getting Psychedelic
Let's start with some spinning triangles. The idea here was to create a hypnotic stroboscopic effect, and setting this up is actually quite easy. Add another burst with these parameters:
        const triangles = new mojs.Burst({
  radius: { 0 : 1000,easing: 'cubic.out'},
  angle: {1080 : 0,easing: 'quad.out'},
  left: 0, top: 0,
  count: 20,
  children : {
    shape: 'polygon',
    points: 3,
    radius: { 10 : 100 },
    fill: ['red','yellow','blue','green'],
    duration: 3000
  }
});
Everything here should be fairly familiar by now, though there are a couple of new points. You will notice that rather than defining the shape as a triangle, we have called it a polygon before assigning the number of points it has as 3.
We've also given fill function an array of colors to work with, every fifth triangle will revert back to red and the pattern will continue. The high value of the angle setting makes the burst spin fast enough to produce its stroboscopic effect.
If the code isn't working for you, make sure you have added the triangles object to the event listener class as we did with the previous objects.

Pretty psychedelic! Let's add another burst to follow it.
Dancing Pentagons
We can use something almost identical to our triangles object to make the burst which follows it. This slightly modified code produces brightly colored overlapping spinning hexagons:
        const pentagons = new mojs.Burst({
  radius: { 0 : 1000,easing: 'cubic.out'},
  angle: {0 : 720,easing: 'quad.out'},
  left: 0, top: 0,
  count: 20,
  children : {
    shape: 'polygon',
    radius: { 1 : 300 },
    points: 5,
    fill: ['purple','pink','yellow','green'],
    delay:500,
    duration: 3000
  }
});
The main change here is that we have added a delay of 500ms, so that the burst will not begin until after the triangles. By changing a few values, the idea here was to make the burst spin in the opposite direction to the triangles. By happy accident, by the time the pentagons appear, the stroboscopic effect of the triangles makes it look like they are spinning together.

A Little Randomness
Let's add an effect that makes use of random values. Create a burst with these properties:
        const redSparks = new mojs.Burst({
  left: 0, top: 0,
  count:8,
  radius: { 150: 350 },
  angle: {0:90 ,easing:'cubic.out'},
  children: {
    shape: 'line',
    stroke: {'red':'transparent'},
    strokeWidth: 5,
    scaleX: {0.5:0},
    degreeShift: 'rand(-90, 90)',
    radius: 'rand(20, 300)',
    duration: 500,
    delay: 'rand(0, 150)',
  }
});
This burst will create lines which begin red and fade to transparency, shrinking over time. What makes this component interesting is that random values are used to determine some of its properties.
The degreeShift gives the child object a starting angle. By randomizing this, it gives a totally different burst on every click. Random values are also used for the radius and delay functions to add to the chaotic effect.
Here is the effect by itself:

Since we are using random values here, we need to add an extra method to our event handler for the object:
        redSparks
  .tune({ x: e.pageX, y: e.pageY })
  .replay()
  .generate();
The generate() function calculates fresh random values every time the event is called. Without this, the shape would choose random values the first time it is called, and continue using those values for every subsequent call. This would totally ruin the effect, so make sure you add this!
You can use random values for almost every element of mo.js objects, and they are a simple way to make unique animations.
Randomness isn't the only way to add dynamic movements to animations however. Let's look at the stagger function.
Staggering Lines
To show off how the stagger function works, we are going to make something a little like a Catherine Wheel. Create a new burst with these parameters:
        const lines = new mojs.Burst({
  radius: { 0 : 1000,easing: 'cubic.out'},
  angle: {0 : 1440,easing: 'cubic.out'},
  left: 0, top: 0,
  count: 50,
  children : {
    shape: 'line',
    radius: { 1 : 100,easing:'elastic.out' },
    fill: 'none',
    stroke: ['red','orange'],
    delay:'stagger(10)',
    duration: 1000
  }
});
Everything here is familiar by now, a burst creates 50 children which are red or orange lines. The difference here is we pass the delay property a stagger(10) function. This adds 10ms of delay between the emission of every child, giving it the spinning effect we are looking for.
The stagger function doesn't make use of any random values, so you will not need a generate function in the event handler this time. Let's see all we have so far in action:

We could easily stop here, but let's just add one more burst to round this project off.
Smart Squares
For this last burst, let's make something using rectangles. Add this object to your code and event listener:
        const redSquares = new mojs.Burst({
  radius: { 0 : 1000,easing: 'cubic.out'},
  angle: {360 : 0,easing: 'quad.out'},
  left: 0, top: 0,
  count: 20,
  children : {
    shape: 'rect',
    radiusX: { 1 : 1000 },
    radiusY:50,
    points: 5,
    fill: 'none',
    stroke: {'red':'orange'},
    strokeWidth:{5:15},
    delay:1000,
    duration: 3000
  }
});
This object does not add anything new to what we have already worked on today, it is included merely to show how complex geometric patterns can be easily created through code.
This was not the intended outcome of this object when it was created in the testing stages of writing this tutorial. Once the code ran, it became clear that I had stumbled onto something far more beautiful than I could have made on purpose!
With this final object added, we are done. Let's see the whole thing in action.
Mo.js: A Powerful Tool for Web Animations
This simple introduction to mo.js covers the basic tools needed to create beautiful animations. The way those tools are used can create almost anything, and for many tasks web libraries are a simple alternative to using Photoshop, After Effects, or other costly software.
This library is useful for those working in both programming and web development, the event handling used in the project could easily be used for creating reactive buttons and text on websites or in apps. Have fun with it: there are no mistakes, only happy accidents!