
You have a million files to rename on your computer, and you're not looking forward to the long and tedious task. Don't panic; you don't have to rename all your files manually. There are a couple of easy ways to do this on a Mac.
Whether you want to use the Rename feature in Finder or create an Automator workflow, you can batch rename all your files almost instantly.
Batch Renaming Multiple Files Using Finder
The Finder in macOS includes a very useful Rename tool. You can replace text in a filename, add text before or after the current name, or choose a new name format and add an index, counter, or date before or after that name. This is how you can use it.
- Open Finder and go to the folder with the files you want to rename.
- Select all the files whose names you want to change.
- Control-click on top of any of the selected files and click on Rename.
- Click on the dropdown below Rename Finder Items and select Add Text. You can also choose to Replace Text or change the format. But we'll use Add Text for this example.
- Type the words you want to add to the filenames.
- Select either before name or after name, depending on where you want to add the next, and then click Rename.

As you can see, this is a pretty quick and easy way to batch rename all your files. While we showed how to add text to a filename, you can also replace text or even add a different format. It all depends on what you need to name your files. Play around with this option until you find your desired settings.
Batch Renaming Multiple Files Using Automator
Most casual users may not have used the built-in Automator app in macOS, but it's pretty handy in situations like these. You can use it to create workflows that will save you time and even use your Mac's Automator with your browser.
However, we'll use it to create a workflow that'll help us batch rename multiple files. This will take a few steps, but it's actually pretty easy to do. Just be sure to follow our steps.
Create a New Workflow in Automator
Setting up a new Automator workflow isn't as hard as you think. Just follow these steps:
- Open Automator on your Mac. You can use Spotlight Search on your Mac to find it. Simply press Command + Space, type Automator, and press the Return (or Enter) key.
- Click on New Document.
-
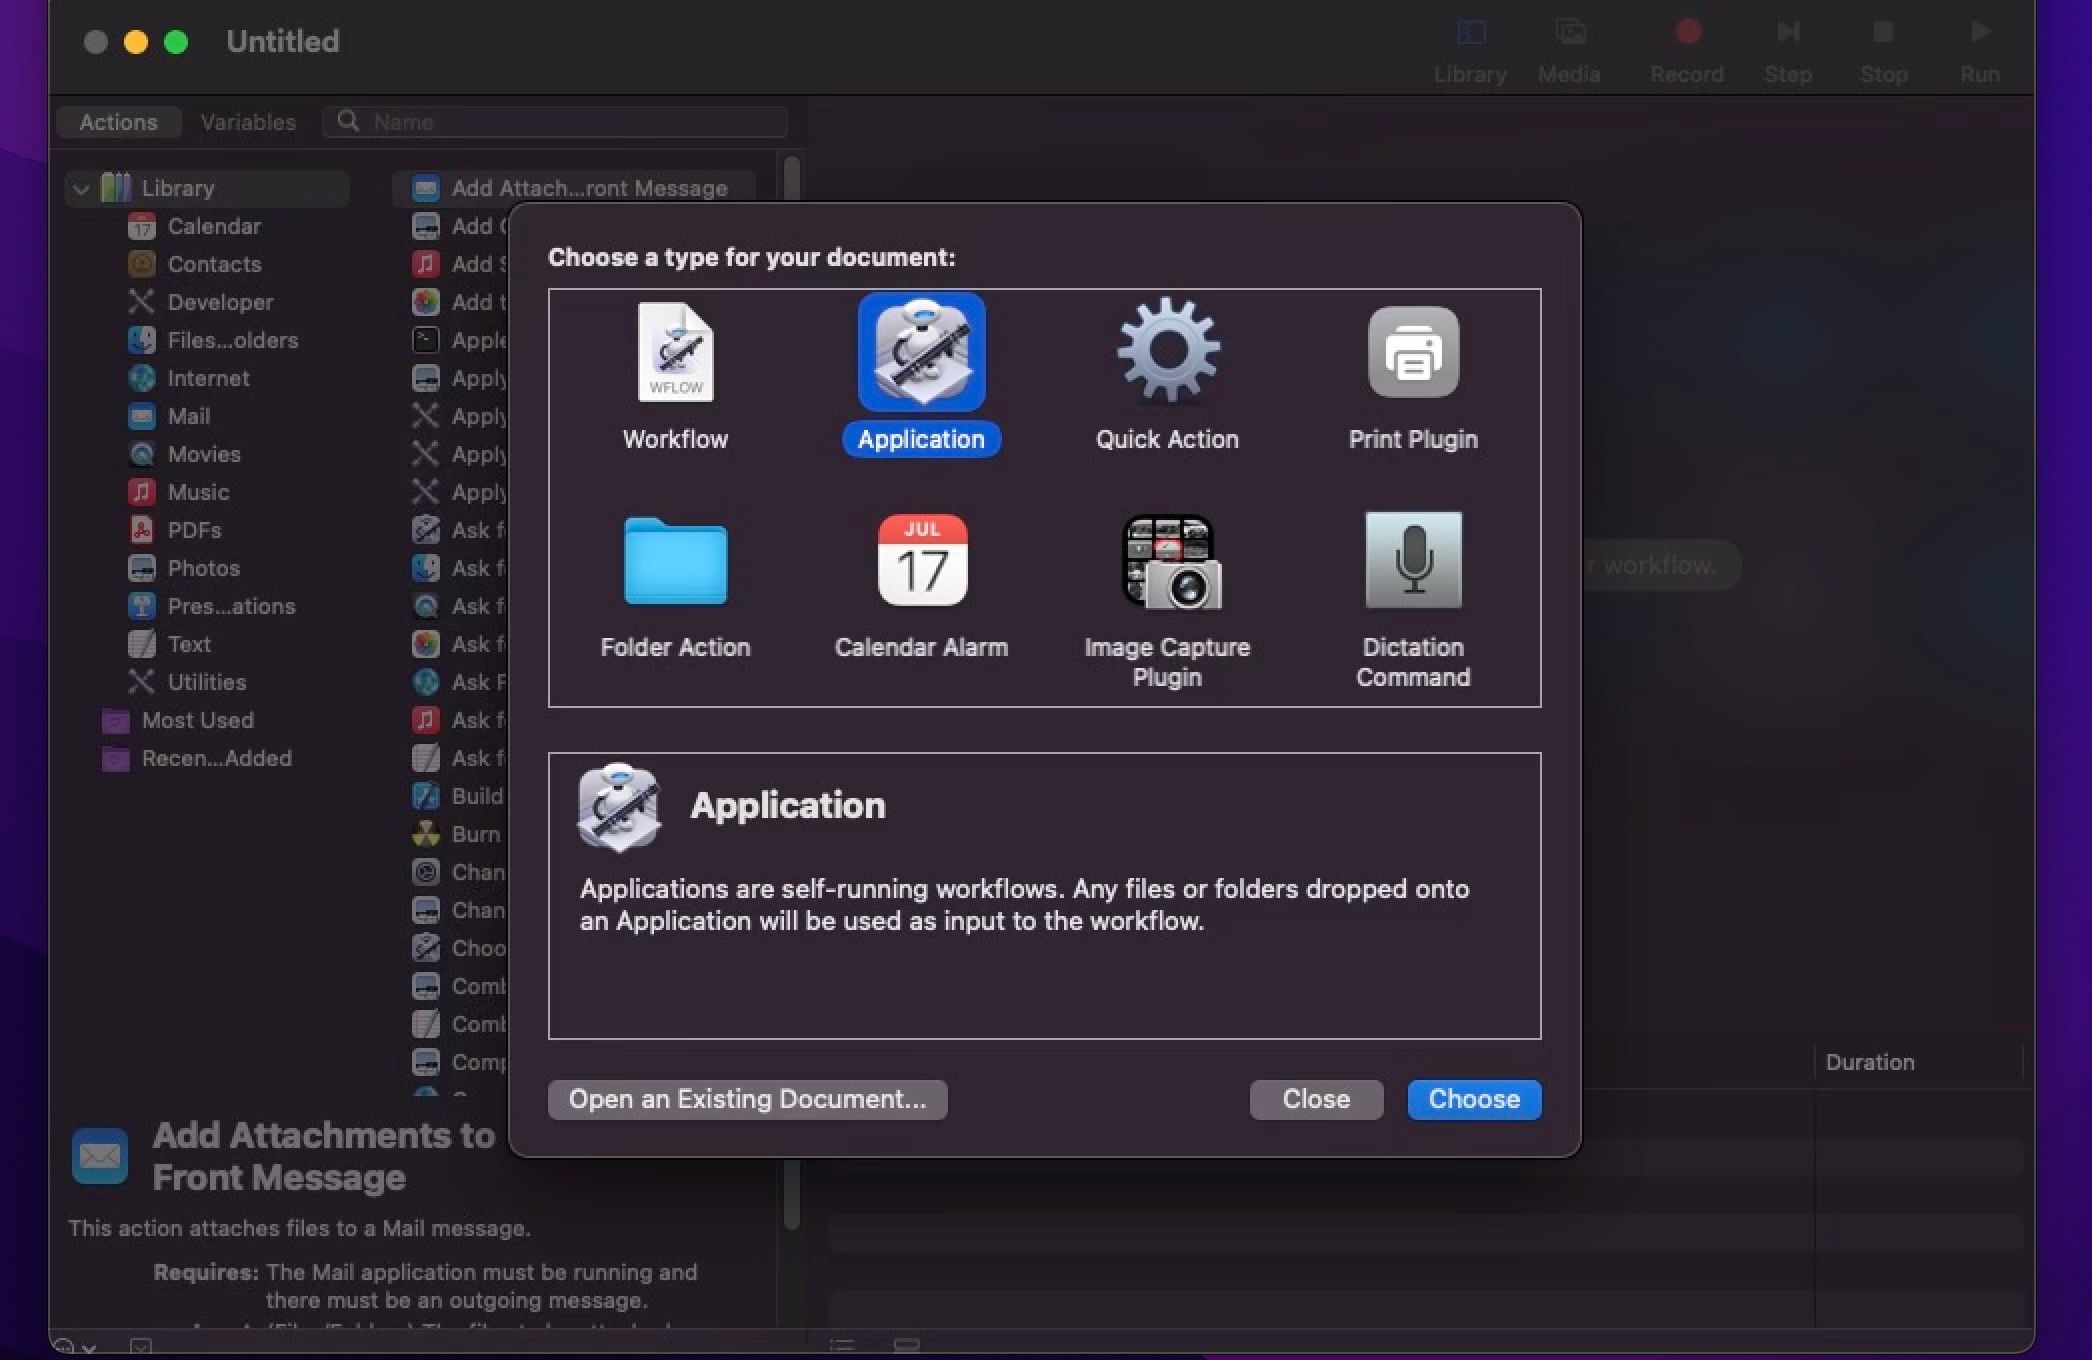
Select Application as the document type when Automator opens and click on Choose.
-
To begin, click Library in the left sidebar. Then, find and double-click the Get Selected Finder Items action.
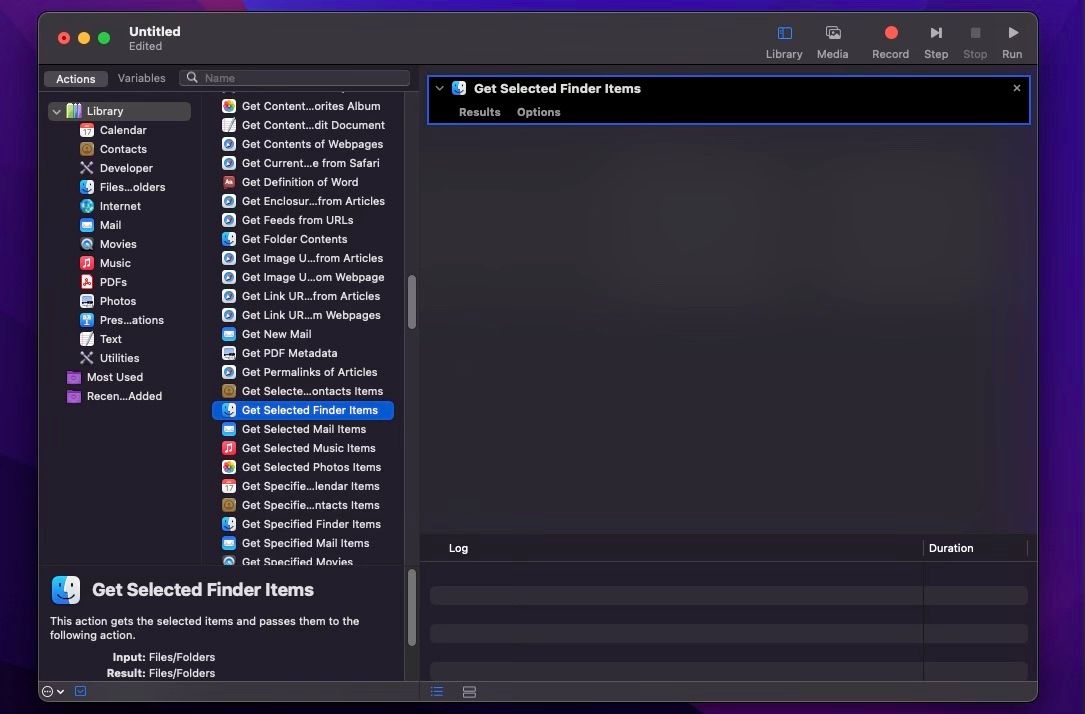
- A dialog box asks if you want to add a Copy Finder Items action to the workflow. Click Add, as this allows you to make copies of the files in case something goes wrong. If you don't get this dialog box, double-click it from the list of actions.
- By default, the duplicate files will be saved on the desktop and not in a folder. If you have a lot of files, you should save them to a folder. So, create a folder on the desktop, Then, in the Copy Finder Items action box, select Other from the To dropdown list.
- Navigate to the folder you created on your desktop (or elsewhere) and click Choose.
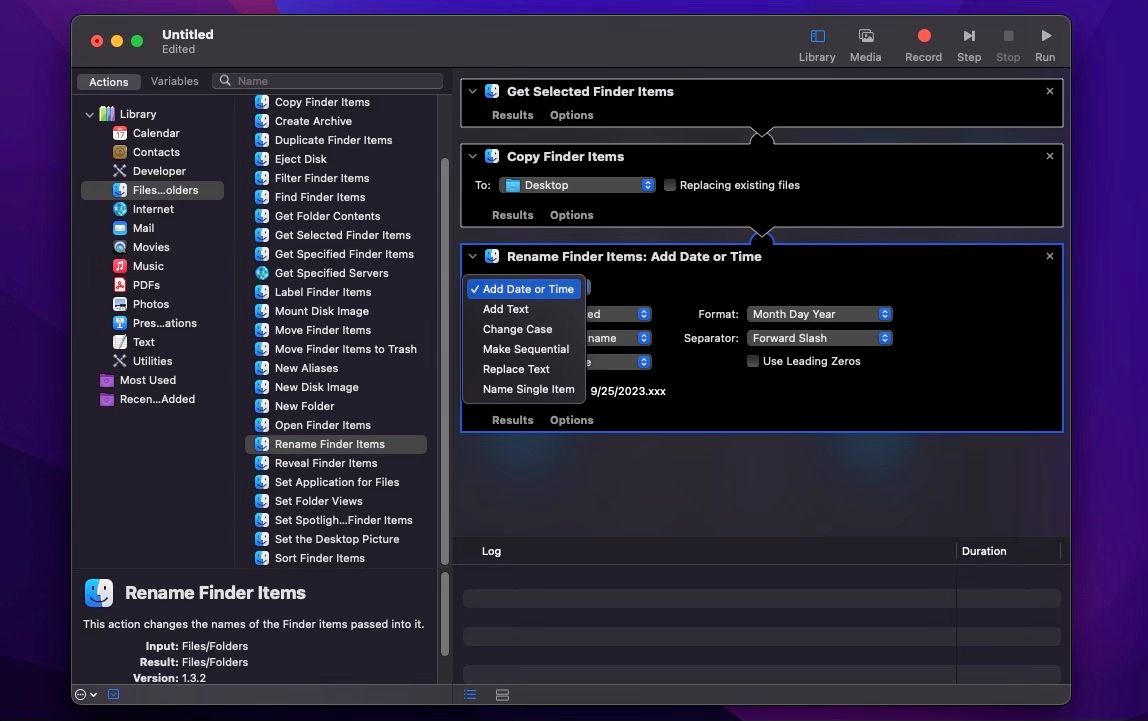
- Next, double-click on the Rename Finder Items action in the list.
-
Now, select how you want to rename your files for the Rename Finder Items action on the right. Select an option from the dropdown list at the top of the box. For this example, we're using Make Sequential. The other options change depending on the option selected in the dropdown list. Select the options you want, referring to the Example at the bottom of the action box to see how the filenames will look.


Save Your New Workflow
Now that you've configured the Automator workflow to your liking, it's time to save it. Here's what you need to do:
- Click File in the menu bar and select Save.
- Navigate to the folder where you want to save your app. You can put it in the Applications folder (or any other folder). Enter a name for the app, and be sure that the File Format is set to Application. Or else you won't be able to use it.
- When you're done, click Save.

Now, you can start using your new app, but you can go one step further and place it on your Dock in macOS by dragging the workflow from the folder where you saved it and placing it in the Dock. This will make it much easier to use in the future.
Use Automator to Batch Rename Your Files
This is the really fun part because you'll see how you pretty much just created a fully functional app for yourself. Follow these steps to start renaming your files:
- Open Finder and go to the folder with all the files you want to batch rename.
- Select all the files by clicking on them while pressing the Command key, and then drag them into the Automator app in the Dock, Desktop, or wherever you saved it.
- Click on OK if you get a pop-up message asking you to grant access to Finder to your new app.
-
Click OK again if the Automator app also asks for access to other folders.
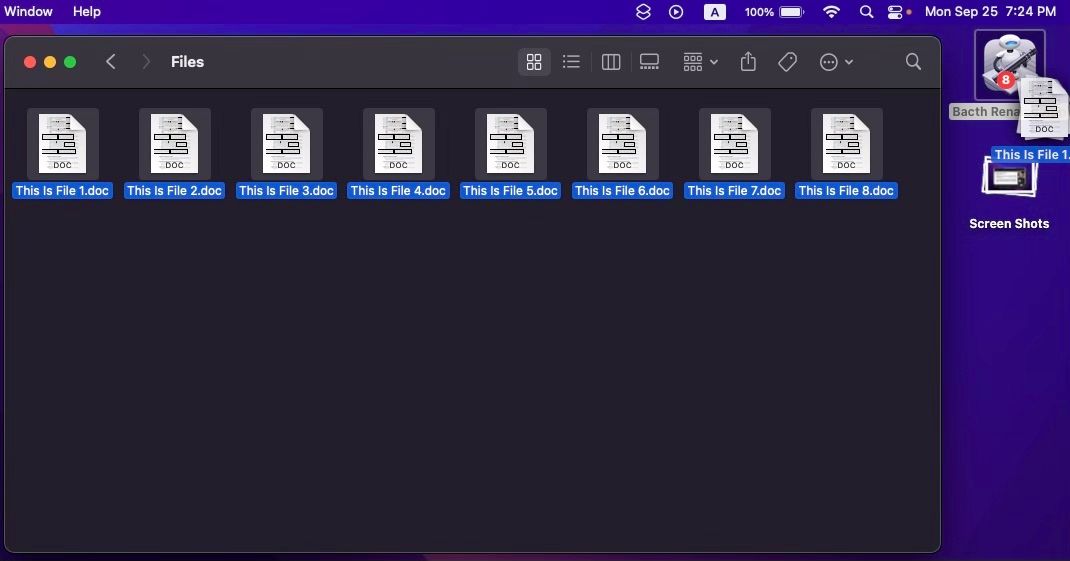

That's it! You'll find the newly renamed files in the folder you selected when you created the Automator app. Granted, it does take quite a few steps just to rename a couple of files, but the bright side is that you can reuse this app as many times as you want. This is especially useful if you have a lot of photos or videos you want to sort in a few seconds.
Batch Rename Your Files Instantly
As you can see, your Mac has all the necessary tools you need to rename multiple files at once. Whether you want to do it yourself or become a programmer by creating your very own app, you can batch rename all your files without having to do it individually.