It's dead simple to type up a document in Microsoft Word: just click on a blank document and start typing. Of course, Word provides tons of options for formatting, fonts, and more to make your documents stand out.
One of these options is the text box. Why would you need a specific tool for inserting text when you can type it anywhere in a Word document? Let's take a quick look at how to add customizable text boxes and why you might want to.
How to Add a Text Box in Word
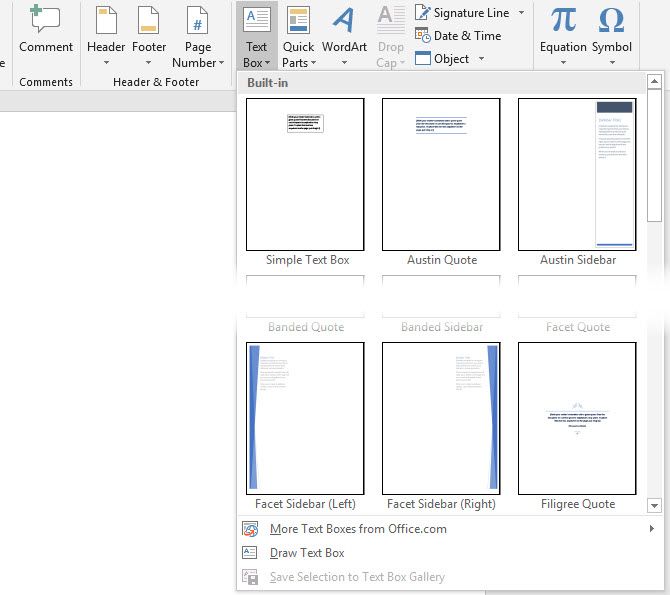
With a Word document open, switch to the Insert tab. In the Text section, you'll see a Text Box entry.
Once you click this, you'll see a variety of built-in options. These range from the basic Simple Text Box to more involved options like Banded Sidebar. Simply click the one you want to insert it into your document.
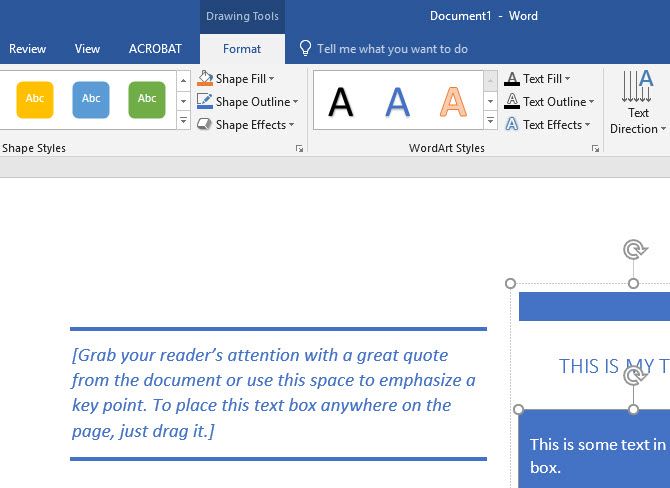
Word will place the text box into a default position with some generic text. Next, you can customize it to your needs.
How to Customize Text Boxes in Word
With a text box inserted into your document, you can click and drag the outline to move it anywhere on the page. Grab one of the handles and you can resize the box too.
Double-click inside the box to select the placeholder text and insert your own. When you're working inside a text box, use the Format bar at the top of the page to change the colors, font style, alignment, and more.
Why Use Text Boxes in Microsoft Word?
For simple documents with standard layouts, you probably don't need text boxes. But they can add a nice touch for more dynamic papers. They're perfect for pull quotes, calling attention to the most important parts of your piece. You might use them for a statistical aside or graphically different text instead.
Try text boxes in your next document for an exciting touch! For more on Microsoft Word, check out hidden Microsoft Word features that make life easier and how to add watermarks to Word documents.
Image Credit: dennizn/Depositphotos


