At the moment there's a craze for taking old black and white images and using Photoshop to add color back in. It might turn out to be a fad but the techniques are all worth knowing. If you've ever wondered how it's done, today I'm going to show you. You'll need to know the basics of Photoshop to follow along; if you don't, check out some of these great sites.
Unless you're incredibly talented and spend a huge amount of time working on it, a colorized black and white photo will never look like an original color image. It will always appear slightly off. Nothing in the real world is a single color; there are millions of tiny little variations. Even something that's painted with the same paint will have differences because of how light hits it. Adding these natural variations into your colorized image is incredibly difficult.
Portraits are one of the most popular kinds of image to colorize. Unfortunately, the problems are even worse. It's really hard to colorize a person without making them look like a zombie! It's best to start with something simpler where you can make small mistakes and still have the final image look great. Once you have the techniques down, you can move on to more advanced projects.

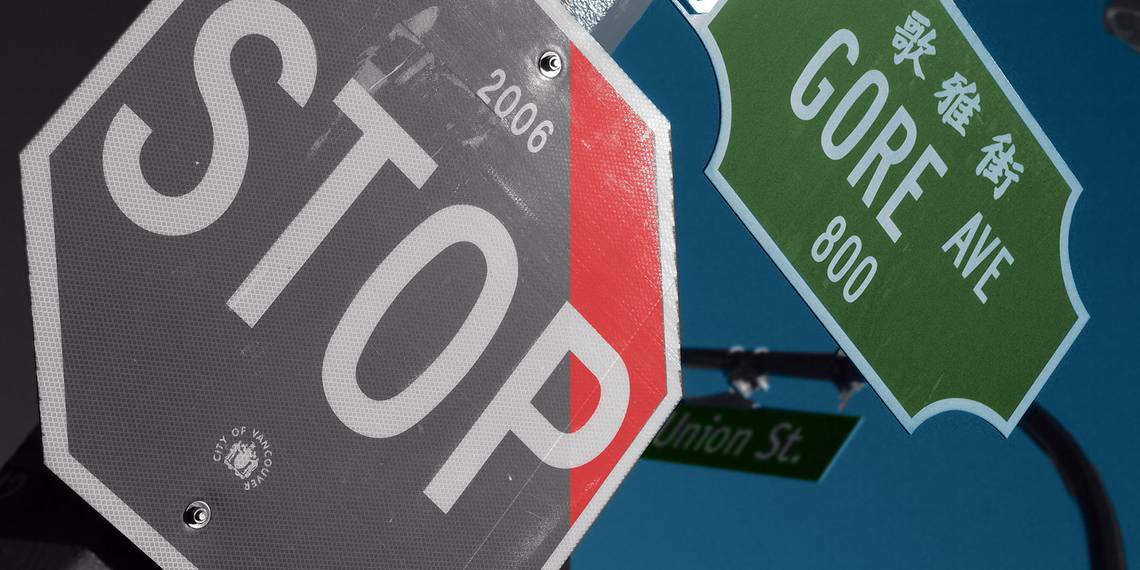
For this example, I'm using this simple photo of road signs courtesy of Roland Tanglao on Flickr. Download it if you want to follow along.
Step 1. Neutralize the Image
Most black and white images have more contrast than color images. Take a look at the example I'm using: no red stop sign would ever be that dark.
If you're using an older image you might find that, because the print has faded with time, you have the opposite problem. In that situation, fix things as best you can before you even think about adding color.
In either case, the first step is to use a Curves layer to adjust the brightness and contrast so that the image is relatively flat and neutral.

When you're colorizing an image, you want to add each color on its own separate layer. Before diving in, it's worth prepping the document so you have a few blank layers ready to go. Add a New Layer and set the Blend Mode to Color. Duplicate the layer about ten times; you can always get rid of any extras at the end.
When you've done that, it's time to get started.
Step 2. Start With the Big Areas
The basic technique for colorizing images is really simple: you paint the color you want to use with an Opacity and Flow of 100% on a layer with the Blend Mode set to Color. The trick is painting accurately and getting the colors right.
It's best to start by working on the big, easy areas of the image. For this image, that's the big STOP sign and the smaller road sign. Rather than trying to paint the color in freehand, use the Pen tool to create a selection and fill that with any color you want. All we're working on now is the selection.

Add a Layer Mask to the image and with a small, hard brush, mask out any areas where you don't want the color to show such as the white letters and nuts attaching the sign to the pole.
You can also double-click on the layer and use Blend If to make sure the highlights and shadows aren't affected as much.
When you've got a great selection, it's time to fine-tune the color. Select the layer you're working on and use the keyboard shortcut Command- or Control-U to bring up the Hue/Saturation dialogue box. Check Colorize and then dial in the color you want to use with the Hue, Saturation, and Lightness sliders.

Make sure Preview is checked so you can judge the results by the image rather than just guessing!
Repeat this process for all the major areas of the image. You can see me work through everything in the screencast below:
Step 3. Work on the Background
Once all the major foreground areas of the image are done, it's time to deal with the background. You can ignore smaller foreground details for now.
The key to getting a good background selection is to reuse the masks and selections you've already made. In this image, the background is just the sky but the principle is the same for every image.

Create a New Layer and drag it to the bottom of the colorizing layers. Change its Blend Mode to Color and fill it with an appropriate sky blue. Tweak the color now and add a layer mask.
Command- or Control-Click on the first color layer you made. This will create a selection outline of its contents. Select the background layer's mask and fill it with black. Repeat the process for every element you've colored.
Finish by tweaking the mask so that the color boundaries look good.
Step 4. Fill in the Details
By now the image should be taking shape. All that's left to do is colorize the small details you've so far ignored. Most of these will have awkward outlines so the best thing to do is use a small, hard brush to carefully color them. Zoom in, take your time, and try and make them look as natural as possible.

The trick here is to spend just enough time so that they look good without wasting time on unimportant details. Most people aren't going to look too closely at your image so feel free to cut a few corners.
Step 5. Make Some Adjustments
Once the final details are colored, it's time to tweak the whole image. If something doesn't look quite right, go in and change it.
Otherwise, just add a Curves layer and adjust the brightness and contrast until you're happy with how the image looks. I found that the colors I'd used were a little desaturated for my taste so I also added a Hue/Saturation layer and added some more saturation.

Save out the image and it's ready to share. You can see my final image above.
Wrapping Up
Colorizing old images is a fun way to practice your Photoshop skills. You'll quickly learn to create good selections and masks. Don't worry too much if your first few attempts look weird. Everyone starts somewhere and colorizing is quite a tricky process.
If you followed along or worked on one of your own images, we'd love to see your results. Share your images and ask any questions in the comments below.