Ableton Live is a software sequencer and digital audio workstation (DAW). It's designed for live performance and remixing of songs, but it can also be used to record music, control stage lighting, visual effects (VFX) and much more.

By the end of this guide, you'll know enough about Ableton to be able to quickly and confidently navigate around a track, solving problems as you go -- let's get started!
Versions & Pricing
Before jumping right in, you need to know about the different versions available. Ableton live is currently on version 9, and comes in three main "flavors":
- Intro: A fairly basic and stripped down version. Ideal for learning the basics or for simple requirements.
- Standard: Contains a vast array of instruments, sounds and tools.
- Suite: The "maxed out" version. This is overkill for most users, but it contains even more tools, instruments, and effects.
It's easy to upgrade to the next version at a later date, and if you're a student, you can receive a substantial discount by purchasing the student version. If you purchase an Ableton controller (something we'll discuss a bit later), you often get a free copy of the Intro version thrown in for free -- now that's a good deal!
Getting Set Up
Once you've decided on your version, and you've purchased a license or physical copy, installation is straightforward. Follow the instructions on screen or read the installation tutorial from the Ableton website.
Once installed, go ahead and open Ableton. You'll be presented with something that looks like this:

Don't worry if it looks overwhelming -- we'll break it down in due course.
Now you need to configure a few options. Open the preferences panel. On a Mac, look to the top-left corner and click Live > Preferences (or Command + ,). On Windows, it's Options > Preferences (or Ctrl + ,).
Select the Look Feel tab on the left. Here you can change the language, general colors, and themes. Underneath the Colors subheading, you can change the skin or theme of Ableton. I prefer the Disco theme, but the default dark gray is the most common.

Select the Audio tab. This is where you can configure your inputs and outputs. For Audio Input Device and Audio Output Device, select the appropriate settings.
If you're using an external audio interface, this will be listed here (providing your drivers are installed). Otherwise it will be pre-filled with "Built-in Output." You can press Input Config and Output Config to fine-tune these settings, along with setting the number of inputs/outputs (I/O) available to Ableton.

Finally, underneath the Latency subheading, select an appropriate buffer size. The buffer size is measured in samples, and this is used to control how quickly Ableton can record and playback sounds.
If this is too high, there may be a large delay between playing a sound and hearing it out of your speakers. If you set it too low, your computer has to work much harder. A good place to start is 256 Samples. If you have strange audio glitches, you may need to increase this.

Now that you're all setup, it's time to make some music -- go ahead and close the preferences panel.
Session vs. Arrangement View
The "traditional" approach in music software is to record tracks from left to right. Ableton has this ability, but what really sets it apart from other DAWs is the Session view. This arranges clips vertically, and allows you to trigger any clip in any order. It really opens up creative avenues for making music, and you may discover a new arrangement of your song!
Session view is most often used for remixing songs live. It can also trigger clips or songs in response to various events. If you want to record music the "traditional" way, Ableton has a built in Arrangement view that can be accessed with the Tab key. Once in arrangement view, pressing Tab again will take you back to the session view.

You can use arrangement view to record the output of a session or to record yourself or a band, and session view to remix your latest hit or experiment with a new arrangement.
The Interface
Switch back to session view. There are four main components (alongside the controls at the very top). The leftmost section is for navigating and selecting project files, instruments, and effects. This is called the Browser, and can be shown or hidden using the small arrow in the top-left corner.

The Browser is split into two halves. The left side lists folders on your computer and Ableton's built-in folders:
- Sounds
- Drums
- Instruments
- Audio Effects
- MIDI Effects
- Plug-ins
- Clips
- Samples
These Categories are where you can search for the effects and instruments built into Ableton. Underneath this is Places, where you can search your computer for files.
The right side of the Browser is where you can navigate to specific files or folders within the category or place you have selected. The top section of the browser contains a search feature, which allows you to search in the selected folder for a particular sound, instrument, or effect.
At the bottom-left of the Ableton window is an information viewer. Hover over anything in Ableton, and this will tell you what it does. This is extremely helpful, and can be a lifesaver in helping you learn.

The bottom pane is the Effect Controls section. This is where you can configure any instruments or effects you have assigned to a track -- something we'll go into greater detail about later on.
Finally, the remaining panel on the right is the session or arrangement view. This is where you will create and manipulate audio.
Making Music
Now that you know about the interface, let's make some music! Ableton comes with several instruments that you can use to make sounds, or you can use the included samples, which are pre-recorded snippets of sound or songs.
In session view, by default you'll see seven vertical panels. These will probably be called something like "1 Midi", "2 Audio," and so on. The final one of these is called "Master", and is the overarching master channel.

These default tracks are defined in Ableton's default project. It's possible to save your own default project so whenever you open Ableton you have a basic structure ready to go. But straight out the box, you get Ableton's default project.
Before you can make any music, you need to understand the difference between tracks.
MIDI tracks can only accept MIDI instruments, and cannot play samples themselves. MIDI devices and tracks are covered comprehensively later on, but for now, think of them as a way of generating a sound, like a keyboard or guitar.
Audio tracks are the opposite of MIDI tracks. These can play and record sounds from other devices (such as a microphone or other device), but they cannot generate any sounds on their own.
Finally, there are Return Tracks. These provide a route for processing audio and returning it back. Don't worry about these for now.
Each track has the same basic structure. The top of the track is known as the Track Title Bar. You can right-click here to change the name and color of the track. Underneath this are the Clip Slots. Each clip slot can contain one clip (a piece of or a whole song/sound).
Underneath the clip slot is a mini control panel for each track. Here you can enable or disable the track, adjust settings such as pan or gain, and route audio from or to nearly any other place. The default values are sufficient for now.

Go ahead and delete the two MIDI tracks and one audio track so you are left with one track. You can delete tracks by right-clicking on the track title bar and selecting Delete, or by left-clicking the title bar and using your delete or backspace key. If you only have one track, you won't be able to delete it.
Open the Browser from the left hand side -- it's time to find some sounds! Underneath Categories, select Samples. Use the right side of the browser to search for some sounds you like -- Ableton comes with lots of samples, and each version (Intro, Standard, and Suite) comes with a different selection.
You can use the cursor or the arrow keys to select a sample, and doing so will play a preview of it. Most of these will be short sounds of people or instruments. If you want something a bit more complex, select Clips from the Categories submenu. Clips are usually longer samples, but most of them won't preview when you click them. To hear a preview, select Click to Preview from the bottom of the browser.
Once you've found a sample you like, drag it into an empty clip slot by clicking and holding with the left mouse button. This will now show up as a clip.

You can drag multiple clips onto empty clip slots, or drag them over existing clips to replace the old clips with the new ones.
Once in the session view, clips have a random color assigned. You can change this by right-clicking and selecting a new color.

Press the small triangle next to a clip to play it. Notice how the interface changes. The triangle turns green, and you get audio meters on this track and the master.
Down in the mixer section, try playing around with the various controls. The Track Activator will enable or disable the track. When disabled, no sound will come out of the track, but it will keep playing -- think of this like a mute button.
Use the Pan Knob to adjust the pan of the track, or adjust the volume using the Track Volume Slider to the right of the output levels.
If you want to stop or start sound, press the spacebar.
Go ahead and drag some more clips onto the track. Once you have more than one clip, try playing another one -- what do you notice? There are several things that happen once you trigger a new clip in the same track.
The currently playing clip stops, and the new clip starts. The new clip won't start immediately however -- it will start after a period of time (usually one bar). This is where a knowledge of basic music theory will be useful to you.
If you start a clip in the middle of a bar, Ableton will wait until the start of the bar before playing that clip. This makes music sound better and keeps it in time. You can change this from the Quantization menu on the top-left settings bar. This menu also lets you change the time signature and tempo.

If you would like to play more than one clip at the same time, you'll need another track. You can create a new track by right clicking in some empty space, and selecting Insert Audio Track or Insert Midi Track.
Once you have more than one track, you can trigger all of the horizontal clips across multiple tracks using a Scene. A scene is a single row of clips (whereas a track is a column). Scenes can be found on the right hand side under the Master track, and can be colored, renamed and adjusted just like clips.

Double clicking a clip will open it in the effects controls section at the bottom of the screen. Here you can manipulate the audio sample, as well as fine-tune the sound. You can adjust where the sample starts or stops, as well as the pitch, timing, volume, and much more.

For now, there are only a few main points to look at.
Underneath the Sample Control, there is a Loop button, which is turned on by default. This means that once a clip is finished playing, it will start again. It won't ever stop unless you press Stop. If you'd like a particular clip to only play once, simply disable looping using the loop button. Looping can be configured on a per-clip basis, so you can have some clips looping, and others only playing once.
The Warp button adjusts the timing of a clip to match the current timing of your project. This can sometimes get confused and muddled up, but there are things you can do to make it more accurate. Ableton has an in-depth guide to warping if you'd like to know more.
Finally, one of the most useful actions is the Launch Mode. This defines how clips play once started. If you don't see the launch panel, you can show it by using the the small "L" button underneath the clip controls.

There are four launch modes:
Trigger: The default mode. Clicking a clip will play it.
Gate: The clip will play for as long as it is held down. Once you release the mouse the clip will stop playing.
Toggle: Click to start. Click to stop.
Repeat: This repeats the clip every x bars -- as defined in the quantization menu previously.
Launch modes are where your creativity can really come alive. When used with a MIDI controller or keyboard shortcuts, you can get some really creative sounds out of Ableton.
Assigning Shortcuts
Now that you know how to use session view, there's one last trick you need to know. Press the Key button in the top-right. This will turn on or off the Key Map Mode. This is where you can assign keyboard keys to almost any function in Ableton -- the most important being triggering clips.

Once in key map mode, simply click an action (such as starting a clip), and then press a key. Your new key will appear next to the function you pressed. Go ahead and exit key map mode when you're finished.

If, after assigning keys, nothing happens, you may need to disable Computer MIDI Keyboard. This lets you play a virtual (musical) keyboard with your computer keyboard. Disable it by pressing the little keyboard button on the top-right next to the key map mode button (after ensuring you're not in key map mode).
MIDI Tracks
Up until now, you've been working with samples -- real, "genuine" audio recordings. Now we'll move on to MIDI. MIDI stands for Musical Instrument Digital Interface, and is a way to have a virtual instrument such as a keyboard or drums. MIDI devices play a sound when given a command.
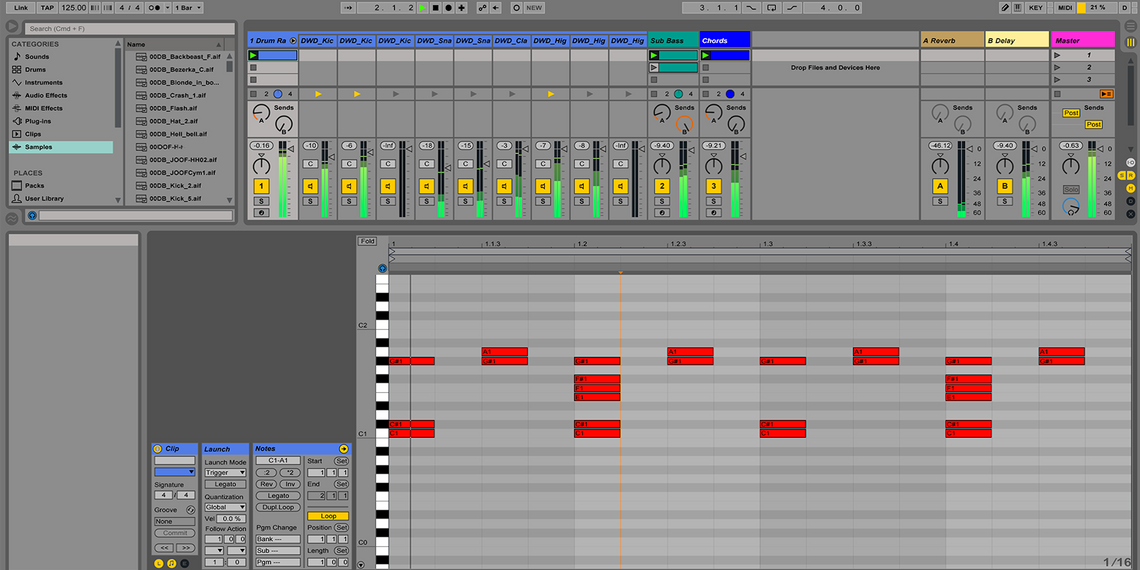
To get started with MIDI, go ahead and create a new MIDI track by Right Clicking > Insert Midi Track. Double-click an empty clip slot to create a new clip. You can play this clip, but no sound will come out -- it's an empty clip.
Double click on your MIDI clip to view the MIDI Note Editor. This is a "virtual" keyboard that you can play or program. Clicking on the keys won't produce any sound, however -- you'll need to press the MIDI Editor Preview button at the top of the virtual keyboard -- it looks like a pair of headphones.

Even though you've enable the MIDI editor preview, you still won't hear anything. You need to assign an instrument to the track before any sound will come out.
Start by adding some notes -- a C major scale consisting of the notes C, D, E, F, G, A, B is about the simplest you can get. Press the B key to enter draw mode -- this will allow you to enter notes.
If you press the Fold button above the virtual keyboard, Ableton will hide all the keys you have not used yet.

Now that you have some notes, double-click the Track Title Bar for your MIDI track. Open the browser and select Instruments underneath the categories heading. Expand the Simpler category, and choose a suitable instrument -- I'm using Grand Piano from the Piano & Keys section.

Drag this instrument on top of your track name -- this will assign it to the track. Now when you press play, you should have a pleasant piano sound!
This instrument contains various effects and settings. You don't need to understand them all right now, but Ableton has made things simple for you by "summing" all the controls into a simple grand piano control panel -- located in the effects controls section at the bottom of your screen.

Try playing around with settings like Reverb and Bright and see what happens to your sound.
Drum Racks
A Drum Rack is a special kind of MIDI instrument -- and it's not limited just to drums. This allows you to assign samples to keys on the keyboard, and is a neat self-contained way to trigger multiple samples.
Inside the Browser's Instruments section, drag the drum rack onto its own channel. The effects panel will now show the drum rack controls. This mainly consists of 16 slots (more are available on separate "pages"). Each slot is triggered by a note from the (musical) keyboard.

You can drag samples from the browser into a slot in the drum rack. You have various controls to alter the sample, and if you create a new clip on your drum rack channel, whatever note you play in this clip will trigger the sample you setup on the drum rack -- pretty neat!
MIDI controllers
One particularly nice feature about Ableton is that it can work with a seemingly unending number of MIDI controllers or keyboards. I previously showed you how to build your own MIDI controller using an Arduino -- which works pretty well.
A MIDI keyboard lets you make music and record clips using a real keyboard, but one that is routed through your track. Want to change your instrument? No problem: just select a new one in Ableton.
When using a MIDI keyboard, you need to configure Ableton to "listen" to your external device. In the control section of your MIDI track, underneath MIDI From, select your MIDI device (once it's connected).

Your MIDI track will automatically convert the notes you play into the appropriate sound, depending on the instrument you choose.
A MIDI controller differs from a MIDI keyboard in that they often have buttons and knobs instead of keys. Once connected, you can map your controller to Ableton just like the keyboard shortcuts above.
On the top right of Ableton, press the MIDI Map Mode Switch button. Once in this mode, trigger a clip or move a parameter, and then press or move the corresponding physical control on your MIDI device. Once done, simply press the MIDI map mode switch button again to exit MIDI map mode.

Many MIDI controllers offer a combination of keyboard keys and buttons, and you can even configure the keyboard keys to trigger clips instead of playing notes -- the possibilities truly are endless!
Effects
Effects are a great way to liven up your tracks, and they're easy to use!
There are two types of effects -- MIDI Effects and Audio Effects. MIDI effects can only be applied to MIDI tracks, whereas audio effects can be applied to audio or MIDI tracks.
Once you've chosen an effect from the browser, simply drag and drop it onto your channel. Your effect will then show up in the effect controls section. You can add multiple effects and adjust their order and placement, along with their settings.

You can use a nearly unlimited number of effects -- the only real limit is your processing power.
Recording the Session
So you've got a bangin' session going on, and now it's time to record it. Ableton can record the output from the session view straight into arrangement view.
All you have to do is press the Record button in the top control panel. Once recording, you can mix and match clips all you like, safe in the knowledge that the perfect combination of clips will always be available in the recording.

Once you're finished, press the Stop button in the top control panel. Press Tab to switch to the arrangement view, and your recording will be there -- all separated into multiple tracks ready to edit or export.

Exporting Finished Tunes
Once you've produced an awesome song, it's time to export it.
Go to File > Export Audio/Video. From here, you are presented with various options to configure. You can export each track as a separate file, but for now, leave the settings as they are and then click Export.

Start Making and Recording with Ableton Live
That's it -- you're done! We've only just begun to scratch the surface today, and we barely covered the arrangement view -- fortunately, most of the session view tricks work in arrangement view, too.
Of course, if you want to know more, the Ableton Live manual is very comprehensive, and goes into every item in great detail.
If you're looking for songs to remix, or samples to manipulate, then make sure you checkout these three places to find royalty free music.
Alternatively, if you're looking for something a bit simpler, perhaps something just to mix songs like a DJ, then why not checkout our guide to the best DJ software for every budget.
Did you learn how to use Ableton Live today? Why not share your favorite tips and tricks with everyone in the comments below?