Recording a decent video of your smartphone is not always easy. It can sometimes be done via software, but often, you'll get the best results with a proper camera and the right setup. Here's a full description of the setup I use to record video reviews for MakeUseOf -- it is not perfect, but it is simple and effective.
Sample Video
Let's start with the results first. Here is a video I made with this method:
sample video here
What You'll Need
This method uses five basic ingredients.

- Camera: This should be a good-quality dSLR. I use a Canon T3i. You may be able to get away with a decent point-and-shoot like the previously reviewed Canon PowerShot ELPH 320, but setup may be harder.
- Lens: You don't need a very wide lens for this. I use a Canon 18-55mm optically stabilized lens, with stabilization switched on - this is important for video work.
- Tripod: You will need a decent tripod with a ball head - this is crucial for pointing the camera down. It doesn't have to be fancy. I use a Weifeng 6662A tripod which can be found on AliExpress for $70 including international shipping.
- SD Card: Your SD card must be fast enough to take HD video. We previously looked at how to choose the right SD card for the job.
- Spirit level: Even though the Weifeng tripod includes two spirit levels, they're not where I need them to be. A simple construction level does the job. You may be able to use your phone as a spirit level in a pinch, but I do recommend you get a real level.
One key missing ingredient is an external mic, which is essential for decent sound. We recommend the Audio-Technica ATR-3350, which costs less than $20 and is what our video editor, Dave LeClair, uses for Video Game Hub.
Setting Up The Tripod
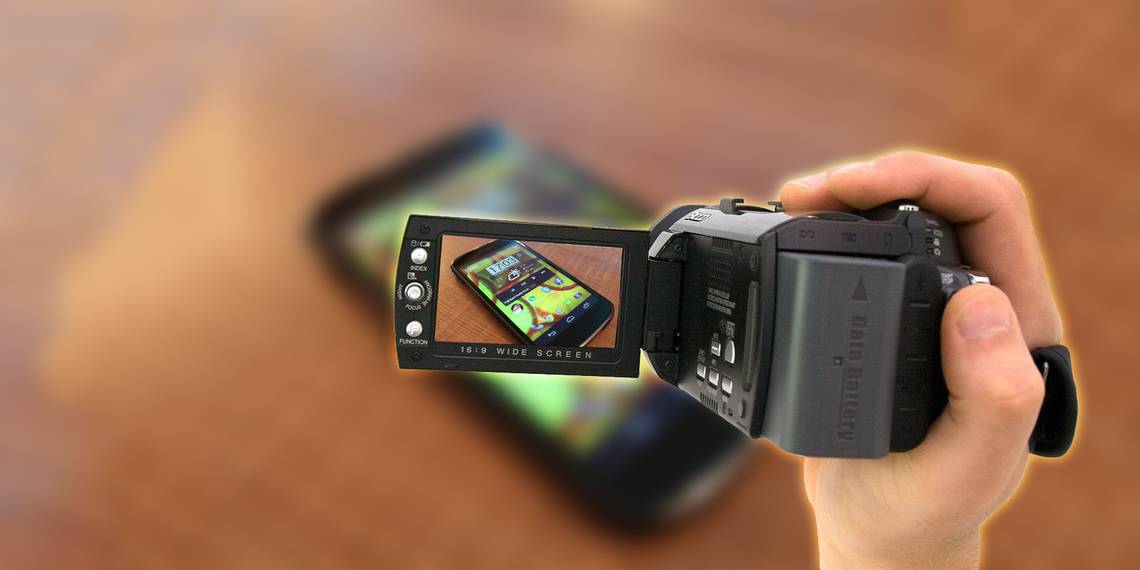
This is what we're going for:

Nothing fancy: The phone's on the table, and the camera is pointing down at it. There is no need to open the tripod's legs at a very wide angle (the Weifeng has three levels). Since you're zooming in on the phone, the legs won't show in the shot.
Here is a closer look at the tripod's ball head:

There are two grooves along its circumference that allow it to point straight down. Above, you can see the stem inserted into the groove - all that remains is putting on the camera and fine-tuning the angle.

This is where the spirit level comes in. Lock the camera into the tripod and point it down. Now simply place the spirit level on a flat area of the camera, and adjust it laterally until the bubble's as close to the center as possible. Next, rotate the spirit level 90 degrees (so you can adjust the up-down axis) and carefully adjust the camera along that axis.
This takes longer to read than to do - it's simple. Once you have the camera dead center, tighten the ball head down so it doesn't move on you.
Phone and Camera Settings
Make sure your phone's screen is relatively clean, and crank the brightness up to maximum. This is important to avoid glare and reflections -- you want the screen shining nice and bright into the camera. Then put it on the table so that it's roughly in the center of the frame, and zoom in with your lens until it fills up as much of the shot as you want it to (I usually go for full height).
Next let's tackle some camera settings. Note that each camera has its own menu structure so I can't tell you how to set these (what to press when). I can only suggest what I think you should set.

There are several issues you may come across here. First up, white balance. The phone screen takes up most of your shot, and the colors shown on the screen will change as you use the app or game during the video. If you leave white balance at auto, you'll get wild color variations throughout the video. So, lock this to a specific setting (daylight, above).
Next, focus: Do not attempt to use autofocus. Switch your lens to manual, and use the camera's focus check feature to zoom in on the image at 5x or 10x magnification, then manually adjust the lens focus until it's nice and sharp. Your phone will not be moving away from the lens during filming so locking focus is safe.
Finally the trickiest point: Avoiding moiré. Moiré is a name for those annoying twisty lines you often see in videos of computer screens. The key to avoiding it is to play with your aperture and shutter speed settings. This is tricky because the camera's LCD may make it difficult to spot moiré, but it is possible.
That's it. All in all, setup takes about five minutes, and the video comes out nice and clear.
Now You Teach Me
What am I doing wrong? What would be an easier or better way to record my phone's screen? Share your tips in the comments, along with links to YouTube videos showing your work.