Windows is a complex beast. It never ceases to amaze us just how much you can do with this operating system. To share the possibilities, we have rounded up some lesser known tips and tricks for the curious reader.
We've covered simple Windows tricks in the past, so these are aimed at those of you who have a more advanced grip on your systems and are looking to learn even more.
If you already know all of these then please drop your own suggestions in the comments - the more tips and tricks shared the better!
Change Default Printer Depending On Location
Location-aware printing is a feature available on laptops and portable devices powered by battery. It allows you to move locations, like between home and work, and for your default printer to automatically switch depending on the network.
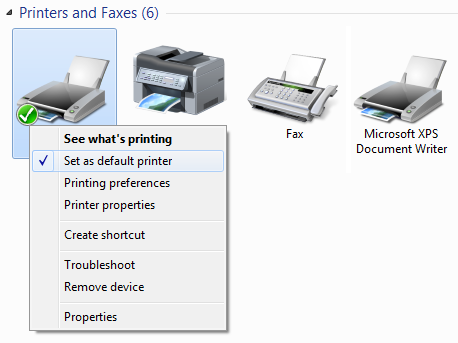
First, you'll need to set the default printer for the network you're on. Do a search for Devices and Printers and select the result to load the new window. Now right-click the printer you want as default and click Set as default printer.
Then click a printer in this window and click Manage default printers on the toolbar. Select the Change my default printer when I change networks radio button. Next, choose a network and printer from the Select network and Select printer dropdown respectively and click Add. Repeat this process for as many networks you'll be connecting to.
Bear in mind that if you're wanting to set a default printer for a wireless network, then you'll need to have connected to it in the past. Also, should you want to reverse this process and just have one printer for all networks, click the Always use the same printer as my default printer radio button.
Lock A File
You can lock files to prevent them from being overwritten or deleted using third-party programs (like Easy File Locker), but they're not entirely necessary.
This one comes courtesy of Dan at Super User. First, search for PowerShell on your system and launch the application. Then input the following:
#Specify the file name
$fileName = "C:\myfile.txt"
#Open the file in read only mode, without sharing (I.e., locked as requested)
$file = [System.io.File]::Open($fileName, 'Open', 'Read', 'None')
#Wait in the above (file locked) state until the user presses a key
Write-Host "Press any key to continue ..."
$null = $host.UI.RawUI.ReadKey("NoEcho,IncludeKeyDown")
#Close the file (This releases the current handle and unlocks the file)
$file.Close()
The script has been commented so you know where to edit - the second line is probably all you need, where you switch out the file name. Essentially, from the above example, when you try to run "mytextfile.txt" you'll receive a warning saying that the process cannot access the file because it's being used elsewhere.
Search Your Files With Operators
Sometimes there'll be data on your computer that you need to hunt down and you're not sure where it's stored. Or perhaps you need to bring up a list of data that matches specific criteria. Have no fear because you can use operators to make your system search even more powerful.
AND, NOT and OR are three simple operators that will come in very handy. For example, searching dog AND cat will search for files that contain both of those words. Searching dog NOT cat will show you everything that includes the word dog, but not cat. Finally, dog OR cat will show you files that contain either word.
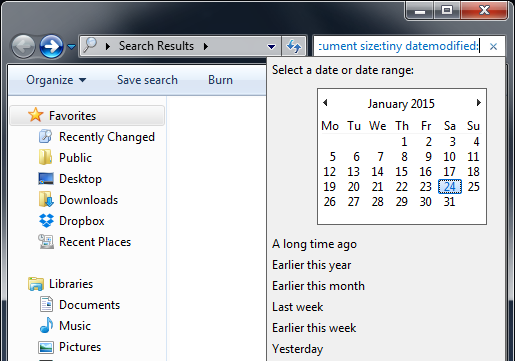
If you click the search box then you'll be able apply filters based on what of data it is, what the file type is, when it was last modified, and the size of it. However, you can take this one step further by using advanced search terms.
These include things like System.Author:~!"joe", which will search for files whose authors don't have 'joe' in them. There's also System.Kind:<>picture, which will search for files that aren't pictures, and System.Size:>10mb that'll look for files larger than 10MB.
All of these operators can be used together to get the ultimate refinement. For a full list of all the operators available, check out Microsoft's help page.
Always Run Applications As Administrator
Some programs will require to be run as an administrator. This means that their permission levels are heightened and it allows them to perform certain actions. You'll often have to do this on older programs, developed for past versions of Windows that didn't use User Account Control (UAC).
UAC is enabled by default to try and protect users and make them more aware of their actions and how it'll impact their system. The notification level can be adjusted, but that doesn't help if you always want to run specific programs as administrator.
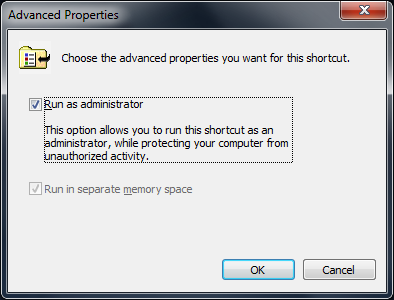
To do so, first right click the program shortcut. At this point you could select Run as administrator, but this will just be a one off. Instead, select Properties, ensure you're on the Shortcut tab, then click Advanced.... From here you just need to tick Run as administrator then apply changes with OK.
Warning: There is an alternative method, but this one is only for those who are very confident with Windows. When choosing this solution, you should have adequate security precautions in place to protect your system from rogue applications abusing Administrator privileges.
A way to run all applications with admin rights per default, is to enable the administrator account, which is hidden by default. The admin accounts you can create normally don't actually have full permissions, hence the implementation of UAC.
To enable this hidden account, search for cmd, right click the result and select Run as administrator. Input the following:
net user administrator /active:yes
You should receive output to confirm the command was successful. You can then switch to the administrator account where every program will run with the highest level permissions.
If you want to disable the administrator account then just follow the above process and switch out yes for no in the input.
Install Software From The Command Prompt
Installing software can sometimes be a pain, especially when you have to progress through loads of pages in the installer and be careful not to accidentally agree to any tricky-to-remove bloatware.
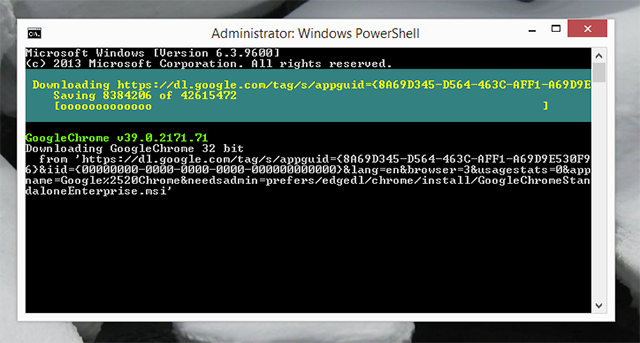
There's a program called Chocolatey that plugs into Windows PowerShell. It allows you to install one of the thousands of programs available from their library - and all you need to type are three words.
Linux has a similar feature, but Chocolatey brings the ability right into Windows. It's a breeze to operate and the great thing is that it'll deny any bloatware from installing.
If this sounds appealing, be sure to check out our guide on how to use Chocolatey.
Launch Programs In Batches
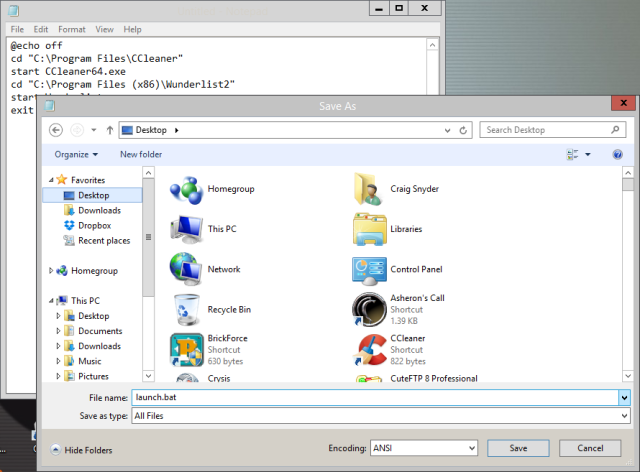
Can you think of programs that you always launch together? Perhaps you never have Steam open without Raptr, or you always run Winamp and Last.fm together.
If so, you should think about using a batch file to have these files open together simultaneously. You can even edit the script to let you open up multiple folders all at once.
It's a simple procedure that'll take five minutes and it'll save you a whole load of extra clicks down the line. Fans of automation will be sure to love this tip.
Check out our guide on how to launch programs in batches for details on how to perform this.
Give Us A Tip
Windows is a hugely powerful operating system and the majority of users will only ever scratch the surface of what it's capable of. We want to get the most out of it and these tips are just some of the ways that you can.
While these are tricks that we've found useful, there's so much more out there. We'd love to hear the clever, geeky methods that you use to get stuff done on Windows.
Have you ever used any of these tips? Do you have any of your own to share?
Image Credits: Point to laptop screen Via Shutterstock


