The launch of Windows 10 in 190 countries has been met with excitement, with many expressing satisfaction with Windows 10. Fans have asked for a better operating system; Microsoft engineers have answered.
Here we'll uncover seven less obvious features to make sure you get the most out of Windows 10. Are you ready? Here we go!
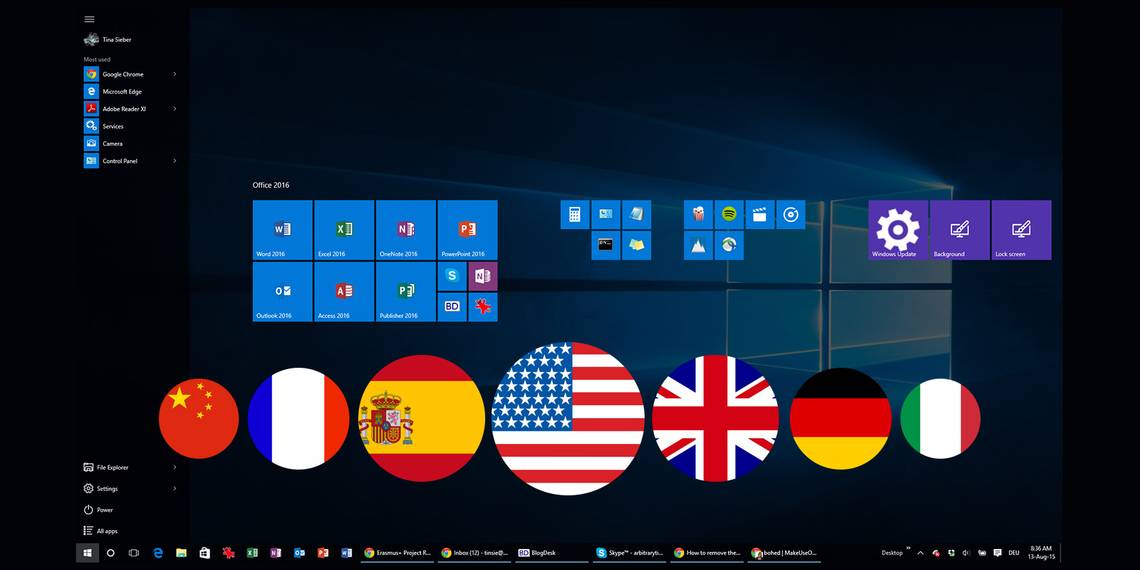
Changing the Cortana Language
Speaking of language, Cortana - the personal assistant for Windows 10 - can do more than just speak in her native English language. Cortana is able to handle much more. At this moment, she is able to understand seven other languages: American and British English, German, Italian, Spanish, French, and Mandarin Chinese.
If you want Cortana to change her speech, or if you want to enable Cortana in the first place, you can open Settings from the Start menu and then click on Time & Language, and go to Region & language.
On the right panel, click your desired country. In the languages section, click Add a language. Then select Set as default. Afterwards, click on Options and then Download the speech files. After downloading and updating the speech files, click Settings and choose the language you just installed - the one Cortana will speak. You can even click on Recognize non-native accents for this language if you're not a native speaker of the language chosen.
Note that this will change other regional settings, such as your keyboard layout. However, you can easily switch between layouts by using the shortcut Windows + Spacebar.
Recording Video, Not Just for Gamers
Gaming is a big deal for Microsoft. Not only did Microsoft allow Windows 10 users to stream XBox One games to their PC or tablet, but you can also record videos using the built-in Game DVR feature.
Instead of just using the DVR feature to record games, you can use the tool to record videos of apps or desktop software. Though, it doesn't work with every app or the desktop or File Explorer, it can still be a useful tool.
To record a game or screen: click on Windows key + G - or the keyboard shortcut Windows key +Alt + R. You'll then be prompted and asked if you want to open the Game bar. For this part, you'll have to lie a little and click Yes, this is a game box. Afterwards, you'll be able to record video by clicking on the circular record button. In the settings menu, you can configure the video quality and resolution.
You can then find your saved clips in the Game DVR section or inside the Video > Captures folder.
Saving Video Where You Want It
If you don't want to save your files in C:\Users\[your username]\Videos\Captures. WDA_Punisher on YouTube says it is possible to save your video files where you want it.
To change your location, click File Explorer. Then right-click Videos, found under Your PC, and then click Properties. Click on the Location tab and change your default folder in the menu box by clicking Browse and then choosing a different destination (E drive, for example). After you're done, click OK.
Afterwards, go to the Start menu and click Settings. Then go to System and click Storage. Under Save Location in the menu box you'll be given an option to set your default save folders for music, video, documents, and pictures. Be sure to have a folder on the desired drive (E:\Videos, for example).
The New Photos App
Windows 10 comes with several new apps and one of them is Photos.
The new Photos app is organized and easily searchable, making your life moments easily accessible. Albums are automatically created when you import, save, or take a screenshot and are usually arranged by date created (in reverse chronological order). To get the most out of your Photos app, you'll want to learn some tips.
Edit Photos
In the Settings tab of the Photos app, you can turn on or off automatic photo enhancement. You can also edit your photos by clicking the pencil icon and choosing between basic fixes, filters, light, color, and effects.
In the Basic Fixes menu, you can rotate, crop, straighten, retouch, and fix red-eye. You can also choose the one-click Enhance button. You can adjust the brightness, highlight, contrast, and shadows in the Light menu. In the Color menu, you can change the saturation, temperature, and tint. You can also choose the Color boost option, which boosts (or makes less prominent) a single color in an image. You can choose between six Instagram-like filters in the Filters menu and change the effects (vignette or tilt-shift) in the Effects menu.
You can revert back to the original image by clicking on the undo and redo buttons and compare by clicking and holding the compare button at the top of the screen.
Share Photos
In the Photos app, click Collections, choose your photos and then press the share button at the top of the screen - it's that easy! You can also use the keyboard shortcut Windows key + H to open the Share toolbar. Be sure to first install Facebook, Twitter, and other social apps so that your photos can be properly shared.
Don't miss out on other new apps, such as Groove Music (formerly Xbox Music), Maps, Movies & TV, or the Phone Companion.
Universal Engine for New Fonts - Adding Language
Typing in your own language shouldn't be a problem. However, millions of people around the world continue to have complications.
The heart of this problem lies with something called a "shaping engine." Shaping engines are used for complex scripts such as Arabic and Chinese characters, for example. Before Windows 10, people were able to download their own fonts and keyboards, but many people still experienced difficulties even after downloading proper scripts.
So, Windows engineers worked together with Unicode to create a universal shaping engine, which is "capable of supporting any complex script when provided with a suitable font." This meant complex scripts that were once not available (or gave their users problems) should now be ready to use. And it seems users of these complex scripts are rejoicing with the Windows 10 update.
To add a language: Click Settings, Time & Language, Region & Language and then browse languages you want to add. Select Add a Language. It's worth noting that different users can use different languages for each account.
Roll Back to Windows 8.1
Want to know a secret Microsoft probably doesn't want you to know? Well, here we go. If you find yourself disappointed with Windows 10 and the new features, you can roll back to Windows 8.1 after 30 days of having upgraded. We're sure Windows would rather have you stay on the Windows 10 train, but, hey, it's a free world and you can do what you like. Choose your own adventure.
In order to roll back, you should click Settings found under the Start menu. Go to Update & Security and then click Recovery. Under the Recovery menu, click Get Started found under Go Back to Windows 8.1.. All done! You should be back to Windows 8.1..
More Features Coming Soon
Microsoft has said Windows 10 will be the last Windows version. They're betting recent video, picture, font, and the promise of future updates will keep you hooked and dissuade you from rolling back or switching to another desktop operating system. Their gamble seems to have paid off for now, as is shown in our MakeUseOf Windows poll.
What do you think? Will you be switching or staying with Windows 10? Have you discovered other exciting features? If so, feel free to share in the comment section below.