Converting old photographic images to digital formats that can be easily shared is a time-consuming process. It is also potentially expensive if you rely on photographic shops to carry out the conversion.
The same is true of photographic slides. What, exactly, can you do with old photo slides? Is it possible to scan them, or should you just take a photo of photographic slides to share online?
In fact, there are several ways to digitize slides. Here’s how to convert old slides, negatives, and photos into digital image files you can print or share online.
Clean Up Your Media
Before scanning or photographing old media, take a moment to check them for dust and dirt. As this will also be scanned, it's wise to clean first rather than touching up the scan later.

You will need:
- Cotton or nylon gloves
- Standard microfiber cloth (anti-static preferred)
- Pure alcohol cleaner (additive free)
- Can of compressed air
Avoid water-based chemicals. Cleaning should take place in a well-ventilated area. It's also wise to have a test slide---perhaps of a poor shot that you don't want---to ensure the cleaning method is effective. If not, use one of these tools to restore your old photos.
How to Clean Slides
Wearing the gloves, take the dry cloth and wipe in a straight line across the slide. No unnecessary pressure is required. If dirt is caught in the edges of the frame, dispel it with the compressed air can.
With your slides cleaned up, you'll be ready to start scanning.
How to Clean Negatives
Negatives are delicate and prone to dirt, dust, and even mold. If they’re not already stored in a cool and dry location and kept in plastic pockets to reduce physical contact, they should be.
Wearing the gloves, take a dry, clean anti-static cloth and fold it around the negative strip. Draw the negatives through the cloth, allowing you to clean both sides simultaneously.
Dirt, mold, and even rust can be removed with a small amount of alcohol cleaner on a cotton wool ball. Gently rub this back and forth on the negative until the dirt is removed.
How to Clean Old Photos
Cleaning old photos can be fraught with difficulty, depending on the age of the photos and how they were developed.
Generally speaking, a gentle gust of directed air should be enough to remove most dirt; a clean, soft brush should also do the job. The aim is to remove loose dirt, prior to scanning (see below). Once this is done, persistent issues (folds, tears, immovable debris) can be dealt with in image editing software like Photoshop.
However, older photos (certainly those form the 19th century) require other methods of cleaning. It is worth researching the type of photos you have and check where you can have them cleaned or restored by a specialist.
5 Ways to Scan Slides
As they’re so small, slides can hide quite a few secrets, especially if you don’t have a slide projector. Consequently, it is worth knowing how to scan and save them for viewing and sharing.
1. How to Scan Slides With a Flatbed Scanner
Easily the most obvious tool for scanning a photographic slide is a scanner. Whether a standalone flatbed scanner or one built into your printer, either is fine. However, you can't just stick your slide on the flatbed and press scan.
This is because the scanner features a thin beam of light that will only illuminate a portion of the slide.
Instead, use a diffuser to ensure an even spread of light which will enable an even capture of the slide.
Diffusers can be bought online, but you can also make your own. Follow the steps in our guide to capturing your old slides with a flatbed scanner and you'll be scanning your slides with good results within 30 minutes.
2. Convert Slides to Digital With a Slide Projector

Another method of digitizing slides is to employ a slide projector. It doesn't have to be brand new (you might find an older model on eBay) but it does have to be able to project a clear image of the slide.
For the best results, hang up a white sheet (or dedicated projector screen) and black out your windows. Switch off the lights, then snap the projected image with a digital camera—preferably using a tripod.
3. Digitize Slides With a DSLR Duplicator Mount
If you're passionate about photography, you probably own a DSLR. Slide duplicators can be mounted on DSLR cameras to photograph old slides. Be sure to select a device that matches your camera brand.
These are lens-mounted devices with a slot to place slides. Once focused, the devices are the perfect size to get a full, high-definition copy of the image. The end of the mount slot is usually opaque plastic to diffuse the light source.
You don't necessarily even need to take a photo with this solution. If your DSLR has a video out feed, you can use the device as a slide viewer through your computer. Slides can be captured directly into software or even recorded as a video.
Slide scanning mounts for DSLR cameras can be purchased from well-known photographic retailers.
4. Convert 35mm Slides to Digital With a Dedicated Slide Scanner
For a more straightforward approach, you might consider some dedicated hardware.
Various slide scanner devices are available. Some are even capable of scanning slides and photographic negatives. It's a smart idea to opt for hardware from reputable photographic brands rather than cheaper alternatives.
The KODAK Slide N SCAN is a smart solution.

KODAK Slide N SCAN
When it comes to scanning and digitizing old negatives and slides, it doesn't get much easier than with KODAK's Slide N SCAN. The process for viewing and converting your old photos is as short and sweet as the scanner's name; pop a photo in the side, let the scanner work its magic, and watch your memories appear on the 5-inch LCD display.
- Functions
- View and convert negatives and slides
- Brand
- KODAK
- Quick and easy conversion process
- Adjustable 5-inch LCD screen
- Includes required cables and adapters
- Supports a range of SD cards for easy file transfers
- Requires an SD card to operate
The process is simple: insert the slide, press a button, and the slide is scanned. An image of the results is displayed, while the scan is saved to an SD card or sent via USB to your PC.
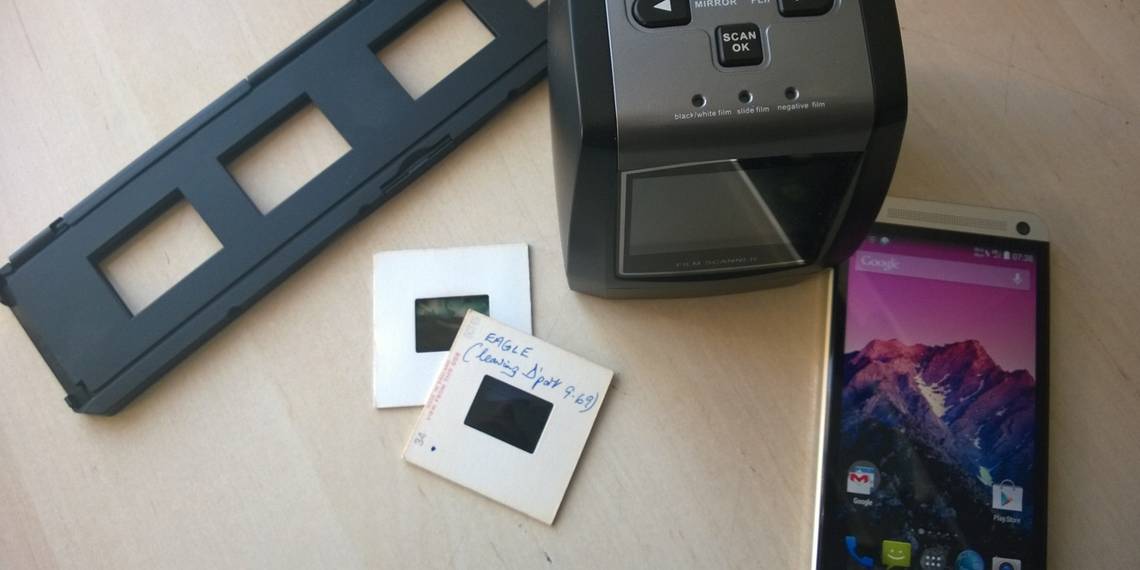
5. How to Convert Slides to Digital With an iPhone or Android App
Incredibly, all you really need to scan slides to digital image formats is an iPhone or Android. But like snapping images of old photos, the default camera app isn't suitable.
Rather, you'll need an app that is optimized for photographing slides (or negatives or transparencies) and a suitable light source.
Download: Slidescan - Slide Scanner App for Android | iPhone (Free)
All you need is a light source (e.g. a day-lit window, or the dedicated web page) and a steady hand. Once snapped, the frame can be cropped out of the image leaving just the original slide to share online.
3 Ways to Digitize Photographic Negatives
When photos taken on an SLR or other film camera are developed, the negatives are returned along with the prints. This is so copies can be made, but thanks to technological advances you can do this yourself.
No dark room required!
Here’s how to digitize your negatives.
1. Scan Your Negatives
The first option is to use a standard scanner. As with slides, you can use a bought or custom-built diffuser to ensure an evenly-lit image.
Once scanned and saved to your computer, use an image editor to convert the negative into a correctly-colored image.
2. Use a Slide and Negative Scanner
Many slide scanners support capture of the negative images too. These are typically saved to the memory card (or on your PC via the USB cable) and can be converted or edited however you see fit.
The Kodak Slide N SCAN mentioned above handles negatives as well as slides.
3. Convert Negatives to Photos With a Mobile App
Mobile apps can also be used to convert negatives to color, digital images. Better still, color conversion occurs in real time, so you don’t need to worry about using a desktop image editor.
Download: Photo Negative Scanner for Android
Download: Negative Photo: Photo Inverter for iPhone
Note that both options require in-app purchases for advanced editing features and watermark removal.
Steady hand not an option? Don't worry. This compact smartphone slide scanner features a battery powered backlight and is compatible with most phones.

Rybozen Mobile Film and Slide Scanner
The Rybozen Mobile Film and Slide Scanner uses its built-in blacklight to turn your old negatives into digital memories. Set a slide or negative on the tray, turn the scanner on, and use your smartphone to capture the image. That's all there is to it.
Rybozen's Slide Scanner is also a breeze to stow away thanks to its lightweight, foldable design. Not to mention, with a price tag of well under $50, this scanner makes reliving memories simple and accessible.
- Brand
- Rybozen
- Power
- 2x AA batteries (not included)
- Weight
- 140g
- Affordable price range
- Light, foldable design makes it easy to store
- Free app for scanning and editing photos
- May be hard to focus depending on your smartphone
How to Scan Old Photos and Save Them to Your Computer
It’s also a good idea to make a copy of any old photos you own. These can be cleaned up and scanned, hopefully with blemishes removed.
The best way to do this is clean the photo, scan it, then use an image editing tool to repair it. This might be anything from getting rid of red eye and creases to “repairing” a torn photo or sharpening a blurred image.
Our guide to the best ways to scan old photos explores this topic in greater depth.
Now You Know How to Digitize Slides, Negatives, and Photos!
While you might not want to throw them away, knowing how to scan slides so that they are easily shared with friends and family is a great way to rediscover old photos. After digitizing slides, you might even include them in family tree research.
Not sure how to share your pictures? You might share online to social networks like Facebook, store in a cloud drive, or simply copy to USB.