At the heart of every WordPress install is the wp-config.php file, a file so sacred and shrouded in mystery that every WordPress user knows it should never be touched.
Or should it?
In fact, there's a lot of lesser known useful hacks that can be without damaging WordPress in any way, and it's about time you took your WordPress skills up a notch. Read on for 5 of my favourite wp-config tricks.
This article is strictly intended for self-hosted WordPress.org sites, not those hosted on WordPress.com (what's the difference?).
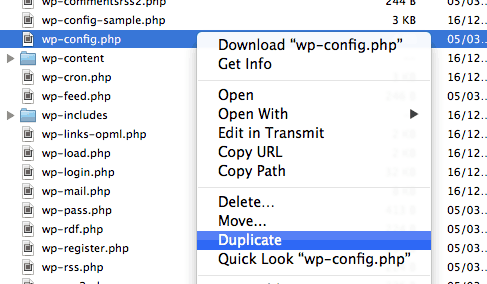
Before you start, know that you can potentially stop WordPress from loading if you mess up the syntax of this file, even with something as silly as forgetting a semi-colon. However, it's also incredibly easy to duplicate it before you start editing so that you have a backup. If you break something, just delete your altered file and rename the backup - all will be well with the world again. It's actually very hard to permanently damage a WordPress install, short of deleting your entire database. Before attempting any of these, you may also want to check out our ultimate guide to fixing 500 Internal Server Errors.
The wp-config.php file can be found in the root of your WordPress install, and requires you to login over FTP or SFTP in order to edit it. If you're unsure how to do that, the contents of this article may not be appropriate to your skill level - but here are some useful IFTTT recipes to use with WordPress (that don't involve editing files).
Log Errors To a File
Sometimes outputting a bunch of nasty errors to the public front-end of your site really isn’t desirable. Log the errors to a file instead! Define the following, then wait a while and you’ll see a new error.log in the wp-content/ directory slowly filling up. It’s a good idea to disable this as soon as you have a good enough enough sample of the errors, since there’s no built in log rotation or limits - you could fill your entire server with gigabytes of logs!
define('WP_DEBUG', true); // change back to false to disable
if (WP_DEBUG) {
	define('WP_DEBUG_LOG', true);
	define('WP_DEBUG_DISPLAY', false);
	@ini_set('display_errors',0);
}
Look for lines with PHP_ERROR rather than NOTICE or WARNING - the latter won't break your site, but the former might.
Disable Post Revisions
I once found a post with over 100 revisions: that’s 100 additional rows in the posts table that aren't needed. Disable post revisions entirely with the following simple line:
define('WP_POST_REVISIONS', false );
or
define('WP_POST_REVISIONS', 3);
to limit them to a sensible number instead. Of course, some people like having post revisions, particularly in an environment where editors make changes to your work - but if it's just you writing, and you have a tendency to work on posts a little at a time, it's just not worth it. Note that this trick won't delete any existing post revisions, it'll simply stop new ones from being created.
Shared User Table
Sometimes, you want more than one WordPress install - we do that here at MakeUseOf.com. But giving users a separate login for each site is just ridiculous, and running a "multisite" network of blogs doesn’t help either (believe me, we tried) - in fact, it overly complicates the situation when a few lines in your wp-config.php is really all that’s needed. What you want is what's called a shared user table - that is, while each blog remains its own entity with separate plugins and posts etc, only the user database is shared.
First, decide on your main blog - this will be where user management is done. Let's call it blog A. Blog B and C will be "sub-blogs", and will draw from the main blog A user table, -and I'm assuming they'll be installed in separate folders. In the wp-config files for B and C, add the following lines. In this example, the main blog uses a database prefix of "blogA".
define('CUSTOM_USER_TABLE', 'blogA_users');
define('CUSTOM_USER_META_TABLE', 'blogA_usermeta');
The database prefix is a specific term chosen during setup of your first blog (the one used to manage everything). The default is wp_ but new installs will encourage you to change this. If you're unsure, it’s the word that comes at the start of all your database table names.
You also need to ensure cookie domains are the same - without this step, users will be need to log in separately to each site (albeit with the same password and capabilities, which are now shared).
define('ADMIN_COOKIE_PATH', '/');
define('COOKIEPATH', '/');
define('SITECOOKIEPATH', '/');
define('COOKIEHASH', md5('CHANGETHIS'));
Be sure to replace CHANGETHIS with your own randomly generated string of characters to secure your cookies. Finally, you should see a number of lines similar to the screenshot below, defined with random "salt" and "key" values. Ensure this is the same in each config file; if you don't already have any, use this page to generate them.
Thankfully, none of the changes you make to wp-config.php will be lost with each upgrade, however there’s one other small change which you may need to redo if the upgrade overwrites it: in wp-includes/capabilities.php.
The _init_caps() function is where the capabilities for the current user is fetched - if we don’t change this, the user will be able to log in, but not actually do anything. Find the following code:
function _init_caps( $cap_key = '' ) {
	global $wpdb;

	if ( empty($cap_key) )
		$this->cap_key = $wpdb->get_blog_prefix() . 'capabilities';
	else
		$this->cap_key = $cap_key;

	$this->caps = get_user_meta( $this->ID, $this->cap_key, true );

	if ( ! is_array( $this->caps ) )
		$this->caps = array();

	$this->get_role_caps();
}
and change the
$this->cap_key = $wpdb->get_blog_prefix() . 'capabilities';
so it’s hardcoded to whatever your main blog prefix is
$this->cap_key = 'blogA_capabilities';
Each upgrade, just check you still have full access to each blog; if not, redo this fix.
Fix The Site URL
If you’ve messed up the URL settings, sometimes you can lock yourself out of the admin area in a nasty chicken-and-egg scenario. You could fix it with access to the settings, but you can't access the settings because the settings are wrong ;(
Luckily, you can override any database options where the URL is stored - jet add the following lines to your config file:
define( 'WP_SITEURL', 'http://example.com/' );
define( 'WP_HOME', 'http://example.com/' );
Don’t Break The URL When Migrating
Migrating a WordPress site to a new domain can be done in a few ways, but if you’ve gone for the hardcore command-line database and file dump, this is most common way for the site to become inaccessible. Rather than fix it after the fact, add the following line to put WordPress into relocate mode.
define('RELOCATE',true);
Now once you've migrated everything, visit /login.php and the URL settings will be updated for you. Check it worked then delete this line from the config.
Mastering your wp-config.php is one step on the road to complete WordPress mastery - I'd also recommend you learn about interacting directly with the database with these handy SQL queries.
Got any other wp-config hacks you'd like to share?


