Your iPhone captures amazing video whether you're shooting in 4K, slow-motion, or good old 1080p. But what use is glorious video if nobody can see it?
Sharing just about anything from iOS is a painless affair, and video is no exception. The best method or service for you depends on who you want to share with. We'll even show you how to create a link for videos on your iPhone so people can watch them from any device.
Let's look at the best ways to upload and share videos directly from your iPhone.
1. Share Videos From the Photos App
When you shoot a video, it saves to the Photos app on your iPhone, possibly uploading to iCloud Photos if you use that service. To view all your videos, open Photos and go to the Albums tab, then scroll down and tap Videos.
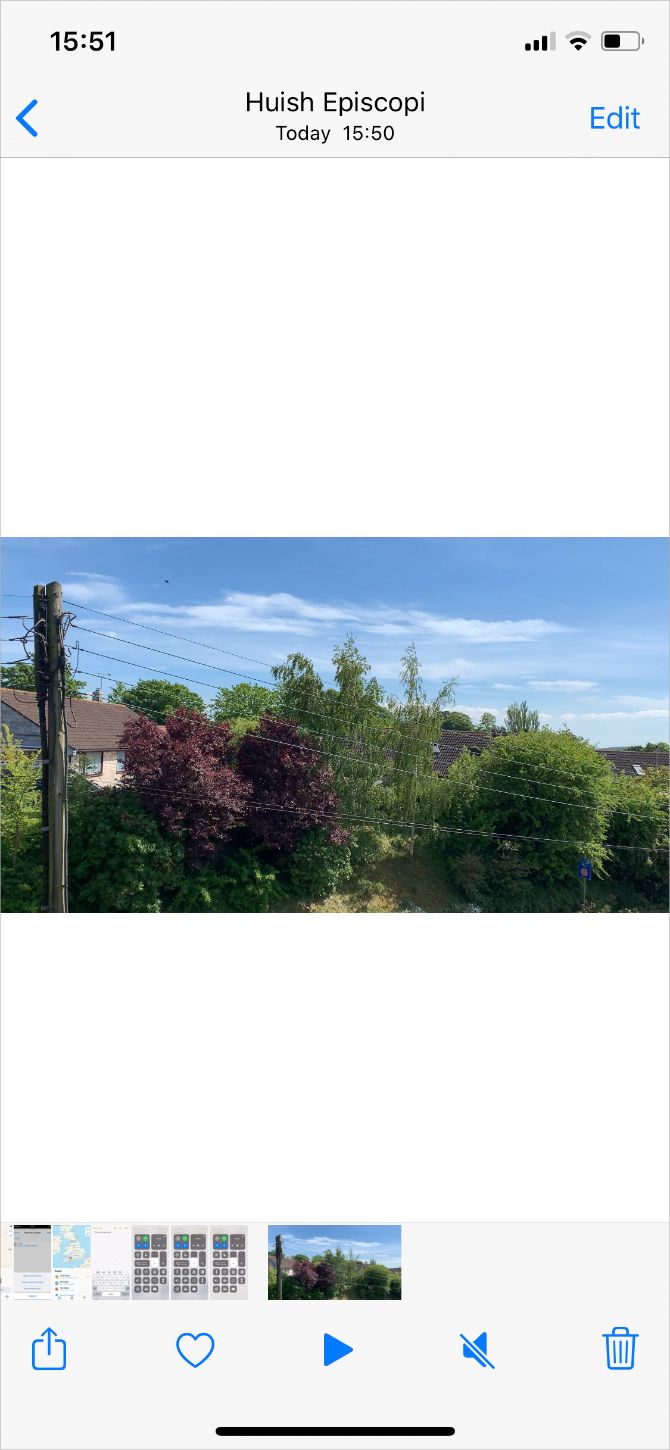
The easiest way to share videos from your iPhone is using the Photos app itself. Here's how to do it:
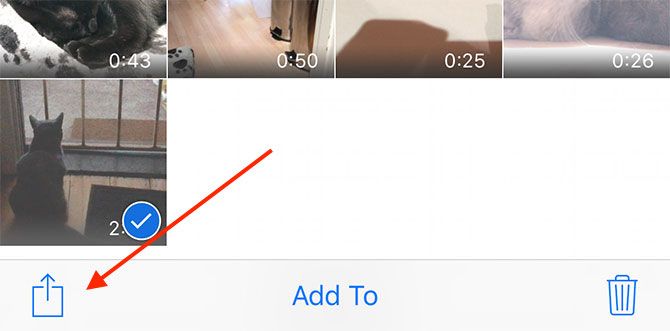
- Open the video you want to share in the Photos app and tap the Share button.
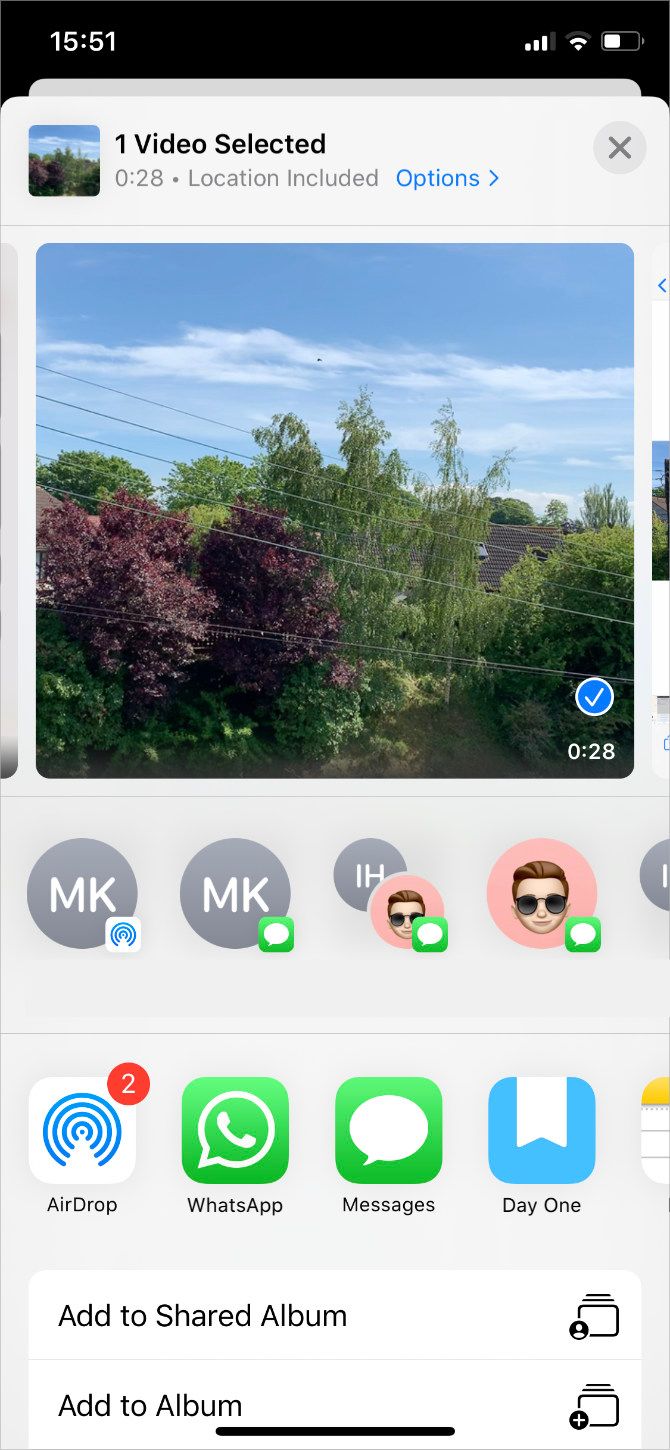
- The top row of the Share Sheet shows your recent AirDrop and Messages contacts. The second row lists apps you can use to share videos.
- Tap the contact or app you want to share your video with.
This is the best way to share videos that you want to send using the Messages app, especially since the top row of the Share Sheet lists your most recent contacts from that app. However, your iPhone might compress videos you send using Messages (if it sends over SMS) to meet your service provider's size limits.
Tapping an iPhone app in the second row of the Share Sheet usually opens a new window that lets you add a message or choose exactly how to share the video using that app. Alternatively, you can open the app itself and use the sharing features inside the app for even more options.
Why choose the Photos app? Sharing directly from this menu is a great way to go if you want to browse through the videos on your iPhone before choosing which one to share.
2. Share to Local Devices Using AirDrop
The best way to share videos from your iPhone to nearby Apple devices is by using AirDrop. It's much faster than uploading videos to the internet and doesn't compress their contents at all. Even better, AirDrop lets you share across any Apple device: iPhone, iPad, or Mac.
Here's how to share your iPhone videos using AirDrop:
- Open the Photos app and find your video.
- Tap the Share button, then select the AirDrop option in the second row.
- You should see every Apple device within Bluetooth range that has AirDrop turned on. Tap the one you want to share your video with.
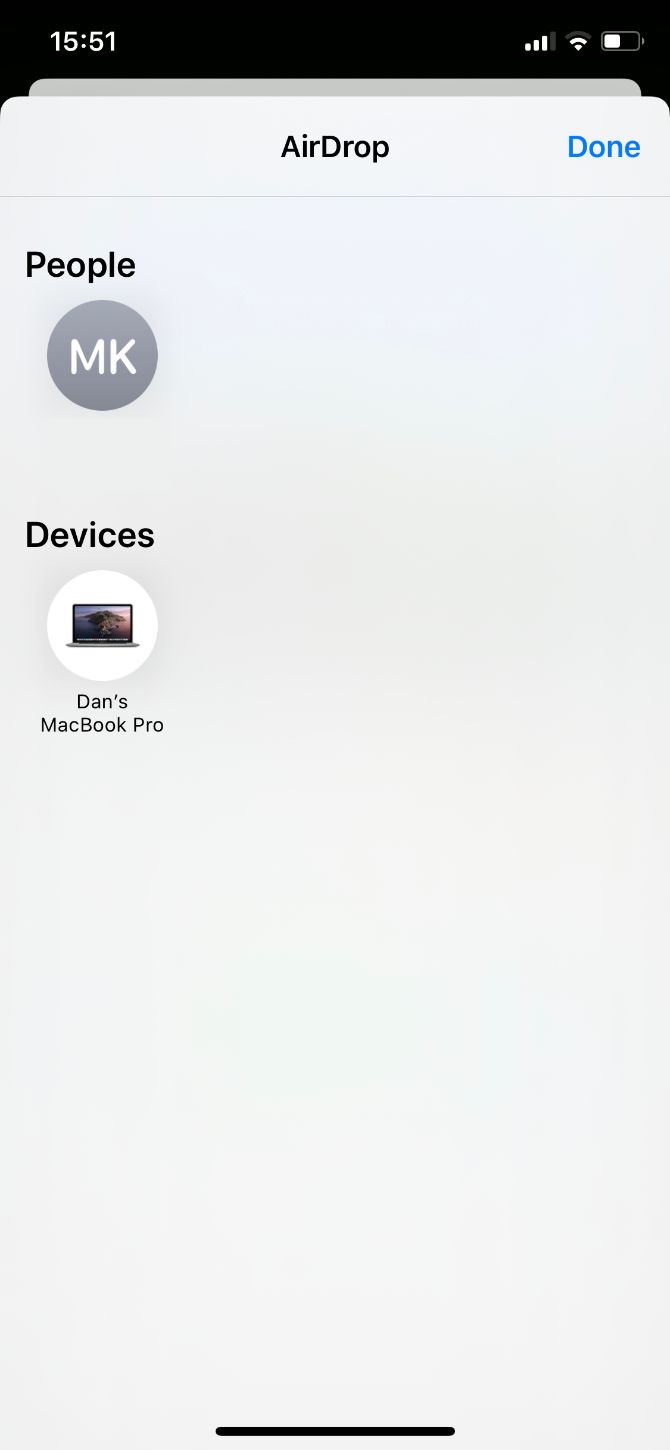
AirDrop is a little temperamental and seems to work best with newer devices. You don't need to be on the same Wi-Fi network, but you do need to have Wi-Fi and Bluetooth turned on. Check out our AirDrop troubleshooting guide if you run into any problems.
Why choose AirDrop? Transfer speeds are lightning-fast since AirDrop doesn't rely on an internet connection. AirDrop also doesn't need to compress your videos at all.
Sharing to Local Android Devices
AirDrop doesn't work with Android devices, so you need to use third-party apps to share locally across platforms. Generally speaking, for this to work, both devices need to use the same third-party app and connect to the same Wi-Fi network.
If you can't connect to the same Wi-Fi network, create a personal hotspot on your iPhone instead. Go to Settings > Cellular > Personal Hotspot to do so.
Plenty of third-party apps are available for cross-platform sharing, but we recommend apps like SHAREit or PhotoSync. Both of these are available for free on iPhone and Android devices.
Download: SHAREit for iOS | Android (Free)
Download: PhotoSync for iOS | Android (Free, subscription available)
3. Upload Videos to Social Media Platforms
If you want to share your iPhone videos with all your friends, family, and followers, then social media and video-sharing platforms are the best choice. Simply download your favorite app, log in, and upload your video using the app itself.
Here are some of the best apps to upload your iPhone videos to:
- YouTube: Public, private, or unlisted videos, with almost no size limits.
- Vimeo: Public and private high-quality videos limited to 500MB/week.
- Instagram: Public videos of up to one minute or longer with IGTV.
- Facebook: Public or private videos with a limit of 240 minutes or 10GB in size.
- Twitter: Public videos with a limit of two minutes and 20 seconds or 512MB in size.
- Flickr: Public or private videos with a limit of three minutes or 1GB in size.
All of these video hosting sites offer slightly different ways to upload videos from your iPhone. Most of them are available from the Share Sheet in the Photos app, but you can also choose to Upload, Post, or Share videos from within the apps themselves.
Which platform should you choose? If your videos aren't particularly long, use whichever service most of your friends and family already use. Just be warned that many social media apps employ fairly aggressive video compression.
4. Upload Videos to a Shared Album in iCloud
iCloud Shared Albums are one of the best ways to share videos with other friends and family members who have an iPhone. Shared Albums work like a private social media feed. Everyone gets notifications for new photos or videos and can add comments. You can even let other people add their own videos.
Shared Albums in iCloud don't use any extra iCloud storage, so you won't lose space because other people keep uploading more videos. For this to work, Apple compresses the uploaded videos. So they won't look as good on recipients' devices as they do on yours.
Here's how to create a Shared Album for sharing videos over iCloud:
- Launch Photos and find the video you want to share. Select multiple photos and videos if you want.
- Tap the Share button, then choose Add to Shared Album beneath the first two rows.
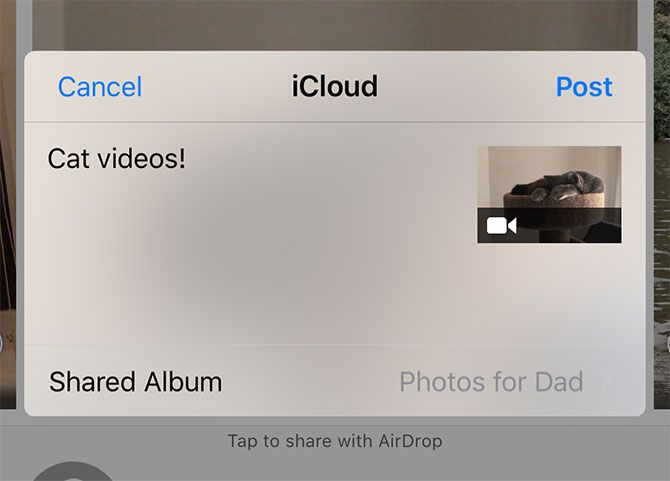
- In the popup that appears, add a comment to your video. Then choose a Shared Album or create a New Shared Album and pick who to share it with.
Why use iCloud Shared Albums? iCloud Shared Albums are free and easy to use with any Apple device, letting you add more pictures and videos to the same Shared Album time and time again.
Create an iCloud Link to Share Your iPhone Videos
To use iCloud Shared Albums, everyone needs to have an Apple device. But if you create an iCloud link for your videos instead, people can watch or download your videos from any device.
You can share these video links to people over text, email, social media, or even add a link on your blog. The links expire automatically after 30 days, but you can also choose to stop sharing your video earlier if you want.
Here's how to create an iCloud link for videos on your iPhone:
- Open Photos and select the video you want to make a link for.
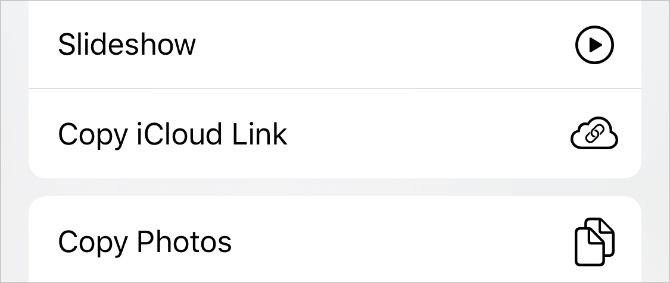
- Tap the Share button, then scroll down and select Copy iCloud Link.
- After your iPhone prepares the video link, Paste it into a text message, email, or social media post to share it with whoever you want.
- To stop sharing an iCloud link, go to the For You tab in Photos and find the Recently Shared section. Tap the video you want to stop sharing, then tap the three-dot menu (...) and choose to Stop Sharing.
5. Share Videos Using Google Photos
Google Photos is similar to iCloud Photos, but it's a better option for sharing with Android and Windows users. After uploading your iPhone photo and video library to Google Photos, you can share a link to your videos to anyone with a Google account.
Google lets you upload all your photos and videos to Google Photos for free in "high quality," which uses minimal compression to reduce the size of your files. You can upload original-quality videos instead, but these files will eat up your available Google Drive space (you get 15GB for free).
Here's how to share your iPhone videos using Google Photos:
- Open Google Photos on your iPhone. If this is your first time using it, sign in using your Google account and upload your iPhone photos and videos to Google.
- Select the video you want to share, then hit the Share button.
- Choose a recent Google contact or use the Search button to find a Google account using someone's name, phone number, or email address.
- Tap Next and write a message to send with your video, then tap Send to share it.

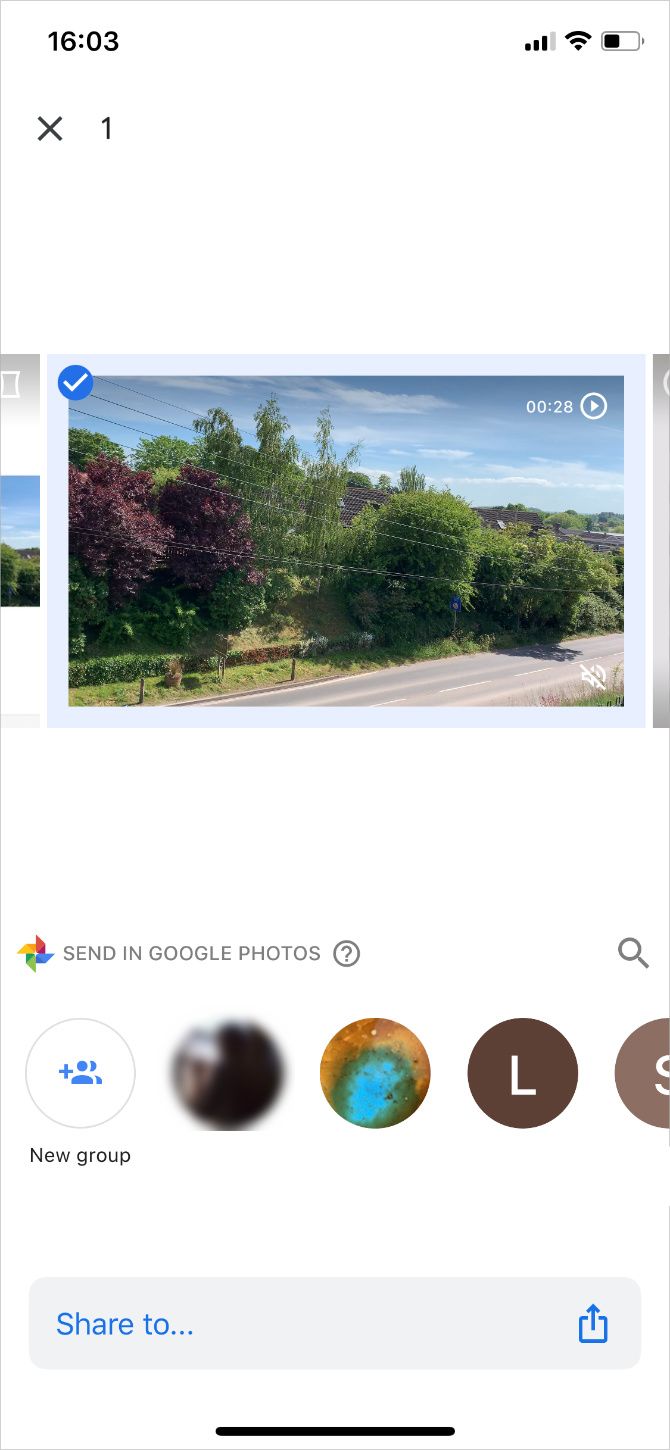
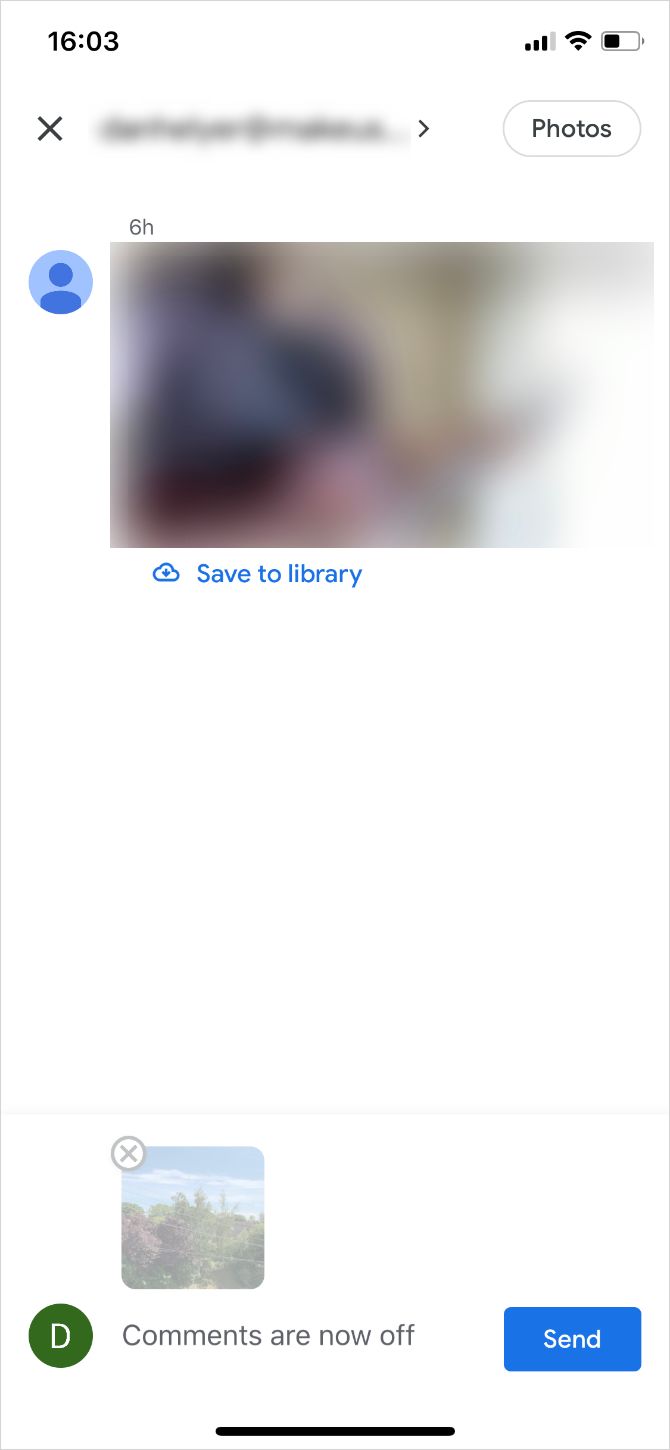
Why use Google Photos? It's perfect for sharing videos with non-Apple devices that can't access iCloud. Plus, you can use Google Photos to back up your videos online.
Download: Google Photos for iOS (Free, subscription available)
6. Create a Link Using Cloud Storage Services
If you only want to share a file with one individual or a small group of people, cloud storage services are the way to go. These services don't usually compress your videos, which means you can share them in the highest quality. This also means you might need more space for longer, higher-definition videos.
The lack of compression makes this the best way to share your iPhone videos when quality is a concern for editing or production purposes.
The key to success is having enough storage available on your chosen service. Our favorite options include Dropbox, Google Drive, and Microsoft OneDrive. Each one gives you a small amount of cloud storage for free.
Most cloud storage services work directly from the Share Sheet in the Photos app. But you can also upload files and make video-sharing links within the apps themselves on your iPhone. After creating a link, send it to your friends or family members in a text, email, or social media message.
Which service is best? Google Drive gives you a generous 15GB of space for free. Plus, if you use Gmail or YouTube, then you already have a Google account.
Download: Dropbox for iOS (Free, subscription available)
Download: Google Drive for iOS (Free, subscription available)
Download: Microsoft OneDrive for iOS (Free, subscription available)
7. Peer-to-Peer Transfer With Resilio Sync
You can share videos with a peer-to-peer setup using an app called Resilio Sync (formerly BitTorrent Sync). This removes the need for a cloud storage service, as Resilio Sync sends the file directly from your iPhone to the recipient's device.
Although Resilio Sync is secure and fast---limited only by your internet speed---both devices need to be online and using the app for the transfer to take place.
You need to leave Resilio Sync open on your iPhone for as long as it takes to transfer your videos. Thus, it isn't ideal for large files.
Here's how to share videos using Resilio Sync on your iPhone:
- Open Resilio Sync on your iPhone and make sure the recipient has it open on their own device.
- Tap the Add (+) button and choose to Share file. Select the video you want to share from your photo library.
- From the Share Sheet, choose how to send the Resilio Sync link to a contact.
- Once your contact starts receiving the file, you should be able to follow the transfer status at the bottom of the screen.
Why choose Resilio? If you want a secure peer-to-peer connection for sending uncompressed video, then this is the best way to share videos from your iPhone.
Download: Resilio Sync for iOS (Free)
Edit Your Videos to Perfection Before Sharing
For most users, sharing videos on Facebook or Instagram is good enough. iCloud Shared Albums is the way to go for private sharing if your friends and family all use Apple devices; otherwise Google Photos is a great alternative.
If you have the online storage space available, then cloud services like Dropbox are a good option for sharing uncompressed video files. And if you don't have enough storage, securely transfer videos directly between devices with Resilio Sync instead.
Choose the option that's right for you and keep the camera rolling. Just make sure you use some iPhone video editing apps to perfect your videos before you share them with the world.

