
Microsoft Excel offers two ways to link data: one is between spreadsheets in the same file, the other is between spreadsheets in separate files. Here, we’ll show you how to link two Microsoft Excel spreadsheet files and have data automatically imported from one into the other.
With this method, you don’t need to link Excel documents together. What’s more, when new data is input into the source file, the destination Excel file is updated immediately to reflect the change.
How to Sync Data Between Microsoft Excel Files
Here we’ll show you how to make it such that when data is entered into one Excel file ("Source data" in our example), it is automatically imported into another ("Destination file"). This is just one of the many ways to save time when using Microsoft Excel.
Here is what the source file in our example looks like.

To synch data between Excel files, do the following:
- Open both Microsoft Excel documents.
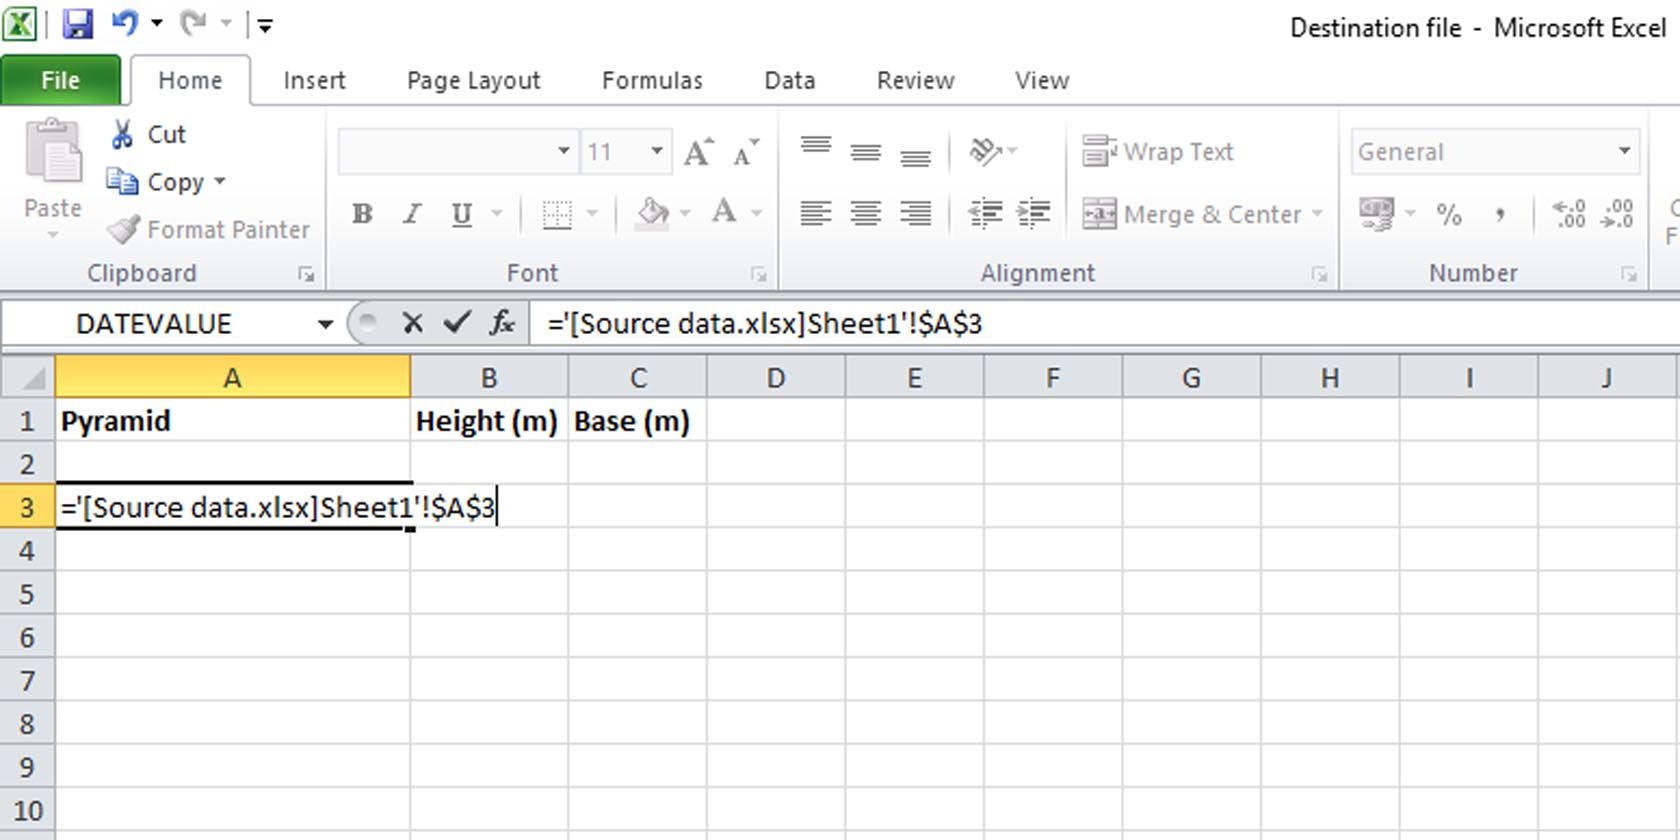
- In the destination file, click on the cell into which you want data to be automatically imported and press the Equal to key on your keyboard.
- Switch over to the source Excel file and click on the cell from which you want data exported.
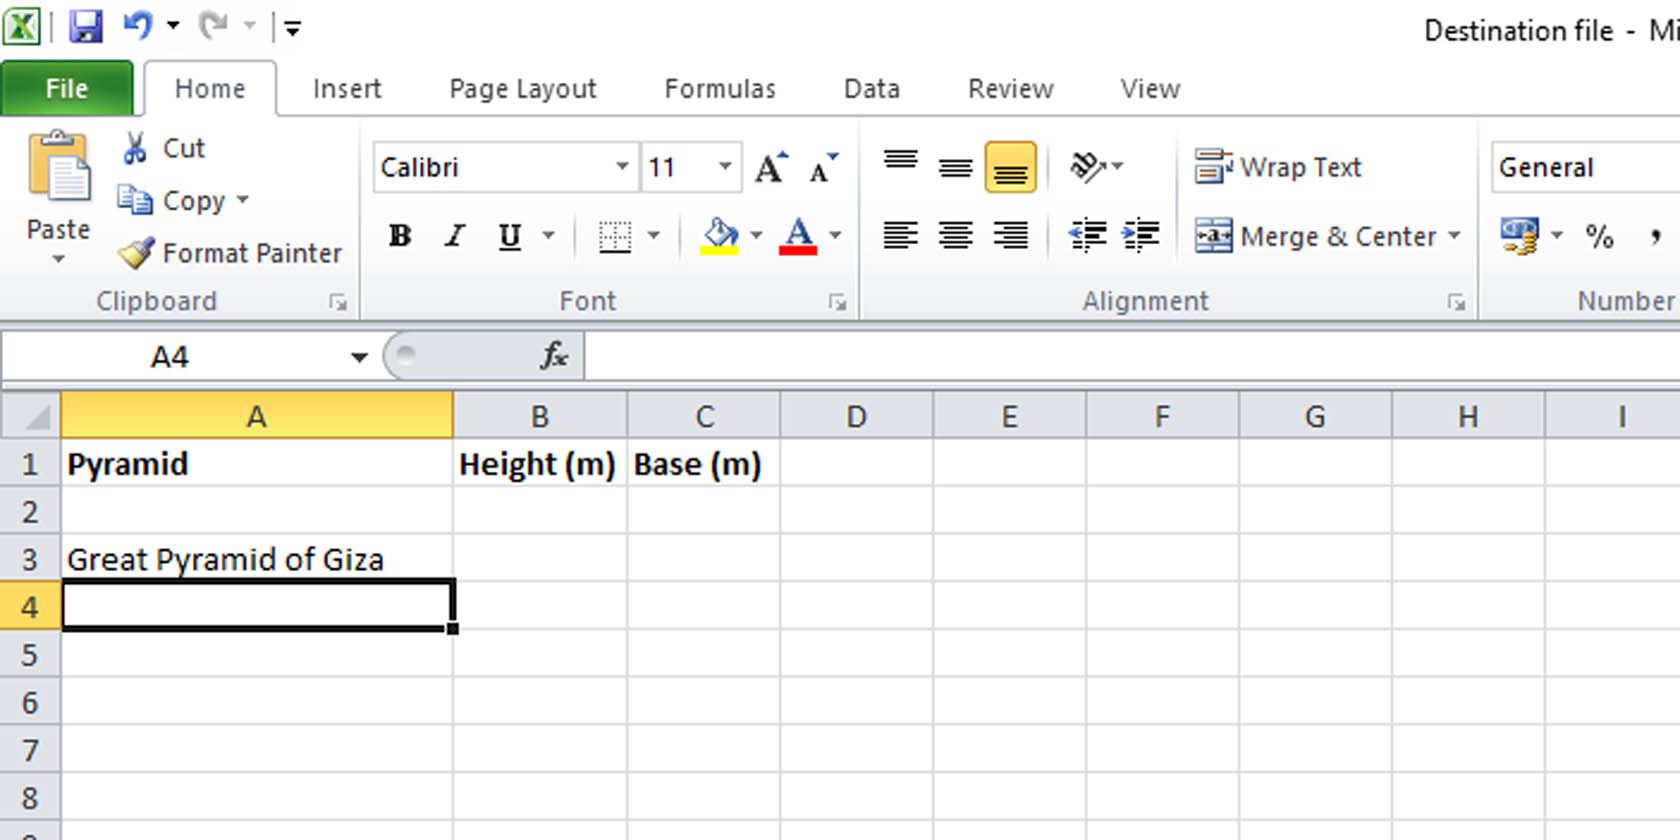
- Switch back to the destination file. You’ll see a formula in the cell in which you were working.
-
Remove the dollar signs from the equation. They are part of the cell reference portion of the equation.
-
Hit Enter.

-
You can now copy this cell and paste it into any cell in the destination file which you want to mirror in the source file. With it set up this way, the corresponding cell in the source file will be linked to the cell in the destination file. For instance, if you copy and paste this formula into cell A5 of the destination file, it will be linked to cell A5 in the source file.
- You can also drag the cell from the bottom right corner to fill the column. All cells formatted this way will reflect corresponding cells in the source file.


Any time data is added to the source file, it will be automatically filled in to the corresponding cells of the destination file, provided those cells contain the formula we’ve used above.
General Formula for Automatically Importing Data in Excel
The power of Microsoft's spreadsheet is that it lets you get the most out of your work with a few of Excel’s advanced features. All you need to know is a few handy formulas. Here’s the formula for importing data into Excel files in general. You can type it in manually if you don’t have the source file open.
='File_path\[File_name]Sheet_name'!Cell_reference
You’ll need to replace "File_path" with the actual file path of your source file, "File_name" with the name of the source file including the extension, "Sheet_name" with the name of the Excel worksheet, and "Cell_reference" with the cell in the source file from which data is to be imported. Don't forget to keep the quotation marks and exclamation point.

You can use it directly if you know the file path, file name, sheet name, and cell from which data is to be imported.
Here’s the formula as used in our example:
='D:\Excel doc data sync\[Source data.xlsx]Sheet1'!A3
Work Smarter and Increase Your Productivity in Excel
The simple method to automatically import data in Microsoft Excel by syncing files will save you a load of work and increase your productivity. It makes creating summary spreadsheets a breeze, and you can have all the relevant data on separate Excel sheets without the extra hassle of having to manually set them up.