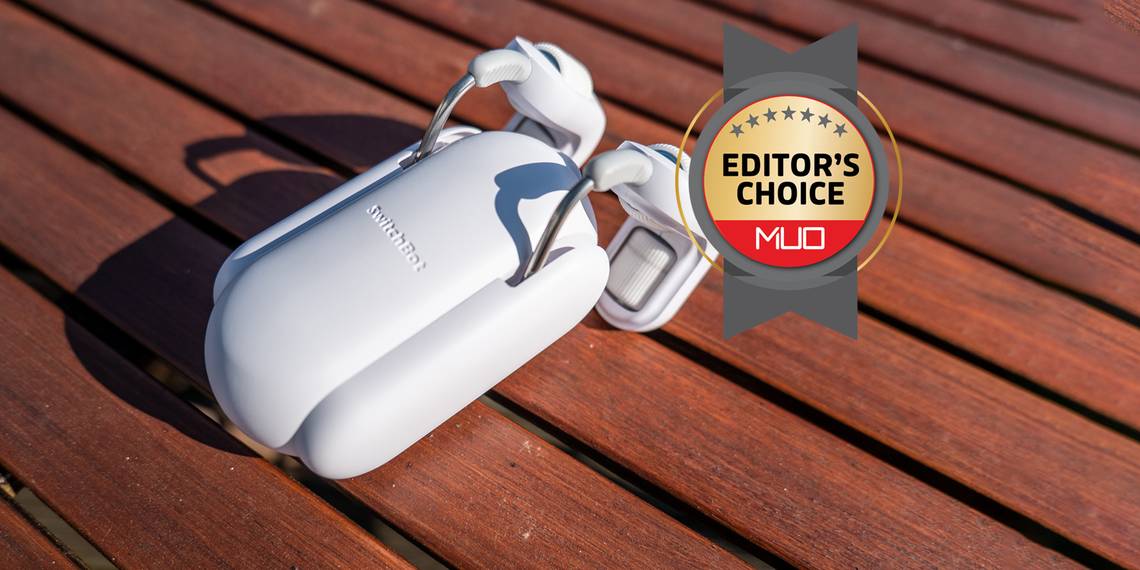
SwitchBot Curtain


SwitchBot has shown yet again it can play a critical role in your smart home setup by making any dumb devices smart. The SwitchBot Curtain reliably opens and closes your curtains for you, with on-device scheduling and Bluetooth control. But if you need more dynamic automation, you can add in the Hub Mini for cloud and voice assistant control. Combine with the other SwitchBot products (such as the generic button presser), and you'll soon have the ultimate smart home.
- Brand: SwitchBot
- Connectivity: Bluetooth
- Weight: 260g
- Dimensions: 3.94 x 1.97 x 1.18 inches
- Battery Life: Up to 6 months
- Compatible with: Rods, U-rails, I-rails
- Choose carefully—but they have models for most curtain types
- Rod 2.0 handles extendable rods more reliably
- The wider SwitchBot ecosystem lets you automate practically anything
- On-device scheduling without need of a hub or phone
- Bluetooth range is great
- Simple to install with o inavsive modification needed of your curtains or fixings
- Can get pricey if you need a double pack, with solar chargers, and smart hub
I admit curtains were the last thing I would have thought of automating. But only because I rarely think about curtains at all. In fact, I don't think I've ever closed them, but I really ought to. It turns out that curtain automation was the very thing I needed after all.
The SwitchBot Curtain is a little robot that sits on your rod, and does the job for you. As it were. Join me today as I put the SwitchBot Curtain (the older Rod and newly released Rod 2 type) through its paces. I'll also take a look at the wider SwitchBot ecosystem, some accessories to go with the SwitchBot Curtain, and how they can all integrate together.
What Is SwitchBot?
The SwitchBot empire began as a smart button presser: a little robot with a lever that would come out and press a button for you. It enabled you to make any one-button dumb device—like a coffee machine—smart. At the time, I passed on the opportunity to review one, because it sounded like the height of laziness, and keeping these dumb devices around within a smart home just didn't feel right.

But as my smart home journey continued, past the peak of inflated expectations, plummeting into the trough of disillusionment, and rising back to the plateau of contentment, I've realized that older, dumb products, are an essential part of the ultimate smart home. It's not about getting all the whizzy smart Wi-Fi-equipped gadgets, because half the time they won't even work together thanks to different standards.
Instead, it's about automating the common everyday tasks to actually save you time and effort. The SwitchBot ecosystem is a great solution for many of these.
Curtain Types: Choose Carefully!
SwitchBot really have considered every type of curtain out there, and they have four or five different SKUs to suit most curtain types:
- Rod and Rod 2 (both 15-40mm diameter)
- U-rails; both EU and US-style
- I-rails
Rod 2 is the newest version designed for curtains that run along a rod, with improved handling of extendable rods, but is otherwise functionally identical. Ensuring you’ve selected the right type and that your particular system is compatible is a crucial step, so do check over the product page very carefully.

For this review, we tested a few of the SwitchBot Curtain Rod and Rod 2 types, which support rods from 15-40mm in diameter. All of our test rods hovered around the lower end at about 18mm, but we can't see why it wouldn't perform just as well with thicker rods.

What about different curtain types though? Not to worry: if they run on a rod, the SwitchBot Rod likely supports them:
- Ring-top curtains, which attach to a set of rings using curtain hooks.
- Grommet curtains, which have reinforced cut-outs at the top of the curtain.
- Tab-top curtains, which feature a loop of material that the curtains hang from.
- Back-tab curtains, which are similar to tab-top curtains, except the loop of material is affixed to the back of the curtain rather than the top.
Ring-top and grommet curtains are typically the easiest of installations, requiring no more than simply attaching the SwitchBot Curtain device. Tab-top and back-tab curtains are a little more complex, and can require some additional fixings, such as plastic clips (included in the box).

Double Curtains
If like most people, your curtains exist as a pair, you can either buy two SwitchBot Curtain devices, or join them together. Thankfully, SwitchBot has bulk discounts, so if you purchase as a pair, it costs $160, rather than $99. You can save even more in a 4-pack.
Test 1: Ring Top, Non-Extendable Rod
For our first test, I tried a basic ring top type of curtain with a non-extendable rod, so the installation was simple, and I used the original Rod type. These feature a ratcheting clip, and you'll need to push them together a little more strongly than you think they ought to be in order to grip the rod correctly. I needed two SwitchBots here due to the length of the rod—it had a supporting point in the center that couldn't be removed.

Adding the device to the SwitchBot app is trivial thanks to the Bluetooth connectivity. It's automatically detected, and you can then name it, and specify which type of product and curtain you're being used with. Because this curtain was a pair, I had to immediately add another SwitchBot curtain before I could continue to calibration. Don't worry—you won't have to control both SwitchBots, as they'll appear in the app as a single item (although you can if you want). However, once added, you will need to calibrate each one.
It's also not a problem if one side of your curtains is longer than the other, as ours is: once calibrated, both will go only as far as they need to. Calibration is a little tricky the first time due to the use of three small onscreen buttons: left, pause, and right. You need to move the SwitchBot using those buttons, and stop it at the precise start and endpoints of your rod. If you let it overrun by even a small amount, the calibration will not complete as it'll never be able to perform a full open or close action. It took a couple of tries to get the knack of it, but eventually, it worked fine.
If you find the SwitchBot isn't able to fully close your curtains, it's worth moving the first curtain ring back an inch or so, such that there's a bit of overlap.
Test 2: Tab-Top, Extendable Rod, Single Curtain
For the next test, I tried on an extendable rod, albeit one where the difference between the extension and main rod is very slim. These curtains are lightweight, tab-top style, and I also opted to remove the center support of the curtain rod so that I could attach both curtains together, thereby able to do the whole length with one device.

For use with tab-top curtains, you'll find a number of plastic clips in the box. These should be installed on the first two tabs, surrounding where the SwitchBot will sit, and facing each other. The other two clips can then be placed on the next two tabs, facing the same direction as the second. It's easy enough to install, but with such lightweight curtains I do sometimes have to correct them, having slipped down to the side. Heavier curtains would ensure they stay on top of the rod.

Installation the SwitchBot Rod 2 is a little more complicated, and must be done in two halves. Sprung metal arms on the top ensure the tension is kept around the rod, and once both are on, you can clip the two halves together.
In this case, the single SwitchBot had no problem pulling the two curtains halves, nor did it experience any issues when going over the extension rod. Another success!
Test 3: Grommet Type, Tricky Extendable Rod
Next up, it was off to the guest room, where we have some grommet-type curtains. The extendable rod here is much more difficult, with a difference of about a millimeter or two between the extension and the main rod. Initial testing showed that the Rod 2 device simply couldn't overcome the gap. Not to worry though: included in the pack is a metal smoothing plate embedded in some clear tape. Just remove the thin layer of plastic backing (not the entire piece of plastic - you need that tape), then carefully smooth it over the extension piece. The result isn't perfect, but does allow the Rod 2 device to transition from one side to the other.

Unfortunately, it's at this point that I found out the grommet curtains we have in here are really quite rubbish as far as curtains go. After pulling for a certain length, the tension they create on the rod stops them from moving any further. This isn't really a failing of the SwitchBot—I can't pull these curtains by hand either (which is probably why they're in the guest room).

SwitchBot also include a plastic chain in the box for use with stubborn grommet curtains like these, but unfortunately, the spacing of the clips didn't quite work for us.
Test 4: Ring-Top, Extendable Rod
Up in my kid's bedroom, we have a very wide double window frame with the same type of extendable rod as the guest room; so again, I needed to use the included metal plate to even out the transition. Because of the length, we also needed two SwitchBot devices here. Thankfully, the ring-top style curtains presented no issues, and operation here has been smooth throughout.

Bluetooth Control and Set-Up
No matter which style of SwitchBot Curtain you’ve got, after downloading the SwitchBot app and creating an account, adding devices is unexpectedly simple. It all runs once Bluetooth, so there's no need to connect to an ad-hoc network, or try to remember your own Wi-Fi details to transmit over then wait for it to join; it's right there, immediately. Select the new device which is automatically detected, and proceed to configure it,


Out of the box, the SwitchBot Curtains are only compatible with Bluetooth, which means your phone needs to be in range in order to control them. That said, because of the low data requirements I found the range to be more impressive than, say, Bluetooth audio devices, which typically cut out at about ten meters or behind a wall. I was easily able to control from the room directly above, next to, or just down the corridor. I also found they were much quicker to come alive in the app compared to most IoT devices, which take at least a few seconds to ping back status and be accessible.


If you want additional smart features, you'll need to also purchase a SwitchBot Hub Mini, however, there's one exception to this: scheduling. You can create some basic schedules of operation and save those to the SwitchBot Curtain itself. For most use cases, this will probably be enough. In autumn and winter, I'll set up a standard close action in the evening and open in the morning to heat the room. In summer, I'll switch over to closed in the daytime (to keep the room cool), and open at night (to let in cool air). Not everyone needs to control their bedroom curtains from the kitchen.
Battery Usage, and Solar Panel
After a few weeks of twice-daily usage to open and close, the SwitchBot curtains were down to about 85%. That works out to about 3-6 months before they'll need charging (over USB-C). Of course, we already have enough devices in our lives without needing to recharge the curtain bots too, which is why SwitchBot also sell an optional solar panel. This attaches directly to the back of your SwitchBot Curtain to keep it topped up.

If the placement isn't suitable, because your curtain rod is too high up, not to worry. The set also includes some adhesive velcro tabs, and a short 50cm USB-C cable is hidden in the back of the solar panel. It's a really elegant and efficient design.
You do need fairly bright sunlight levels for these small panels to work. If your windows are shadowed most of the day or overlooked by the neighbor's house, it may not work for you. If your curtains retract fully off to the side of your windows, such that the panels will never see the sun at all, it obviously isn't going to work either. Since we'll be keeping the curtains closed in summer, it should charge the battery enough then to last all through winter.
SwitchBot Hub Mini, and IR Devices
If you want to add cloud control, third-party automation, and voice assistant integration, you'll need a SwitchBot Hub Mini. The Hub Mini acts as a replacement Bluetooth controller for any devices you connect it to, giving you the ability to remote control from anywhere in the world, or making the device accessible to Google Home and Alexa, as well as automation services such as IFTTT. It also enables you to create scenes; a set of SwitchBot actions, which we'll cover more later. While Apple's HomeKit isn't directly supported, you can export the scenes to a Siri Shortcut.


The SwitchBot Hub Mini also has another secondary function: it can act as an infra-red blaster to control your other non-smart devices, such as TV or aircon. The process of learning a device is simple enough, and if the device is in the database then all the buttons are ready to use. If not, you can still teach it individual buttons, but you might want to save the hassle and just learn the buttons you actually need to be automated.
Not sure if your remote is infrared (IR)? Look for an LED at the front. If you see the letters "Mhz" or "Ghz" somewhere on the label at the back, it's probably a radio-frequency-based controller, not IR. These can't be controlled by the Hub Mini.

Once you've added an IR remote to the Hub Mini, it'll appear as a device on your main screen, ready to be controlled. You can also add an action for that device into any scene you create. For instance, I created a movie night scene, consisting of:
- Close the cinema curtains with the SwitchBot Curtain.
- Turn on the amplifier, from the Hub Mini.
- Turn on the projector, from the Hub Mini.
- Turn on the PC, using one of the original SwitchBot momentary button pushes.
This is a routine I go through at least once a week, walking around various switches in the cinema room, while we're all waiting for things to boot up. It takes a few minutes at least! Now, I can do that from the kitchen—with a simple command to Siri on my watch—and the room is ready by the time we get there. That might seem like a trivial automation, but it's going to save me a few hours a year.

There are a few caveats to using the Hub Mini though. The first is that your devices will no longer work over Bluetooth (as the Bluetooth is now paired with the Hub Mini, rather than your phone). If my Wi-Fi was playing up, or Starlink was experiencing a short outage, I found this meant my devices would disappear completely from my account, which was a bit disconcerting.
Secondly, you should be aware that dumb devices don't report their status back to the controller, so it's possible to get out of sync. For instance, my PC has a single power button, being operated by a SwitchBot button presser. Turning it on or off is the same action in either case. But if I accidentally power off using the Windows shutdown, the automation to turn everything off will instead power it back on again. If you stick to just using scenes and remember not to try and manually control things, you won't have a problem.
Manual Control and Assist Mode
You're probably wondering if you can still pull your curtains closed or open after fitting a SwitchBot Curtain, and the good news is, yes you can, if you've enabled Assist Mode in the settings. In fact, as the name suggests, it's even better. Just tug lightly on either side, and the SwitchBots Curtains will take over and finish the job for you!
Remote Control
If you don't want to be woken by the whirring sound of automated curtains in the morning, and would rather just control them yourself when you wake up, another optional accessory you might consider is the aptly named SwitchBot Remote. This works with all SwitchBot products, not just the Curtains. It features two buttons, and each can be assigned to a single action. This is perhaps the weakest offering in the SwitchBot empire, when compared to similar smart home button products like the Flic. Flic allows you to assign one press, double, or even long press, to distinct actions. The SwitchBot Remote meanwhile has two buttons, but each can only have one action.
Is It Worth It?
Where I’m from, curtains tend to come as a pair. This means that for a single window, you'll need a set of two SwitchBots at $160. If you don't want to recharge them, you might also want to add a few solar panels (another $40), and perhaps the Hub Mini to allow for remote and cloud control. At that point, you're potentially $250 in to make single pair of curtains "smart". That's a fair chunk of change for anyone. You can cut that significantly if you buy in bulk, modify your curtains to be a single run, and only need a basic schedule.

I am blown away by the adaptable nature of the entire SwitchBot ecosystem. For the Curtain product specifically, the issue of awkward extendable rods can be overcome more easily with the Rod 2 version, so they now work with more types of curtains and rods than ever.
SwitchBot has clearly put a lot of thought into handling many types of typically dumb products around the house, and I can't wait to see what they come up with next. The original SwitchBot button presser at $30 is remarkably good value for money, and plugs a hole in the smart home ecosystem that's badly needed. The Hub Mini is also good value, and not only a good upgrade for adding cloud control to your SwitchBot devices, but also makes for a very effective quick and dirty infra-red controller. Throw in some IFTTT automation support, and we've got a winner.
For me, the most powerful aspect of the SwitchBot devices was having every part of a regular routine integrated—close the curtains, turn on the projector and AV receiver, power on the PC—all via a Siri shortcut. That's the sort of smart home magic that excites me, and it's simply not been possible before.
If you can afford it, SwitchBot will fill the gaps in your smart home.