Page views are an important metric for tracking web performance. Software tools like Google Analytics and Fathom provide a simple way of doing this with an external script.
But maybe you don’t want to use a third-party library. In such a case, you can use a database to keep track of your site’s visitors.
Supabase is an open-source Firebase alternative that can help you keep track of page views in real time.
Prepare Your Site to Start Tracking Page Views
You need to have a Next.js blog to follow along with this tutorial. If you don’t already have one, you can create a Markdown-based blog using react-markdown.
You can also clone the official Next.js blog starter template from its GitHub repository.
Supabase is a Firebase alternative that provides a Postgres database, authentication, instant APIs, Edge Functions, real-time subscriptions, and storage.
You will use it to store the page views for each blog post.
Create a Supabase Database
Go to the Supabase website and sign in or sign up for an account.
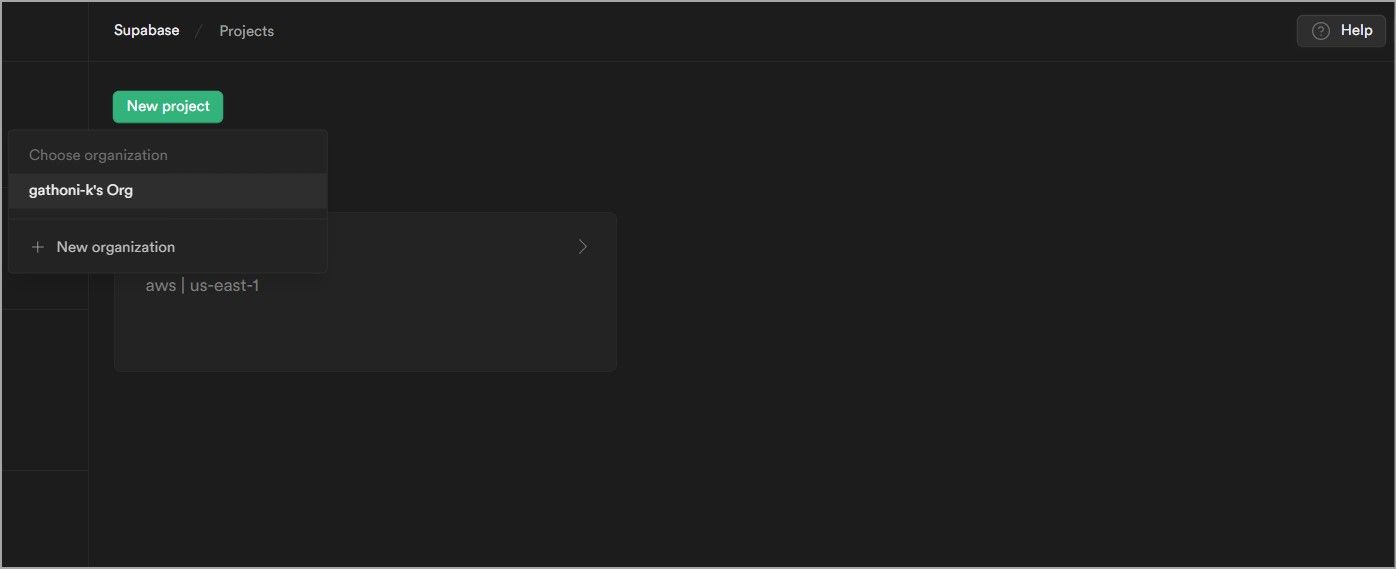
On the Supabase dashboard, click on New Project and choose an organization (Supabase will have created an organization under the username of your account).
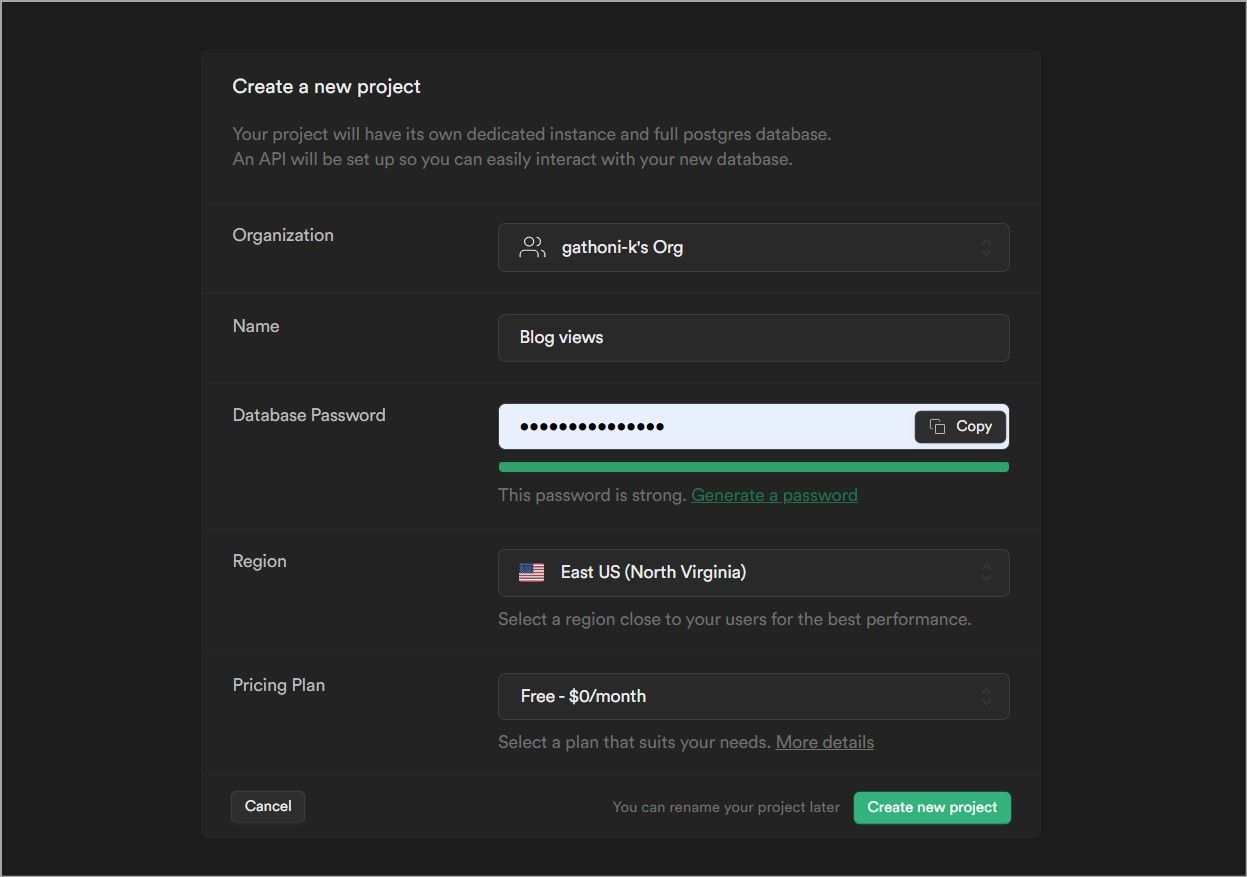
Fill in the project name and the password then click Create new project.
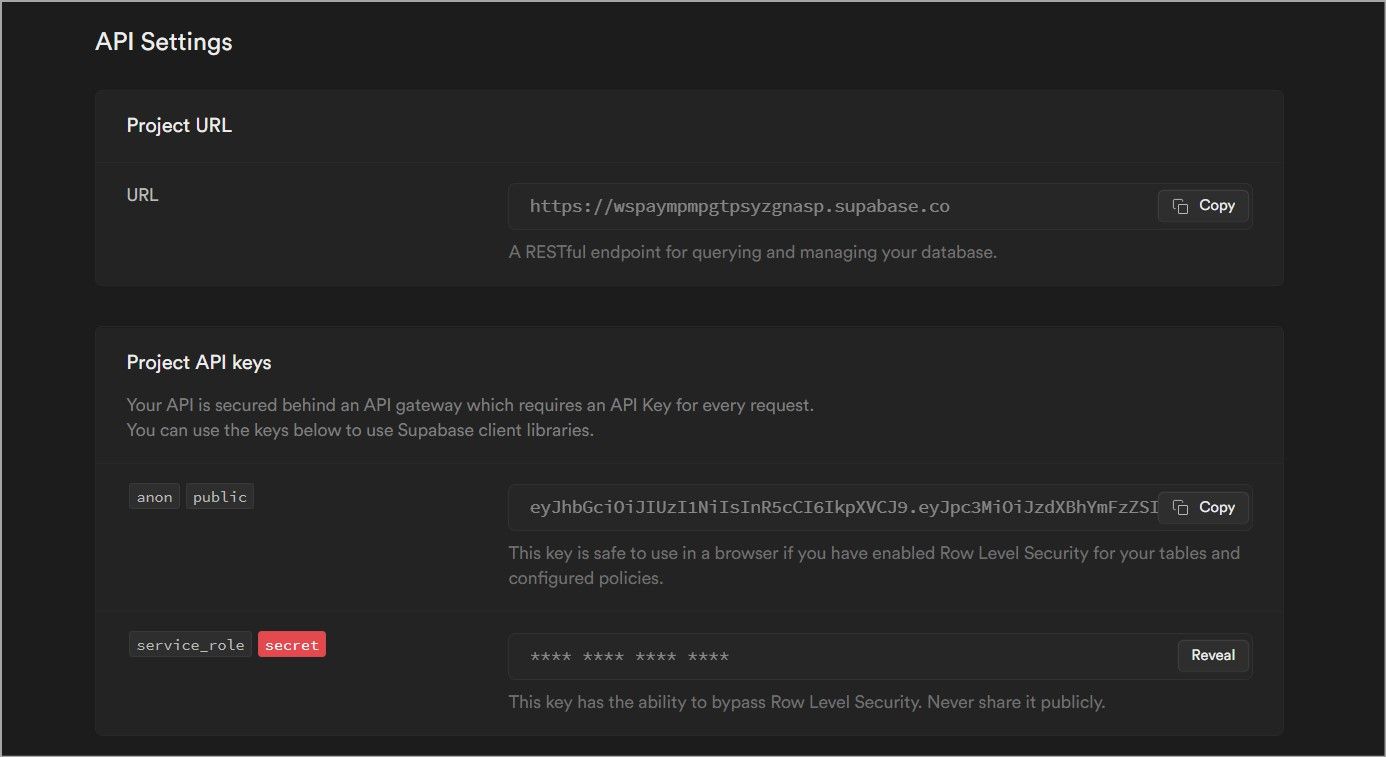
In the settings page under the API section, copy the project URL and the public and secret keys.
Open the .env.local file in Next.js project and copy these API details.
NEXT_PUBLIC_SUPABASE_URL=""\nNEXT_PUBLIC_SUPABASE_KEY=""\nSUPABASE_SERVICE_KEY=""\n
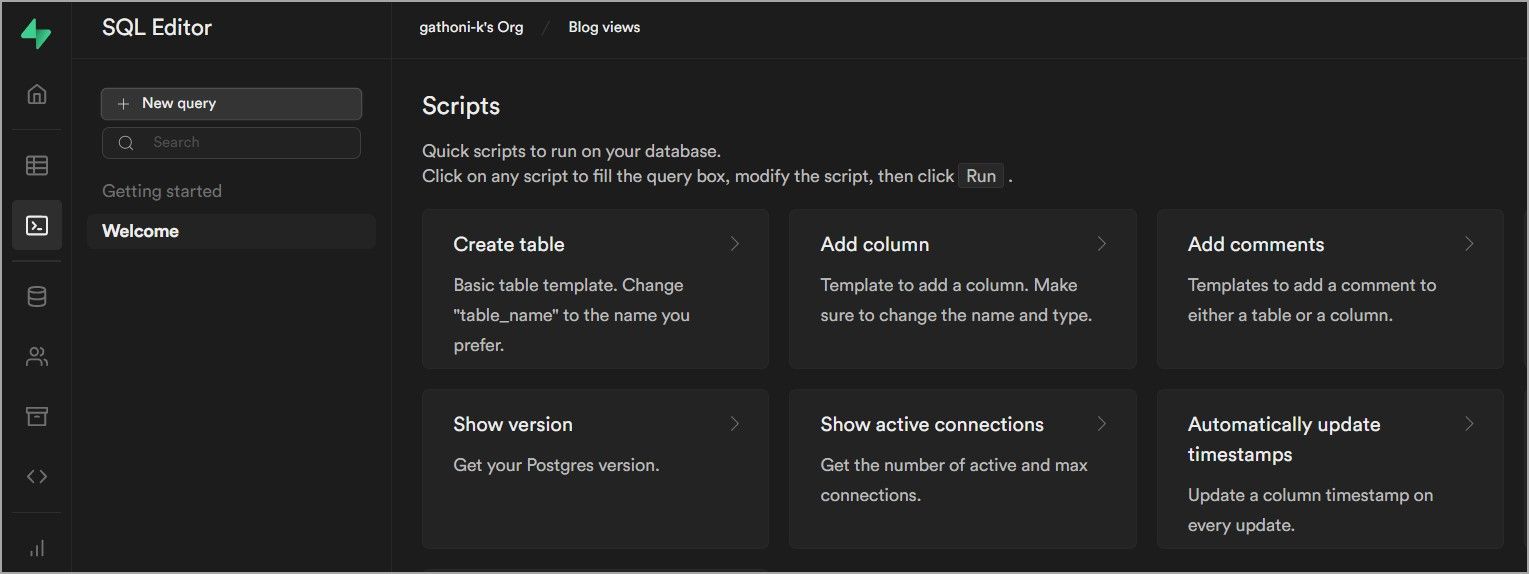
Next, navigate to the SQL editor and click on New query.
Use the standard SQL command to create a table called views.
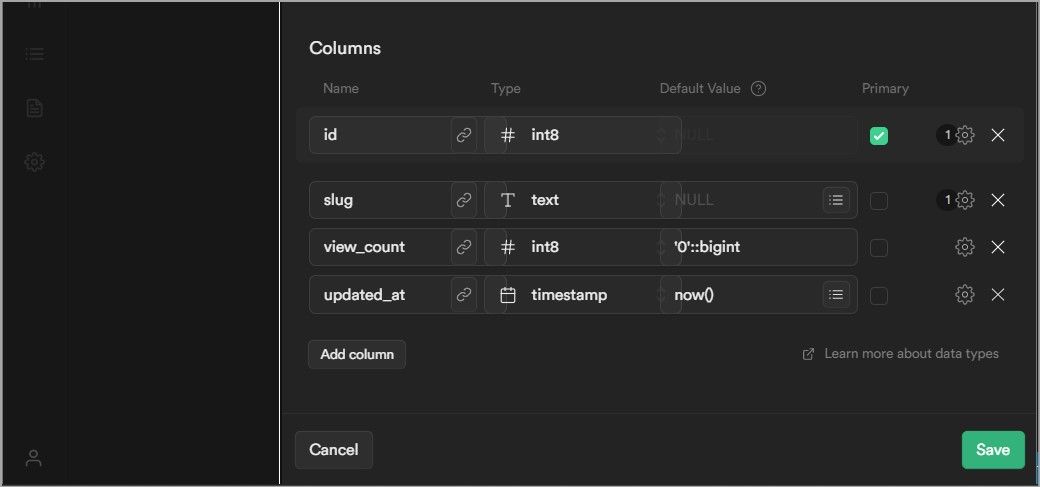
CREATE TABLE views (\n id bigint GENERATED BY DEFAULT AS IDENTITY PRIMARY KEY,\n slug text UNIQUE NOT NULL,\n view_count bigint DEFAULT 1 NOT NULL,\n updated_at timestamp DEFAULT NOW() NOT NULL\n);\n
Alternatively, you can use the table editor to create the views table:
The table editor is on the left pane of the dashboard.
Create a Supabase Stored Procedure to Update Views
Postgres has built-in support for SQL functions which you can call via the Supabase API. This function will be responsible for incrementing the view count in the views table.
To create a database function, follow these instructions:
- Go to the SQL editor section on the left pane.
- Click New Query.
-
Add this SQL query to create the database function.
        CREATE OR REPLACE FUNCTION update_views(page_slug TEXT)
RETURNS void
LANGUAGE plpgsql
AS $$
BEGIN
    IF EXISTS (SELECT FROM views WHERE slug=page_slug) THEN
        UPDATE views
        SET view_count = view_count + 1,
            updated_at = now()
        WHERE slug = page_slug;
    ELSE
        INSERT into views(slug) VALUES (page_slug);
    END IF;
END;
$$; - Click Run or Cmd + Enter (Ctrl + Enter) to execute the query.
This SQL function is called update_views and accepts a text argument. It first checks whether that blog post already exists in the table and if it does, it increments its view count by 1. If it doesn’t, it creates a new entry for the post whose view count defaults to 1.
Set Up Supabase Client in Next.js
Install and Configure Supabase
Install @supabase/supabase-js package via npm to connect to the database from Next.js.
npm install @supabase/supabase-js\n
Next, create a /lib/supabase.ts file in the root of your project and initialize the Supabase client.
import { createClient } from '@supabase/supabase-js';\nconst supabaseUrl: string = process.env.NEXT_PUBLIC_SUPABASE_URL || '';\nconst supabaseServerKey: string = process.env.SUPABASE_SERVICE_KEY || '';\nconst supabase = createClient(supabaseUrl, supabaseServerKey);\nexport { supabase };\n
Remember you saved the API credentials in .env.local when you created the database.
Update Page Views
Create an API route that fetches the page views from Supabase and updates the view count every time a user visits a page.
You will create this route in the /api folder inside a file called views/[slug].ts. Using brackets around the file name creates a dynamic route. Matched parameters will be sent as a query parameter called slug.
import { supabase } from "../../../lib/supabase/admin";\nimport { NextApiRequest, NextApiResponse } from "next";\nconst handler = async (req: NextApiRequest, res: NextApiResponse) => {\n if (req.method === "POST") {\n await supabase.rpc("update_views", {\n page_slug: req.query.slug,\n });\n return res.status(200).json({\n message: "Success",\n });\n }\n if (req.method === "GET") {\n const { data } = await supabase\n .from("views")\n .select("view_count")\n .filter("slug", "eq", req.query.slug);\n if (data) {\n return res.status(200).json({\n total: data[0]?.view_count || 0,\n });\n }\n }\n return res.status(400).json({\n message: "Invalid request",\n });\n};\nexport default handler;\n
The first if statement checks whether the request is a POST request. If it is, it calls the update_views SQL function and passes in the slug as an argument. The function will increment the view count or create a new entry for this post.
The second if statement checks if the request is a GET method. If it is, it fetches the total view count for that post and returns it.
If the request is not a POST or GET request, the handler function returns an “Invalid request” message.
Add Page Views to the Blog
To track page views, you need to hit the API route every time a user navigates to a page.
Start by installing the swr package. You will use it to fetch the data from the API.
npm install swr\n
swr stands for stale while revalidate. It allows you to display the views to the user while fetching up-to-date data in the background.
Then create a new component called viewsCounter.tsx and add the following:
import useSWR from "swr";\ninterface Props {\n slug: string;\n}\nconst fetcher = async (input: RequestInfo) => {\n const res: Response = await fetch(input);\n return await res.json();\n};\nconst ViewsCounter = ({ slug }: Props) => {\nconst { data } = useSWR(`/api/views/${slug}`, fetcher);\nreturn (\n <span>{`${\n (data?.total) ? data.total :"0"\n } views`}</span>\n );\n};\nexport default ViewsCounter;\n
This component renders the total views for each blog. It accepts a post’s slug as a prop and uses that value to make the request to the API. If the API returns views, it displays that value otherwise it displays “0 views”.
To register views, add the following code to the component that renders each post.
import { useEffect } from "react";\nimport ViewsCounter from "../../components/viewsCounter";\ninterface Props {\n slug: string;\n}\nconst Post = ({ slug }:Props) => {\n useEffect(() => {\n fetch(`/api/views/${slug}`, {\n method: 'POST'\n });\n }, [slug]);\nreturn (\n <div>\n <ViewsCounter slug={slug}/>\n // blog content\n </div>\n)\n}\nexport default Post\n
Check the Supabase database to see how the view count is updating. It should increase by 1 every time you visit a post.
Tracking More Than Page Views
Page views let you know how many users are visiting specific pages on your site. You can see which pages are performing well and which aren’t.
To go even further, keep track of your visitor’s referrer to see where traffic is coming from or create a dashboard to help visualize the data better. Remember you can always simplify things by using an analytics tool like Google Analytics.


