While most of the internet runs on dynamic addresses these days, static addresses are sometimes helpful to use as well. Whether you need to run a server of your own, set up external devices or services, or are just simply looking to explore, before you get your hands dirty, you need to know your way around and be super careful while setting up an IP address.
Moreover, there's more than one way to go about this. So, one by one, let's look at all the ways you can easily set up a static IP address on your Windows.
Static IP Addresses: The Whys and Hows
An IP address of a computer that stays the same over time is known as a Static IP address. This is in contrast to a dynamic IP Address, which is an address that can tweak over time.
Today, most devices use a dynamic IP address because of their ease of use and management. However, in rare cases, Static IP addresses can become handy. Some of those cases include:
- When you have external devices that you can only connect to your network through your IP address.
- When you connect to other networks through a VPN.
- Static IP addresses can make hosting a server somewhat easier.
Because of a slew of such benefits, using a Static IP address can make your life super easy in some situations. So, now let's look at the different methods you can use to set up a static IP address for yourself.
How to Set a Static IP Address on Windows 11
Like most things on Windows, you have multiple ways to do this. Let's look at the most straightforward method first, which is using Windows Settings.
Here's how you can set a static IP Address using the Windows settings:
- Head to the Start menu search bar, type in 'settings,' and select the best match. Alternatively, press the Windows Key + I to launch the Settings menu.
- Then head to Network & internet settings.
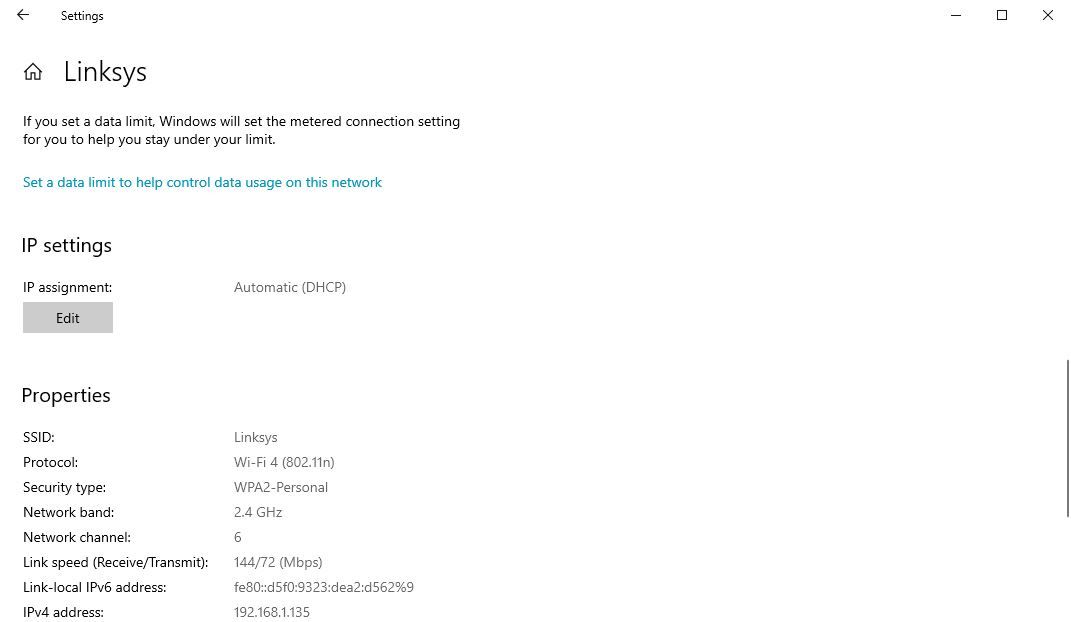
- Look for the Properties button. It's right next to your connection settings.
- Scroll down and look for the IP assignment section. Then click on Edit.
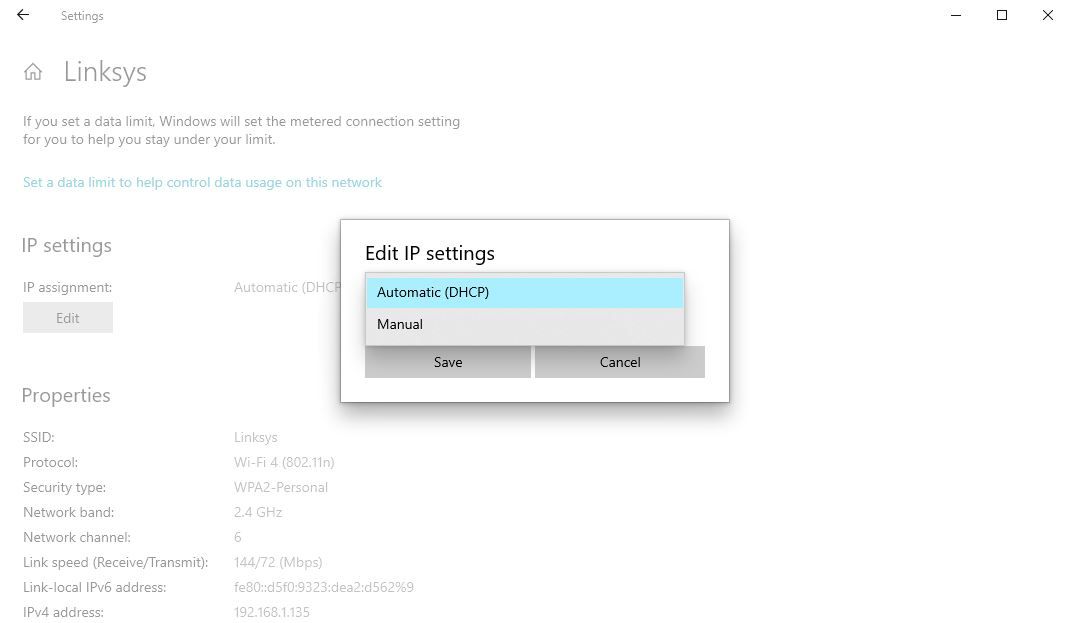
- In the new Edit IP settings dialog box, click on the scroll-down menu and select Manual.
- Toggle on the switch for the IPv4 button.
- Fill in all the network details here, including the IP address, Subnet mask, Gateway, and then click on Save.

Follow the above steps meticulously, and your Windows 11 will have a new static IP address from here on.
How to Set Up a Static IP Address on Windows 10
The basics of setting up an IP Address in Windows 10 are similar. Even though the implementation of steps might differ here and there, you have to follow a pattern that's pretty much the same. Here's how:
- Open the Windows 10 Settings.
- Click on Network & Internet.
- Depending on how you are connected to the Internet, select Wi-Fi or Ethernet.
- Select the current network connection.
-
Under IP settings, select the Edit button.
-
Click on the drop-down menu and select Manual.
- Toggle on the IPv4 switch.
- Set up the static IP address here and fill in other relevant information, such as the Preferred DNS, Default Gateway, etc.
- Click on Save.


After you are done, you will have a new static IP address on your PC from here on.
How to Set Up a Static IP With Command Prompt
The above method, using the Settings GUI, is only one of the ways to tweak your IP address settings. For those of you who tilt more towards a command line rather than a simple click-and-play GUI, luckily, alternatives exist. For instance, you can also use the Command prompt, and set up the address with just a few commands.
To change up your IP address through your Command Prompt, follow the below steps:
- Head to the Start menu search bar, type in 'cmd,' and launch the cmd as administrator.
-
Type in the following command in the cmd and hit Enter:
ipconfig /all
-
Under Ethernet adapter, note the information for the following data:
- IPv4
- Subnet mask
- Default Gateway
- DNS Servers
-
Type in the following command to assign static IP address on your Windows and hit Enter:
netsh interface ip set address name= "Ethernet1" static 10.1.4.220 255.255.255.0 10.1.4.1
In the above command, replace Ethernet1 with the name of your adapter, and change 10.1.4.220 255.255.255.0 10.1.4.1 with the device IP address, subnet mask, and default gateway address corresponding to your network configuration -
Now type the following command to set up a DNS server address and hit Enter:
netsh interface ip set dns name= "Ethernet1" static 10.1.4.1

That's it. Your new static IP address will be set up from here.
How to Set Up a Static IP Address With PowerShell
PowerShell is another tool primarily handy for power users, designed to give them more control and management capabilities through task automation. If any of the above methods fail, you can also use PowerShell to set up the Static IP Address. Here’s how you can get started:
- Head to the Start menu search bar, type in ‘powershell,’ and run it as administrator.
-
Type the following command to view your current network configuration and press Enter:
Get-NetIPConfiguration
-
Confirm the following information fields:
- InterfaceIndex
- IPv4Address
- IPv4DefaultGateway
- DNSServer
-
Type in the following command to set up a static IP address and hit Enter:
New-NetIPAddress -InterfaceIndex 10 -IPAddress 10.1.4.119 -PrefixLength 24 -DefaultGateway 10.1.4.1
- Here, replace all values of information. Replace the InterfaceIndex number (10) with the number assigned to your adapter. Similarly, replace the above IPAddress with a static IP address that you want to set.
-
Finally, type in the following command to assign the DNS server address and hit Enter:
Set-DnsClientServerAddress -InterfaceIndex 10 -ServerAddresses 10.1.4.1
Again, replace the InterfaceIndex number (10) with your network’s corresponding number. Also, replace the ServerAddress with the DNS IP address.
You will have a new static IP address as soon as you finish all the above steps.
Setting up a Static IP Address on a Windows PC
Setting up your static IP address doesn't have to be complicated. If you follow the above methods we have laid out above, you should be done without any significant difficulties.
And while static IP address has their uses, dynamic addresses are undoubtedly necessary. So, before you make an important switch, ensure you understand their significant differences well.