There are many ways to initialize a Spring Boot application. Your IDE may already integrate Spring’s Initializr or you can manually create the file structure yourself. But the best approach might be Spring’s web-based Initializr tool.
The Initializr tool allows you to generate the basic file structure for any Spring application. It provides you with several options that enable you to customize your application.
Find out how to generate any Spring Boot application using the Initializr.
Project Type and Programming Language Selection
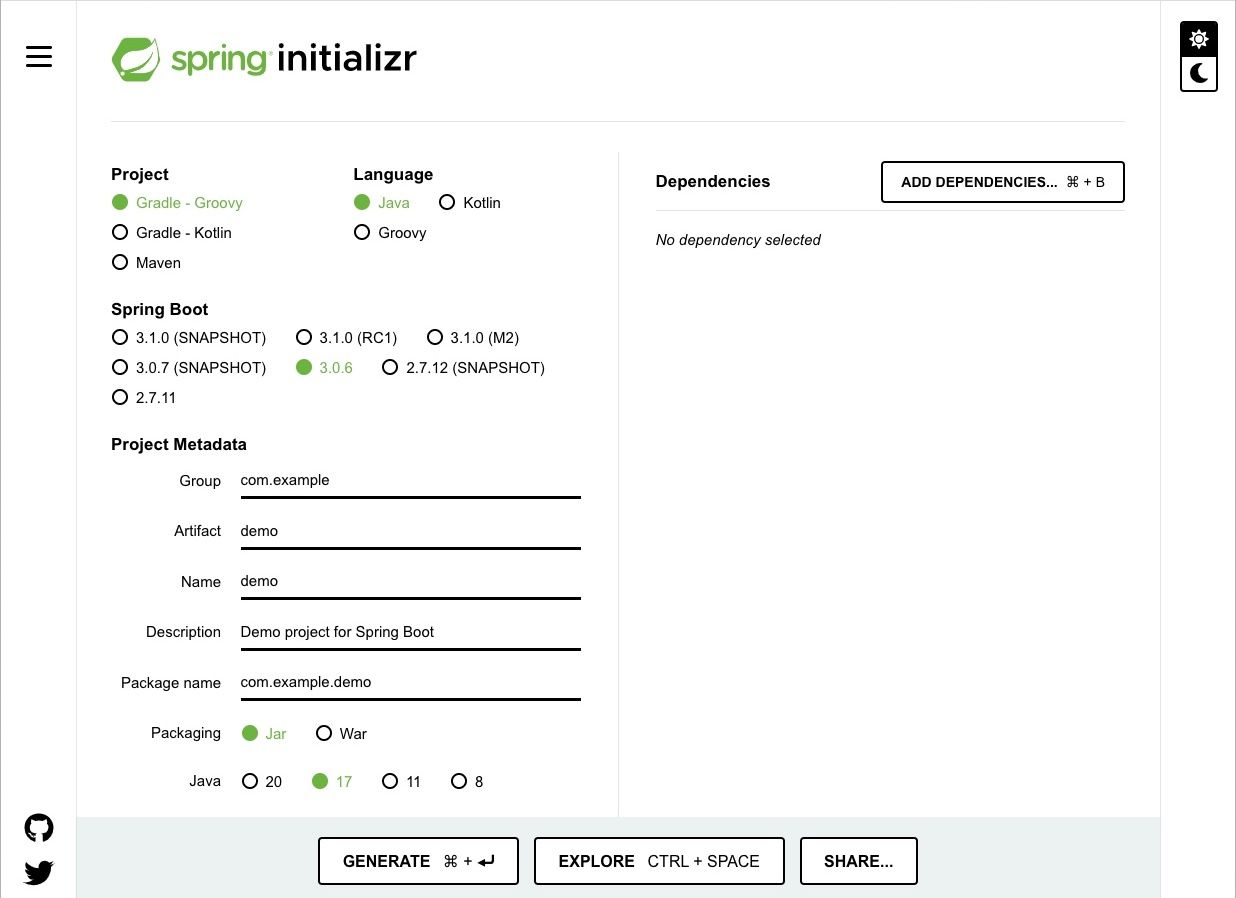
The initial state of the Initializr tool is as follows:
The first thing you’ll need to do is select a new project type. Spring Initializr provides three options here: Gradle-Groovy, Gradle-Kotlin, and Maven.
- Gradle-Groovy: this option allows you to build projects that follow Gradle conventions using the Groovy programming language.
- Gradle-Kotlin: this option allows you to build projects that follow Gradle conventions using the Kotlin programming language.
- Maven: this option allows you to build projects that follow Maven conventions. Maven primarily builds projects using the Java programming language.
After you’ve selected your project type, you’ll need to select the corresponding programming language (Groovy, Kotlin, or Java).
The Different Spring Boot Options
The Initializr provides six versions of Spring Boot for you to choose from, preselecting the option for the latest version. As of April 2023, the latest Spring Boot version is 3.0.6.
The preselected Spring Boot version relates to the preselected Java option metadata section, as you’ll need Java 17 and above to use version 3.x. However, if the version of Java you have on your device is below 17, then you can select Spring Boot version 2.x.
Populating the Project Metadata
Your project metadata is very important, as it helps to generate the Maven pom.xml file or the Gradle build.gradle file (depending on the project type you select). These files will contain data that describes your application and influence its function.
- Group: this field sets the package name.
- Artifact: this field sets the application name.
- Name: when you enter the application name into the artifact field it automatically populates this field with the same text.
- Description: this field details what the application will do.
- Package Name: this field contains both the package and application name. The group and artifact fields automatically populate this field.
Selecting Dependencies
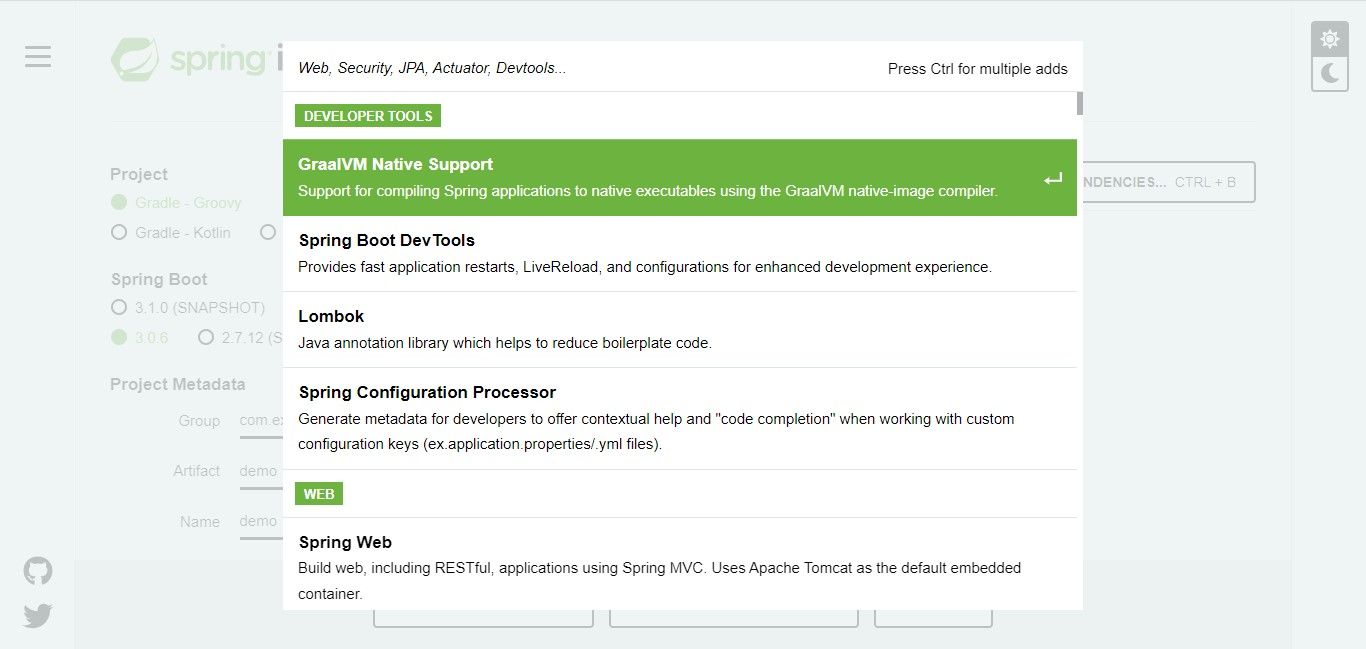
The Spring Initializr has a dependency section that provides you with a plethora of dependencies to choose from. Simply click the add dependency button, and Initializr will present you with a range of different options.
You can either scroll through the list or type the dependency name into the search bar, to add a new dependency to your application. A dependency is a library that adds additional functionality to your application. Some of the most popular dependencies include:
- Spring Web: this library allows you to build web applications using Spring MVC (model view controller architecture). It is an essential dependency for Spring Boot applications.
- Spring Session: this library allows you to manage user-session information.
- Spring Security: this library allows you to secure your application by providing access control.
- Spring Integration: this library allows you to integrate your Spring Boot application with external systems. It also facilitates lightweight messaging for your applications.
- Spring Data: Spring data is available in specific forms, depending on the database that you plan to use with your application. For SQL databases, there is Spring Data JPA, Spring Data JDBC, etc. For NoSQL databases, there is Spring Data MongoDB, Azure Cosmos DB, etc.
- Spring Boot DevTools: this library provides live reloading for your application, and it also provides fast application restart when needed.
Generate a New Spring Boot Application With Ease
The next step in generating a boilerplate for your Spring Boot application is clicking the generate button. This action will cause a jar or war file (depending on the option you selected previously), to download on your device.
You can now import the jar or war file you download into your desired IDE and start developing your Spring application.


