There are many possibilities when working in Notion solo. Add its robust sharing options to the mix, and that increases substantially. From pairing up on a to-do list to building a no-code website, you likely have a task you can tackle with the share features in Notion.
So how does it work? Keep reading for a complete guide to sharing in Notion, plus a list of examples on how to use each.
How to Share Your Notion Pages Privately
You needn’t make your Notion pages public to share with select people. For example, you wouldn’t want more eyes than necessary on your Notion budget tracker. So, to keep it exclusive between you and one other person, you can share it privately by following these steps:
- Go to Share in the top-right corner of your screen.
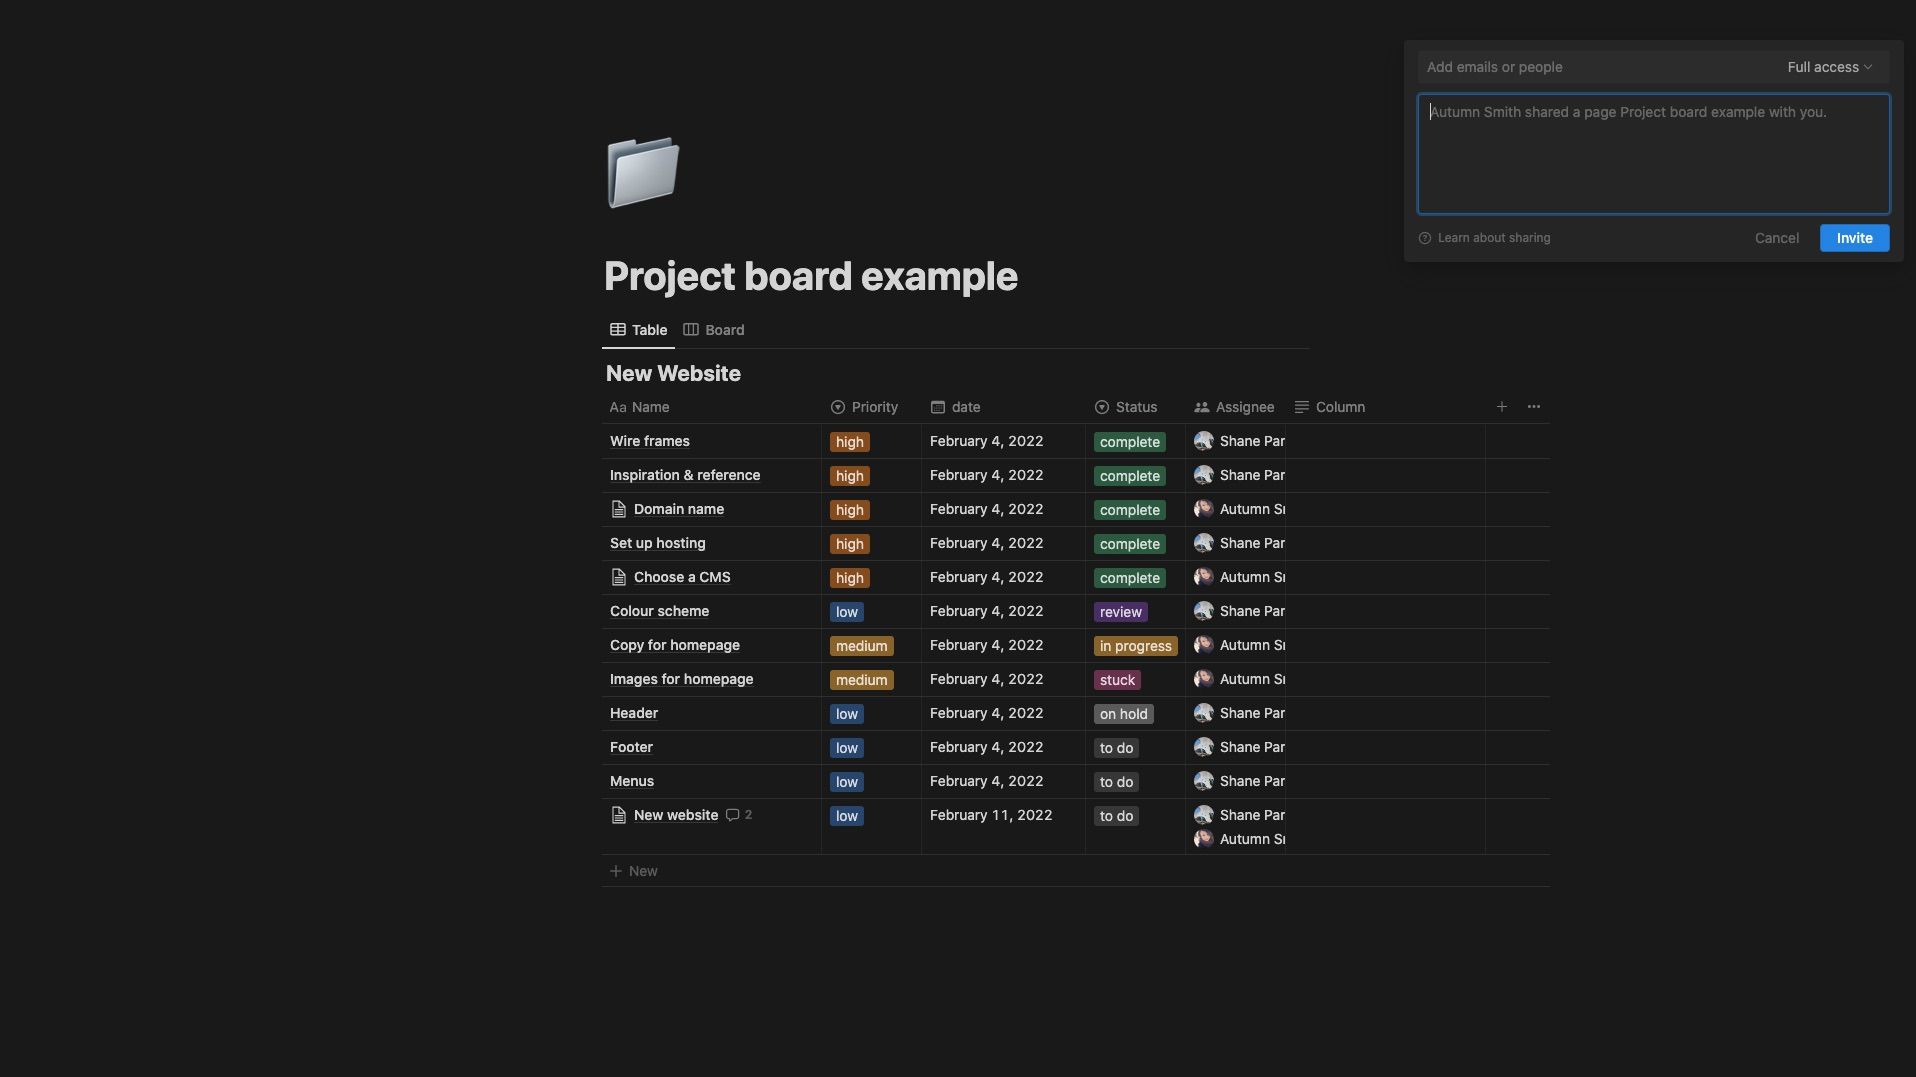
- Click into the field that says Add emails or people—a content box and a list of current guests will appear if you have any.
- If the person you’re adding is already a guest in your Notion workspace, their name will appear on the list. Click on their profile to add them. If they’re not a guest, type their email in the field to add them.
- Select the level of permission you’d like to give them using the dropdown menu on the right—by default, the software sets it to Full access, which allows your guests to edit and share. However, there are comment and read-only options.
- Add a message to the content box below, or leave it as is.
- Click Invite to share the page.
From there, the person you invited will receive an email with a link they can use to access the page.
With the Free Plan, you can host up to ten guests in your workspace—meaning a total overall, not just per page. But guests will only see the pages you share with them.
It's important to remember that when you share a page with anyone, they’ll also gain access to any subpages within, so be sure to double-check what's on there before you do.
How to Share Your Notion Pages Publicly
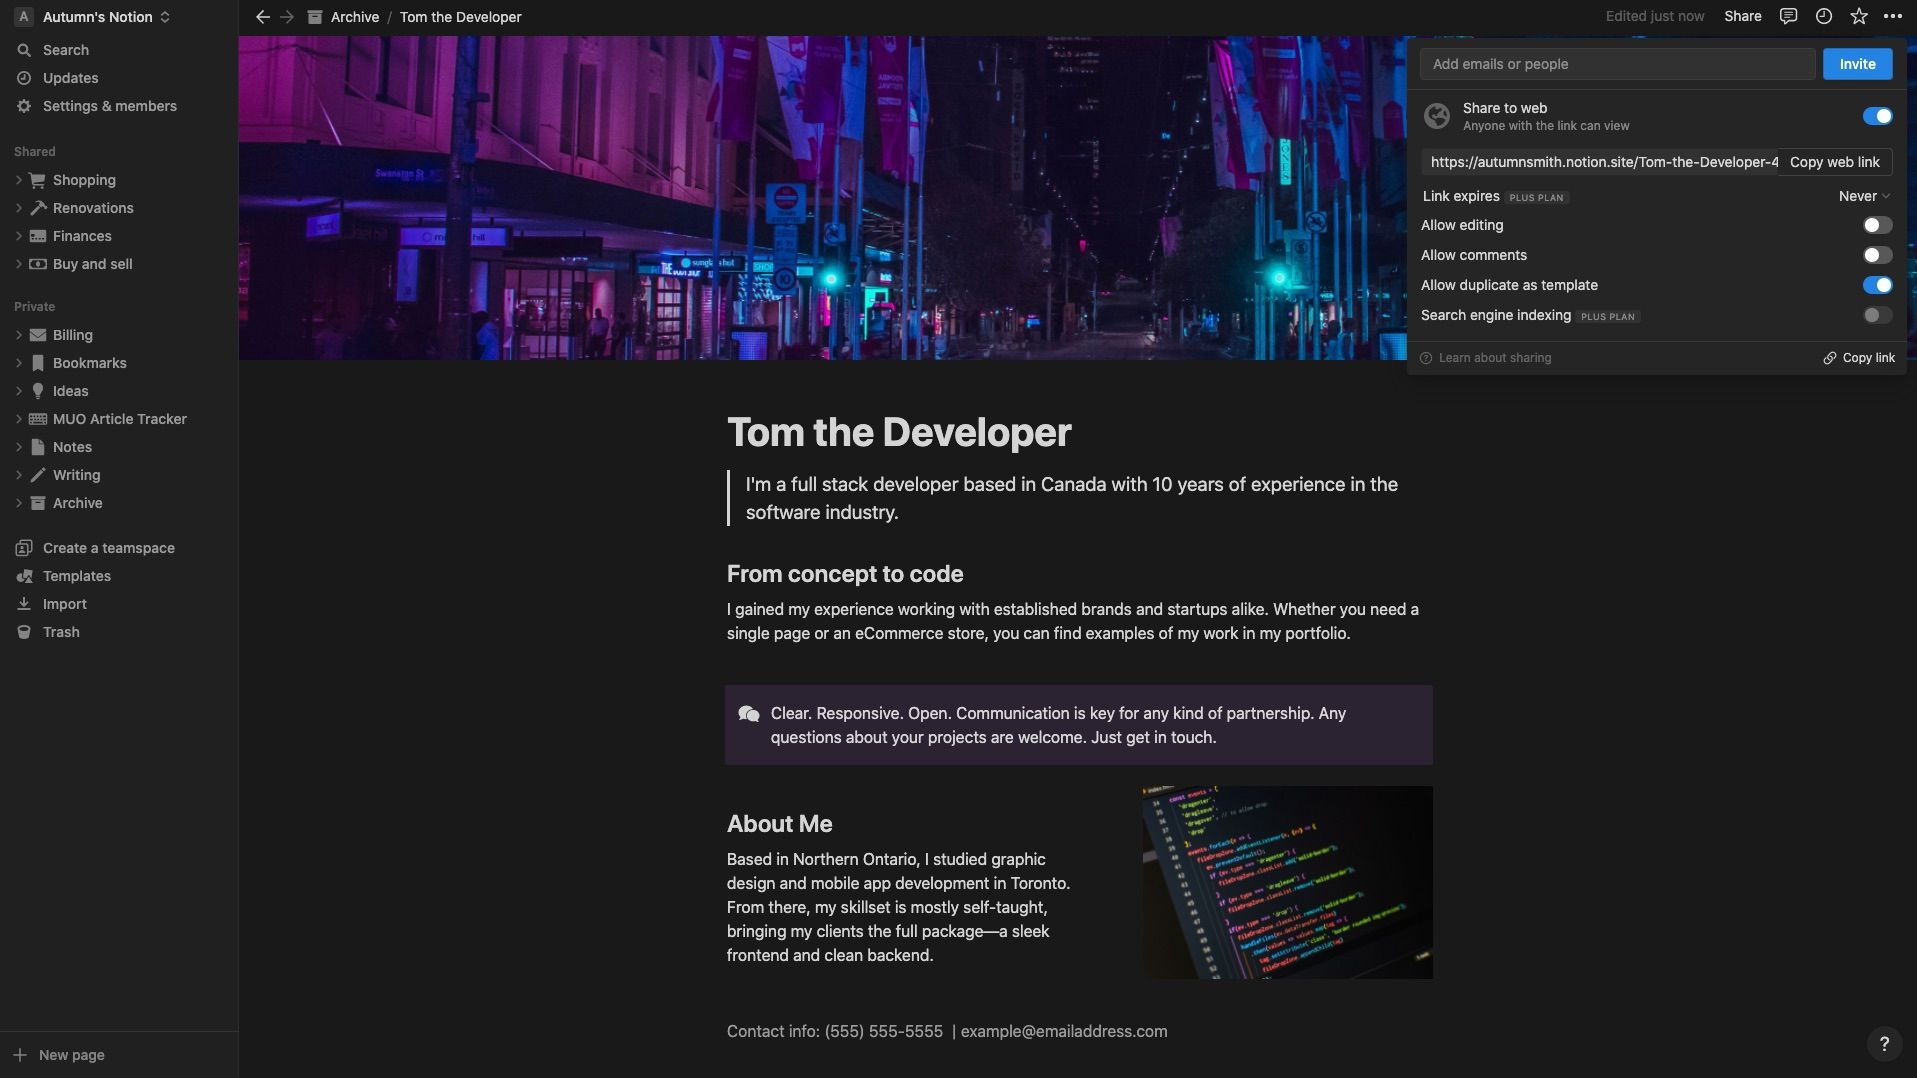
To display your Notion page publicly, head to the Share menu in the top-right corner and toggle on Share to web. Doing so creates a unique link to your page that you can use to give others access—it’s much like making a no-code website in Notion.
That also means anyone with access to the link will have access to your page, so ensure you have your permissions set before you do. Once you turn Share to web on, a list of settings will appear. If not, you can click Show link options in the bottom-left of the share panel.
Within the link options, you can choose whether or not to allow others to edit, comment on, or duplicate your page. If you have the Plus Plan, you can also set a link expiry and enable search engine indexing.
Like sharing your page privately, it’s good practice to double-check what’s on there before sharing, as your viewers will gain access to any subpages.
How to Create a Teamspace in Notion
Notion's teamspace feature allows teams to work collaboratively in a single space.
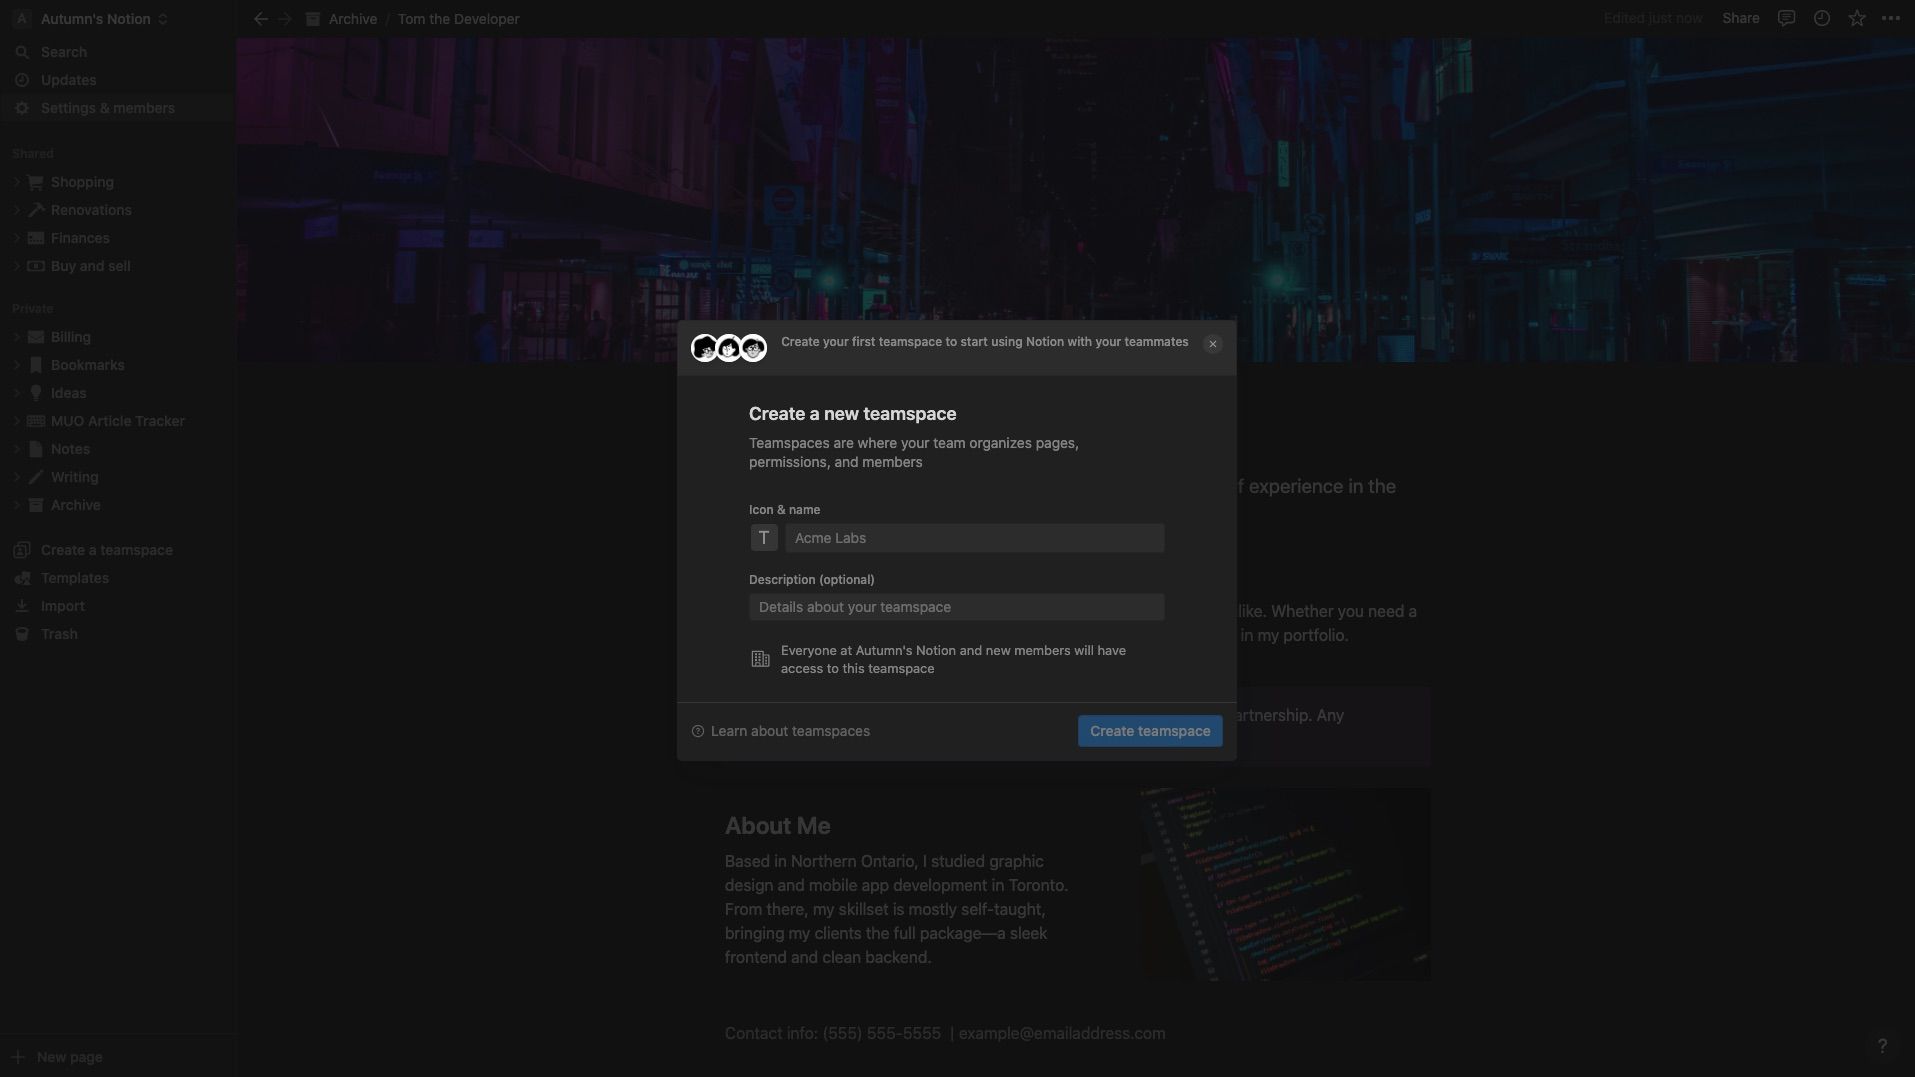
- Click Create a teamspace in the sidebar, and a menu will pop up.
- Add a name and description to the respective fields and click Create teamspace.
- You’ll now have the option to add teamspace members. You can add them by name if you've already made them a guest in your workspace. If not, type in their email. Alternatively, you can click Skip this step for now.
- Assign them a role using the dropdown to the right. By default, Notion sets it to Teamspace member, which only grants them access to pages. Teamspace owner gives them full access to pages and settings.
- Click on Invite.
Next, Notion takes you to your Teamspace. Any pages you add within automatically show up to other members of that space.
It’s also important to note that anyone with access to your workspace, such as your current guests, will have access to your teamspaces. To restrict access and create private teamspaces, you’ll need a business or enterprise account.
Where to Find Notion Pages Others Have Shared With You
Finding pages you’ve sent to others is as simple as looking under the Shared section in your sidebar. There, Notion separates it from the rest as a reminder that anything you do on these pages will be visible to those with access.
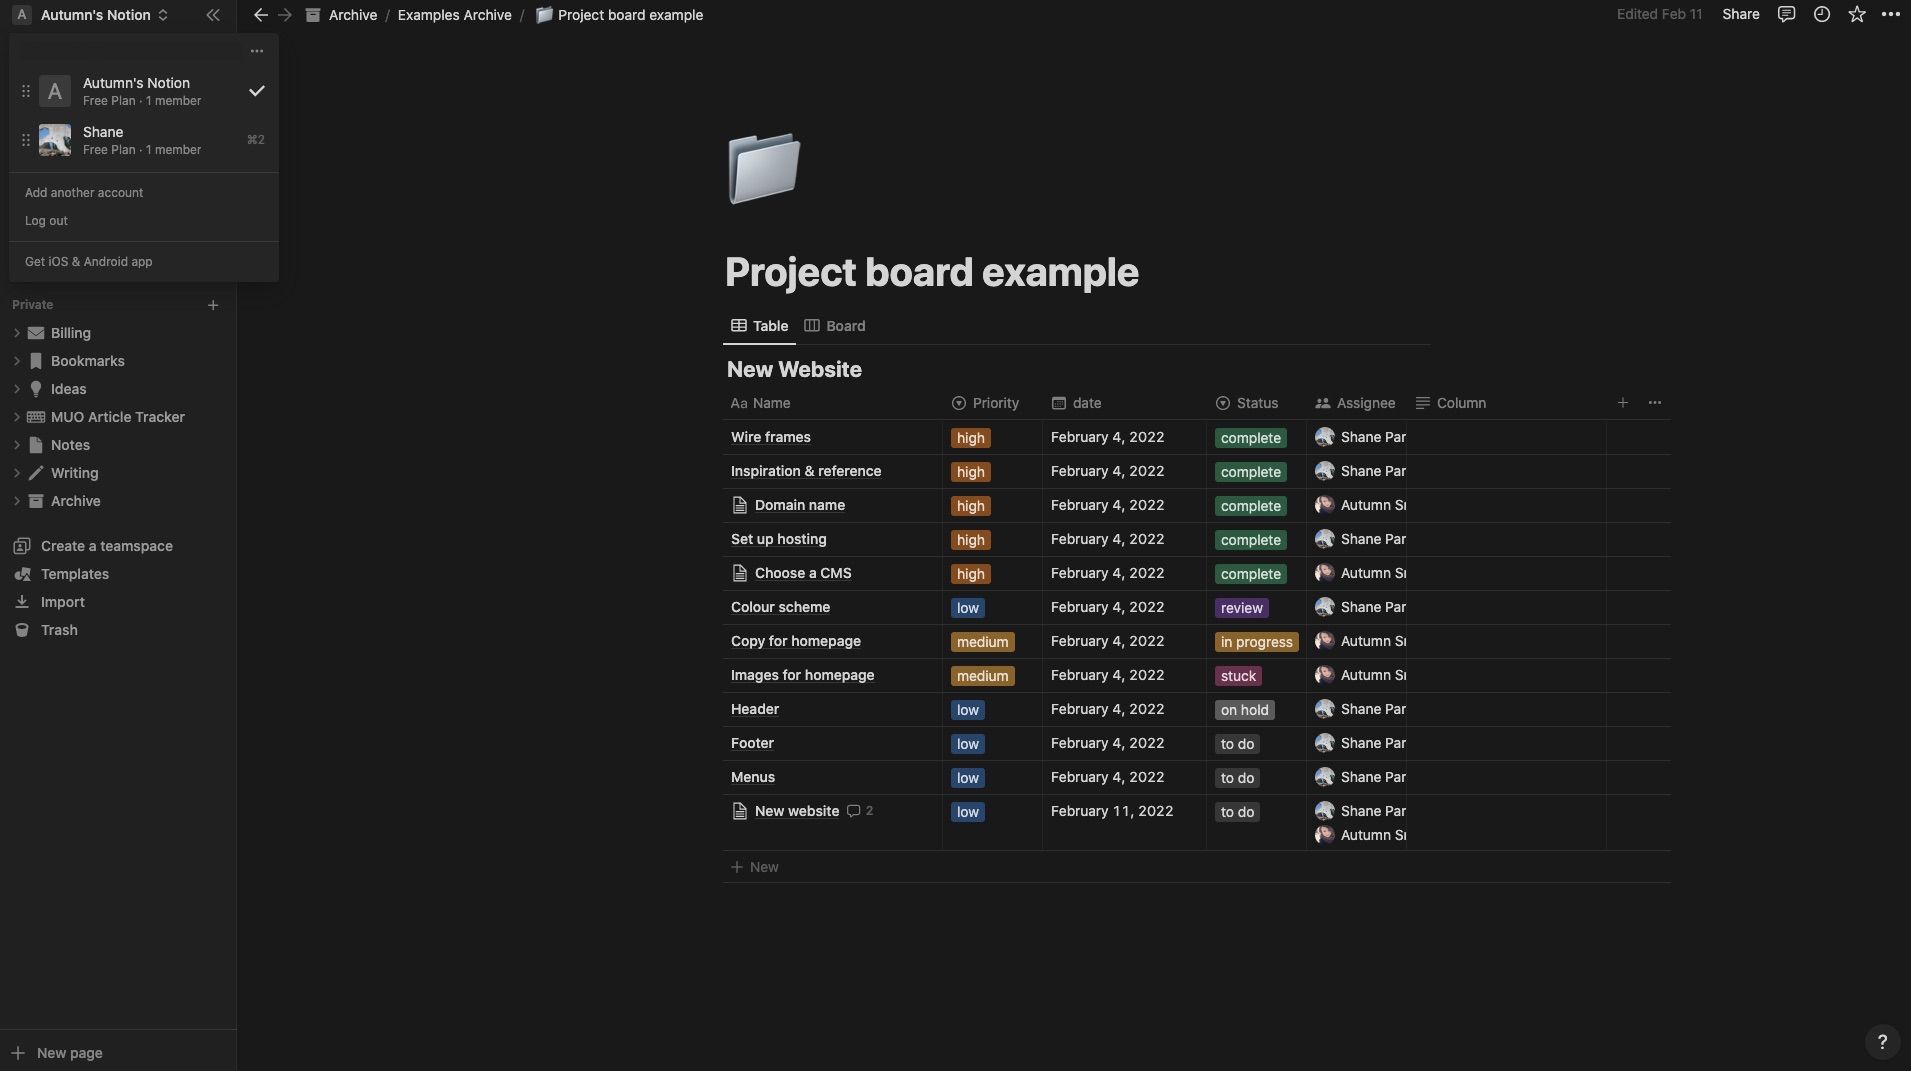
Finding a page that a friend shared with you isn’t as straightforward, especially if you don’t know where to look. To locate them:
- Click your workspace name in the top-left corner.
- Other people's workspaces you have access to will open in a menu. Choose the account you’d like to view.
- You’ll find all the pages your friend shared with you in the sidebar.
Your friend may have shared these pages with others, which means the information you add might not be exclusive between the two of you. You can see who has access by looking at the profile pictures in the top-right corner.
What Notion Sharing Method Should You Use?
- If you’re looking to share individual pages with a select group, such as a Notion project board, or anything you’d like to keep exclusive, private sharing is the way to go.
- If you’re looking to create a Wiki in Notion and want to share it with others, public sharing is likely your best option—plus, if you allow others to edit, they can contribute. But you can also publish view-only documents in the case of online resumes, web pages, and promotional pages.
- If you’re looking to collaborate on multiple projects, using teamspaces will be the easiest method for your coworkers. That way, everything is accessible to everyone in the sidebar, and no one will need to request access. Just keep in mind, to have more than ten people, you’ll need to upgrade out of the Free Plan.
Get Sharing With Notion
With many sharing and permission options, Notion makes collaborating with friends and coworkers a breeze. Plus, if you have information you’d like to share with a bigger audience, you can use Notion to create a no-code webpage or even a multi-page site.

