You're not alone if you worry about the ever-increasing threat of hacking. While authentication prompts and 2FA are sufficient to ward off most would-be hackers, thousands of breaches still succeed every day.
One of the most commonly touted solutions to the authentication issue is YubiKey. But what is YubiKey, and how does hardware authentication work? Can you secure your Linux PC with YubiKey?
Why Use YubiKey for Hardware Authentication?
Many different types of authentication exist, including passwords, SMS authentication, and even authenticator apps you can use with your phone. One less common type is hardware authentication, which involves using a small plug-in device to send an authentication token when prompted.
YubiKeys and other hardware authentication devices have a few advantages over other authenticators. They’re easier to use, much more secure, and are near impossible to compromise without access to the physical YubiKey itself.
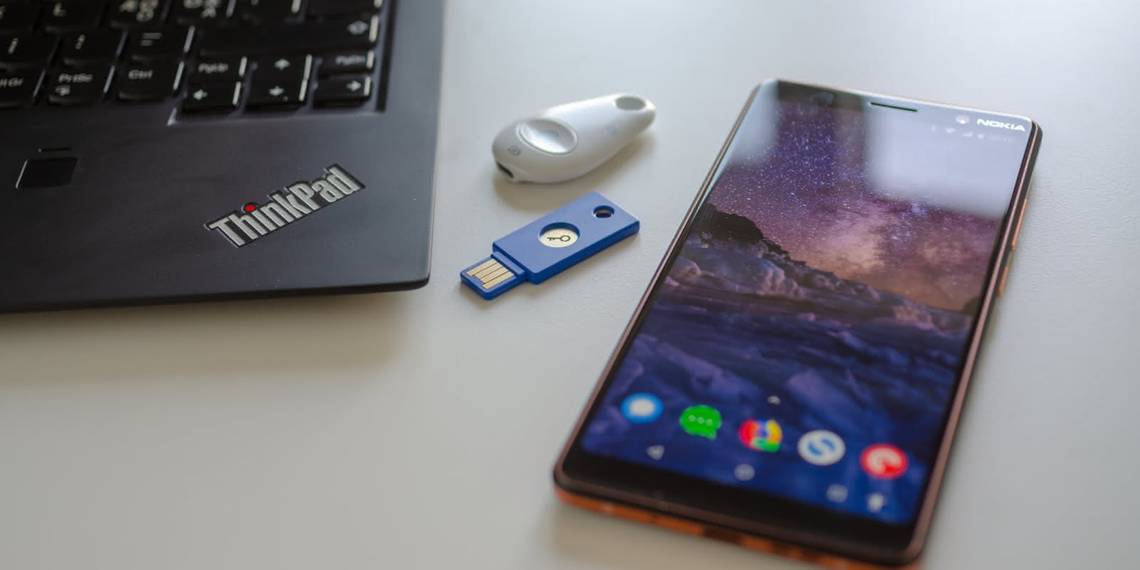
Getting Started With Yubikey
You can start with YubiKey in just a few simple steps. As a first step, you should use the quiz made by Yubico to shop for the best YubiKey for your device specifications. Once you have your YubiKey on hand, you can use it as an authentication device for websites and apps.
You can even use it to authenticate sudo and SSH on your Linux computer. We'll explain everything you need to know about choosing a sudo/SSH-compatible YubiKey and configuring it for authentication.

Choosing the Right YubiKey for Your System
If you want to use your YubiKey for authentication on your Linux computer, there are a few YubiKeys that stand out as superior options. The YubiKey 5 and YubiKey 5 NFC are both classics that work well with systems with USB-A and USB-C, respectively.
If you want to use your YubiKey with your Linux computer and Android phone, you should consider a YubiKey 5c NFC. If you have a Linux computer and an iPhone, you should consider a YubiKey 5ci because it supports USB-C and lightning.
It’s important to note that the YubiHSM Series is not compatible with sudo authentication. Legacy YubiKeys may or may not be compatible with sudo/SSH authentication depending on their specific features.
Before starting with sudo or SSH authentication, you must install the YubiKey PPA. Open the terminal and enter the following commands to update your packages and install YubiKey Authenticator and YubiKey Manager:
        sudo add-apt-repository ppa:yubico/stable
sudo apt-get update
sudo apt install yubikey-manager libpam-yubico libpam-u2f
Next, you’ll need to verify that your system is ready to work with your YubiKey. Run the following command in the terminal to check your udev version:
sudo udevadm --version
The terminal will return a number. If the number is 244 or higher, your system is compatible with YubiKey. You can skip the next step in this case.

Otherwise, you will need to configure your system. You should use the following commands to check whether udev is installed on your computer—and to install it if it isn’t:
        dpkg -s libu2f-udev
sudo apt install libu2f-udev
Next, check whether your YubiKey's U2F interface is unlocked. If you have a YubiKey NEO or YubiKey NEO-n, insert your YubiKey, open the YubiKey Manager, and navigate to Interfaces. Enable the U2F interface and press Save.
Set Up YubiKey for sudo Authentication on Linux
sudo is one of the most dangerous commands in the Linux environment. In the right hands, it provides an impressive level of access that is sufficient to get most jobs done. In the wrong hands, the root-level access that sudo provides can allow malicious users to exploit or destroy a system.
YubiKeys are excellent for sudo authentication because their authentication is nearly impossible to replicate without access to the YubiKey itself. Most YubiKeys are compatible with sudo authentication, including the 5 FIPs Series, Key Series, 4 FIPs Series, Bio Series, 5 Series, and 4 Series.
According to Yubico, the first step you need to take to configure sudo authentication is creating a rules file. If your udev version is 188 or higher, install the new U2F rules from GitHub and copy the 70-u2f.rules file to /etc/udev/rules.d.
If your udev version is below 188, install the legacy U2F rules from GitHub and copy the 70-old-u2f.rules file to /etc/udev/rules.d.
If your udev version is 244 or higher or you have made the necessary rules files, you’re ready to link your YubiKey with your account.
Insert the YubiKey into your computer, open the terminal, and enter the following commands to link your YubiKey with your account:
mkdir -p ~/.config/Yubicopamu2fcfg > ~/.config/Yubico/u2f_keys
Wait for several moments until the indicator light on your YubiKey begins flashing. Touch the button on your YubiKey to confirm the device link.
If you have another YubiKey on hand, you should add it as a backup device by entering the following command and completing the same process:
pamu2fcfg -n >> ~/.config/Yubico/u2f_keys
Finally, you’ll need to configure the sudo command to require YubiKey authentication. You should start by entering the following command to open the sudo configuration file:
sudo vi /etc/pam.d/sudo
Once the configuration file is open, paste the following line just beneath the @include common-auth line to configure sudo to require YubiKey authentication:
auth required pam_u2f.so
Save and exit the file by pressing Escape, typing :wq, and pressing Enter, but keep the terminal open. You won’t be able to reverse the changes you made to sudo authentication if the terminal closes.
Open a second terminal and run the following command with your YubiKey unplugged, then enter your password:
sudo echo testing
The authentication process will fail. Insert your YubiKey and reenter the command and your password. When the YubiKey indicator light begins flashing, touch the button on your YubiKey. It should authenticate the command. If it does, your YubiKey is fully set up for sudo authentication.

How to Set Up YubiKey for SSH Authentication
You can use your YubiKey for SSH authentication, too! Several YubiKey series are compatible with SSH, including the 5 FIPS Series, 5 Series, 4 FIPS Series, and 4 Series. Using YubiKey to authenticate your connections will allow you to make each and every SSH login much more secure.
The best method for setting up YubiKey was outlined by an experienced user on GitHub. You will need SSH 8.2 or newer and a YubiKey with firmware 5.2.3 or newer. You can check your OpenSSH version—and update it if necessary—with the following commands:
        ssh -V
sudo apt update && sudo apt upgrade
Next, you’ll need to configure SSH to accept your YubiKey. Enter the following command to open the vi editor and edit the configuration file:
sudo vi /etc/ssh/sshd_config
Add the following line to the configuration file so that your YubiKey will be accepted:
PubkeyAcceptedKeyTypes sk-ecdsa-sha2-nistp256@openssh.com,sk-ssh-ed25519-cert-v01@openssh.com
Save and exit the file by pressing Escape, typing :wq, and hitting Enter. Lastly, restart the SSH service with the following command so that your new configuration becomes active:
sudo service ssh restart
Finally, you’re ready to create the key pair you will use for SSH authentication. Navigate to the SSH directory and create your new SSH key with the following commands:
        cd home/username/.ssh
ssh-keygen -t ed25519-sk
Two files will be created in the ~/.ssh/ directory. Note that you may need to use ecdsa-sk instead of ed25519-sk if your system is incompatible and the terminal prompts that key enrollment failed.
Next, you’ll need to add the public key to your server with the following command:
ssh-copy-id -i ~/.ssh/id_ed25519_sk.pub username@server
You should also add yourself to the sudoers file so that you maintain permissions after disabling the root login. Access the file and open it with visudo.
Do not open the sudoers file with a normal text editor.
Beneath the line that reads root ALL=(ALL:ALL) ALL, add the following line:
username ALL=(ALL:ALL) ALL
Open the /etc/ssh/ssd_config file and add the following lines to disable root login and password-based login:
ChallengeResponseAuthentication noPermitRootLogin no
Finally, enter the following command to load your key into your SSH agent for the duration of the session:
ssh-add ~/.ssh/id_ed25519_sk
You can now use your YubiKey for SSH authentication. You will need to insert your YubiKey into your computer when prompted and tap the button when the indicator flashes. With this new authentication method, SSH access to your remote server will be significantly more secure.

Other Potential Uses of YubiKey
There isn’t any real limit to how you can use YubiKey on your Linux system. If you want to make your PC extra-secure, consider using your YubiKey for disk or password-free encryption. You can even use it to sign emails and files if you want.
Secure Your Linux System With YubiKey
You don’t have to stop at just using your YubiKey for SSH and sudo authentication. You can also use your YubiKey for authenticating access to many of your accounts across the web. The best part is that getting started with YubiKey 2FA is a simple process.