Any computer can run out of space. The answer is to add more storage – but what if there is nowhere to add a physical drive? You could try an external disk drive, but these can be temperamental. They’re also not ideal for laptops.
For many, the solution is to replace the existing HDD or SSD with a larger capacity device. Better still, you can clone the existing operating system and personal data to the new drive without spending hours reinstalling and restoring backups.
Why You Might Need a New Storage Device
Perhaps your existing storage is too small, or perhaps it is on its way out. It might be too small. You might even be dragging yourself into the 2020s and switching to a SATA SSD or even an NVMe device (here’s how SATA and NVMe differ).
Whatever your reason for replacing the existing storage device on your computer, if you wish to retain the operating system and files, cloning the system drive is the best option (providing there are no viruses on the old drive).
The rest of this guide assumes you have already chosen and bought a new SSD or HDD for your Linux computer. Note that these steps only cover cloning disks of the same capacity or from a smaller disk to a larger device.
What Disks Can You Clone?
Using this method, you can expect to be able to clone:
- HDD to HDD
- HDD to SSD
- SSD to HDD
- SSD to SSD
(SSD covers anything from 2.5-inch SATA devices to M.2 interface NVMe drives).
As long as the destination drive has an equal or larger capacity than the source drive, cloning should be successful.
Two Methods to Clone Your Linux Drive: dd and CloneZilla
If you want to clone your main storage device you have two options
- dd
- CloneZilla
Each option is explained further below.
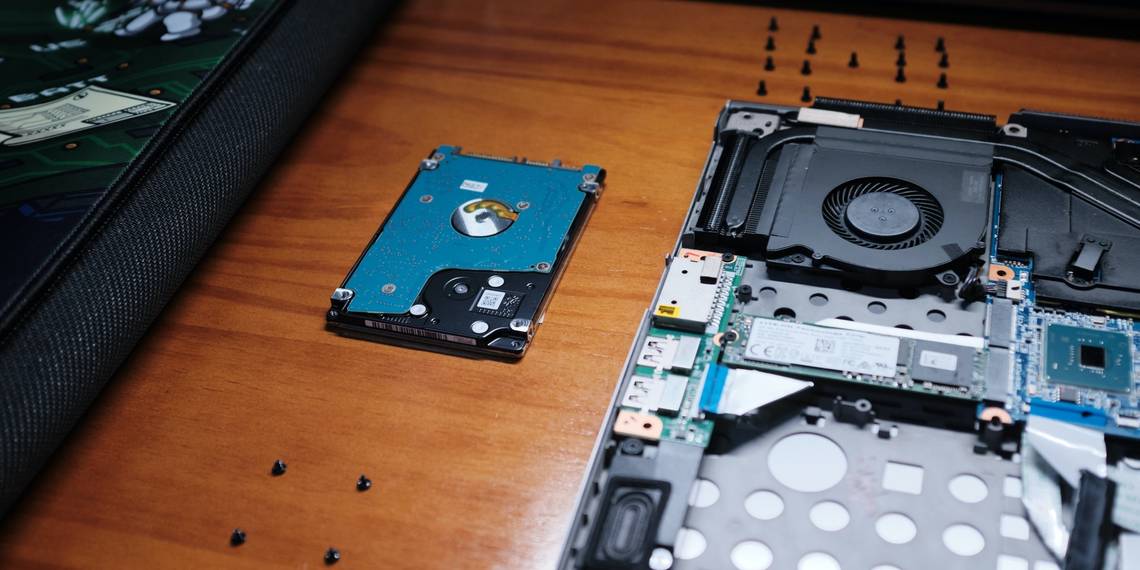
Before proceeding, ensure the new SSD is connected to your computer. For a desktop PC, this might mean installing the disk internally straight away. If you would rather avoid disassembling your computer at this point, and particularly if you’re using a laptop, a USB to SATA adapter is an affordable time saver.
Cloning Your SSD With dd
Using dd is simple. Open a terminal, and check the names of any attached drives:
lsblk
Make a note of the drive names. The internal device is typically sda, but you can check the labels in your distro’s partition editor if you’re uncertain.
The clone command takes this form:
dd if=/dev/sdX of=/dev/sdY
Here, if is the source disk path, and of is the destination path. If the drive you’re cloning is sda and the new disk that you plan to clone to is sdb, then the command would be:
dd if=/dev/sda of=/dev/sdb
This can take a while, so be patient. Consult our guide to cloning and restoring disks with dd for more information.
Why CloneZilla Live ISO Is Better for Full Disk to Disk Cloning
Although you can enjoy fast, accurate results from using dd, it has a key shortcoming. If you are planning to completely replace the disk in your computer with the new device, you need a complete clone.
Unfortunately, running dd from within the terminal of a running PC isn’t going to make a full clone. This approach copies everything, personal data and OS included, but not the bootloader.
Because you need GRUB to boot Linux, you need a different approach, one that will clone everything, bootloader included. This is where CloneZilla’s Live ISO environment comes in.
How to Use CloneZilla to Clone a Linux Drive
CloneZilla is a live environment that you can boot your computer into. It can be installed onto a DVD or USB flash device, and is the best way to completely clone the data on the old disk drive in your computer to a new one.
Download the CloneZilla ISO
Start by grabbing your copy of CloneZilla. I’ve provided the link for the stable version, but you will need to set:
- CPU architecture (amd64, i686, or i686-PAE)
- File type (ZIP or ISO)
- Repository (Auto, OSDN, or SourceForge)
Of these options, the only one you need to take particularly care with is the first. If your computer has a 64-bit CPU (regardless of whether it is AMD or Intel) you should choose amd64. For 32-bit systems, use i686, and if this doesn’t work, use i686-PAE.
Strictly speaking, the file type depends on whether you’re using disc or USB media. However, the smart option is to download the ISO file and use Unetbootin to make a bootable USB device.
The download repository shouldn’t make much difference, and can be left as auto.
- Download: CloneZilla (Free)
- Download: UNetbootin (Free)
It is possible to burn the ISO to a CD/DVD if desired. In this case, use a tool like Brasero or whatever your distro’s default disc burning tool is.
Write the CloneZilla Live ISO to USB
After downloading the Unetbootin .bin file, double-click to run. You’ll see a notification advising you to run the file as root from your terminal. The command is something like
sudo QT_X11_NO_MITSHM=1 /home/atomickarma/Downloads/unetbootin-linux64-702.bin
The file path will differ for your computer. Run this, then in the main UNetbootin interface:
- Select Diskimage
- Confirm the option is set to ISO
-
Click the ellipses (…) button and browse for the downloaded CloneZilla ISO
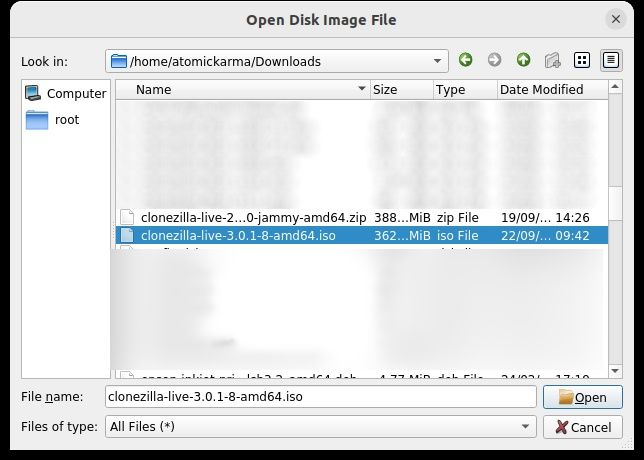
- Click Open
-
Back in the main UNetbootin display confirm USB Drive is selected for Type
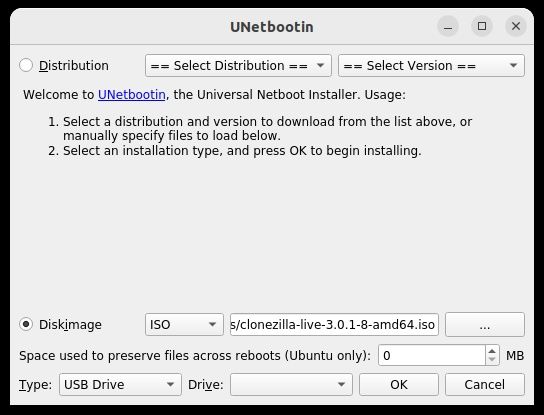
- Confirm the Drive is set to the correct USB device


When you’re ready to create the bootable CloneZilla USB, click OK
Reboot Your PC or Laptop With the CloneZilla Live USB
Once the UNetbootin process has completed, restart your PC and boot from the device.
This typically means accessing the boot menu, which can usually be done by pressing a button on your keyboard as the computer reboots. For example, The HP I am using requires the Esc key to be pressed. Yours might be F2 or F8, F12, perhaps Del – it depends on the system manufacturer.
Check your computer’s documentation, or search online with a phrase like “open boot menu [computer model]” to learn how to access the boot menu.
With the boot menu accessed, select the USB stick you burned CloneZilla to.
Clone One Disk to Another With CloneZilla
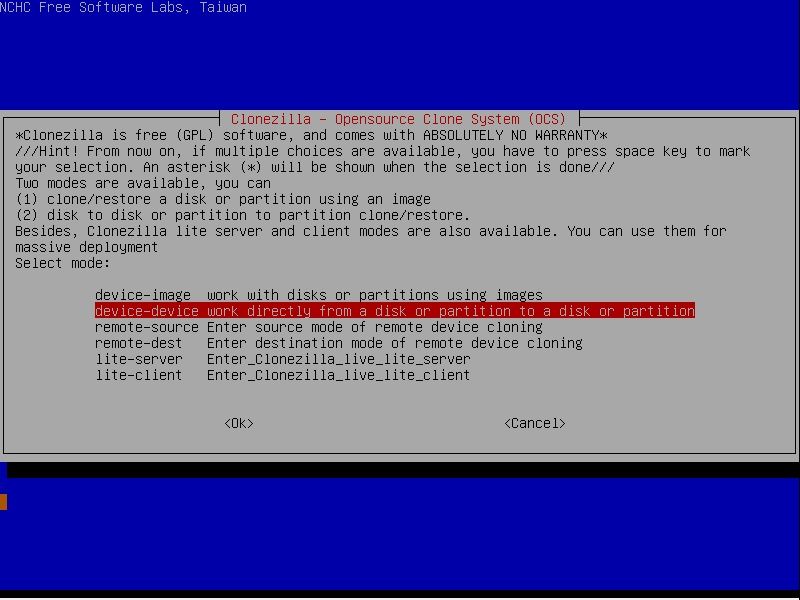
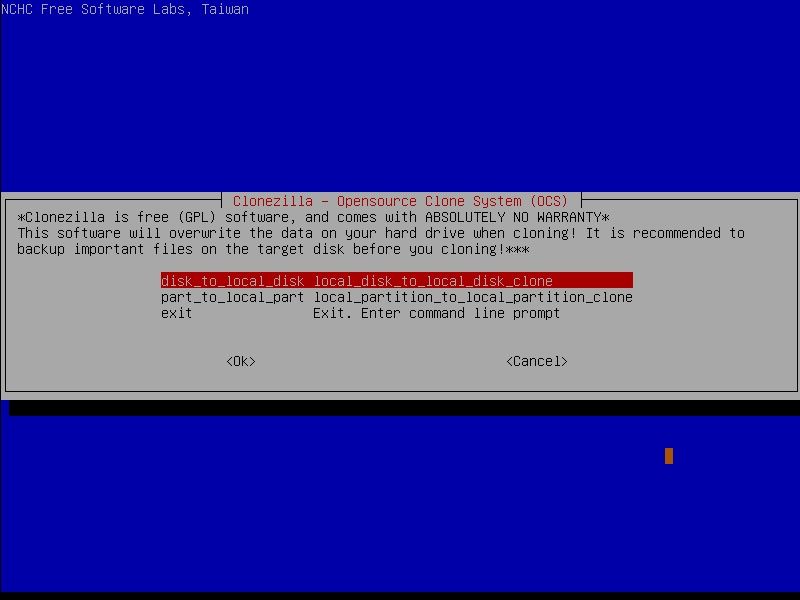
You’ll see a list of eight options when CloneZilla starts. It’s a powerful tool with various uses, but for cloning one disk to another you can simply select the first option and hit Enter. Note that the interface can be controlled by keyboard or by mouse (the rectangular cursor substituting the usual mouse pointer).

Next select your preferred language and keyboard options, then Start_Clonezilla. To clone your disk:
-
Select device-device from the menu and click OK
- Unless you have specific requirements, stick with Beginner Mode and click OK
-
Choose disk_to_local_disk to clone the internal disk to the new device, then OK
- Select the local disk as the source, then OK
- Select the second storage device as the destination, and OK
- In the next screen, advanced parameters are listed, so unless you know what you’re doing, choose the default sfsck option, then OK
- Select -p poweroff to instruct CloneZilla to shut down your computer after cloning, and OK to confirm
- Press Enter when prompted
- Confirm cloning by tapping Y on the keyboard
- Repeat when asked again


Cloning will then commence. How long it takes will depend on how much data you’re cloning.
The process should complete by shutting down your computer.
You’re now ready to install the new HDD or SSD storage in your computer, and can be confident that it will boot as if it was the original disk.
Cloning With CloneZilla Is Surprisingly Easy
Having tested the procedure with dd and finding that the bootloader was not cloned, repeating with CloneZilla was a breeze.
To recap:
- To clone the data on the device, use dd.
- To clone the data and bootloader to a new drive, use CloneZilla
Only the second option will allow you to boot your computer using the new drive. If you have switched to a larger drive, you might consider extending the partition. Make sure you resize the partition safely, without losing any data.