Deploying web applications to Firebase Hosting can be a hassle. However, by using GitHub actions you can simplify and streamline the deployment process, and make it incredibly easy to manage deployment workflows throughout the entire lifespan of a software project.
With just a few simple steps, you can set up a deployment workflow to automate the process. This includes tracking new changes to branches and logging any errors. Read on to learn how to deploy a React application on Firebase’s hosting service.
What Is a CI/CD Pipeline?
A CI/CD (Continuous Integration/Continuous Delivery) pipeline is a set of automated processes implemented to make it possible to continuously build, test, and deploy applications.
Simply put, a CI/CD pipeline is set up to automate the processes involved in the software development lifecycle. This will include the actual development, testing, releases (beta, alpha, and final release), bug fixes, and even feature updates. Essentially, this process makes it possible to easily and quickly ship quality software.
A CI/CD pipeline typically covers a couple of stages, this includes:
- Source stage: This phase covers the actual development and maintenance of the application's code with a version control tool such as Git.
- Build Stage: This step assembles the source code with all its dependencies into an executable format.
- Test stage: This stage incorporates automated tests to validate the quality of the software. The end goal is to detect and correct any bugs. You can carry out different types of tests in this stage and once the code has passed the tests, it is ready to deploy.
- Deployment: This stage automates the deployment process in the production environment.
The pipeline should monitor each stage to ensure that there are no bugs and to improve the entire process for future releases.
What Is GitHub Actions?
GitHub Actions is a feature provided by GitHub to automate a software's deployment workflow processes in the CI/CD pipelines. It makes it possible to define and automate deployment workflows directly from your project’s GitHub repository.
GitHub Actions has several benefits:
- Easy to use: GitHub Actions provides a user-friendly interface and a simple syntax for setting up deployment workflows. You can easily and quickly define your project workflows using the in-built editor on GitHub.
- Native Integration: GitHub Actions is part of GitHub, making it easy to set up, manage, and collaborate on workflows alongside your project's code.
- Flexible and customizable: GitHub Actions provides a flexible and customizable platform that ensures that you can build workflows that fit your specific needs. In addition, It supports multiple programming languages. Meaning, you can use it with whatever technology you prefer.
Set Up a Firebase Project and the React Client
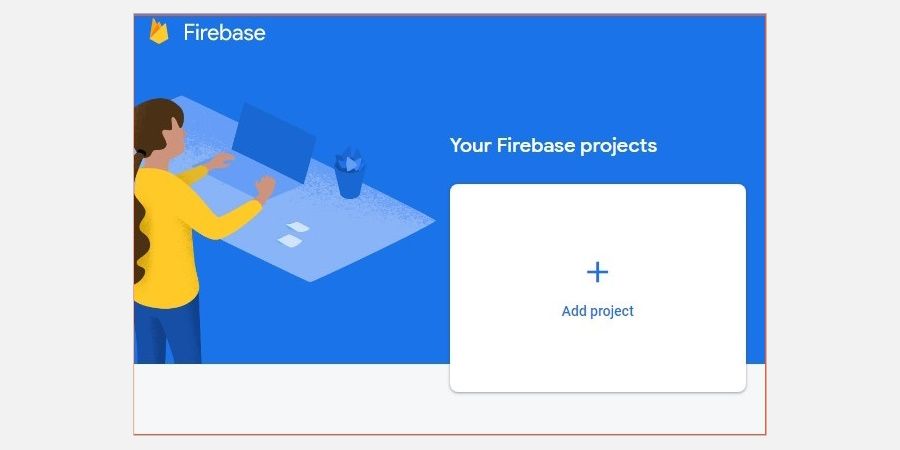
To get started, head over to Firebase and sign in with your Google account. On the console overview page, click Create Project to set up a new project and provide the project's name.
Next, create a React application and install the Firebase command line tools:
npm install -g firebase-tools
You can find this project's code in its GitHub repository.
Login to Firebase from your terminal using your Firebase account credentials.
firebase login:ci
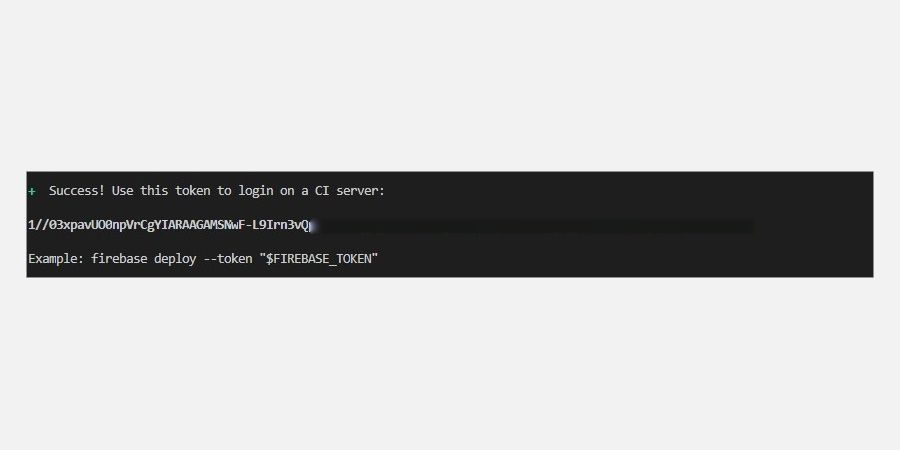
This will trigger the Firebase authentication flow which will prompt you to enter your login details if you're not already logged in. Once Firebase authenticates you, it will print a token. Copy this token; you’ll use it to run Firebase commands in your GitHub Actions setup.
Finally, create a production-ready version of your application:
npm run build
This command generates the necessary files and assets, inside a new 'build' folder in the root directory, required to deploy the application.
Initialize Firebase in Your React Application
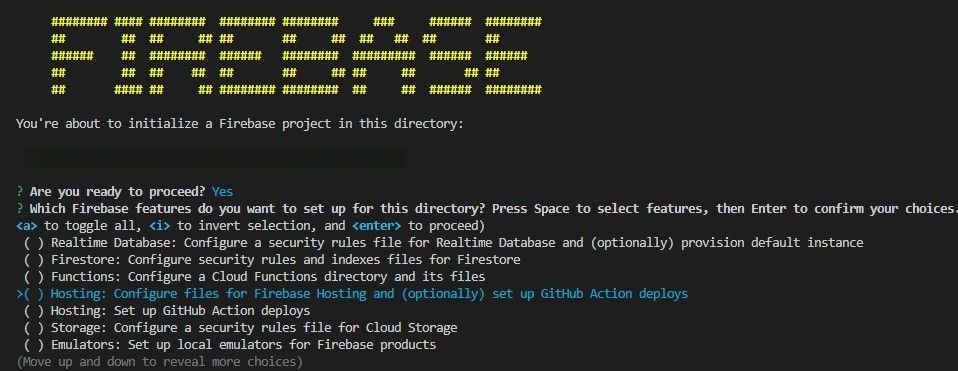
Run this command to initialize Firebase in your project folder:
firebase init
Next, confirm that you want to initialize Firebase in your project and go ahead and select Hosting: Configure files for Firebase Hosting and (optionally) set up GitHub Action deploys from the list of options.
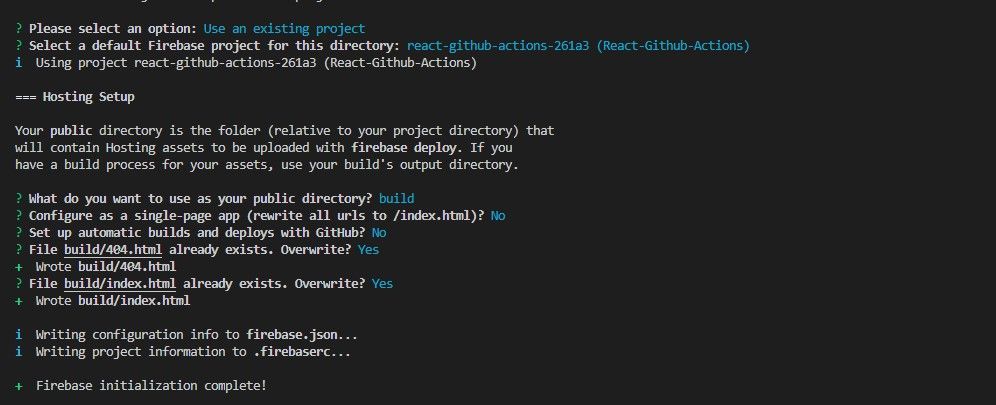
Specify that you want to use an existing project and select the project name you initially created on Firebase's developer console.
Next, specify the 'build' folder as the public directory, select No to rewrite all URLs to /index.html option, select No to the option of setting up automatic builds and deploys from GitHub, and finally, Select Yes to overwrite the build/index.html file option.
After making the changes above, the CLI will create a firebase.json file in the root directory. This file contains all the hosting configuration that the GitHub Actions workflow will require.
Finally, before setting up the GitHub Actions workflow, create a repository on GitHub, and push the project files to it.
Setting Up GitHub Actions
In your project's repository on GitHub, select Settings > Secrets and Variables > Actions. In the repository's secret page, enter FIREBASE_TOKEN as the name of the secret, and paste in the Firebase token you copied in the Secrets fields.
Set Up the Deploy Workflow
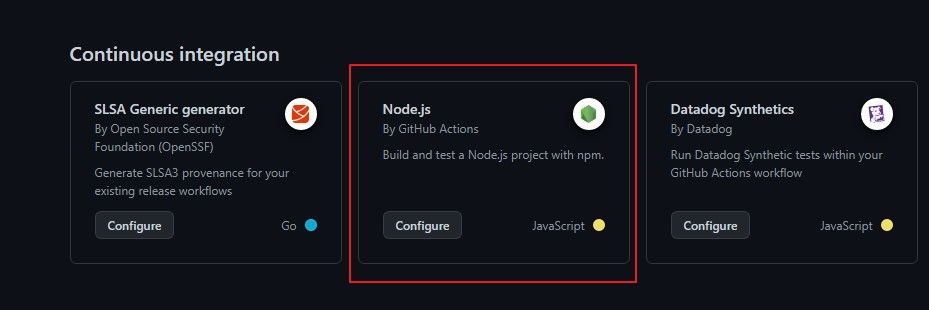
Click on the Actions tab in your project's repository, and select Configure Nodejs workflow in the Continuous Integration section.
Next, rename the file name to firebase.yml, delete the boilerplate code on the editor, and add the code below:
        # This workflow will carry out a clean installation of node dependencies,
# cache/restore them, build the source code and run tests across different
# versions of node
# For more information see:
# https://docs.github.com/en/actions/automating-builds-and-tests
# /building-and-testing-nodejs

name: Firebase CI

on:
  push:
    branches: [ main ]
  pull_request:
    branches: [ main]

jobs:
  build:

    runs-on: ubuntu-latest

    strategy:
      matrix:
        node-version: [14.x]

    steps:
    - uses: actions/checkout@v2
    - name: Use Node.js ${{ matrix.node-version }}
      uses: actions/setup-node@v1
      with:
        node-version: ${{ matrix.node-version }}
    - run: npm install -g npm
    - name: npm install, build and test
      run: |
        npm install
        npm run build
    - name: Archive Build
      uses: actions/upload-artifact@v2
      with:
        name: build
        path: build

  deploy:
    name: Deploy
    needs: build
    runs-on: ubuntu-latest

    steps:
      - uses: actions/checkout@v2
      - name: Download Build
        uses: actions/download-artifact@v2
        with:
          name: build
          path: build
      - name: Deploy to Firebase
        uses: w9jds/firebase-action@master
        with:
          args: deploy --only hosting
        env:
          FIREBASE_TOKEN: ${{ secrets.FIREBASE_TOKEN }}
Here are some of the key properties explained:
- On: Events that trigger the actions in this workflow.
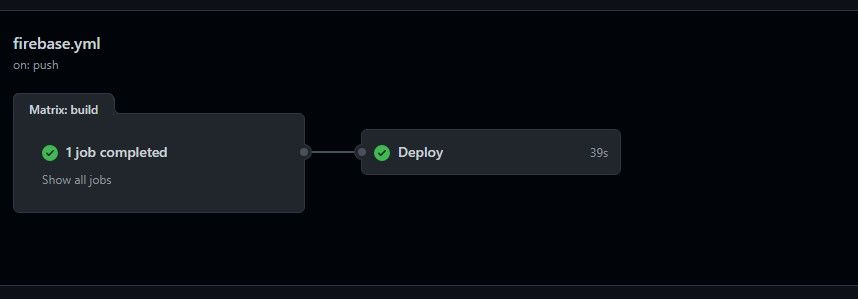
- Jobs: Specifies the jobs that a particular Action should run. In this case, there are two jobs: build and deploy.
- Runs-on: the machine on which this action has to run.
- Steps: Defines a sequence of steps for the Action to perform for a particular job.
- With: Specifies any arguments required by the Actions to run.
- Name: Name of a particular step for a job.
Finally, commit the changes made in this file. GitHub will automatically trigger this workflow, building and deploying the React application on Firebase's Hosting service. You can check for the application's live URL on the deployment logs.
Deploying Applications Using GitHub Actions
GitHub Actions provides a streamlined deployment approach. It ensures you can deploy applications consistently and reliably, regardless of the technology you build them in.
Furthermore, you can easily customize the deployment workflow by using the in-built deployment tools to meet your specific CI/CD pipeline needs.


