Many people are missing out on the benefits of mouse acceleration for gaming due to Windows’ poor implementation of the setting. But, mouse acceleration can actually improve your gameplay, with Raw Accel being a great example.Here’s how you can use Raw Accel to give you predictable acceleration that helps improve your gameplay instead of ruining it.
What Is Raw Accel?
Raw Accel is a customizable mouse acceleration software created by a1xd. This is one of the few mouse acceleration software out there that’s good enough to use for gaming. It has a very useful graph that helps you visualize when the acceleration kicks in and how much acceleration your mouse sensitivity experiences.
This visualization is very important for adjusting your settings and getting the right amount of acceleration you need for your games, especially if you’re going to use an acceleration curve other than linear acceleration.
You should check out how mouse acceleration is making a comeback if you're interested in some history on mouse acceleration and its decline in use to its resurgence.
Is Raw Accel Bannable in Games?
Raw Accel is not a cheat, therefore it is not bannable. It is completely safe to use in all games. If you’re worried about getting banned in Valorant as it has a stricter anti-cheat policy, it is also not bannable there.
KovaaK, the developer of KovaaK’s aim trainer, contacted Riot and FaceIt (pictured above) to prevent the harmless program from triggering their anti-cheat detection systems.
How to Use Raw Accel
If you’re ready to reap the benefits of mouse acceleration, here’s how to use Raw Accel and get started on your acceleration journey. Before you get started though, you should know how to disable mouse acceleration in Windows 10 as that could interfere with your results.
Downloading and Installing Raw Accel for Windows 10
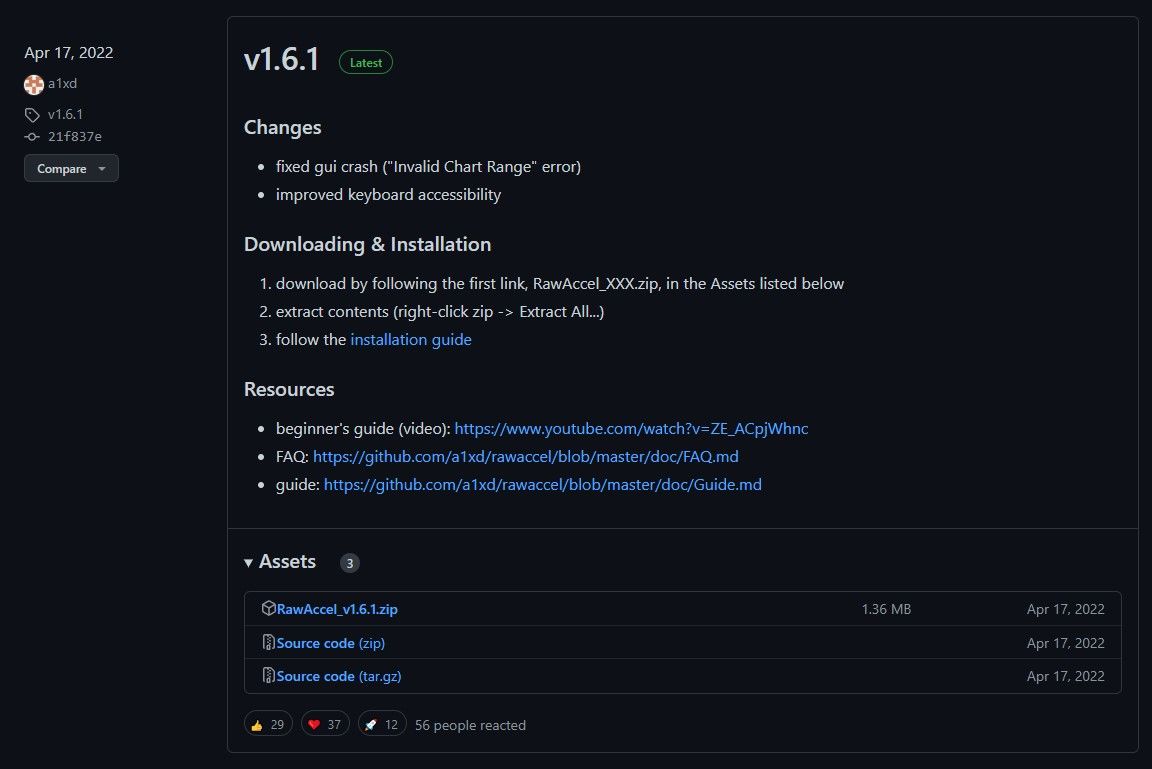
To get started with Raw Accel, you’ll have to download the latest version from GitHub.
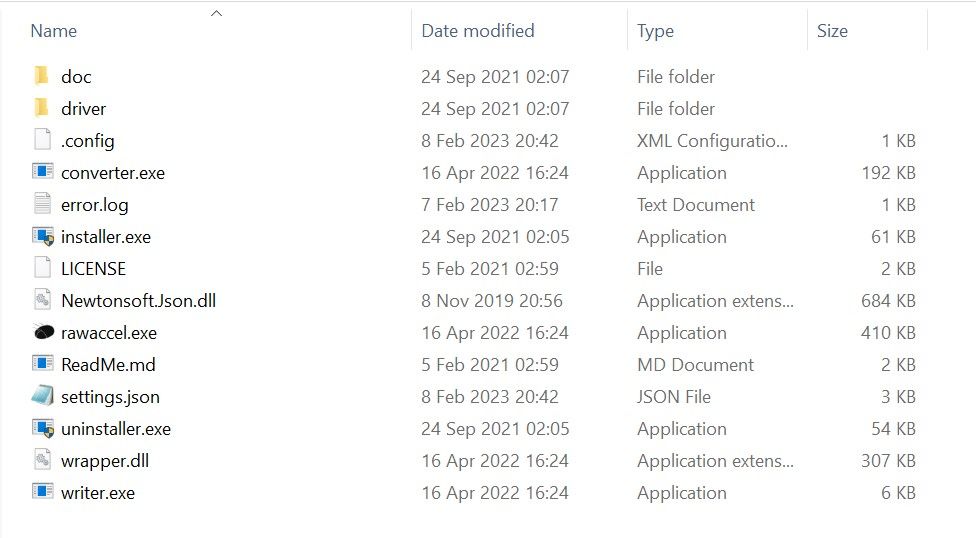
Head to Assets and download the zip file that says RawAccel on it. You can ignore the source code files. After downloading, extract the zip file into the destination folder of your choice.
You may notice that there is already a rawaccel.exe from the extracted folder. However, running it does nothing for now. To be able to get it working, run installer.exe then restart your computer. Restarting your computer is a must, you won’t be able to run Raw Accel unless you do so after running the installer.
How to Read the Graph in Raw Accel
Now that you’ve got Raw Accel installed, you can now open it. The interface is quite crude and it may be intimidating at first. Don’t worry, it’s not hard to understand and we’re here to explain the basics to you.
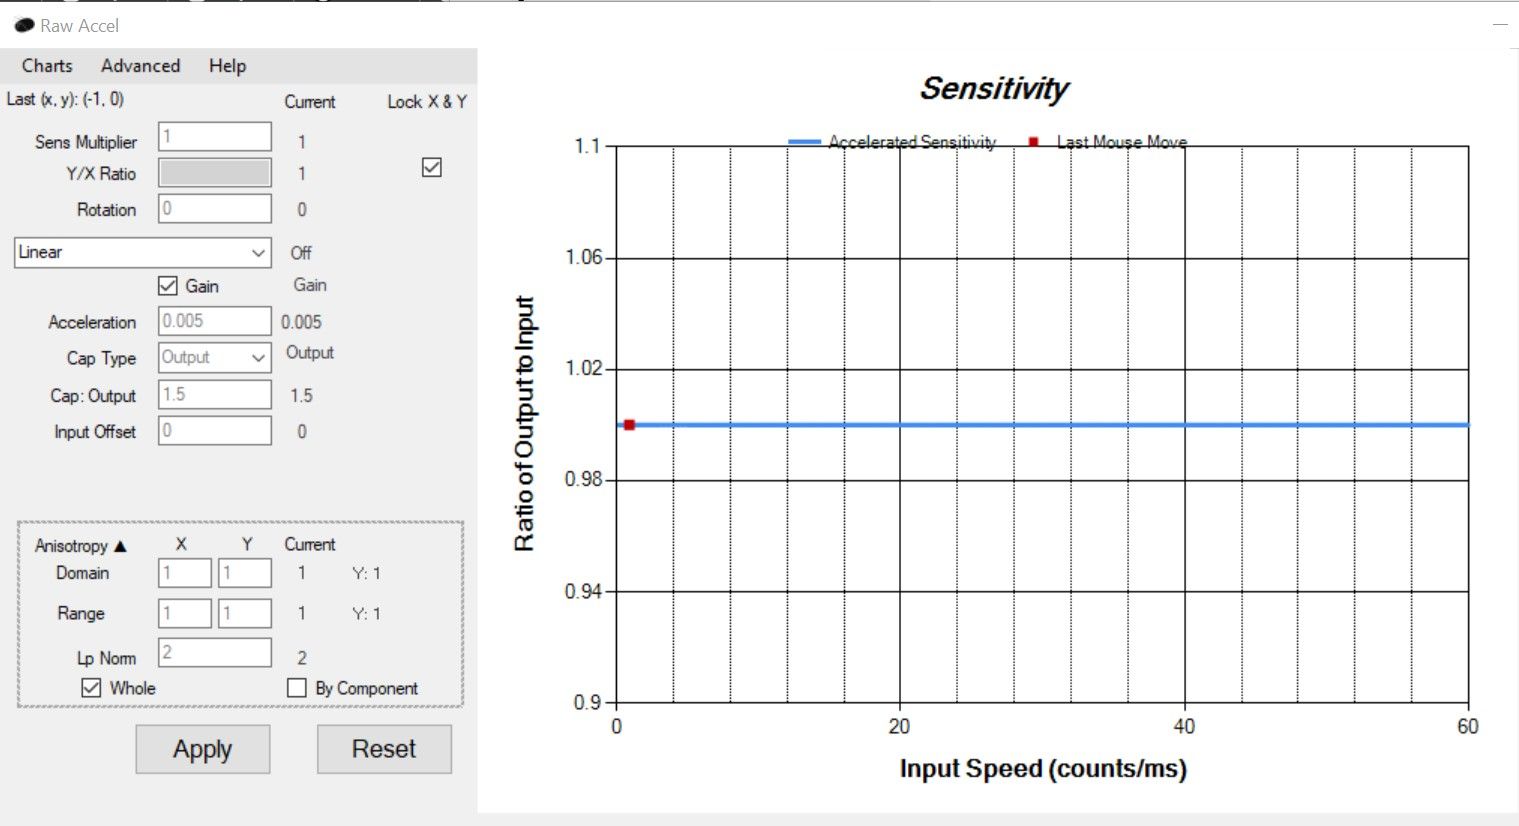
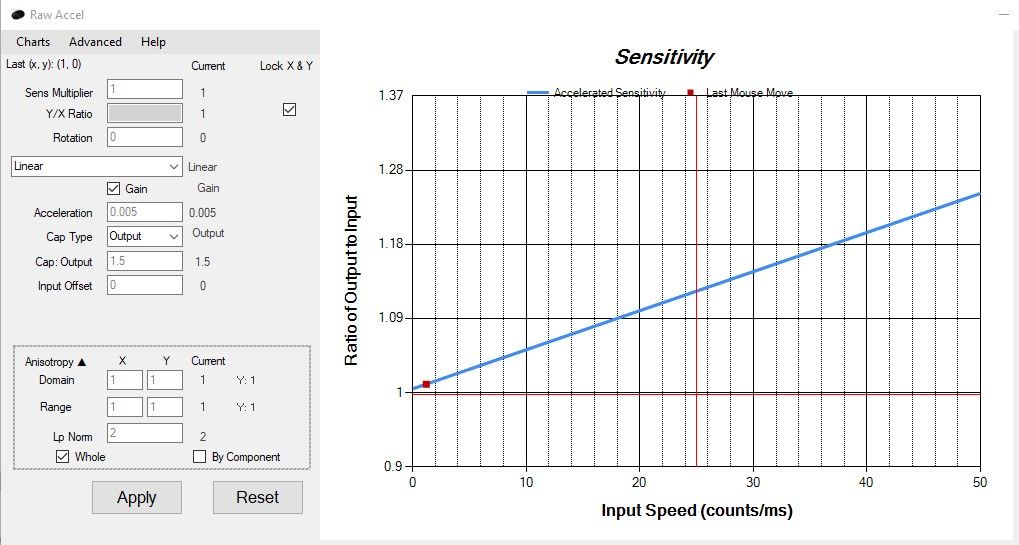
The graph represents how much your mouse is being accelerated. The x-axis represents how fast you’re moving your mouse. However, it calculates the speed through counts per millisecond. This means it scales with your mouse’s DPI. The higher the DPI, the higher the count/ms.
The y-axis represents the sensitivity multiplier. Right now, if you haven’t touched anything, there should be a blue horizontal line on your screen just at y-1. This means it is multiplying your sensitivity by one no matter how fast you move your mouse, meaning your sensitivity isn’t being accelerated no matter how fast or slow you move your mouse.
The red dot on the blue line represents your live inputs. The more you move your mouse, the more inputs you give it, and the more to the right the red dot will go. You can turn this on or off by going to Charts > Show Last Mouse Move.
What Settings to Pay Attention to in Raw Accel
Now that you know how to read the graph, you’re going to want to learn how to manipulate the graph with the different settings.
Right now, it should say Off. Click on the down-facing chevron and select any one of the options and hit Apply below (you’ll have to do this for every change you make). We suggest you start with linear as that’s the easiest to understand.
For now, the only settings you should pay attention to are the Sens Multiplier, Acceleration, Cap: Output, and Input Offset. These settings will change depending on what curve you’re using, but playing around with the different settings will let you know how they affect the graph. We’re just going to be focusing on linear as that’s really all you need.
Sens Multiplier: This determines how fast your mouse moves in relation to your DPI. If you want to use a higher DPI to give Raw Accel more counts/ms to work with, but want to keep your current sensitivity, you can divide your current DPI over the increased amount and set it as your Sens Multiplier. For example, a Sens Multiplier of 0.5 at 1600 DPI feels the same as 800 DPI at a Sens Multiplier of 1.
Acceleration: Acceleration is how fast your sensitivity increases. The higher the number, the more exponentially the multiplier increases.
Cap: Output: Make sure your Cap Type is set to Output. Setting it to input isn’t as intuitive. This allows you to set a limit on how much your sensitivity is being multiplied. You can limit it to a certain number if you don’t want it to go too fast making it more predictable.
Input Offset: This allows you to set the speed at which acceleration starts kicking in. You can leave yourself some room to have low sensitivity for precision. For example, setting it at 15 counts/ms allows you to move your mouse slower than 15 counts/ms at a lowered sensitivity, allowing for precision.
How to Get the Best Mouse Acceleration for Your Games
Now that you understand what the graph is about and how the settings affect the graph, it’s time for you to learn how to put those things together in order for it to help you in your games.
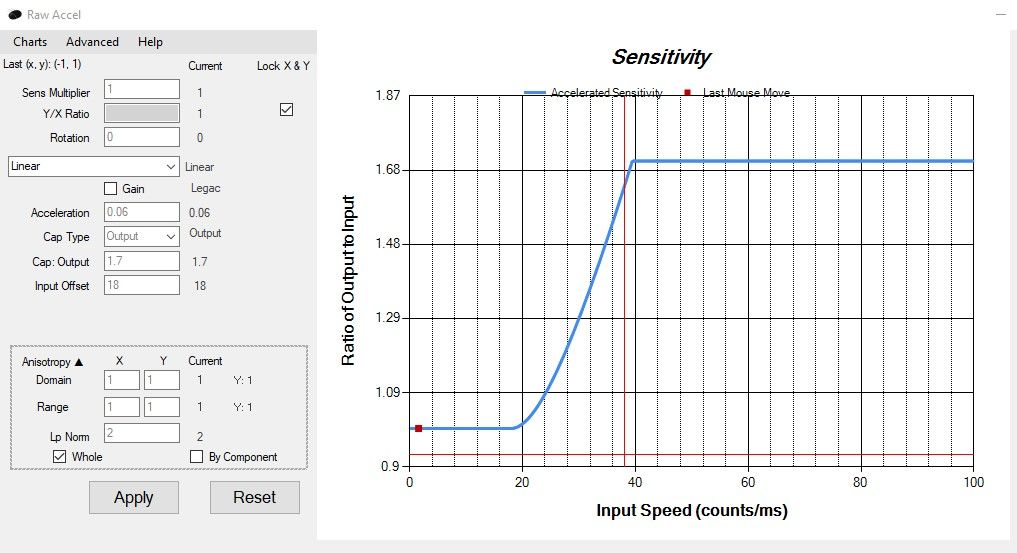
We suggest starting with your offset. Figure out how fast you move your mouse for precise shooting on the graph. For example, you find out that you don’t go faster than 18 counts/ms when you’re trying to be precise. You can set the offset to 18 so that the acceleration only kicks in starting at 18 counts/ms and any faster than that is considered a large flick, meaning you’d want the acceleration.
After your offset, we suggest setting a cap for the output. You don’t really want your sensitivity to keep increasing the faster you move your mouse. We suggest finding a high sensitivity that you find comfortable controlling while doing large flicks. For example, for anything beyond 1.7x, the default sensitivity is too fast. Setting a cap at 1.7x prevents it from going beyond that.
Finally, you should set the acceleration. This will allow you to set how quickly you’ll approach or reach the cap you’ve set. In the screenshot above, the acceleration is set at 0.06 with the Gain off, making the curve quite vertical, reaching the cap in less than 20 counts/ms difference. You can turn the Gain on to make the transition smoother, depending on your preference.
jlum is a popular Valorant content creator for SoaR Gaming and he uses mouse acceleration. If you want some settings to start out and play with, you can refer to these settings that jlum tweeted above about for 1600 DPI.
Enjoy Your Raw Accel Experience!
Mouse acceleration can improve your gaming experience as it takes less effort to make those large turns which can be draining. Flailing your arms around to make large movements gets tiring quick, especially if you’re a low-sensitivity user.
However, with the right acceleration settings, you’ll be hitting precise headshots while being able to aim at flying targets that catch you off guard. We hope this guide helped and that you’ll be able to play more effortlessly with it.

