The average typing speed is around 40 words per minute. If you want to be productive in your work you should aim to type at least 65 to 70 words per minute. Increasing your typing speed will improve your efficiency, which will boost tasks like data entry, copywriting, transcription, and administrative roles.
To test your typing skills, you can build a simple typing test application using Python. Using this, you can get precise results and develop an addictive habit to improve over time.
The Tkinter and Random Modules
To develop the Typing Test Game, you will use the tkinter module and the random module. Tkinter allows you to create desktop applications. It offers a variety of widgets like buttons, labels, text boxes, and layout managers that make it easy to develop applications without too much effort.
Apart from these, it comes with helpful libraries, canvas objects, and HTML/XML/PDF parsers. To install Tkinter into your system, open the terminal and execute:
pip install tkinter
The Random module has a collection of functions for generating random numbers. You can use these routines to produce shuffled sequences, game movements, and pseudo-random integers. Some of its common uses include the simulation of dice rolls, shuffling lists, a random password generator, and in games like hand cricket and number guessing.
How to Build Typing Test App Using Python
Follow these steps to build a typing test application using Python's Tkinter and Random module.
You can find the source code of Typing Test App Using Python and the word text file in this GitHub repository.
Begin by importing the Tkinter and the Random module. Initialize the Tkinter instance and display the root window. Set the dimensions in pixels, the title, and the background color of the window.
        from tkinter import *
import random
from tkinter import messagebox

Mainscreen = Tk()
Mainscreen.geometry('1000x600')
Mainscreen.title('MakeUseOf Typing Game')
Mainscreen.config(bg="aqua")
Download the list of words from the GitHub repository and place it in the same folder as the Python script for easy referencing. Read the contents of the text file and use the split() function to store each word into a list. Initialize the score, missed, and count1 variables to zero and the time variable to 60.
        file1 = open('words.txt', 'r')
words = file1.read().split()
score = missed = count1 = 0
time = 60
Define a function named giventime() that references the global variables mentioned above. If the time remaining is greater than zero, decrement it by one and display it on the timercount label (declared in the later half of the code). Use the after() function to call back the giventime() function after a delay of 1,000 milliseconds (one second).
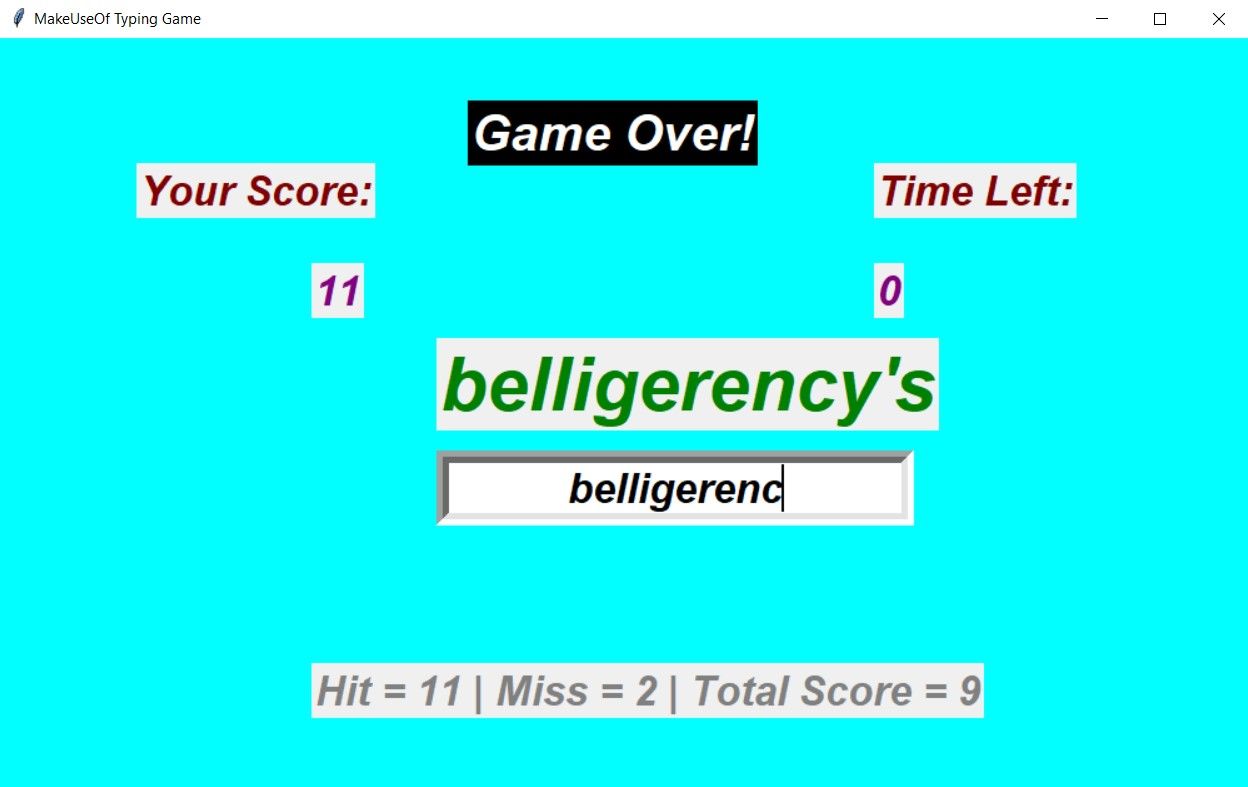
If the time is over, change the content of the startlabel to Game Over and simultaneously display the score on the gameinstruction label. Pass the corresponding variables to the format() function to display the Hit, Miss, and the Total Score.
        def giventime():
    global time, score, missed

    if time > 0:
        time -= 1
        timercount.configure(text=time)
        timercount.after(1000, giventime)
    else:
        startlabel.configure(text='Game Over!')
        gameinstruction.configure(text='Hit = {} | Miss = {} | Total Score = {}'.format(score, missed, score - missed))
Pass the title and the message to the askokcancel() function. If the response received on the dialog box evaluates to true, stop the application using the exit() function.
                rr = messagebox.askokcancel('Game Over!', 'Press Ok to Exit')

        if rr == True:
            exit()
Define a function named game() that takes event as an input argument. Reference the global variables. If the time variable equals 60, execute the giventime() function to begin the countdown. As the game is in progress, change the startlabel to Continue and gameinstruction label to hit enter after typing the word using the configure() function.
        def game(event):
    global score, missed

    if time == 60:
        giventime()

    startlabel.configure(text='Continue..')
    gameinstruction.configure(text='Hit Enter After Typing The Word')
Retrieve the word typed in wordentry using the get() function and check if equals the word displayed on the screen. If yes, increment the score and reflect it on the score label. Otherwise, increment the missed variable by one.
Reorder the items in the words list and display the first element. Use the delete() function from the zero to the last index on the wordentry widget to clear the content.
            if wordentry.get() == labelforward['text']:
        score += 1
        scorelabelcount.configure(text=score)
    else:
        missed += 1

    random.shuffle(words)
    labelforward.configure(text=words[0])
    wordentry.delete(0, END)
Set the startlabel, labelforward, scorelabel, scorelabelcount, labelfortimer, timercount, and gameinstruction using the Label widget. The label widget takes in the parent window in which you want to place it, the text it should display, the font type, size, color, and style along with the background color of the label.
Pass the X and Y coordinates to the place() method to organize the labels at a specific position.
        startlabel = Label(Mainscreen,text='Typing Game',font=('arial',30,'italic bold'),bg='black',fg='white')
startlabel.place(x=375, y=50)

labelforward = Label(Mainscreen,text=' ',font=('arial',45,'italic bold'),fg='green')
labelforward.place(x=350, y=240)

scorelabel = Label(Mainscreen,text='Your Score:',font=('arial',25,'italic bold'),fg='maroon')
scorelabel.place(x=110, y=100)

scorelabelcount = Label(Mainscreen,text=score,font=('arial',25,'italic bold'),fg='purple')
scorelabelcount.place(x=250, y=180)

labelfortimer = Label(Mainscreen,text='Time Left:',font=('arial',25,'italic bold'),fg='maroon')
labelfortimer.place(x=700, y=100)

timercount = Label(Mainscreen,text=time,font=('arial',25,'italic bold'),fg='purple')
timercount.place(x=700, y=180)

gameinstruction = Label(Mainscreen,text='Hit Enter After Typing The Word',font=('arial',25,'italic bold'),fg='grey')
gameinstruction.place(x=250, y=500)
Define an entry widget that accepts the word you type. Set the parent window you want to place it in, the font type, size, style along with the border size and the justify property. Use the place() method to position the entry widget and the focus_set() method to activate the entry box for input.
        wordentry = Entry(Mainscreen, font=('arial',25,'italic bold'), bd=10, justify='center')
wordentry.place(x=350, y=330)
wordentry.focus_set()
An important step is to bind the Enter key with an event in the Tkinter window. Doing so ensures that when the player presses Enter a particular function would execute. To achieve this, you pass the <Return> string and the game() function as parameters to the bind() function. The mainloop() function tells Python to run the Tkinter event loop and listen for events (such as button presses) until you close the window.
        Mainscreen.bind('<Return>', game)
mainloop()
Put all the code together and run the code to play the typing test game at your fingertips.
Output of the Python Typing Test App
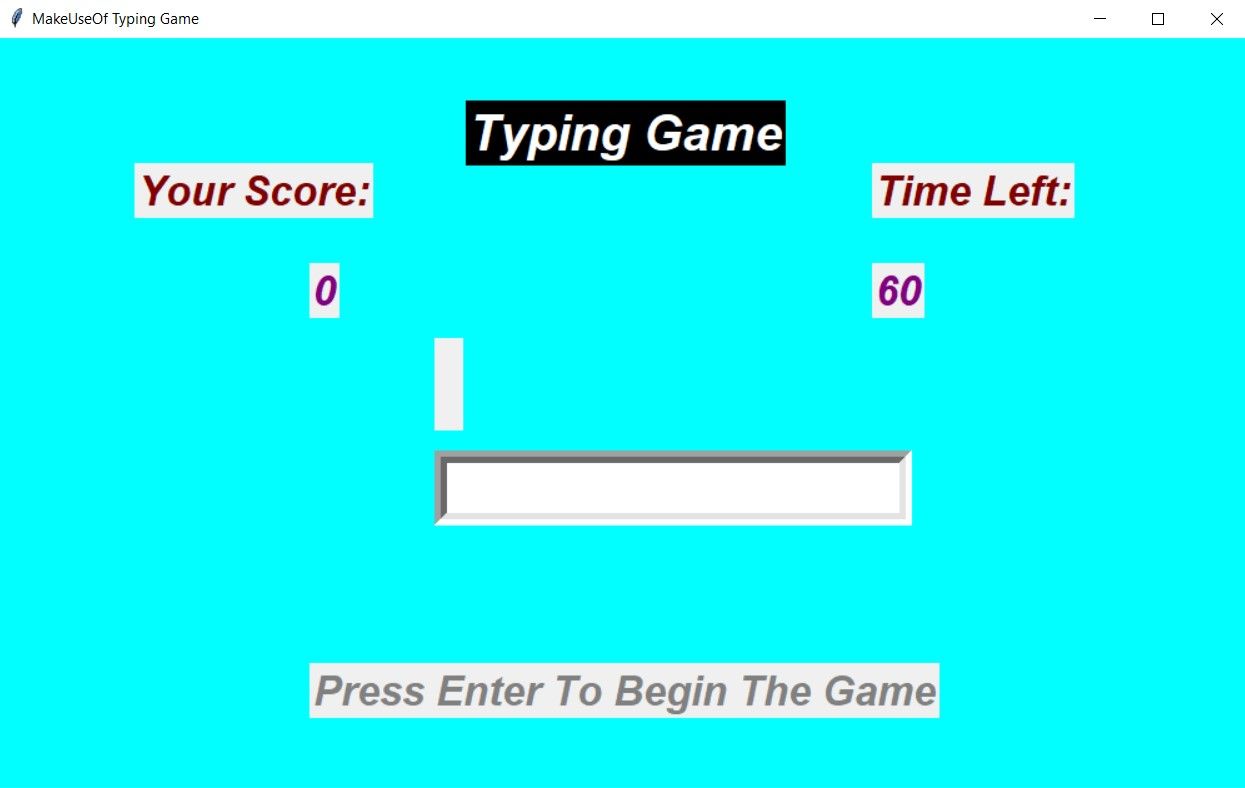
On running the program above, a window appears that is 1,000 pixels wide and 600 pixels tall, with an aqua background color, a scoreboard, countdown timer, and an instruction to begin the game.
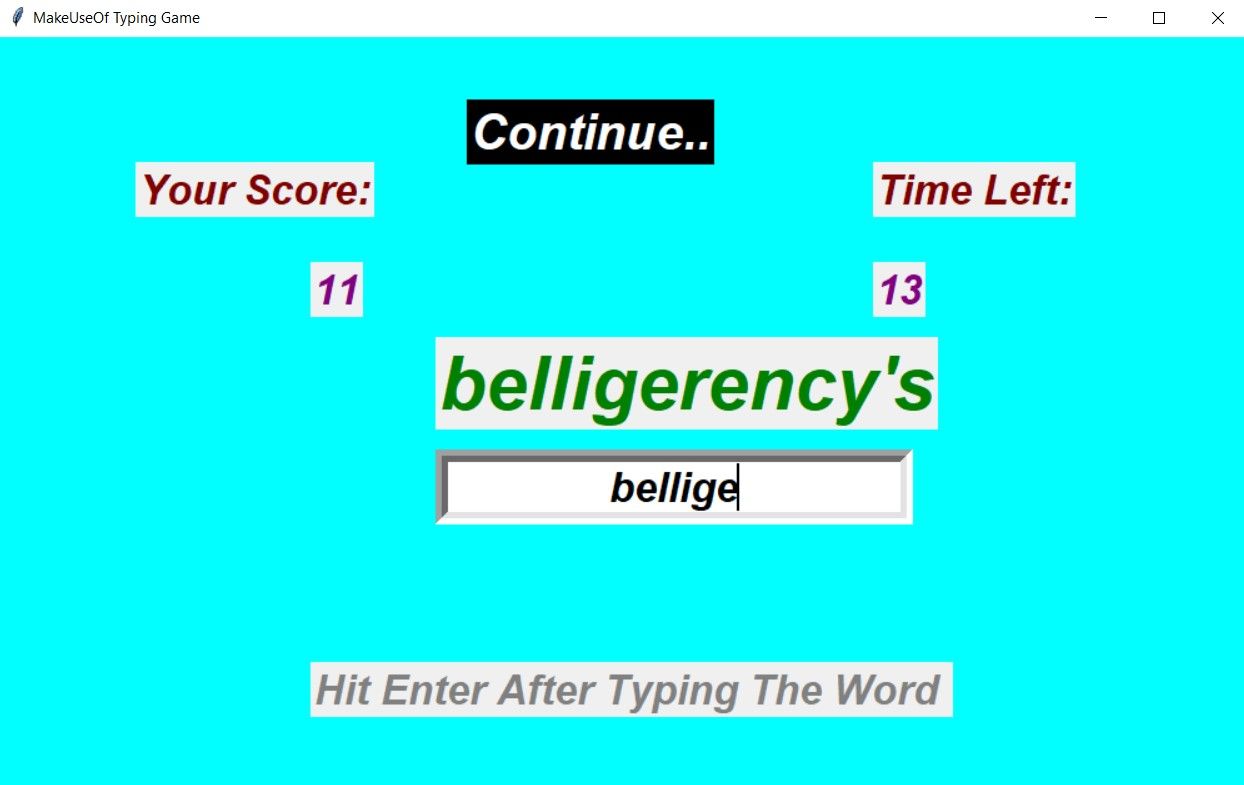
On hitting Enter, the game begins and on each correct answer the program increments the score one.
When the time is over, the program displays the final score along with a dialog box to exit the game.
Tkinter GUI Ideas for Beginners
Tkinter is a very powerful tool that you can use to build simple to fully functional applications that are attractive and robust. Even a newbie can use Tkinter. A few sample projects you can build are a quiz game, an address book, a to-do list, or an image viewer.
If you want to move beyond Tkinter, a few of the popular alternatives include Qt designer, Kivy, Toga, and BeeWare. All these frameworks are versatile and support cross-platform development, so you can run your applications hassle-free on any environment.


