Microsoft Word comes with built-in options to print in black and white. This can be especially helpful if you’re looking to save colored ink, or you have a document that doesn’t require full-color printing.
Here, we’ll take you through the simple process of setting Microsoft Word to print documents in black and white or grayscale. And if you ever need to print in full color again, the switch back is easy.
How to Print a Microsoft Word Document in Black and White
Microsoft Word has quite a few built-in options for getting better prints. It even allows you to print pages in reverse order, which is handy if you’ve got a large document, and want everything to run on its own.
The way to print a document in black and white on Microsoft Word is through the program’s Printer Properties option. This may differ slightly depending on the version of Word you are using, but the general idea remains the same.
- Open the Microsoft Word document you wish to print.
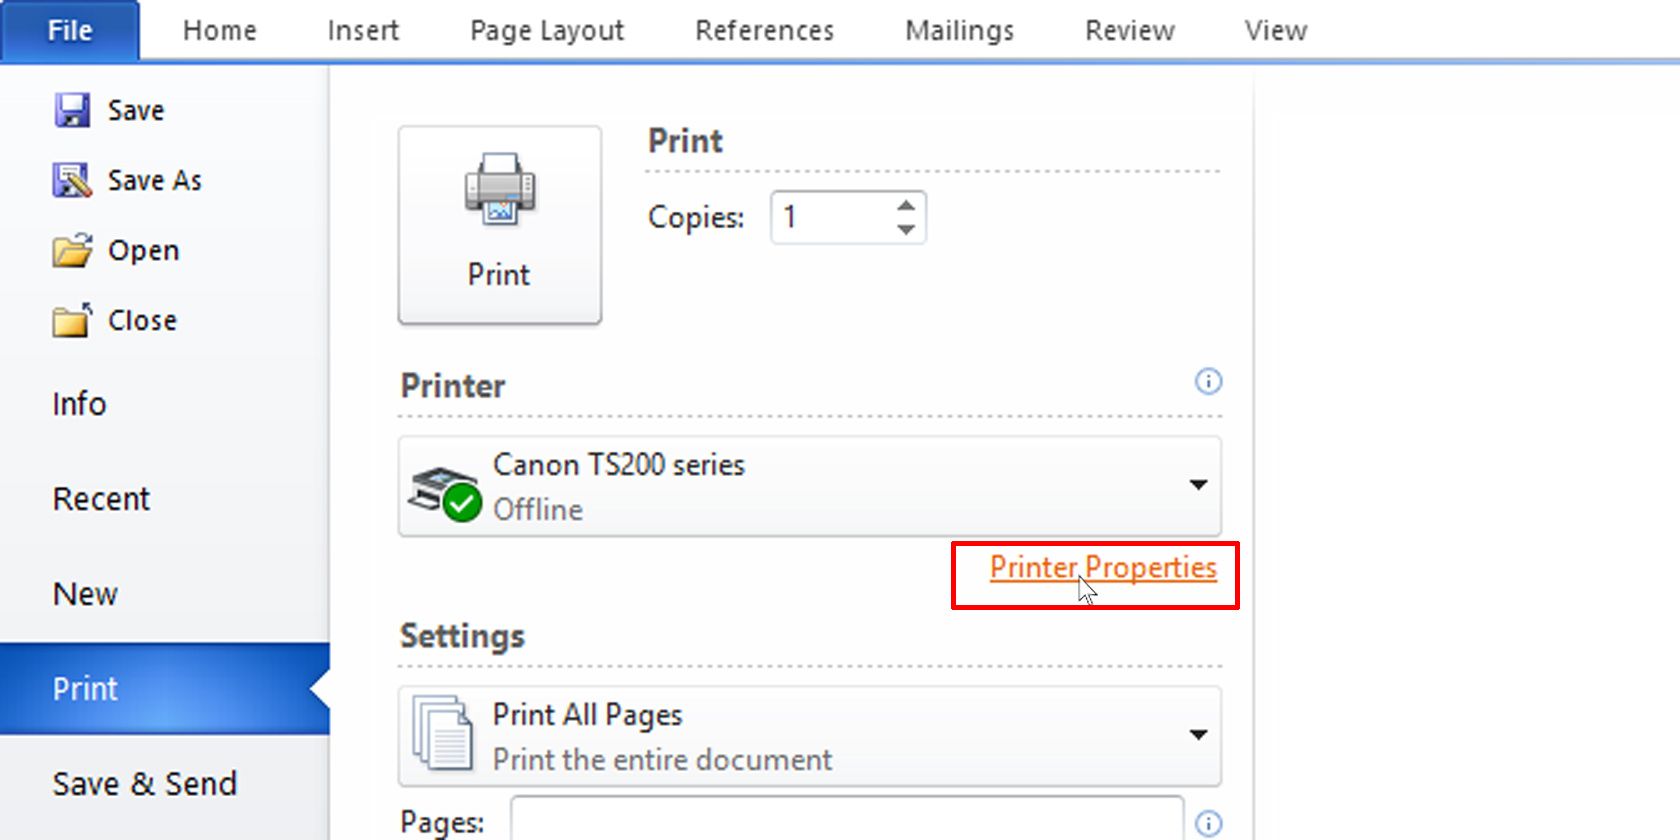
- On the top left of the window, click on File and select Print. You can also press Ctrl + P to bring up the printing screen.
- Under the Printer section, make sure your printer is selected.
- Click on Printer Properties.
-
Under the Quick Setup tab, in the Additional Features section, check the box for Grayscale Printing.
-
If you don’t see a Quick Setup option, the Grayscsale Printing checkbox may be found under the Main tab. You can select it there.
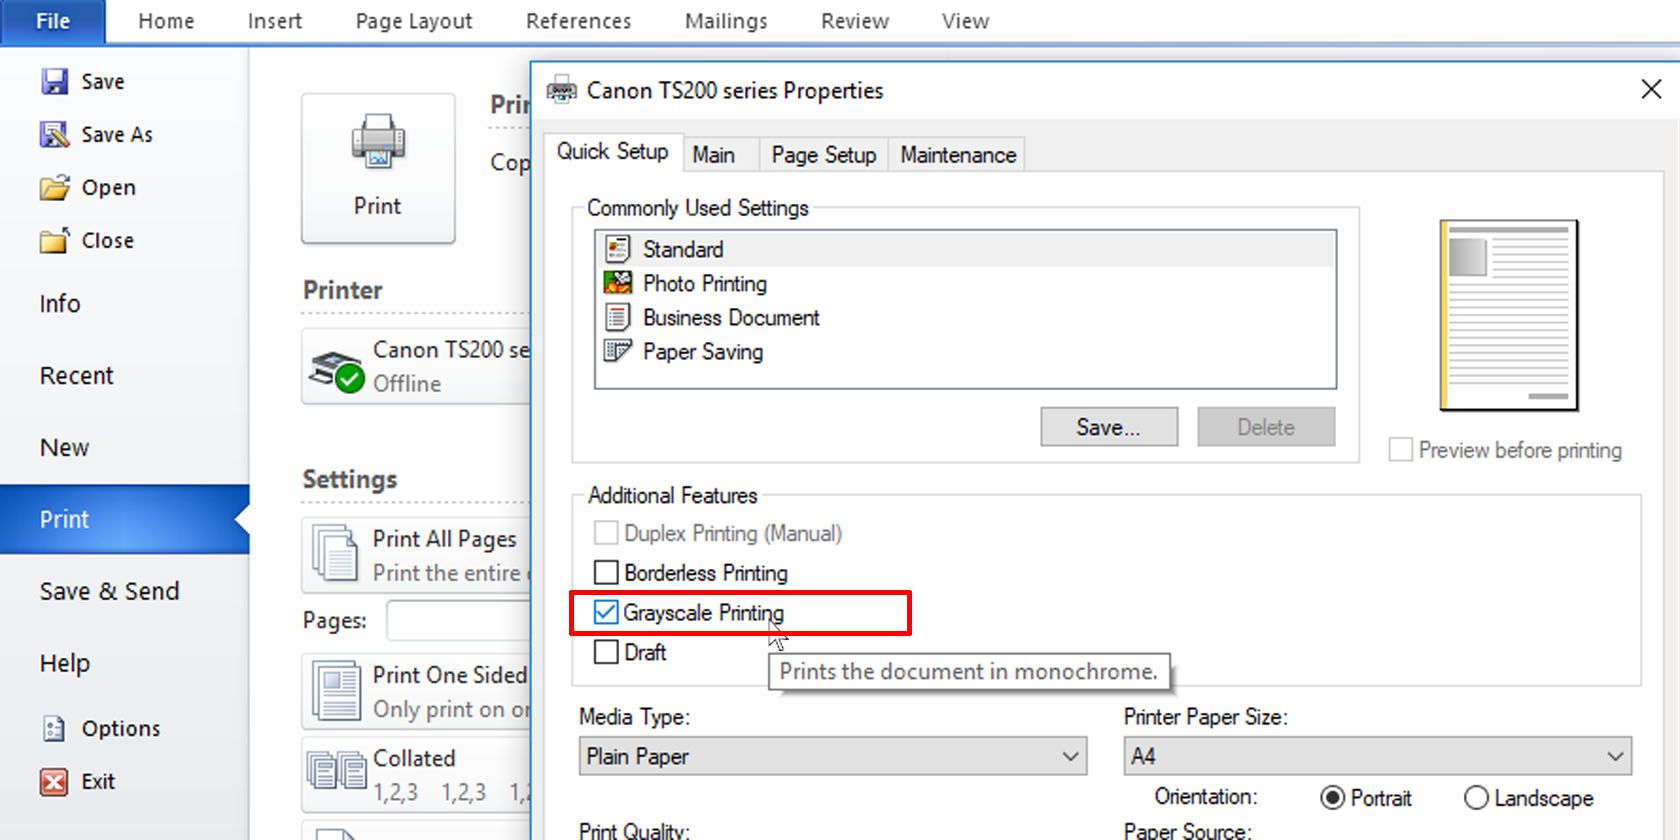
- Click OK.
- Once you’re satisfied with other printing settings, you can click on the Print button to print the Microsoft Word document in black and white.


Give Rough Prints the Monochrome Treatment They Warrant
Whether you want to save toner or ink in your printer’s cartridge, or whether you simply don’t need to waste color, printing in grayscale on Microsoft Word is easy.
And when you’re ready for full-color printing once again, a simple toggle will get things back to the way they were before.