
PostgreSQL (also known as Postgres) is one of the most widely-used database management systems. Many development teams use it as their database of choice when planning the development of an application.
You can use a local PostgreSQL install for development, and then set up a cloud-hosted instance for deployment and production. This is where Amazon Relational Database Service (RDS) takes the burden off your shoulders.
What Is Amazon RDS?
Relational Database Service (RDS) is a part of Amazon Web Services (AWS). It allows for the easy creation of managed relational databases such as MySQL, PostgreSQL, and MariaDB in the Amazon cloud.
With Amazon RDS, you do not have to worry about managing the hardware or software to set up a relational database for your application.
How to Create a PostgreSQL Database in RDS
The process of creating an RDS database is just as easy as creating other AWS resources such as EC2. The only prerequisite you need to create a database in RDS is an active AWS account. The following steps are all you need to spin up a PostgreSQL database in RDS.
- Search and Navigate to the RDS service dashboard.
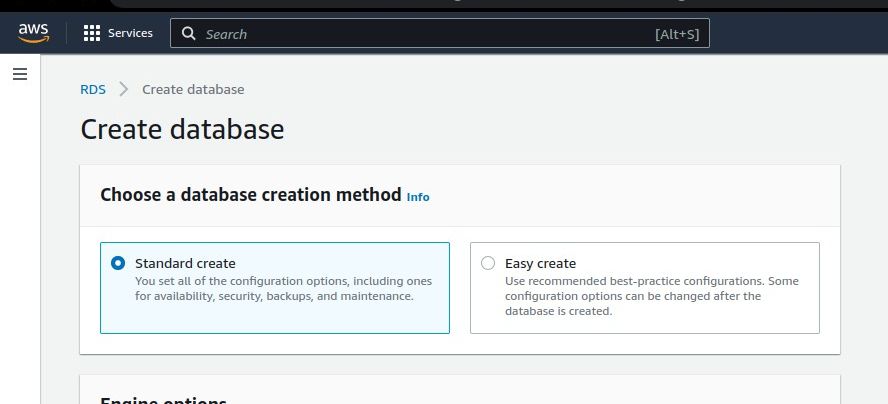
- Click on the Create database button to open up the RDS Create database wizard.
-
The first thing to do on this screen is to choose the method of creation between Standard create or Easy create. Standard create gives you the flexibility to configure your database all by yourself. Easy create presents recommended configuration options for your database with the option to change some of them before or after it creates the database.
The remaining steps use the Standard create option.
-
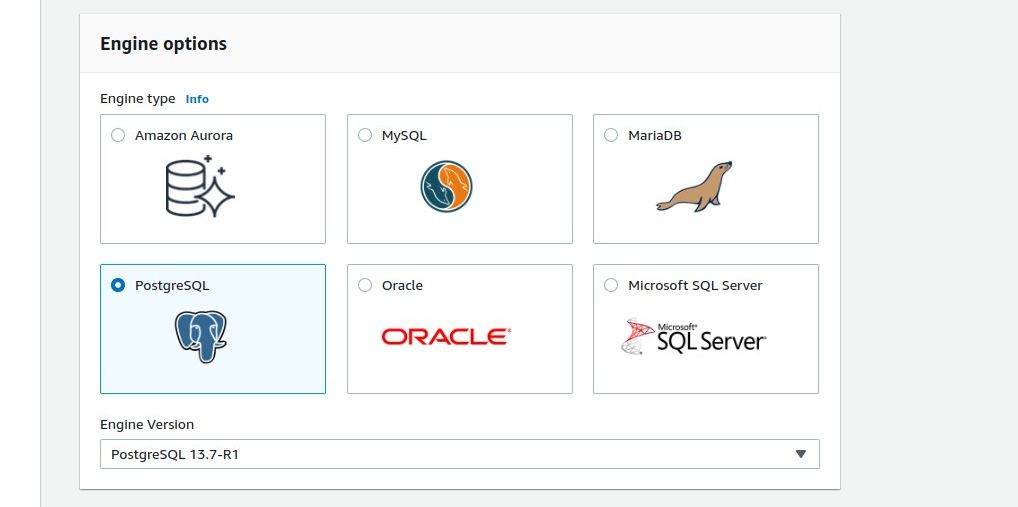
The next thing to do is to select a database engine and version you want to use. Select PostgreSQL. You can leave the default version selected or choose a specific version based on your needs.
-
The next step is to choose a template. A template is simply a set of rules that RDS follows in the background to set up your database according to your needs. You should use the Production template for a full application release.
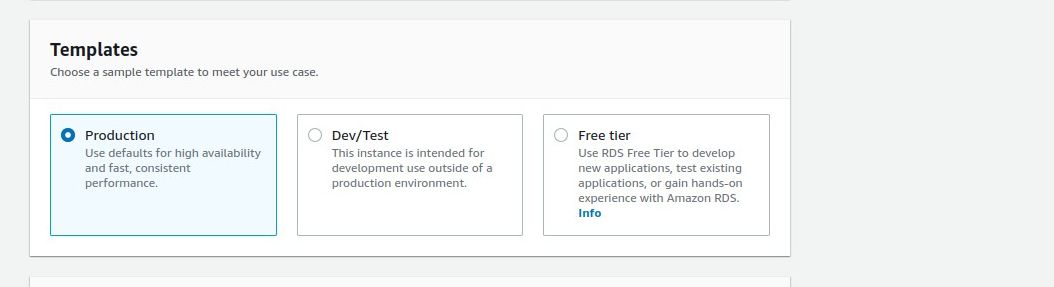
Always choose a template that best meets your needs at a particular time. This will ensure you don’t incur unnecessary AWS charges.
-
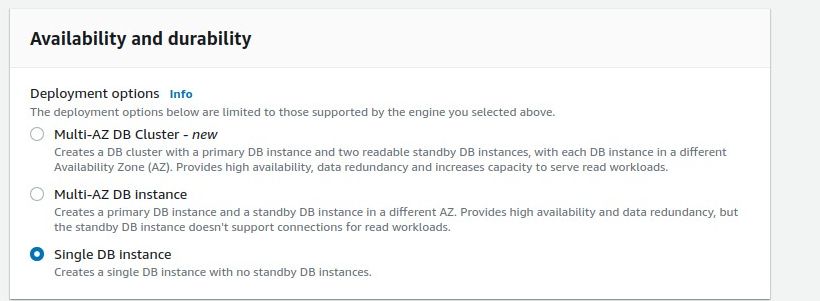
After selecting a template, you are further required to choose your preferences for the chosen template. In the case of the Production template, you can choose the kind of availability you want for the database.
A highly-available application would require a Multi-AZ (Availability zone) DB Cluster or Instance to allow for scalability and redundancy, while a Single DB Instance is okay for small-scale applications.
-
You are now required to set your preferred RDS database identifier and authentication credentials. You’ll use these credentials in your app to access and connect to the database.

-
The next two sections are Instance configuration and Storage where you choose the hardware configuration for your database. You may leave these configurations as recommended by default or modify the options based on your requirements.
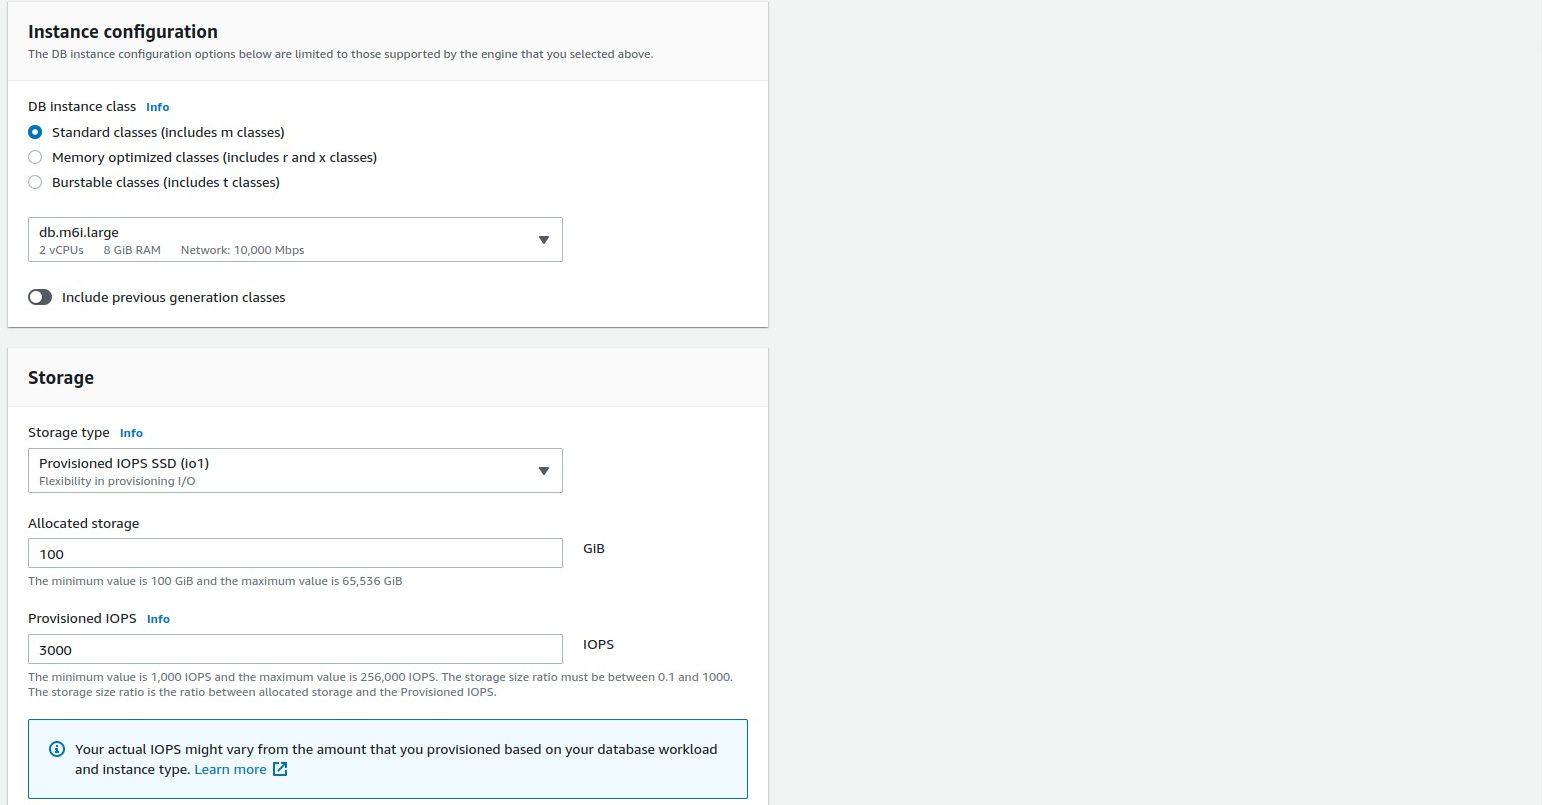
In case you are not sure what your storage size requirements might turn out to be, you can choose a small size to start with. If you enable the Storage autoscaling option, RDS will increase your storage when it reaches the threshold.
-
In the Connectivity section, you have the option to connect your database to an EC2 resource or not. You should only opt to connect if you have your application server running in EC2 or if you plan to host your server with EC2.
You may leave the VPC and availability zone settings as default, or choose a preference if you have one.
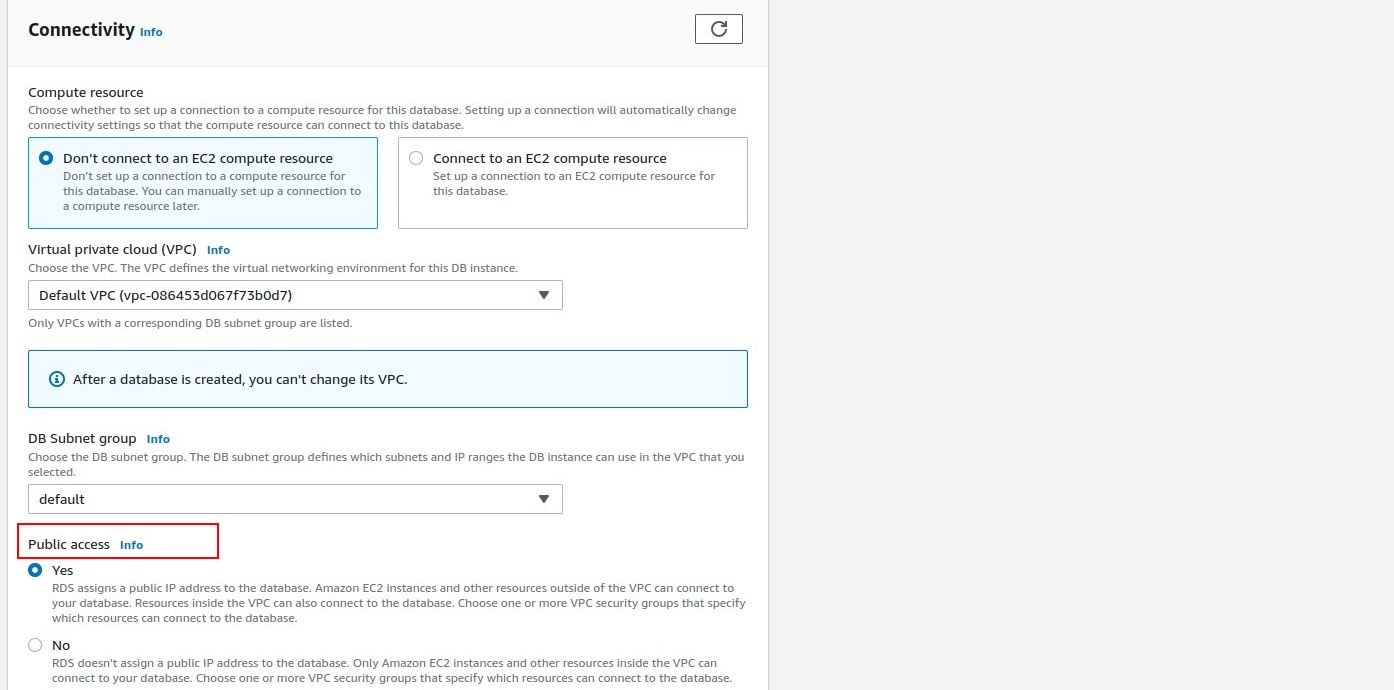
Your application server may not be running on any of AWS’s services like EC2 or Elastic BeanStalk. In that case, you should allow public access in the connectivity section so that your connection endpoint will work from external sources.
-
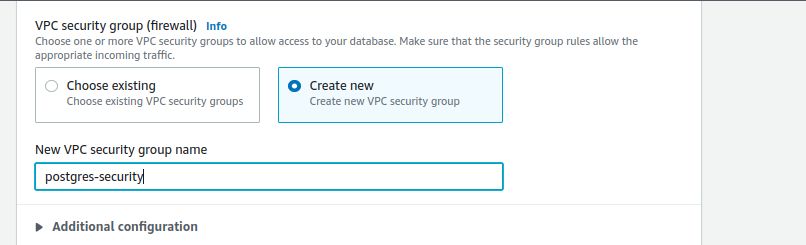
In the VPC security group (firewall) subsection of the connectivity section, choose the option to create a new VPC security group and give it a name. This allows for connection to the database from a source outside of AWS (e.g your application).
-
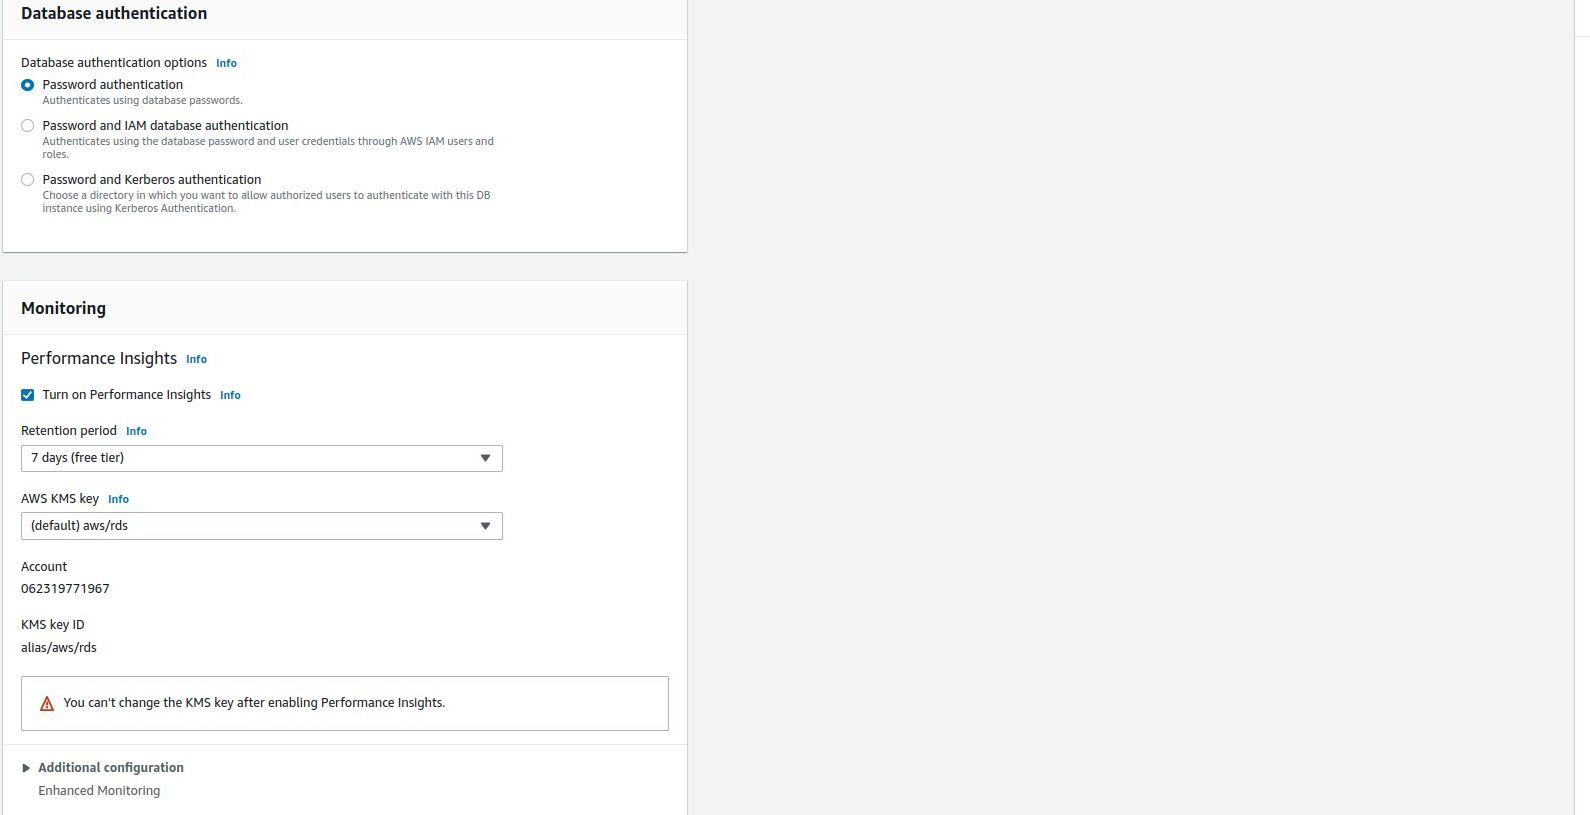
You may leave the Database authentication section as default (Password authentication) since you have set a username and password previously in step 7. Monitoring is where you configure performance insights and how long you want the insights to be available. You may leave this as default or configure it based on your requirements.
- The last section is the Advanced configurations settings where you can select some extra options for your database. You may not need to do any configurations here, but if your database requires encryption, auto-backups, or Amazon CloudWatch logs, you may add some configurations here.
- Once done with all the previous steps, click on the Create database button and wait until the database creation is complete (after the state on the dashboard changes from Creating to Available).


Connecting to an RDS PostgreSQL Database
Connecting to PostgreSQL with web technologies like Node.js is very easy, and you can also connect with the PostgreSQL GUI tool PgAdmin4. To test the newly created RDS PostgreSQL instance with a connection, this section uses PgAdmin4 to connect to the database. Follow the steps below to test the database connection.
-
Login to PgAdmin4, and register a new server.
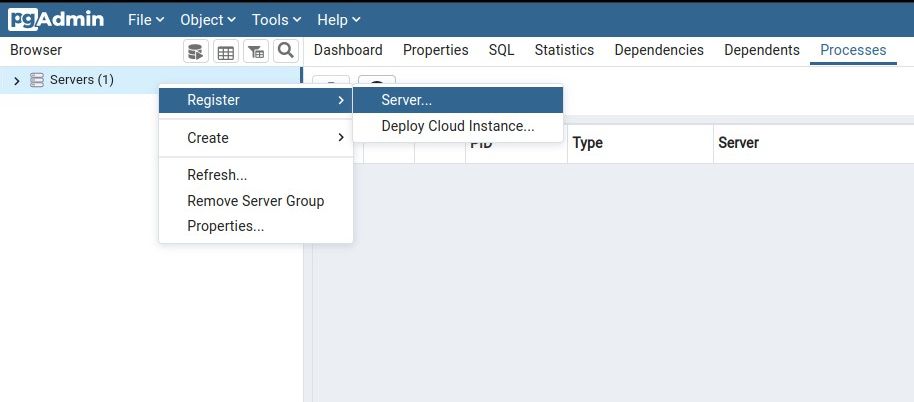
- Give the server a name and navigate to the connection tab. This is where you need the endpoint URL and port of the PostgreSQL instance. You’ll also need the authentication credentials you configured when creating the database.
-
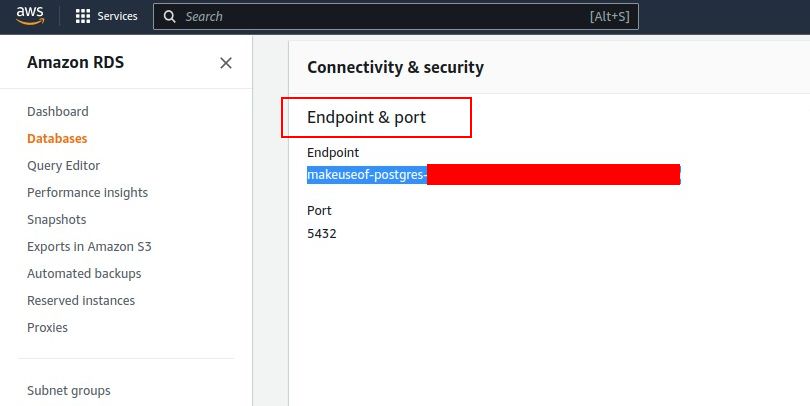
Navigate to your RDS dashboard and open the database instance properties by clicking on the database name. The screen displayed shows the Connection & Security properties of your RDS database.
Copy the Endpoint string and paste it into the Hostname/Address field in PgAdmin4. Then input the value 5432 in the port field. The Maintenance database is the initial database that PgAdmin connects to (by default, the value to put here is postgres).
 Fill in your database authentication credentials (username and password) and leave every other setting as default.
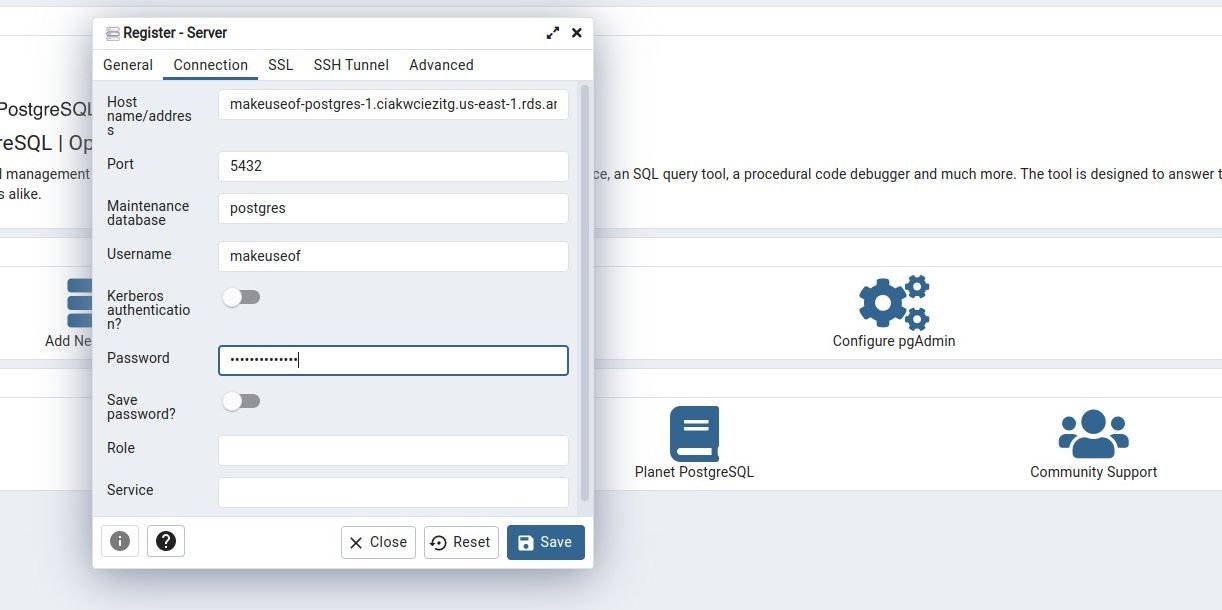
-
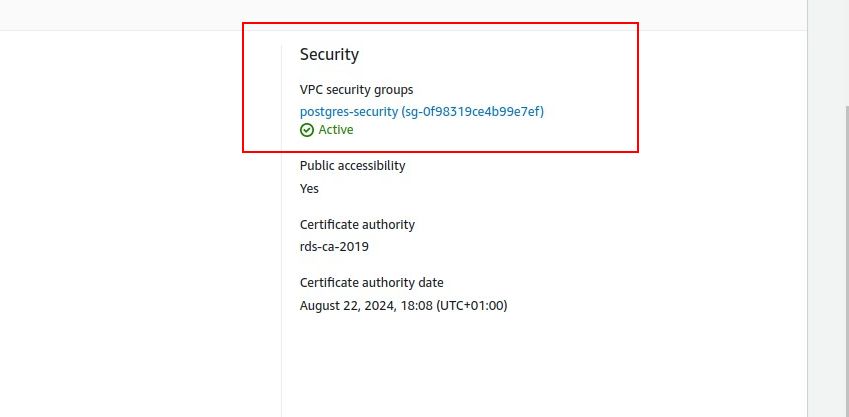
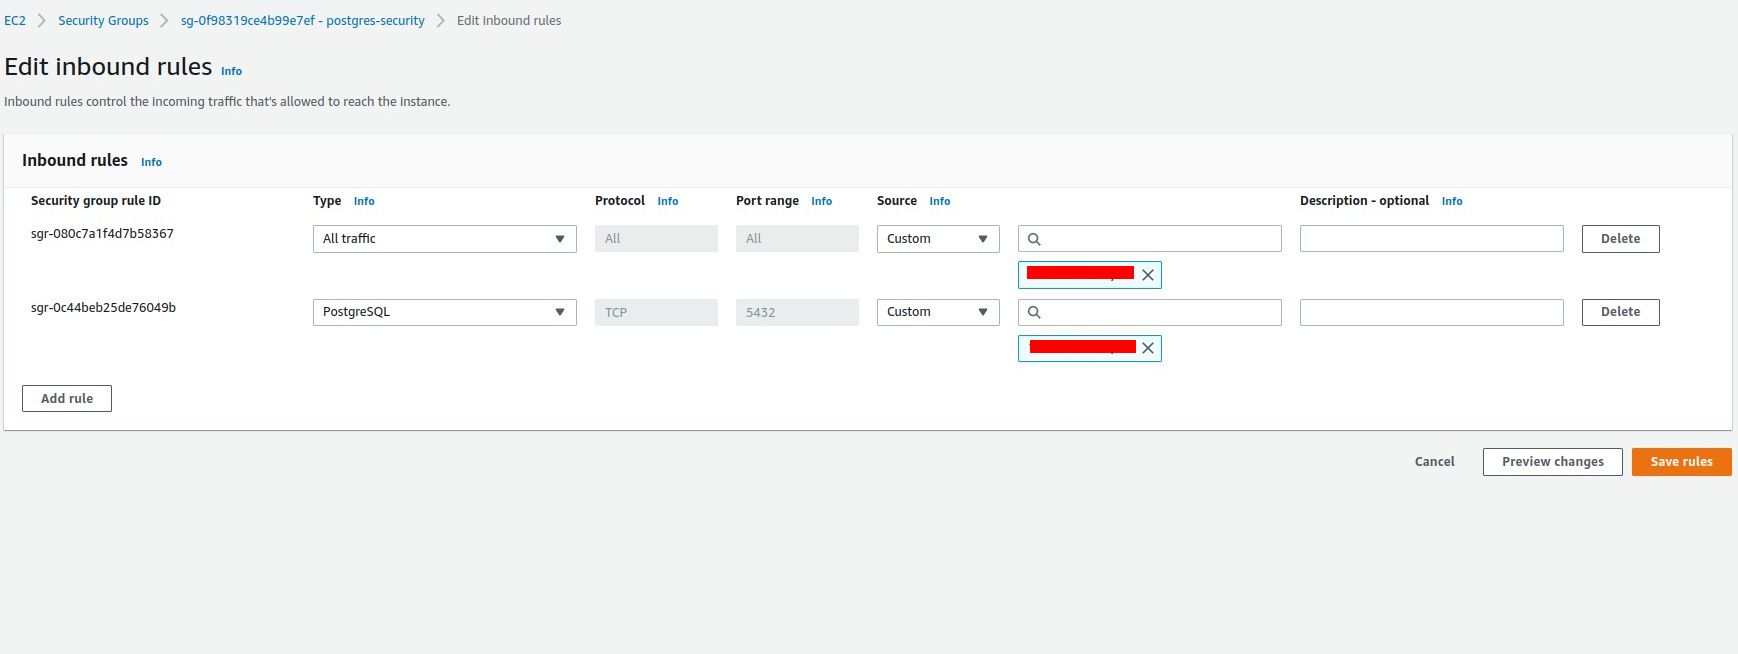
Before saving, you have to edit the VPC security group settings for your database to allow all kinds of traffic from your IP address. To do this, navigate back to the Connectivity & Security properties of your RDS database, then click on the security group to view its configuration.
Go to the inbound rules tab and click on Edit inbound rules. On the screen that shows up, add a new rule that allows all traffic and select My IP in the source. This ensures that RDS will only allow connections from your computer. You can always add a new IP address in case you switch computers or deploy your application on another computer.
-
Go back to PgAdmin4, then click save and wait while it tries to establish a connection with the database. A successful connection adds your database to PgAdmin’s list of servers as shown below:
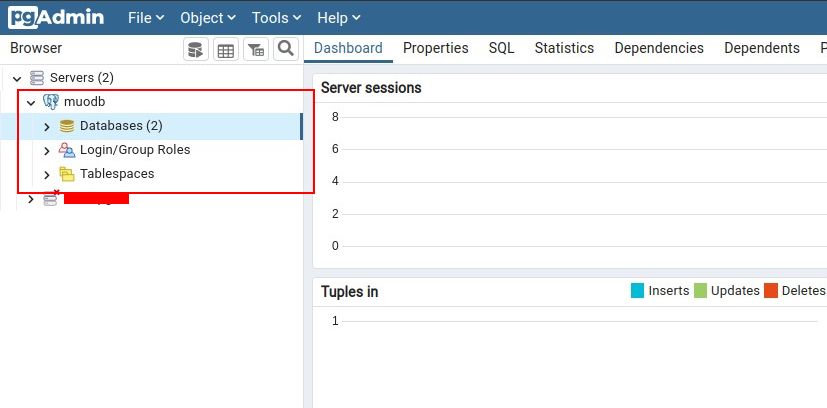


After PgAdmin has connected to the database, you can run queries and do whatever you want with the database.
Launching and Connecting to Databases With RDS
Amazon RDS has many relational database types you can use for any kind of application depending on your needs. PostgreSQL is an excellent first choice, but RDS lets you create and manage databases using many other engines.
You can use PgAdmin4 to connect and manage your databases. You can also connect directly to your RDS database from an application using the same connection details.