If there's one thing abundant today, that's digital entertainment. You can purchase thousands of titles at most popular digital storefronts and find even more completely free. What's the point of being stuck in the past?
Still, many older games are worth your time, for they're not "relics" but "classics". Titles like Syndicate and the original X-Com look and sound crude compared to today's games. Still, their addictive gameplay can give a lesson even to most modern triple-A titles. And the only way to play them is with software like DOSBox-X.
What Is DOSBox-X?
DOSBox-X is a fork of the popular DOSBox app that enables a modern PC to run software made for older PCs. As its name states, it's primarily designed for Microsoft's ancient Disk Operating System, or DOS for short.
Unlike the "vanilla" DOSBox, DOSBox-X comes with baked-in emulation for hardware like 3dfx's Voodoo 3D accelerators and various popular audio cards. Thanks to this, you can even install older versions of Windows inside its virtual environment.
For this article, though, we'll stick to classic DOS games.
How to Download and Install DOSBox-X
DOSBox-X is free and available on Windows, Macs, and Linux. In this guide, we'll be using its Windows version.
Although we'll be using DOSBox-X's Windows 7+ version, the other ones work similarly (more or less). So, you can follow along even if you're on a different OS. Still, expect some variations on DOSBox-X's installation and how you'll manage folders, paths, and "ROMs" (AKA: games).
Start by downloading the app from DOSBox-X's official site, then install it or extract it to a folder.

Depending on the version you've downloaded, and if you installed or extracted it, you'll either find a shortcut to the DOSBox-X app in the Windows Start menu/your Desktop, or you'll have to visit its folder with your favorite file manager and double-click dosbox-x.exe to launch it.
Keep that in mind, but don't launch the app yet - we first have to do some folder juggling.
Setting Up Your Storage for DOSBox-X
Unlike other emulators, DOSBox and its fork we're using, DOSBox-X, emulate a "proper" DOS environment, so you can't simply "load ROMs" into it. Thus, you'll have to allocate some storage to it.
This is easier than it sounds, for it's as simple as creating two folders.
- The first will be DOSBox-X's "working directory" (think of it as the equivalent of "your current Windows installation").
- The second one will be your primary emulated storage, where you'll place all the classic software you want to access from within DOSBox-X.
For convenience's sake, we suggest you create a folder with a name like "DOS" or "DOSgames" inside the directory where you keep ROMs for other emulators or the disk/partition/folder where you install your modern games.

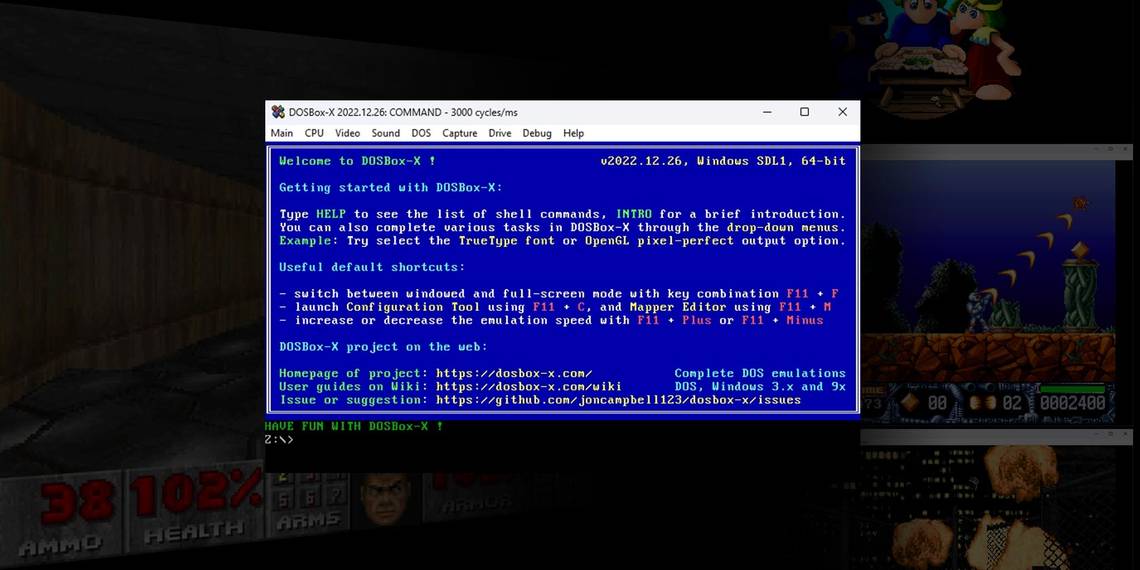
Click in your file manager's "path" field/bar, and copy the full path to the folder you created to the Clipboard. Now's the time to run DOSBox-X, and the first thing you'll see won't be the app but a requester for the folder it should use. "Tell it" (paste with CTRL + V) to use the folder you created in the previous step.

Return to your file manager and create another folder inside the previous one. We'll configure DOSBox-X to "see" this folder as its primary storage.
You can give it a name like C since, in Microsoft's OSes, that was, is, and probably will remain the letter usually mapped to a PC's "system drive". However, we believe it's better to name it something like DriveC, since it will make more sense if you forget about its existence and happen to run into it in the future.

Don't close your file manager yet; now is a good time to "prepare" your games. If you have them in compressed archives, extract your games into individual folders within the C/DriveC folder.

With almost all file-related tasks behind us, it's time to configure DOSBox-X for some retro gaming.
How to Configure DOSBox-X for the Best Experience
DOSBox-X has lots of settings to tweak, so let's get it set up.
1. Setting Up the Directory
Turn your attention to DOSBox-X's window. Choose its Configuration tool from the Main menu entry (or press F11 + C on your keyboard).

Instead of manually mounting the folder you created every time you run DOSBox-X, let's have it always available automatically. For that, we'll have to do some classic AutoExec.BAT editing. Thus, choose the last option in the Configuration Tool's panel, AUTOEXEC.BAT.

You'll see the currently empty DOSBox-X's AutoExec.
Type mount in the first line, press space once, and then type c, which will be the letter of your primary drive inside DOSBox-X's virtual environment. Press space again, and type the full path to the folder you've created for use as your virtual C drive.
If you've copied its path to the Clipboard from your file manager, you'll find that you can't paste it, as usual, using the CTRL + V keyboard combination. Instead, use the Paste Clipboard button.

Press Enter and type c: in the line underneath. That's how you "change the active drive" inside a DOS environment.
By including this command in DOSBox-X's AutoExec, its virtual environment will "change" the active drive to the storage folder you've mounted in the line directly above. If you don't do that, DOSBox-X will show you its internal "Z" drive every time you launch it, and you'll have to switch to your actual storage manually.

Click OK to accept the changes and return to DOSBox-X's Configuration Tool panel. Choose Render to configure the way DOSBox-X shows graphics.

To learn more about all available options, click DOSBox's Help button.

DOSBox's Help offers information about all its configuration options, but for now, turn your attention to those under aspect.
2. Setting Up the Aspect Ratio
For this guide, we'll go for true, which keeps the original graphics' 4:3 proportions, but scales them to fit the entire display, adding black bars on the sides of the screen. Check the aspect-related information to see if you'd prefer another approach.
Click Close to exit DOSBox-X's Help file.

Click on the button with the three dots on the right of the Aspect line, and enable the graphics aspect you'd like to use. Then, click OK to accept and enable the setting.

Click on Save to save all changes. On the new panel that shows up, choose Use primary config file and then click on Save & Restart.

Launching Your Retro-Favorites With DOSBox-X
DOSBox-X is easier if you're familiar with DOS since it works precisely like a DOS-era PC. If you aren't, and interacting with your PC using commands is something new for you, it would be best to check our beginners guide to the Windows Command Prompt.
If that sounds like too much work for playing a handful of games, here's a quick recap of the most important commands that can get you up and running in mere minutes:
- You can see a listing of all folders on the "current level" of the storage using the command dir.
- You can "enter" a folder using the command cd FolderName (for example, cd duke3d).
- You can "exit" a folder and return "one level up" in your storage using the command cd ...
- To find all executables in a folder, use the commands dir *.exe and dir *.bat.
- To launch one of those executables, type its full filename and press Enter.
- You can also use the Tab key to auto-complete paths and filenames. If the auto-completed one isn't what you're seeking, press Tab again to "cycle" through all entries matching what you've typed.

Let's say you want to launch the classic shareware version of id's genre-defining Doom that you already have in your storage in a folder with the game's name.
Type cd doom to "enter" the game's folder.

Type dir *.bat to check for any runnable batch files in the folder. You'll see two, IAFIX.BAT and RUN.BAT.

As you can probably guess from its name, the second one is what you need to launch the game. So, type run.bat and press Enter.

Like all software from that era, Doom can't auto-detect the audio system used by your (virtual) PC. DOSBox-X is configured by default to emulate a classic SoundBlaster 16 card by Creative, so choose that entry by pressing 2.
Next step, enjoy blasting some demons in Doom!

If manually juggling games in DOSBox-X seems like a hassle, maybe it would be worth checking out a front-end like Launchbox. We saw in the past how you can import MS-DOS games into Launchbox, and after the front-end's initial setup, playing a game will be as easy as selecting it from its menu.
DOS in a Box
Thanks to DOSBox-X, you can have the best DOS-era computers had to offer on a window on your desktop and a collection of hundreds of the best games in a folder that will take less than 1% of your actual PC's total storage.
Despite your PC being officially incompatible with such old software, with DOSBox-X, enjoying your retro-favorites in all their pixelated glory will be only one or two commands away!