The Shape tool is one that often gets passed over for more "adult-feeling" tools, such as the Text tool, or Photoshop's Marquee Selection tool. If you take a closer look, though, you'll find that there's a lot that you can do with it when creating graphic designs. Path Operations are one way to unlock this hidden potential.
It's not just the Shape tool, either—Path Operations can be applied to any object in Photoshop created with a vector or outlined with a vector path. If you already love working with geometry in other creative apps like Illustrator, this is one family of tools that you're going to want to remember.
How to Use Path Operations in Photoshop
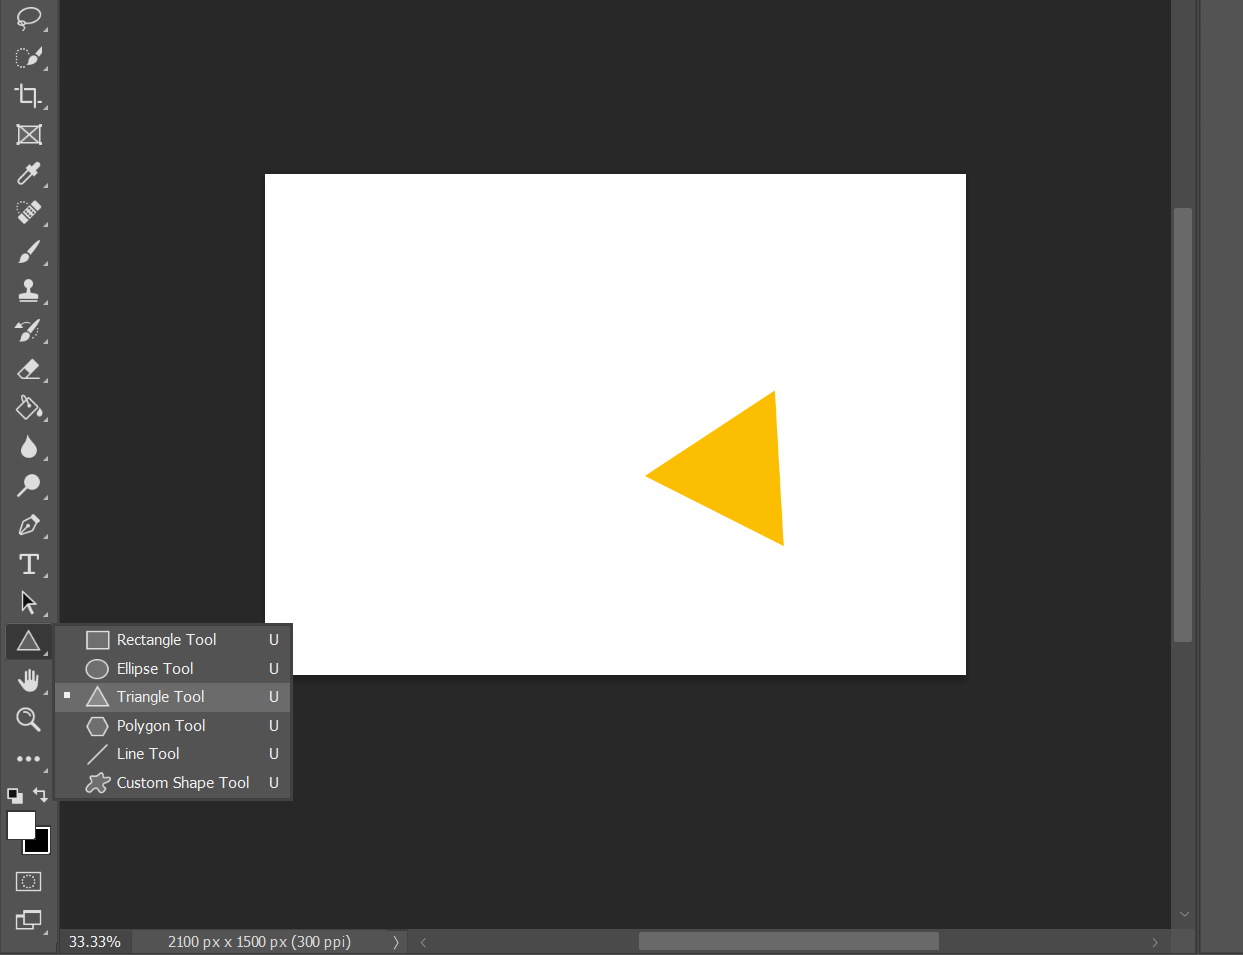
To start, we're going to need to create a vector shape. Hit U or select the one that you want by right-clicking on the Shape tool.
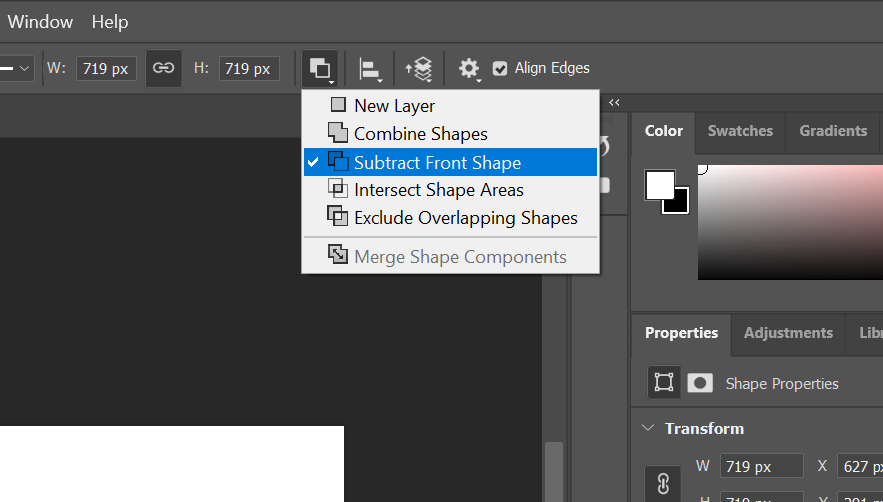
In addition to our triangle, we're going to need to create another vector shape, but before we do that, we're going to need to adjust one key tool option: the aforementioned Path Operations option.
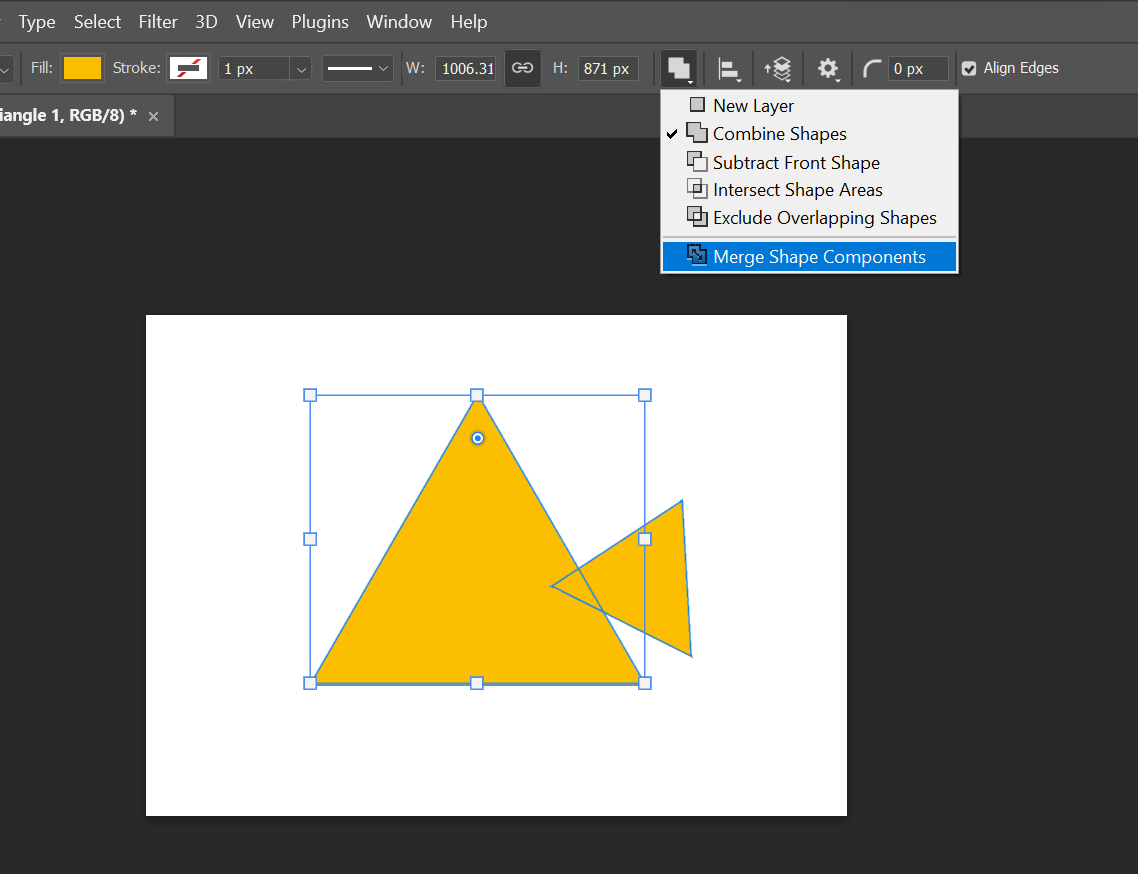
You've got a few different options here. What do they all mean?
- New Layer: This is the default path operation selected—you create a new vector shape layer every time you use it.
- Combine Shapes: This option merges each new shape with the last one.
- Subtract Front Shape: The front shape cuts into the new one.
- Intersect Shape Areas: Only the intersecting area is kept.
- Exclude Overlapping Shapes: Everything except for the intersecting area is kept.
- Merge Shape Components: This option can be used to combine two shape layers retroactively after they have both already been created.
Let's give them all a shot.
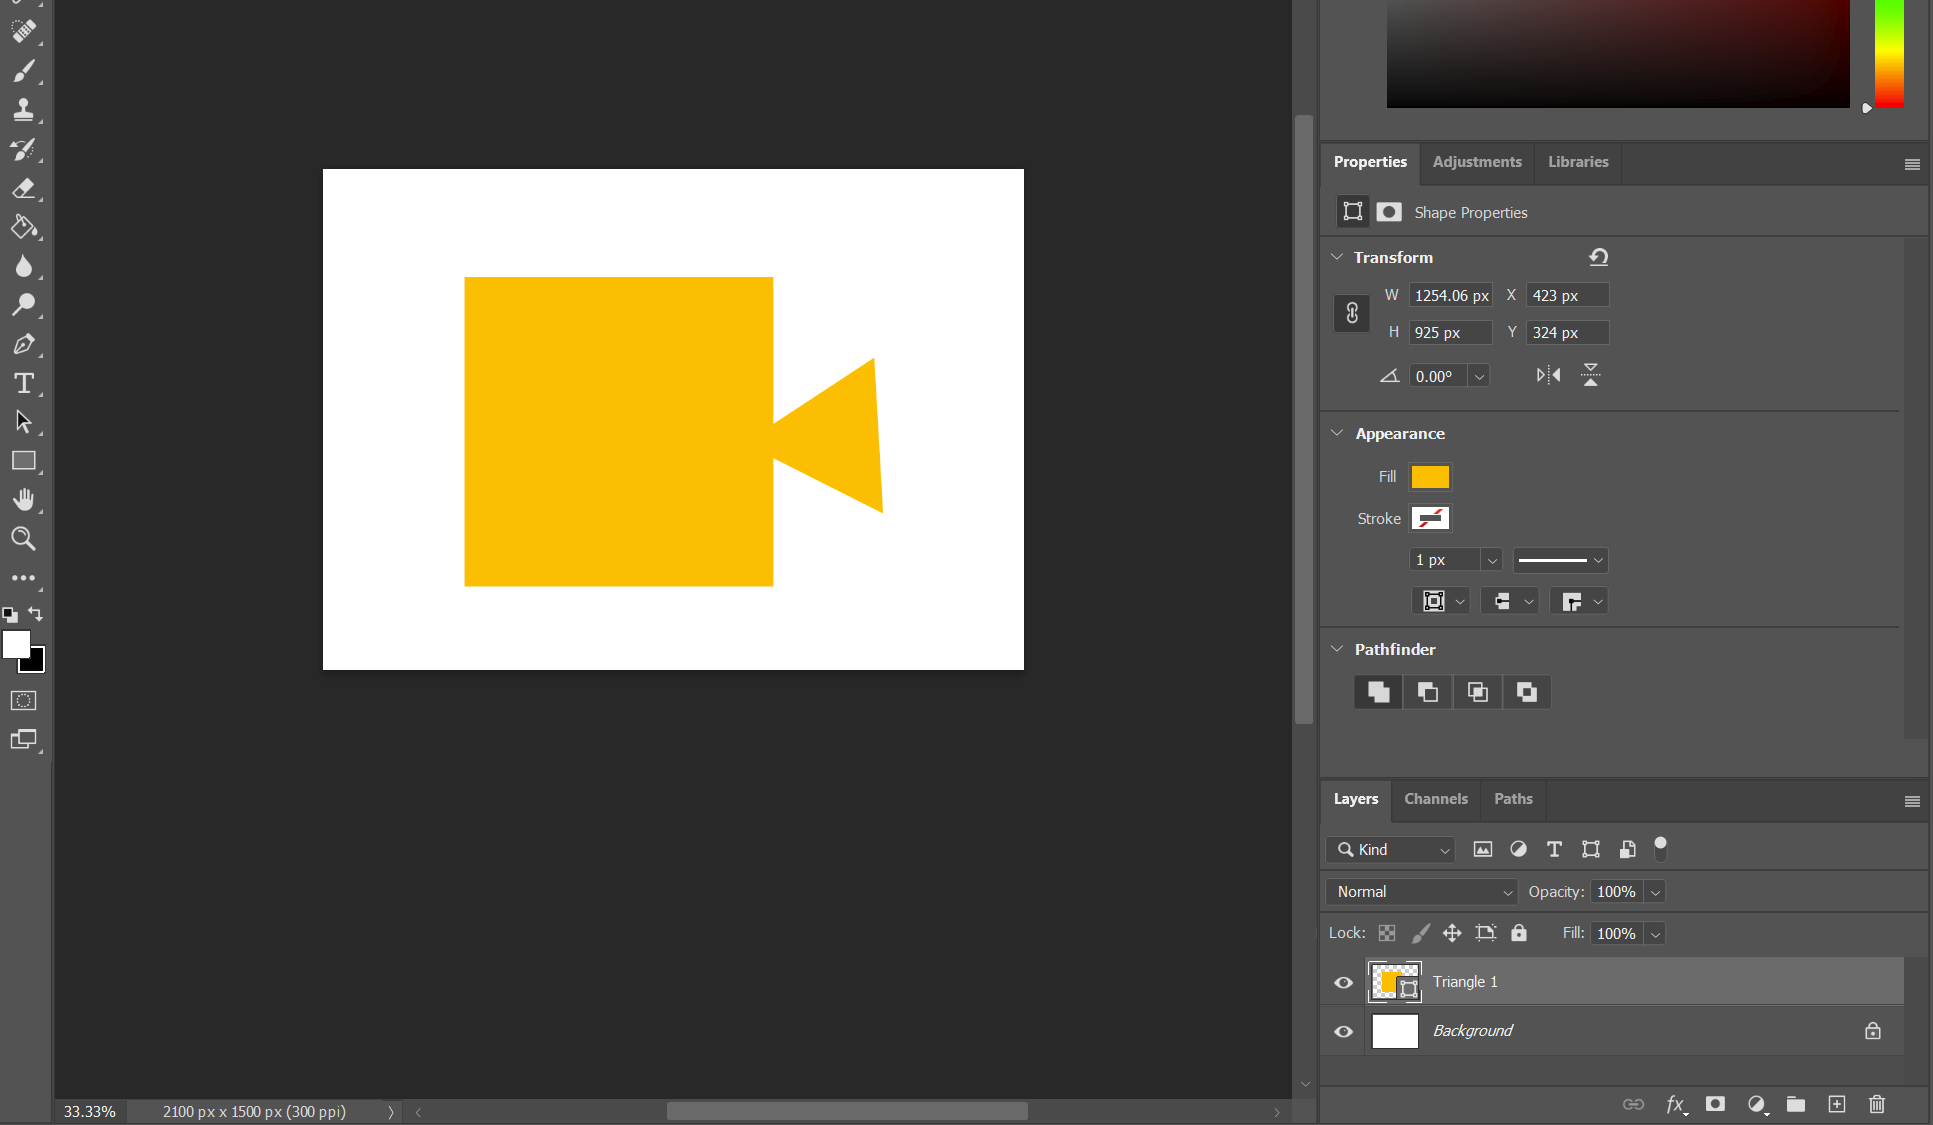
First up: Combine Shapes. We're going to use a square. With your first layer still selected, add in a square.
Nice. It sort of looks like a fish.
If you take a look at the lower right-hand corner, the Layers panel shows that both of these shape layers have been combined into one single layer. They haven't been reduced to one single path, but we can use both on this layer to create different designs.
Just above the Layers panel, you'll see the same Pathfinder options in the Properties window.
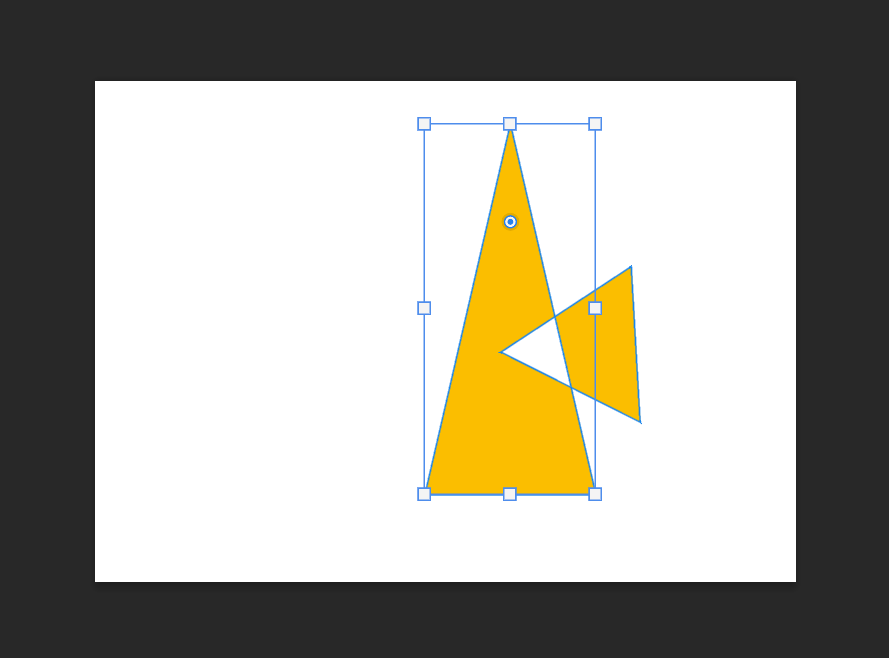
Subtract Front Shape, here, takes our shape parameters and sort of inverts them. Everything that was blank before now has our Fill color all over it. Everything within these two path shapes has been removed. You can use these buttons to experiment with different designs once they're already in front of you.
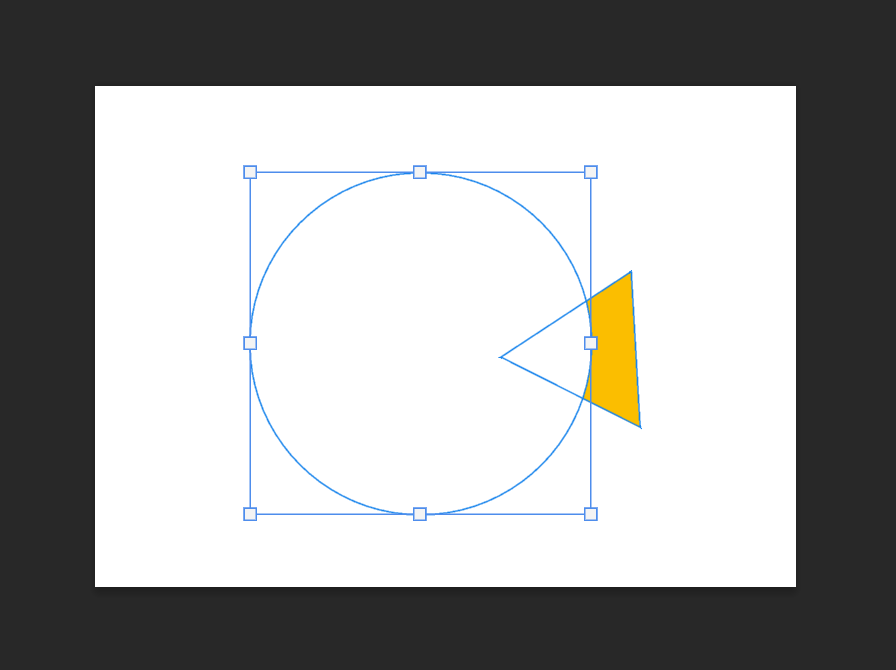
Let's see what Subtract Front Shape can do when we're applying it as we go. Select this option under the Shape tool settings once more and throw a circle down on top of this triangle.
We've stolen the biggest bite of this slice of pizza. This option is really useful when carving out a design—you can freely move anything stuck together on a single layer like this as its own separate element.
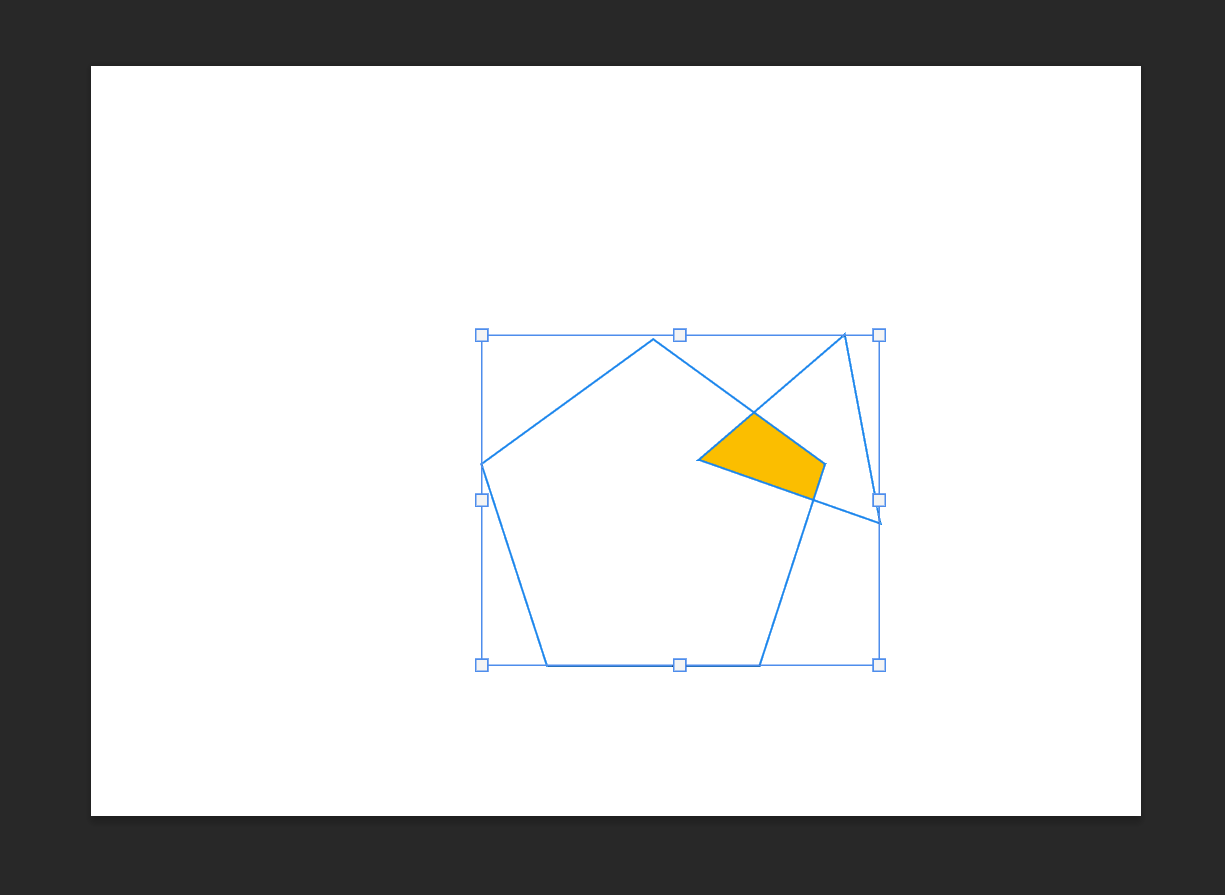
Intersect Shape Elements retain only what these two shape paths have in common; in this case, the left-most tip of the triangle.
Next, Exclude Overlapping Shapes. This is simply the opposite of the previous option—the intersecting wedge is removed, leaving the rest of the shape paths filled in.
Finally, the last and most enigmatic option of the bunch: Merge Shape Components. Unless you've already got two vector shapes hanging out on the same layer, this option will actually be ghosted and unavailable.
Let's set ourselves up—with the Combine Shapes option enabled under your Shape tool settings, add another vector to your first Shape layer.
Now, the Merge Shape Components option should be active and ready to use. Select it from the Path Operations dropdown to merge these two vector components.
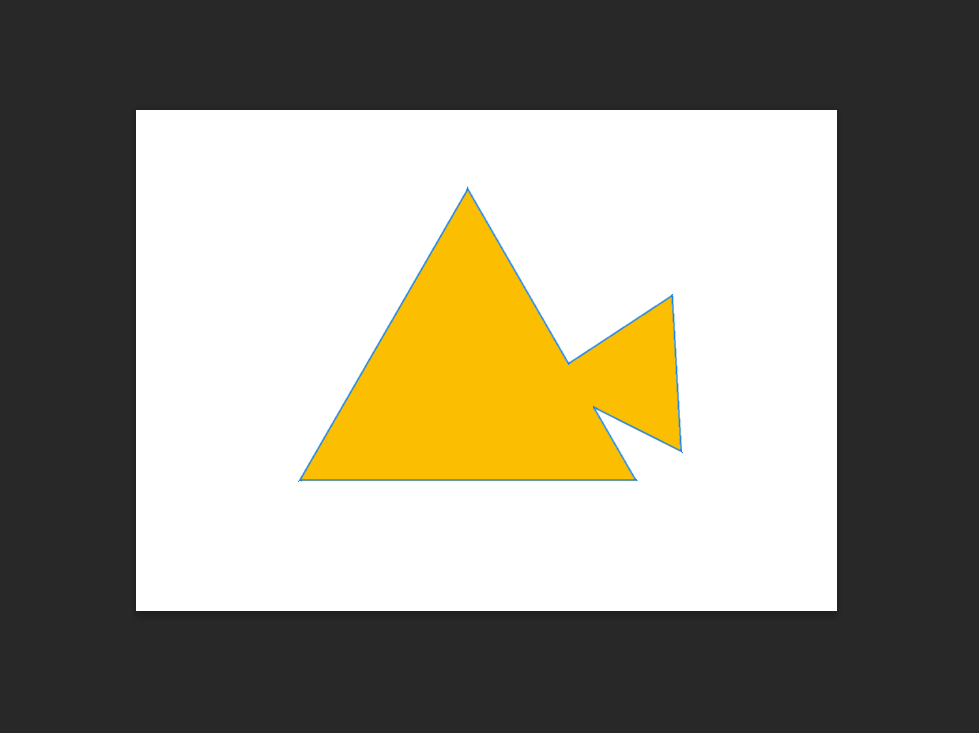
After clicking through the warning that doing so prompts, you'll see that a vector path outlining the perimeter of both shapes together has replaced both of the individual vector paths that came before.
This option might be your most powerful tool when creating vector designs. These compound shapes can then be used to cut into others or used as elements on their own.
Why Exactly Is This Useful?
On their own, these options might not seem like a whole lot, but there is plenty to explore for the burgeoning graphic designers out there. When all of the other path-related tools in Photoshop are taken into consideration, the possibilities here become nigh infinite.
Any vector shape that you create can be modified easily with the Pen tool, which means that you can create pretty much anything you can think of, even with these basic shapes. An extra point and a rounded corner here or there can make a big difference, especially as your skills improve.
Using Path Operations in Photoshop: Some Ideas
Stuck on inspiration? Here are a few ways that we like to use Path Operations in Photoshop ourselves:
- We only used the most basic Shape primitives in Photoshop; there are actually a ton of other options when you use the Shape tool in Custom Shape Mode. By default, you'll find beasts, flowers, and botanical motifs, but there are plenty more to download and install if you know where to look.
- Another way to zest up your design is to play with the Fill and Stroke settings. One of our favorite default schemes has got to be the classic Photoshop halftone coupon preset, complete with a dashed line to cut along.
- This is one convenient way of adding windows through photos or other graphic elements when designing a print layout or a web layout.
- All of these tools are compatible with a Text layer that you've converted to a Shape—you'll find the option by right-clicking any Text layer in the Layers panel and selecting Convert to Shape. Using Path Operations with text is one fun way to create appealing logo designs and to add visual interest to any layout that you're working on.
- For pattern-makers, this tool will often be indispensable. It's the best way to modify vector paths in Photoshop and an excellent technique to apply when creating things like geometric patterns and tessellations.
Photoshop buffs already know that even seemingly-simple tools can often be deceptively versatile. Keep trying stuff and see what you can find on your own.
Choose Your Path
Sometimes, finding your path in life is as simple as booting up Photoshop and creating one. This was just a bare-bones rundown—you'll likely find that you're able to push this tool much further than what our demonstration here has shown.


