Ever thought about what it would look like to make an image all black and white except for one color? It’s super easy to do in Photoshop.
In this tutorial, we’ll show you how to make everything black except for one color. Additionally, we’ll show you how to control how much of one color shows using a layer mask and how to easily split one color into two colors.
Let’s get started.
Step 1: Select One Color and Turn Everything Else Black and White
Before jumping in, if you want to discover for yourself how easy it is, you can download the example image from Pexels and follow along.
This method can be used for just about any image that you want to make black and white except for one color. All it takes is one Hue/Saturation layer and a few adjustments in the Properties panel.
-
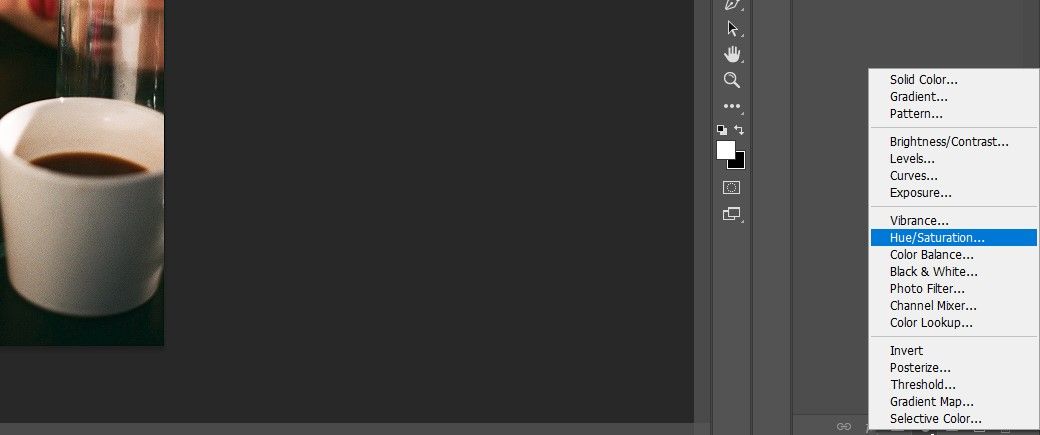
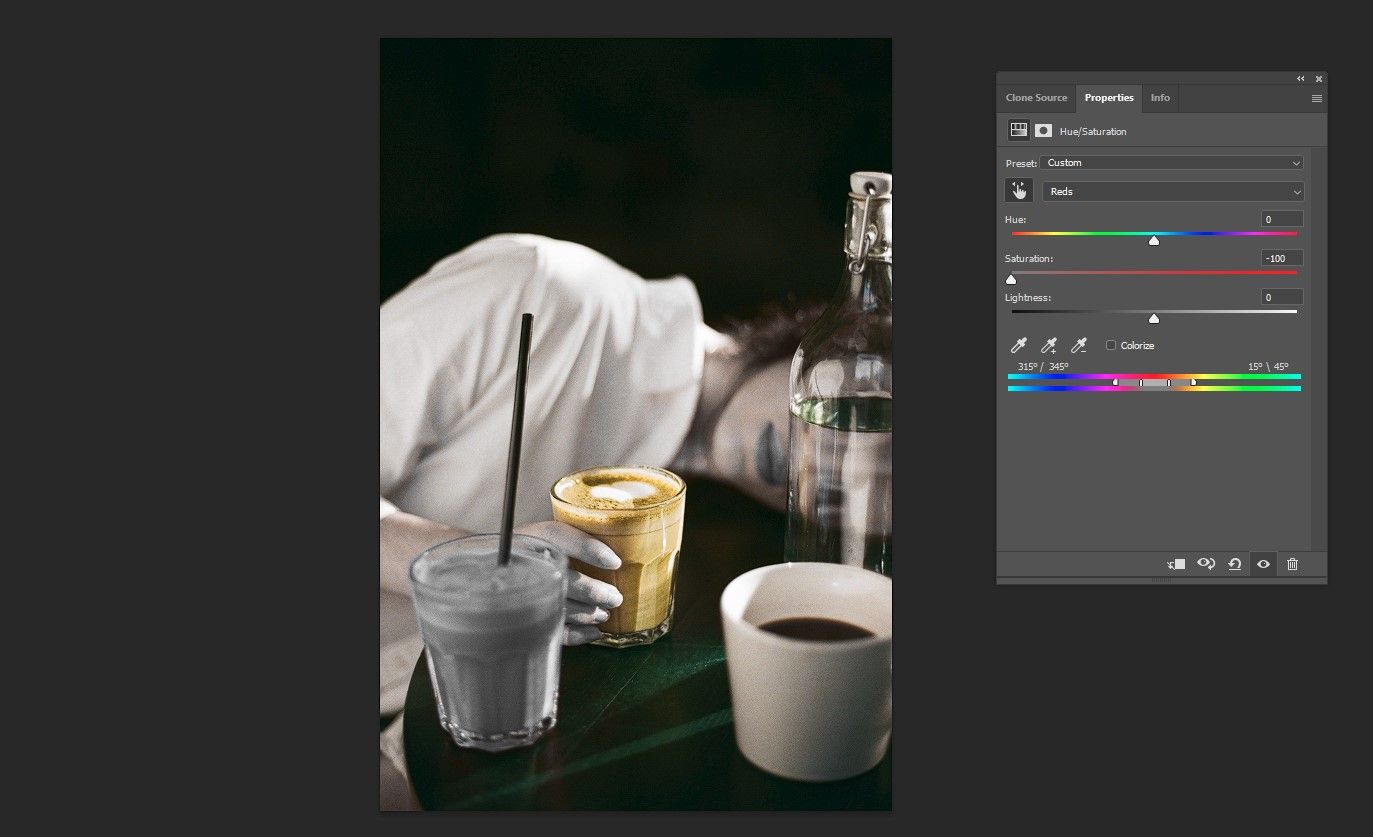
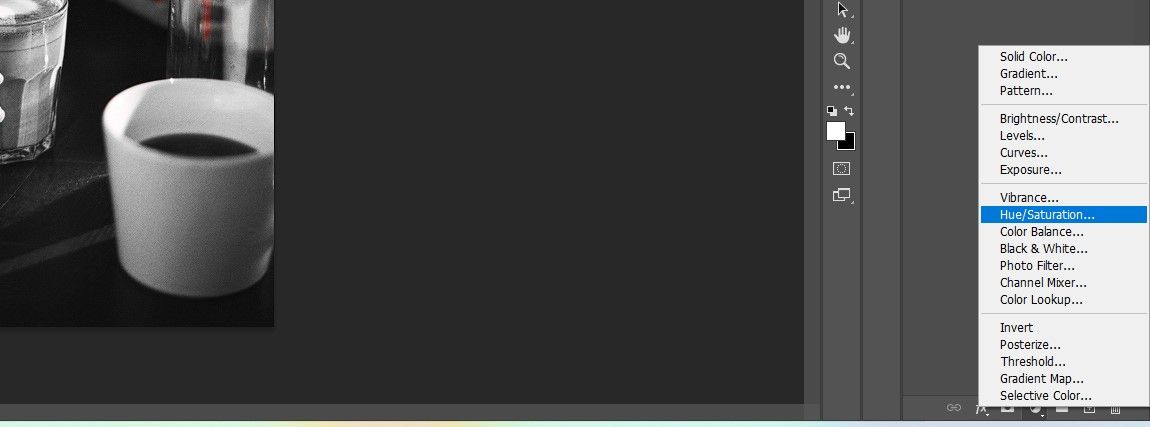
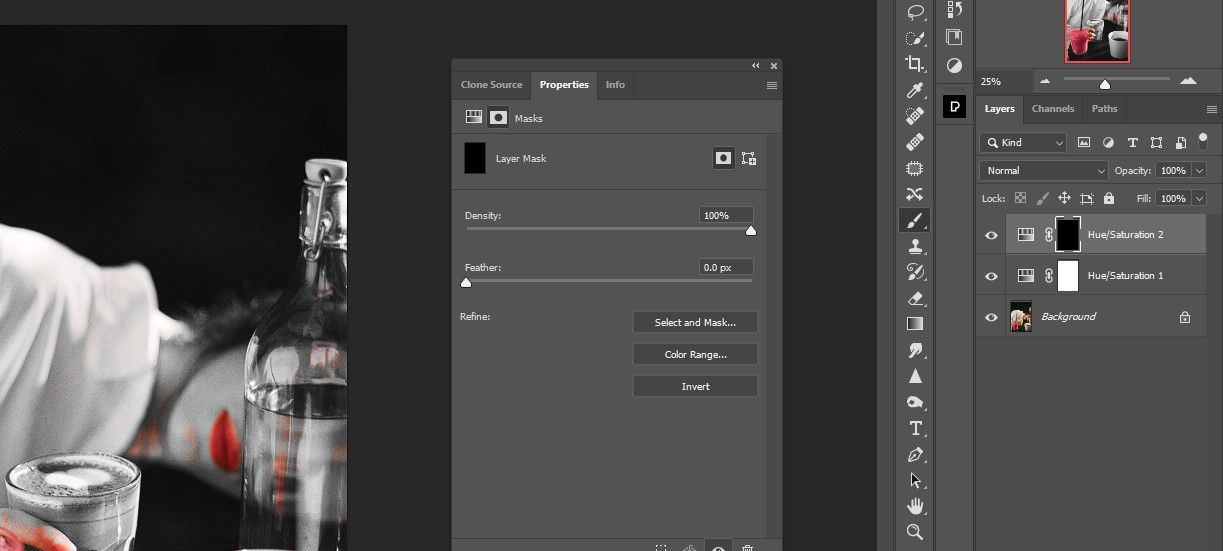
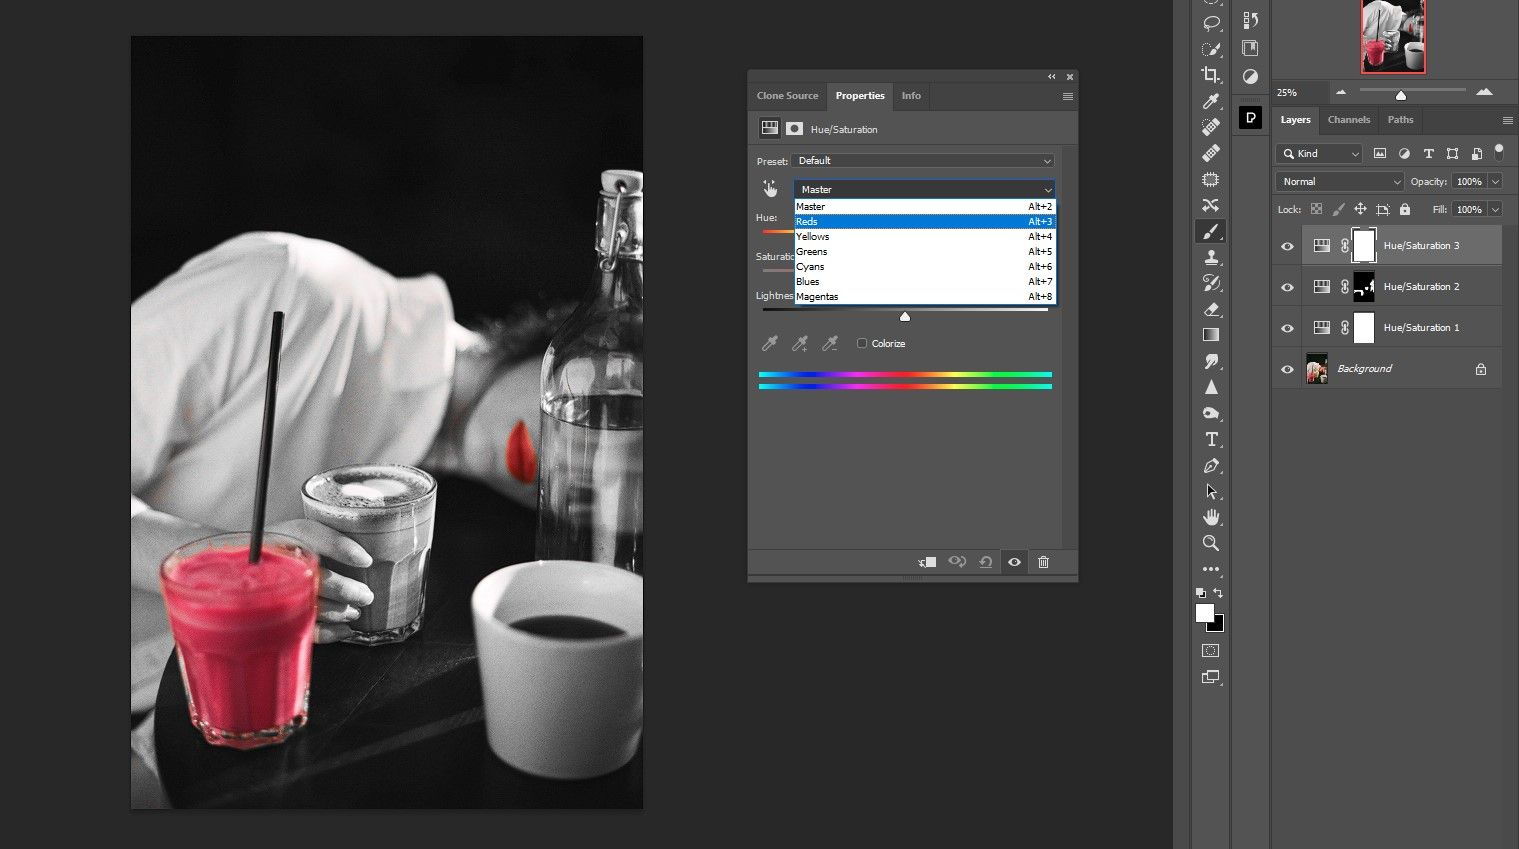
Create a Hue/Saturation adjustment layer.
-
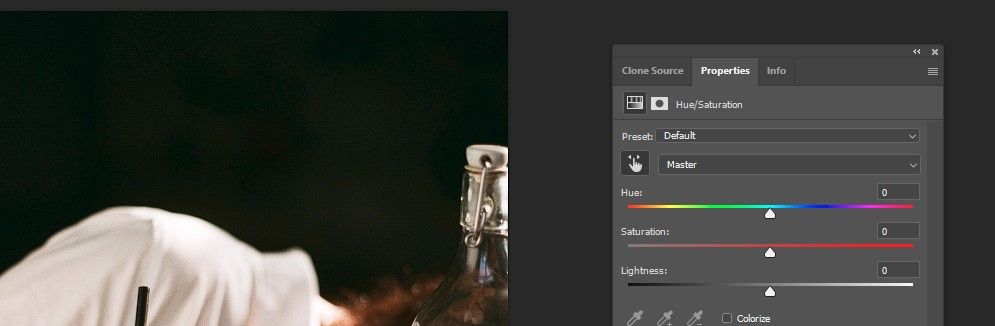
In the Properties panel, click on the Color Picker tool.
-
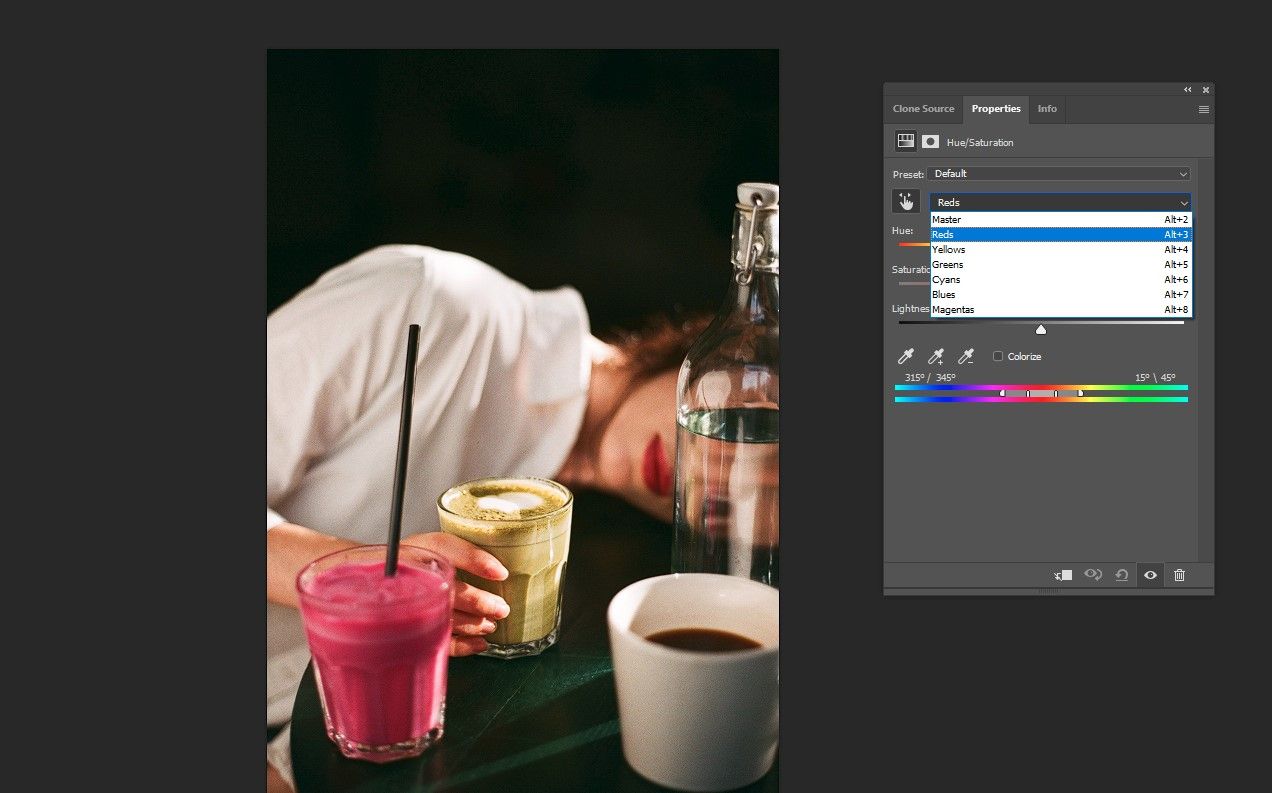
Click on the color you want to select. In this example, we’ll choose the red glass. Alternatively, you can choose red from the dropdown menu.
-
Drag the Saturation slider all the way to the left to remove all the red color from the image.
-
Drag the middle-right handle all the way to the right.
-
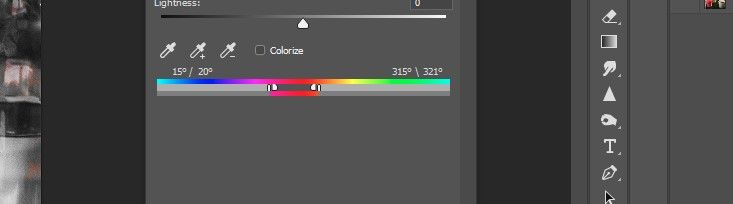
Move the slider on the right to 15 degrees as shown.
-
Move the slider on the left to 315 degrees as shown.
-
Move both the smaller sliders in each group so that they’re directly next to one another as shown. This will refine the selections so that red is the only color in the image.


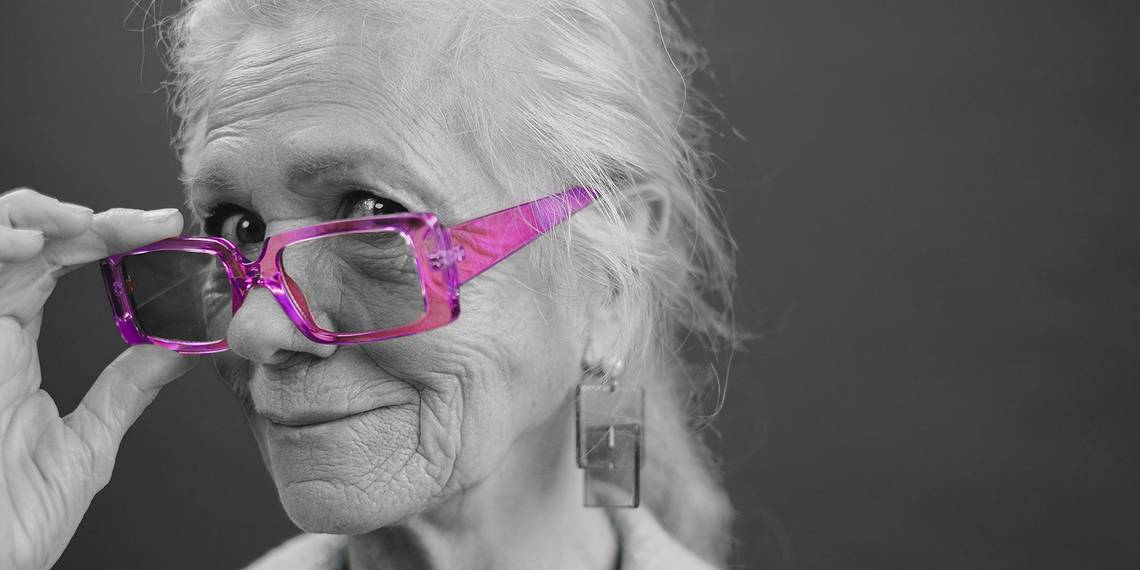
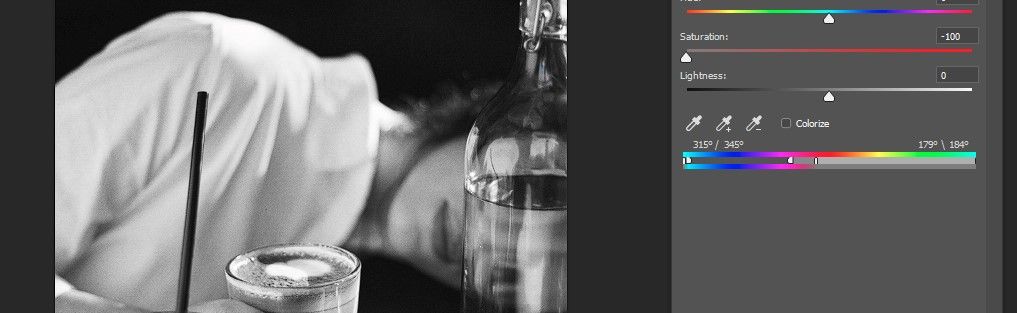
As you can see, we’ve removed every color except for red. But you’ll notice that there’s still red that could be removed if you want the image to make sense. We’ll cover this in the next step.
We also show you how to select all of the same color in Photoshop using other methods.
Step 2: Mask Out the Unwanted Red Pixels
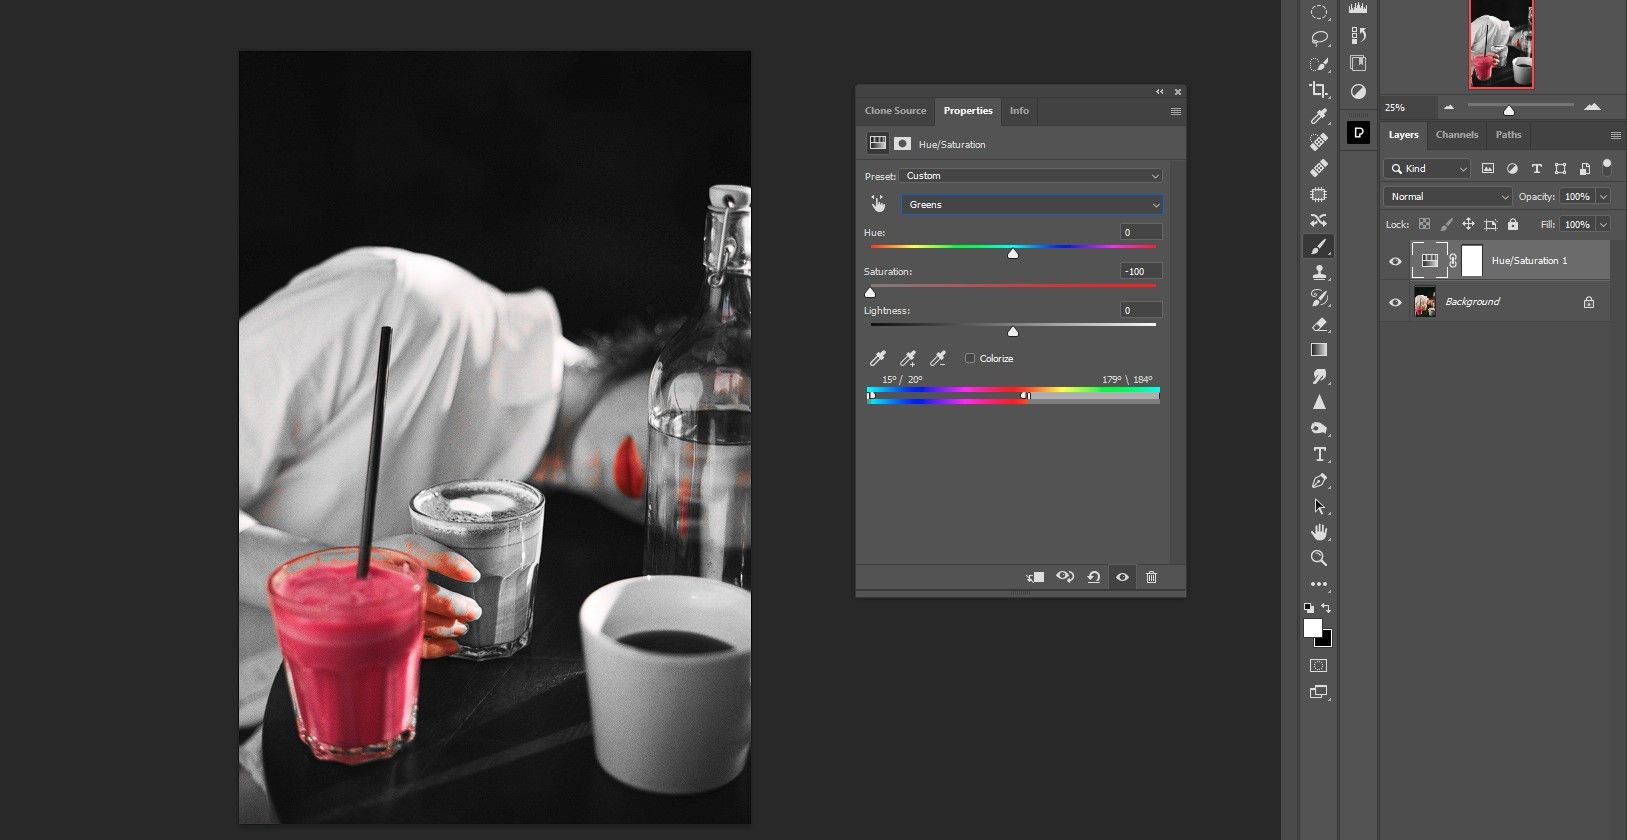
Next, we’ll mask out the red from the fingers, bottle, face, and neck. We’ll leave the lips red as a creative choice.
-
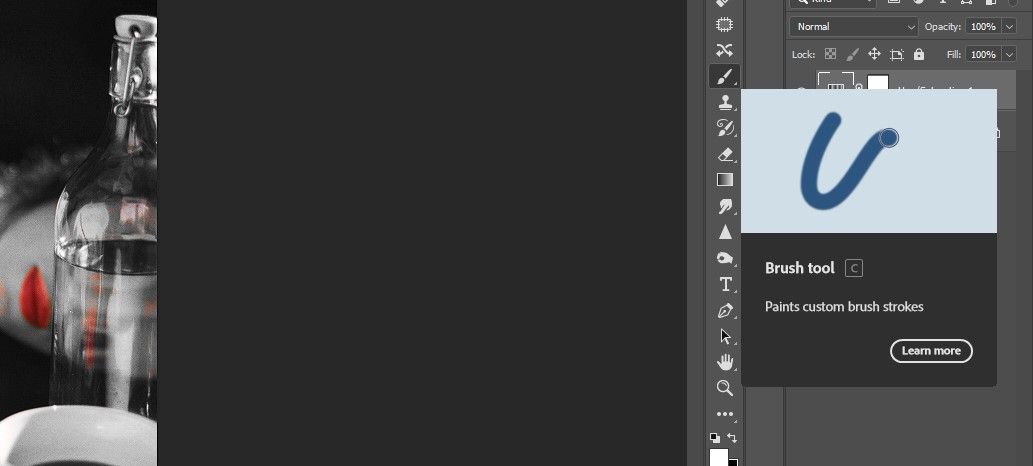
Press B for the Brush tool or select it from the toolbar.
-
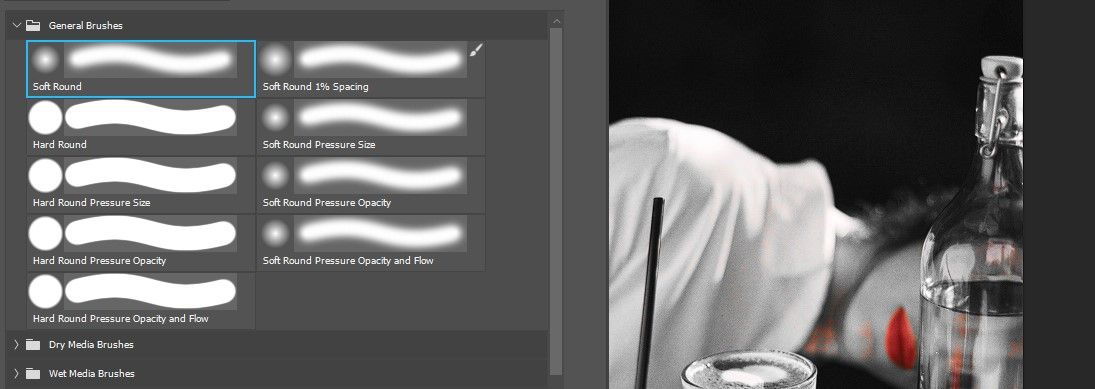
Choose a Soft Round brush.
-
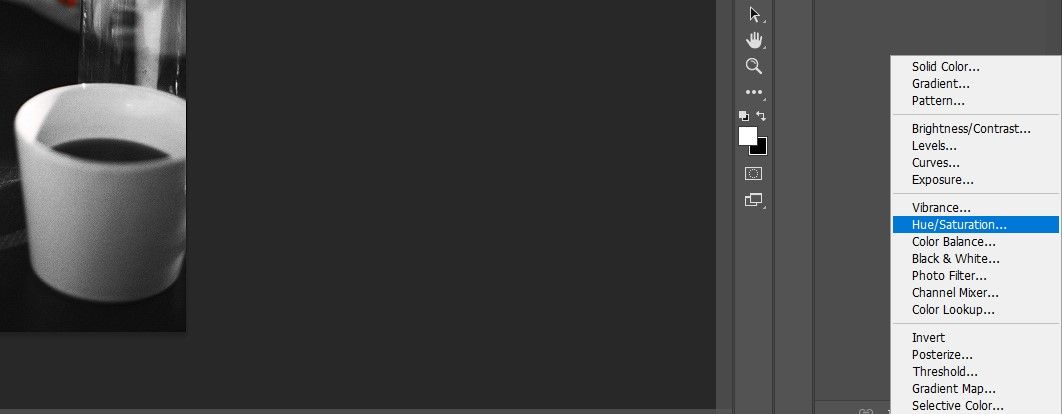
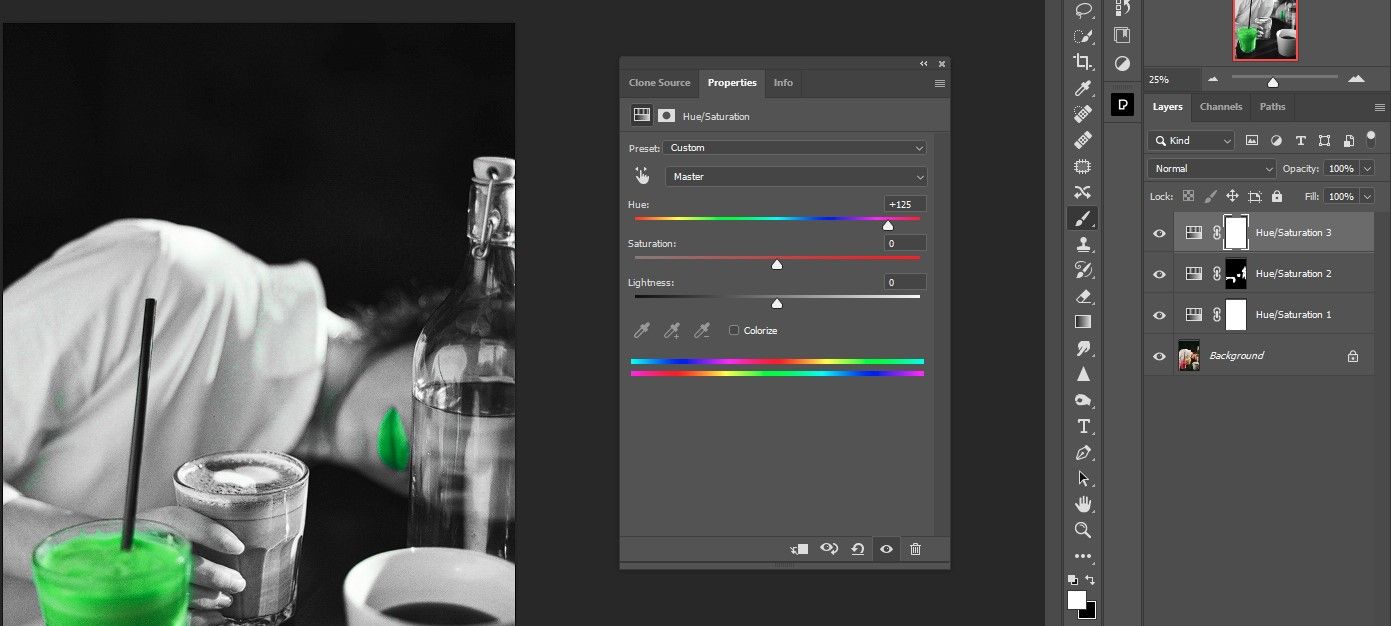
Create another Hue/Saturation adjustment layer.
-
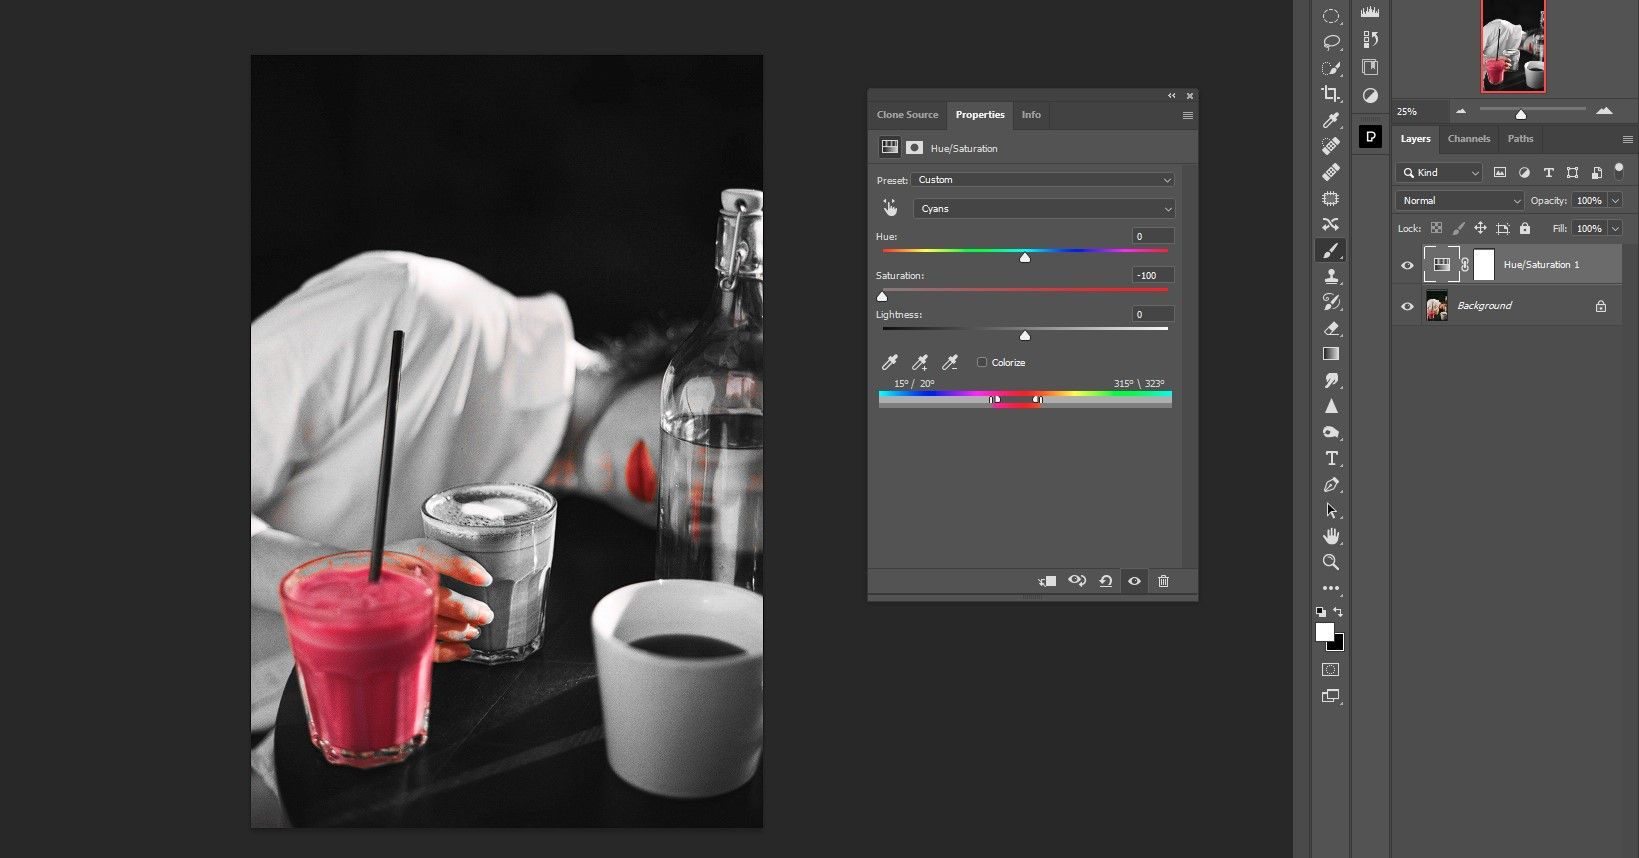
Go to the Reds channel.

-
Move the Saturation slider all the way to the left to remove all the red.

-
With the top Hue/Saturation layer’s mask selected, press Ctrl + I to invert the mask.
-
Press D for the default Foreground/Background colors. We want white as the foreground color.
-
Brush off the red from everywhere except the glass and the lips.
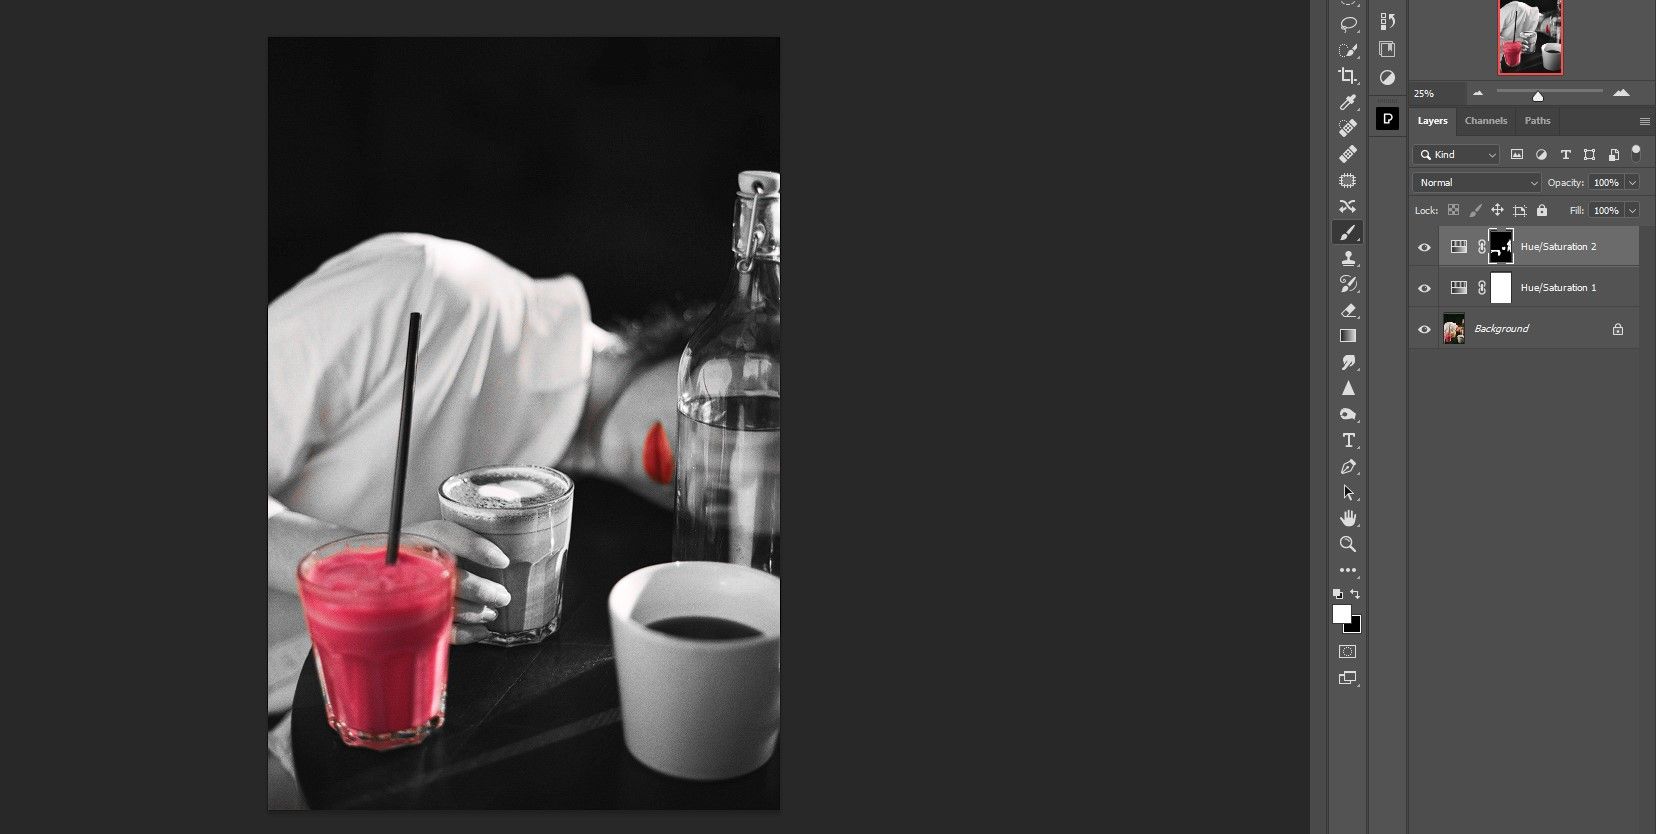


Now, we’ve created the perfect black and white image except for one color.
For Lightroom users, we show you several ways to change the color of an object.
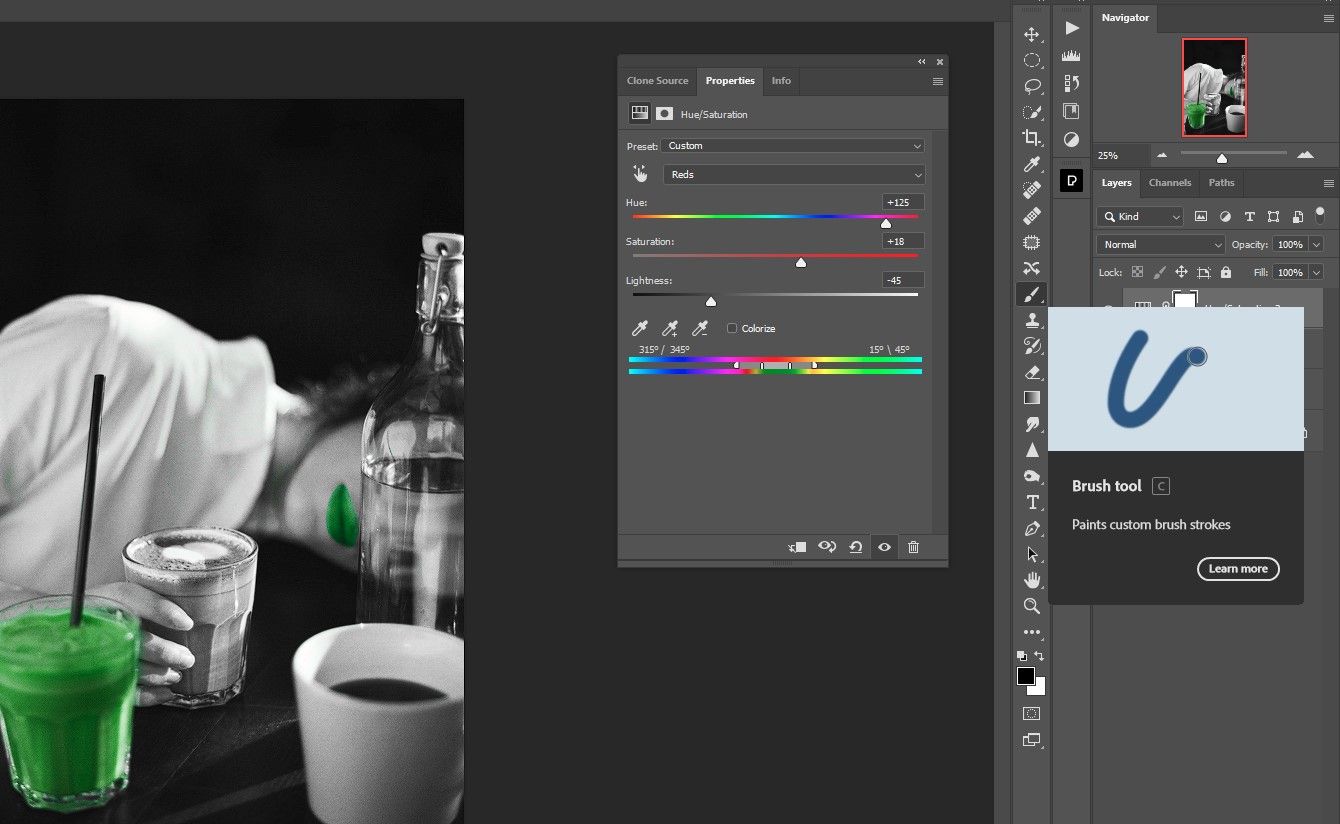
Step 3: Change the Drink to a Different Color
We’ve demonstrated how to change an image to black and white except for one color and even how to mask this color from unwanted pixels. Now, let’s make another creative decision and change the color of the drink. This only requires one additional Hue/Saturation adjustment layer and refinements.
-
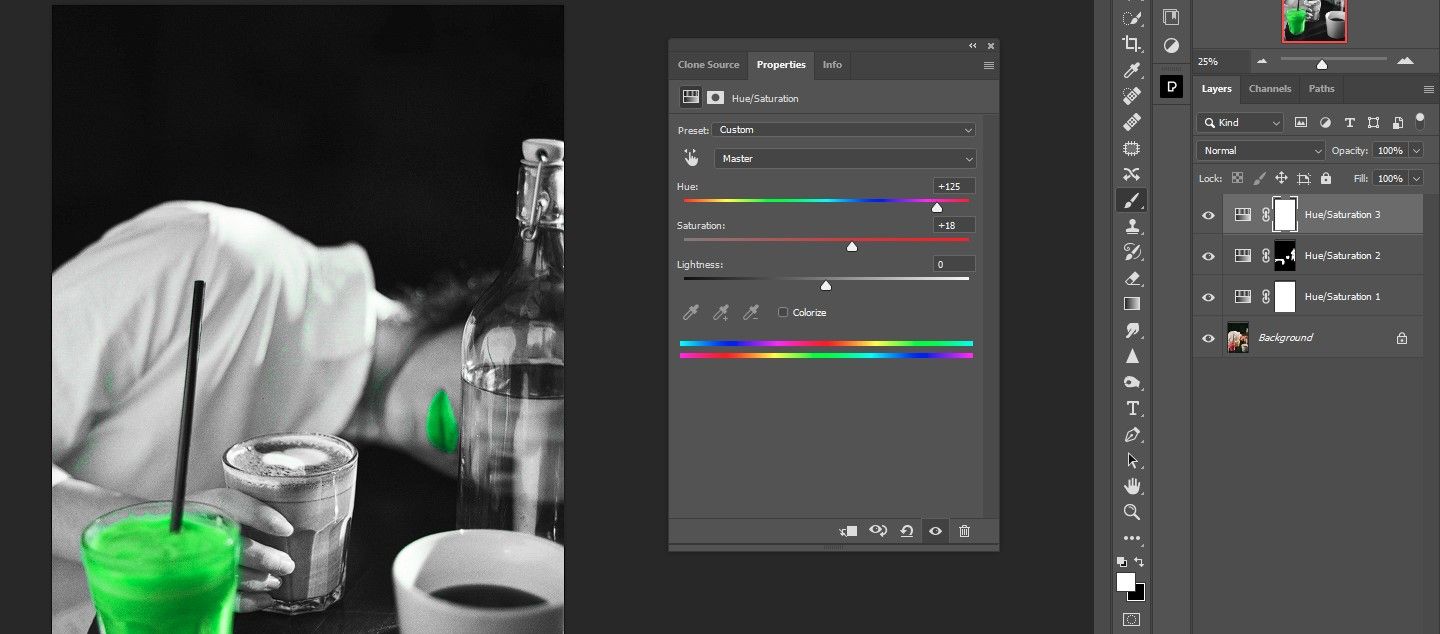
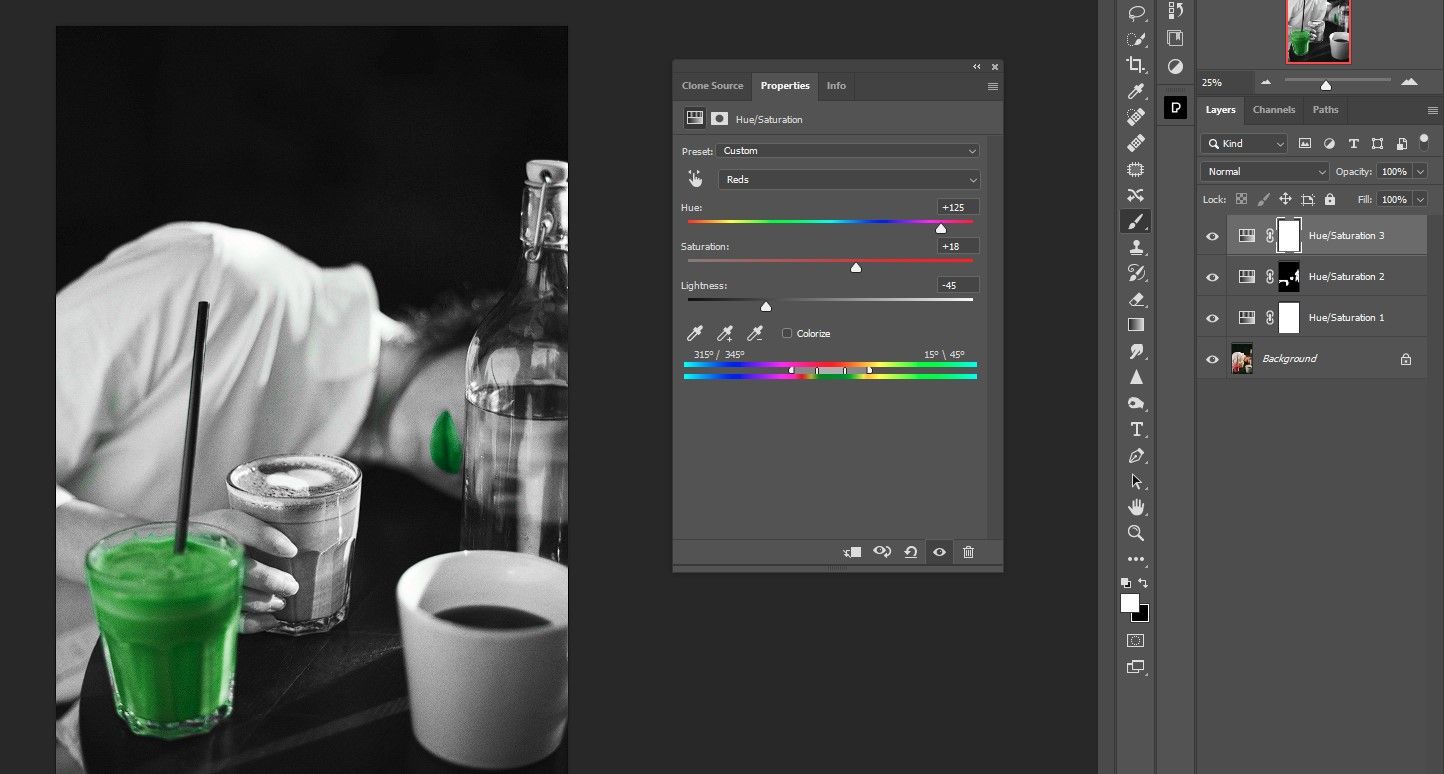
Create a third Hue/Saturation adjustment layer.
-
Choose the Reds channel.
-
Move the Hue slider to +125.
-
Move the Saturation slider to +18.
-
Move the Lightness slider to -45.
-
Toggle the X key to make the Foreground color Black.

-
Press B for the Brush tool once more if it’s not already active from previous use.
-
Brush over the lips to restore the red color.
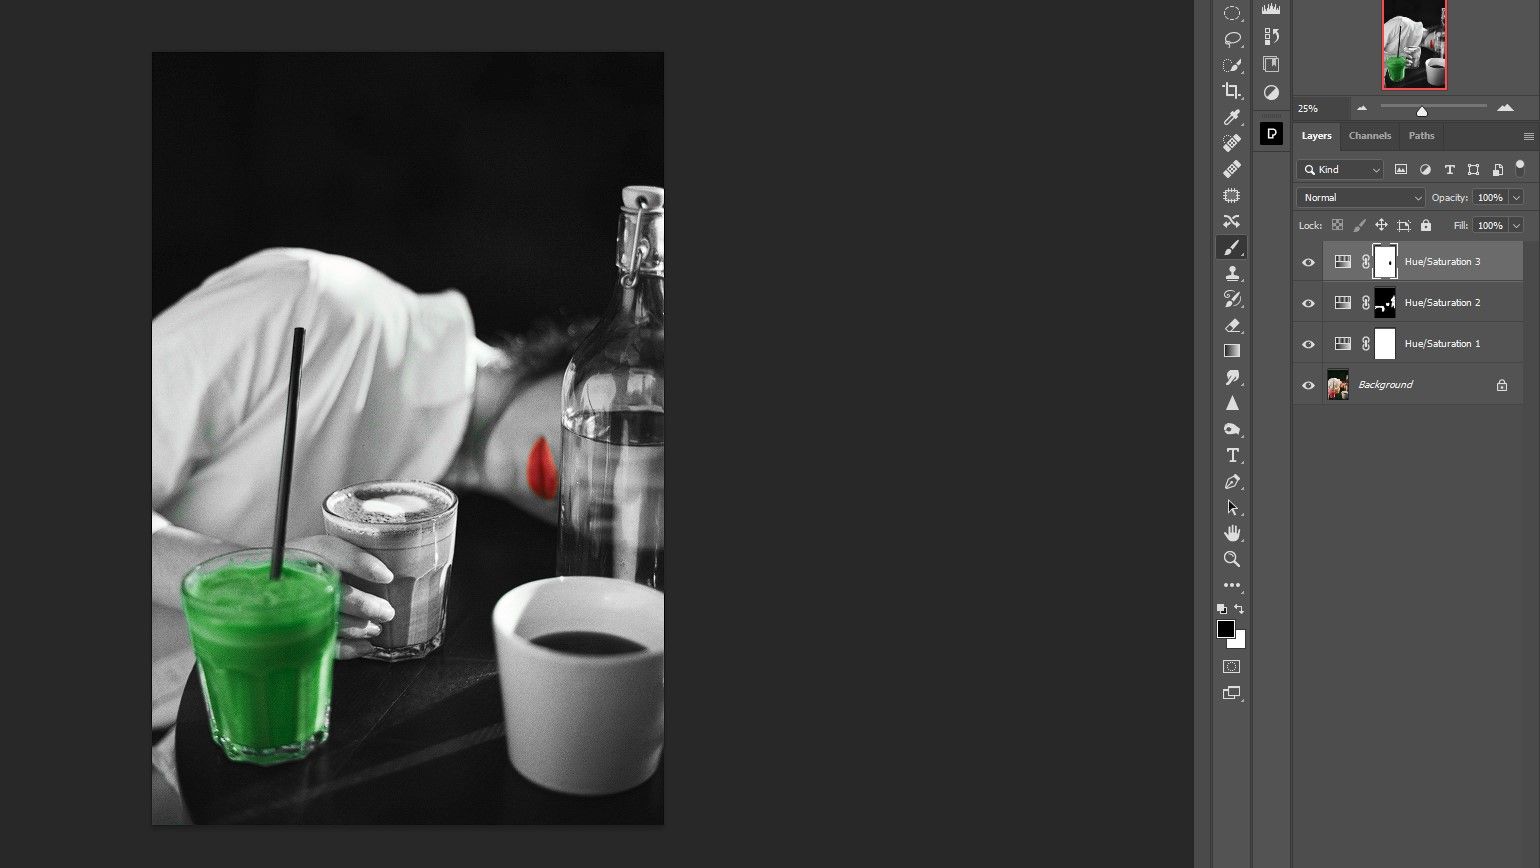


Super easy! Just three adjustment layers and refinements to completely transform a black and white image while keeping one color, with one additional color change.
It’s Almost Too Easy to Make Photos Black and White Except for One Color
As far as tutorials go, it seldom gets any easier than this. With just a few minor adjustments, now you can make your photos black and white except for one color without breaking a sweat.