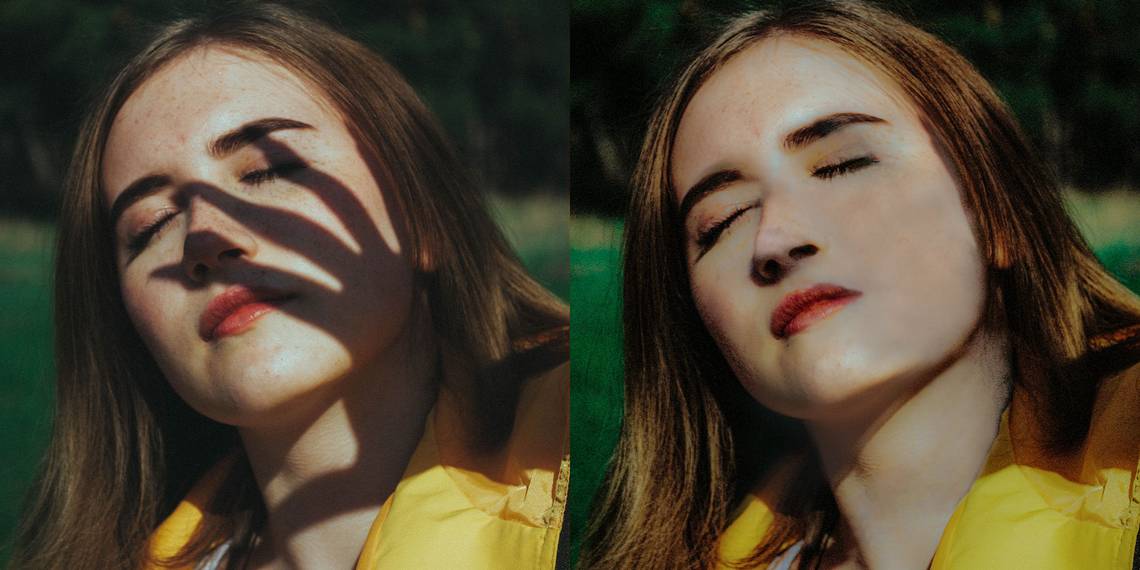
Whether you are a professional photographer or do it as a hobby, people expect you to click good portraits. One of the recurring problems with portrait photography is having an obstacle between the subject and the light source while clicking the photo. For instance, someone raising their hand if the light source is in front of them. It creates unwanted shadows which are challenging to remove.
This article will teach you how to remove unwanted shadows from your portraits in Photoshop without losing too much of the photo detail. The technique is also useful for removing shadows from any other image.
How to Remove Shadows From a Portrait in Photoshop
Depending on the harshness of the shadow, the complexity and time required to remove it will vary. Follow these steps to remove shadows from your portraits.
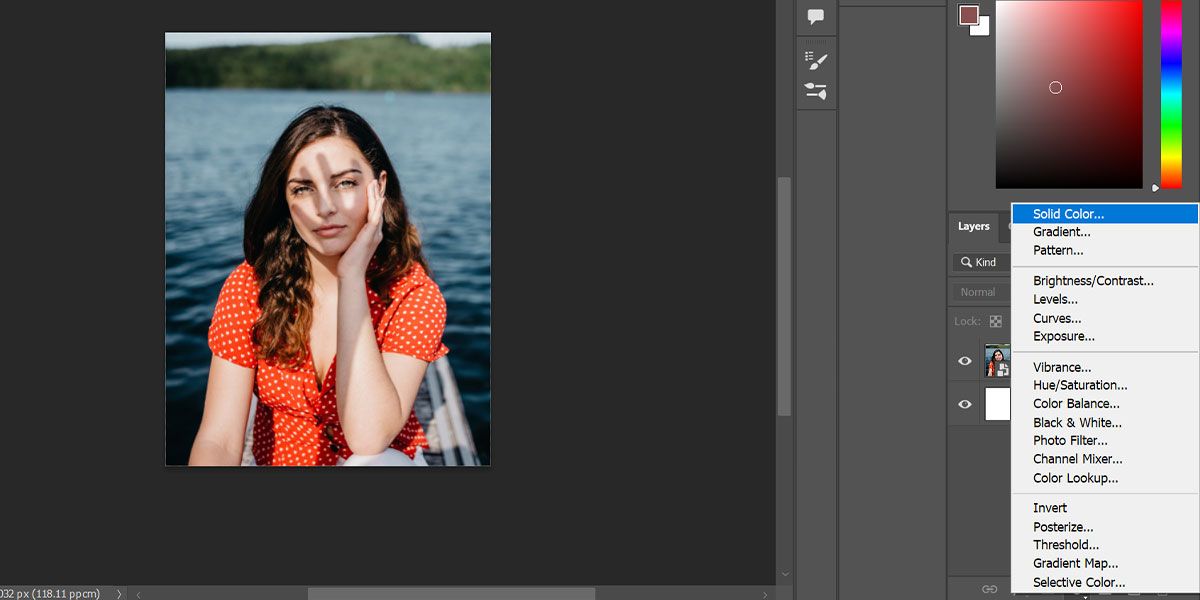
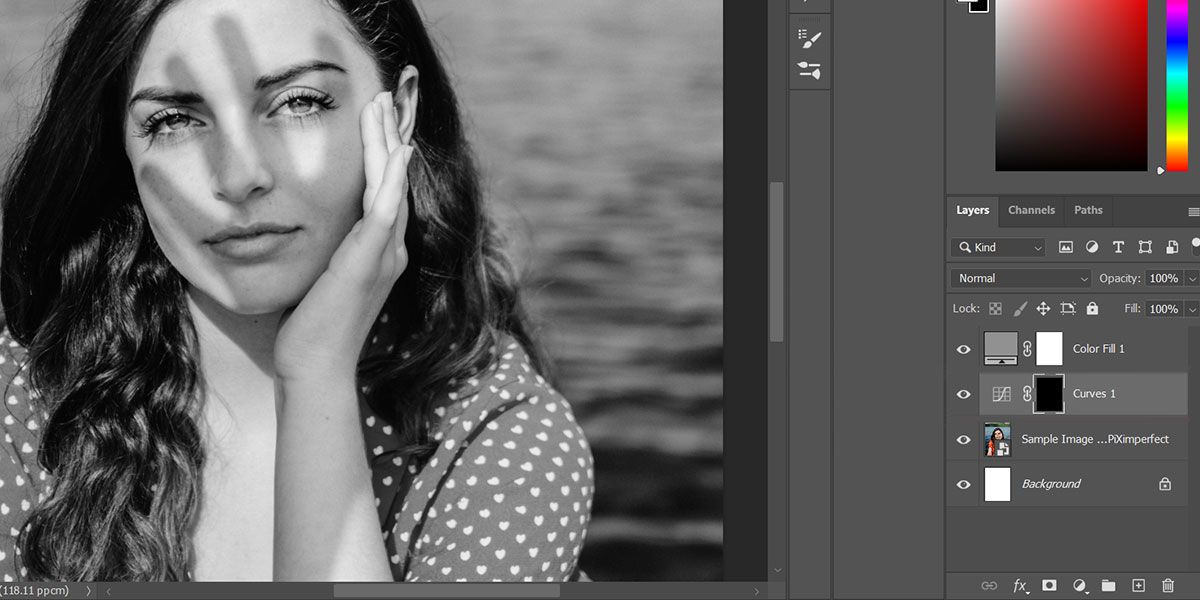
1. Create a Check Layer
First, we're going to create a check layer to better see the unwanted shadow.
- Import your image to Photoshop.
-
Create a Solid Color layer.
-
Set the color to any shade of gray. Remember to keep hue and saturation to zero; any brightness level is alright.
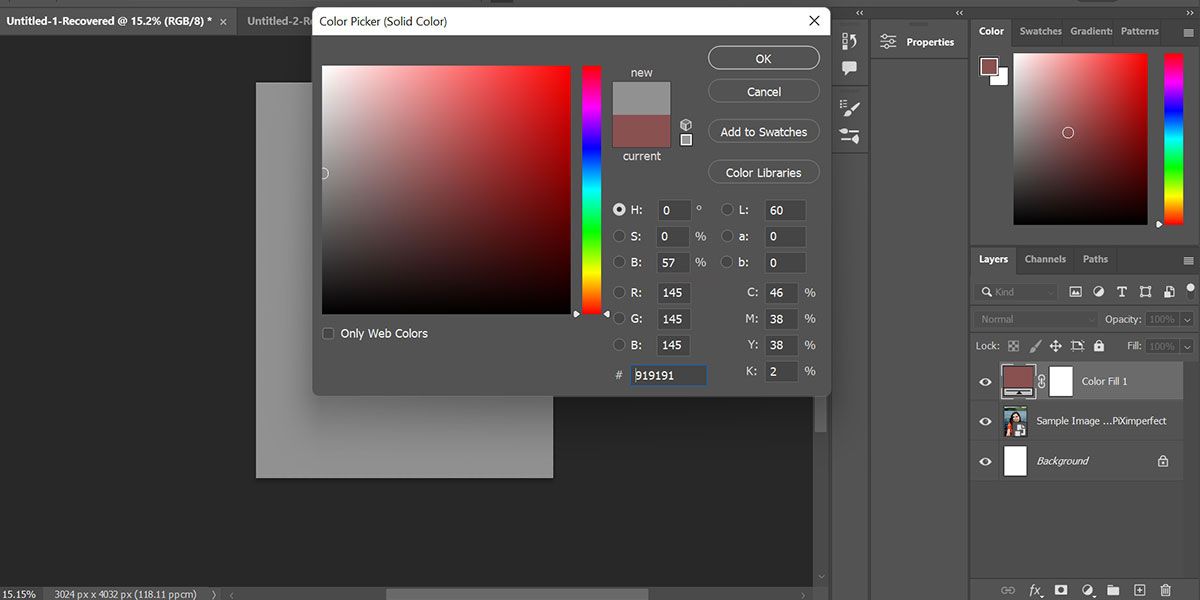


You have created a check layer to get rid of the colors while working with shadows. Since there will be a certain color change in the darker area while brightening the image, it is best to use a check layer. Once you've done this, keep following the steps below.
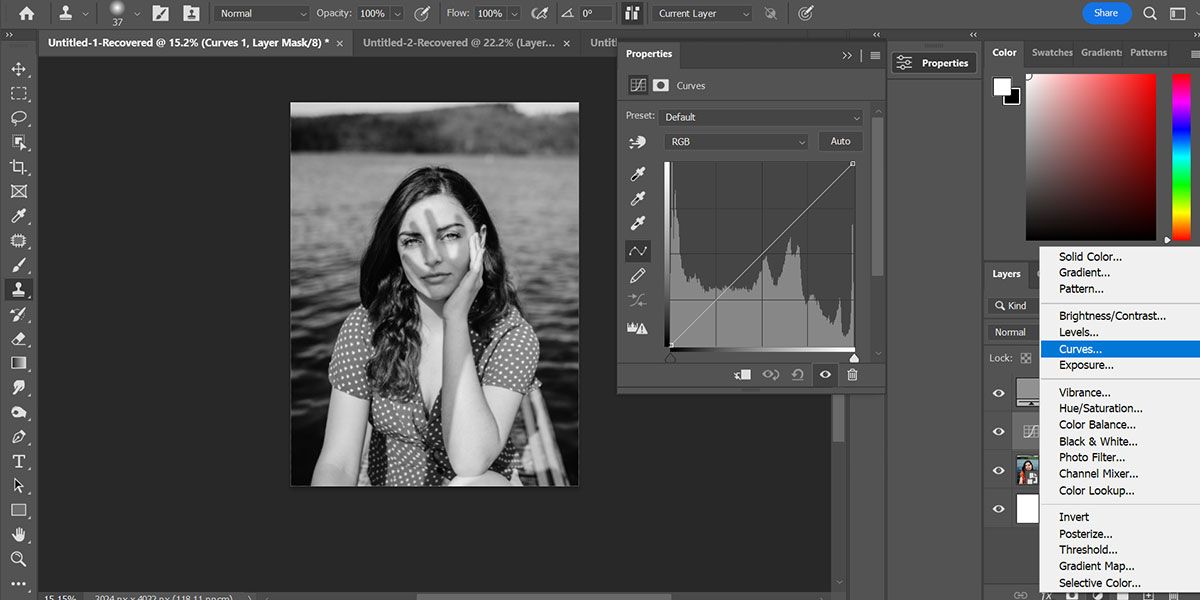
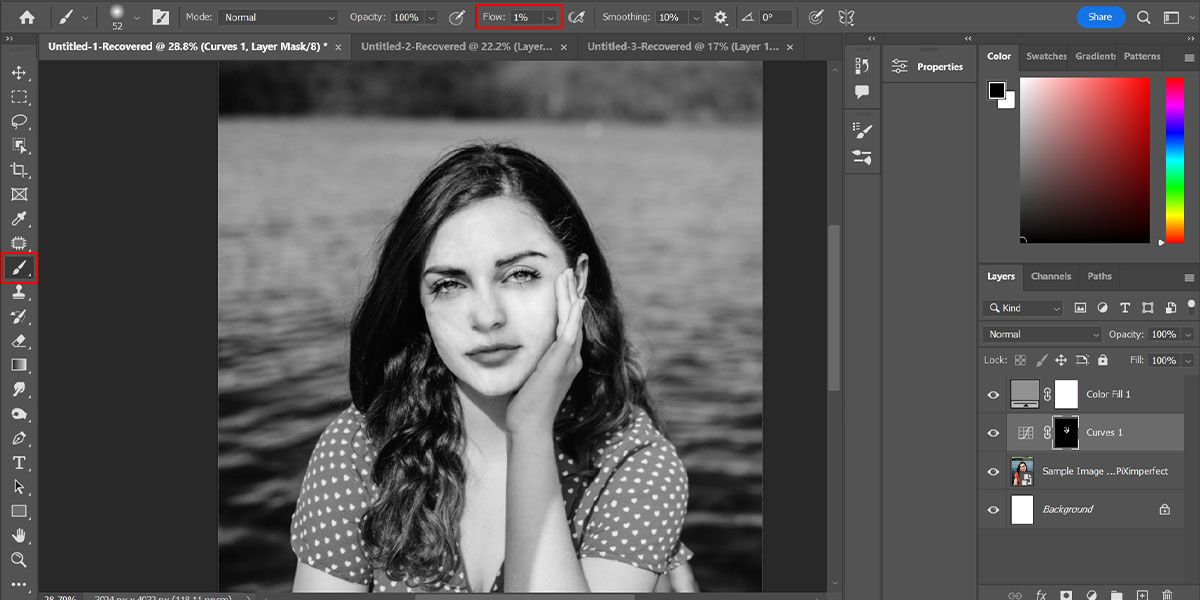
2. Correct the Brightness
Now, we're going to remove the shadow in the portrait.
-
Create a Curves Adjustment layer and select the Hand tool. Place it on the shadow part and move the Curves tool to brighten it. You can also decrease the brightness of the light areas if necessary. If you're not sure how to do it, see our Photoshop Curves tool guide.
-
Click on the mask in front of the Curves layer and press Ctrl + I. It will invert the mask hiding the current edit.
-
Select a soft round brush and set the Flow around 2-5%. Select white as the foreground color and start painting over the shadows to remove them.
- If you have done extra brightening on areas apart from the shadows, press X to change the foreground color to black and paint over the bright part with Flow set to 1%.
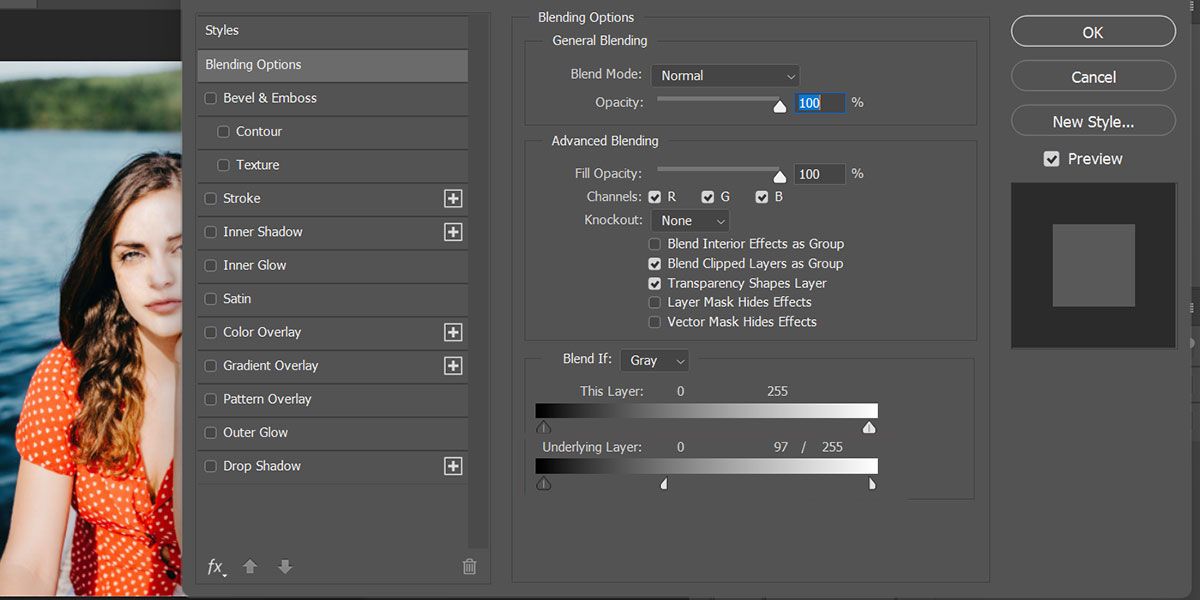
- Create another Curves Adjustment layer, select a point at the center of the curve, and slide it slightly towards the left-top corner. It will brighten the image further for a natural look.
-
Double-click on the right side of the new Curves layer to open Blend If, and while pressing the Alt key, click on the white pointer under the Underlying Layer to break it. Now, bring one part of the pointer near the darker side. It will affect only the shadow part to make it a little brighter.


That's it. You have taken care of the shadows. You can now hide the gray check layer to see how your image looks.
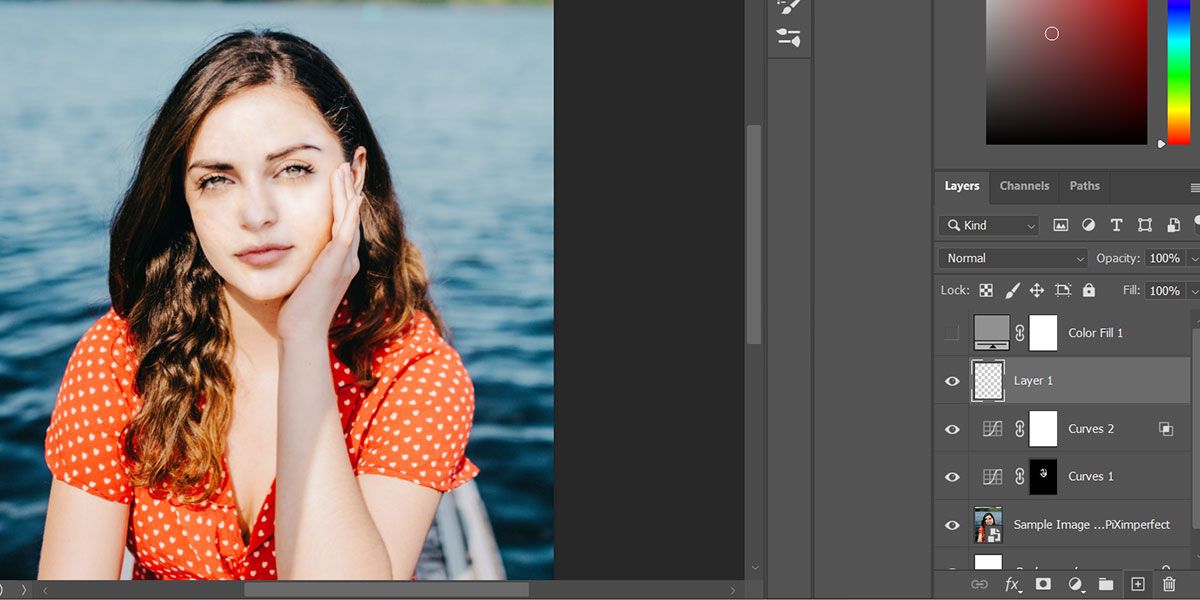
3. Correct the Color
Sometimes when working with shadows, you miss the natural colors. To eliminate any patchy colors from your portrait, follow the below steps.
-
Create a new blank layer.
-
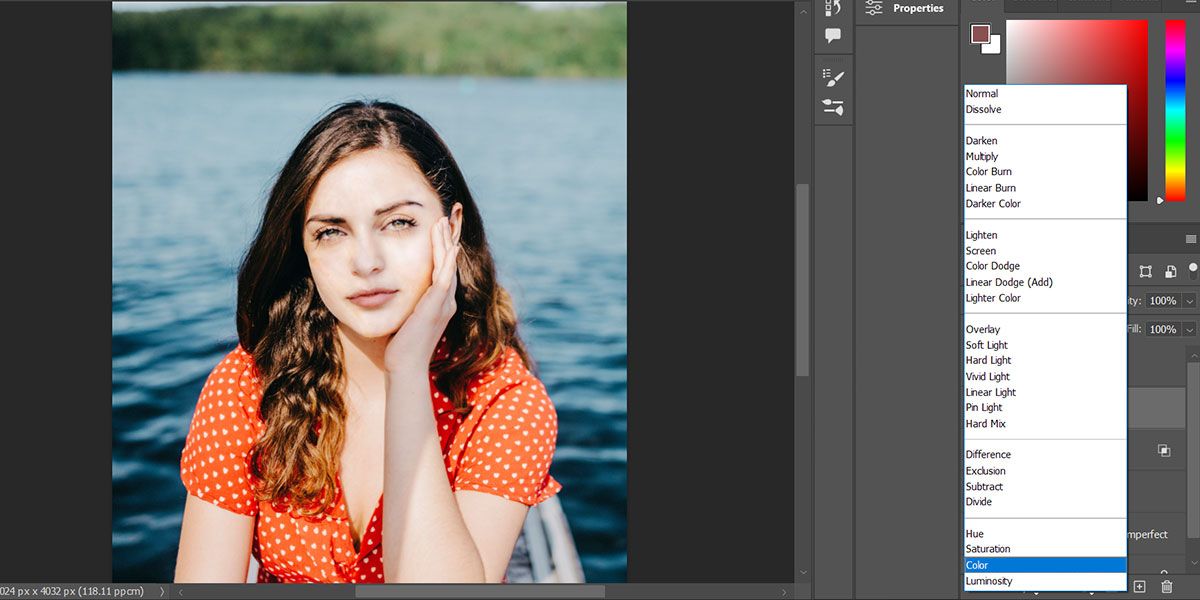
Set the Blend Mode to Color.
-
Select the Eyedropper tool and make sure the Sample Size is 3 by 3 or 5 by 5 Average. Also set the Sample layer as All Layers.
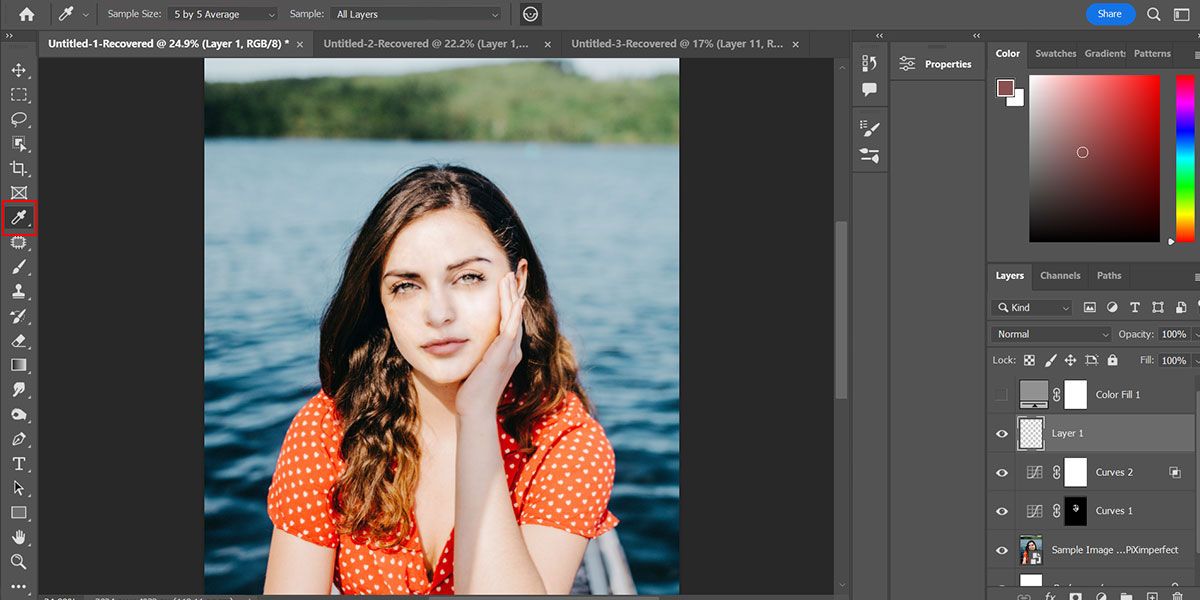
- Select the Brush tool, and while pressing the Alt key, click on the color from the picture you want to copy.
- Start painting over your image to make the colors look as natural as possible. You might have to repeat this process for small sections of your portrait while picking a nearby color each time.
- Lastly, press Shift + Alt + Ctrl + E to create a new layer of all the visible layers—it will create one layer out of all your edits.
-
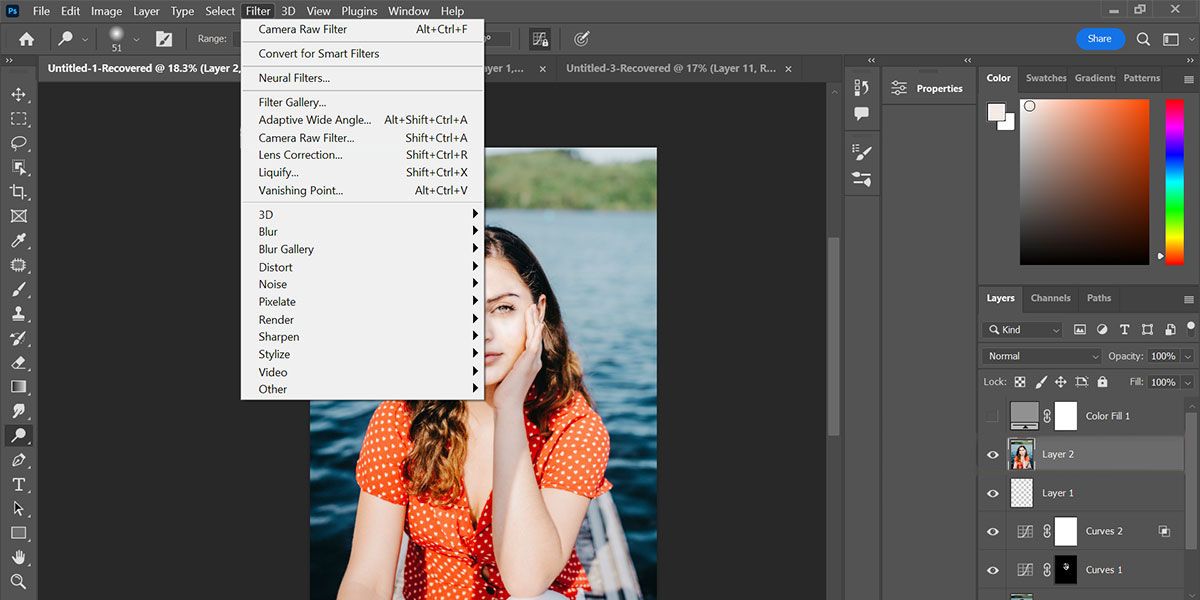
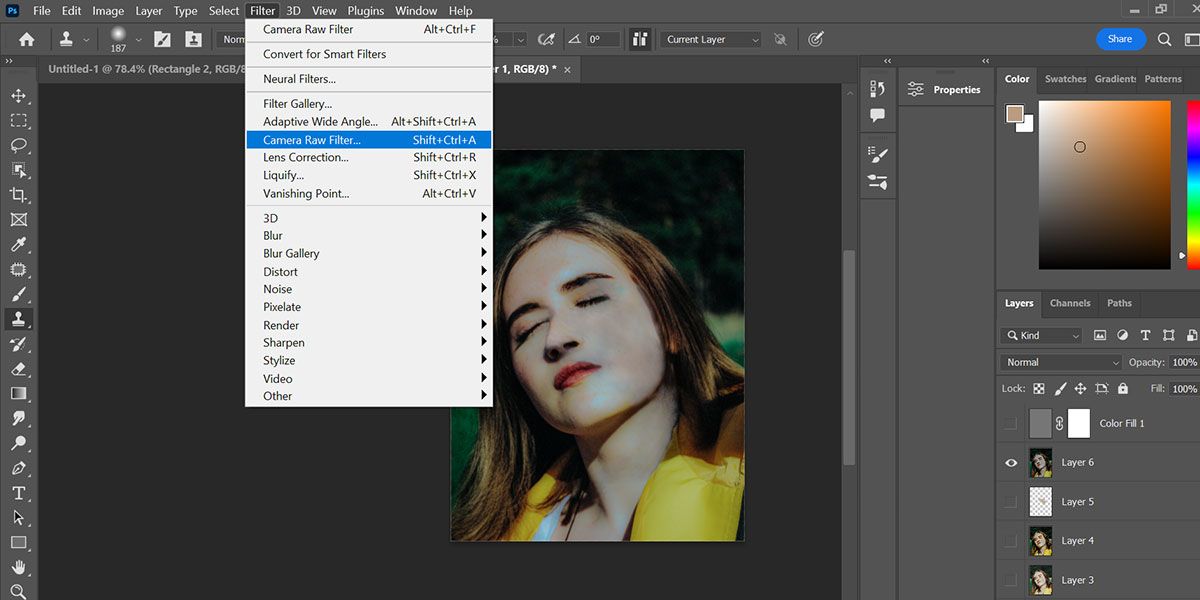
Go to Filter > Camera Raw Filter, and tweak settings like Exposure, Shadows, Texture, Details, Clarity, etc. to give a final touch to your image. Hit Enter once you are satisfied with your edits. See our full guide on how to use Camera Raw in Photoshop.


That's all. You have successfully removed the unwanted shadow from your portrait.
Depending on the intensity of the light source, it can sometimes be challenging to brighten up the image without losing the details. You have to take a few extra steps in this case...
What if the Shadows Are Too Harsh?
If the shadows are too harsh, i.e., the light source is too strong or near the subject, it can be difficult to get the proper brightness level and color. If you have followed the above steps and still can't get the shadow out of the image, you have to recreate that part of the image.
In the below portrait examples, the shadow is impossible to remove using only the above method. Therefore, you must use the Patch tool and Content-Aware Fill to help you completely remove the shadow.

Once you've completed the above steps, follow the steps below:
- Create multiple Curves layers and keep brightening the image to get the best result.
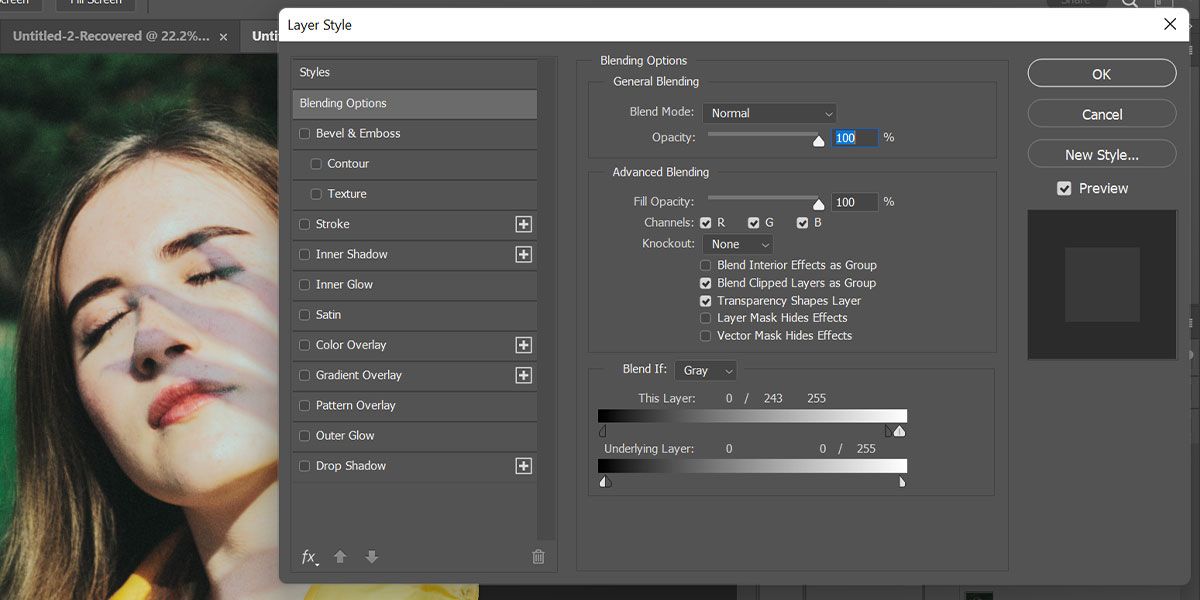
- Double-click on the right side of your Curves layer to open the Blend If properties.
-
Break the white slider under the Underlying Layer by clicking on it while pressing the Alt key, and bring it to the left. Similarly, break the black slider for This Layer and bring it to the right.
- Now, press Shift + Alt + Ctrl + E to create a new layer of all the visible layers.
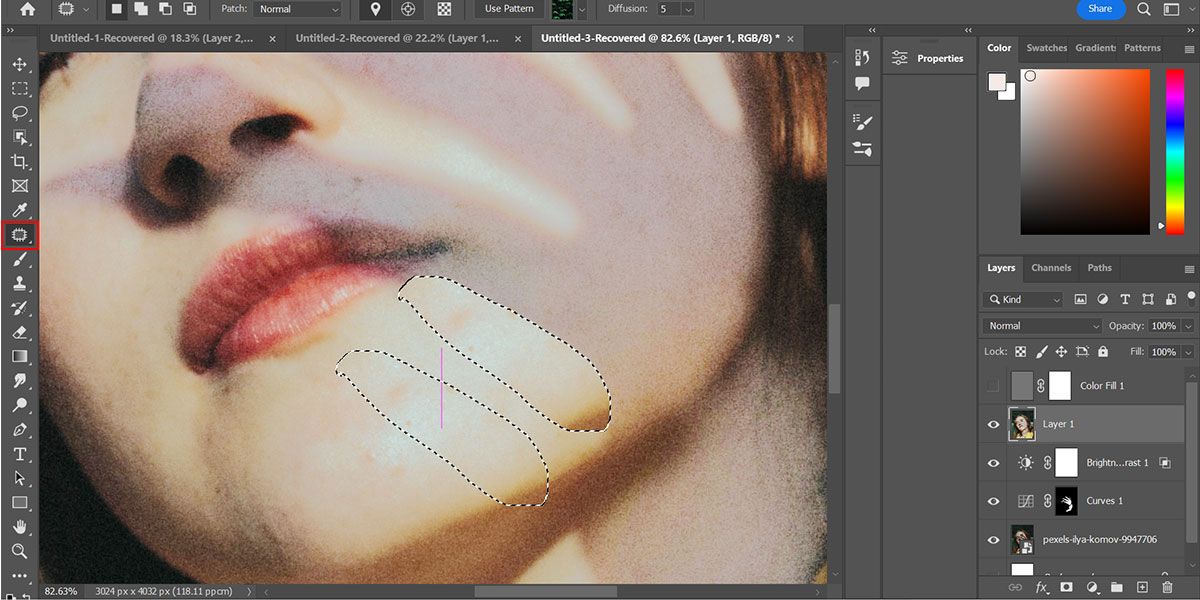
- Select the Patch tool.
-
Start by selecting the shadow borders and replacing them with the nearby natural skin. It will create a mix of both areas. Therefore, you will get the skin texture back in the shadows while removing the harsh outlines. Repeat this process until you have removed every part of the shadow.
- Press Shift + Alt + Ctrl + E to create a new layer of all the visible layers once again.
-
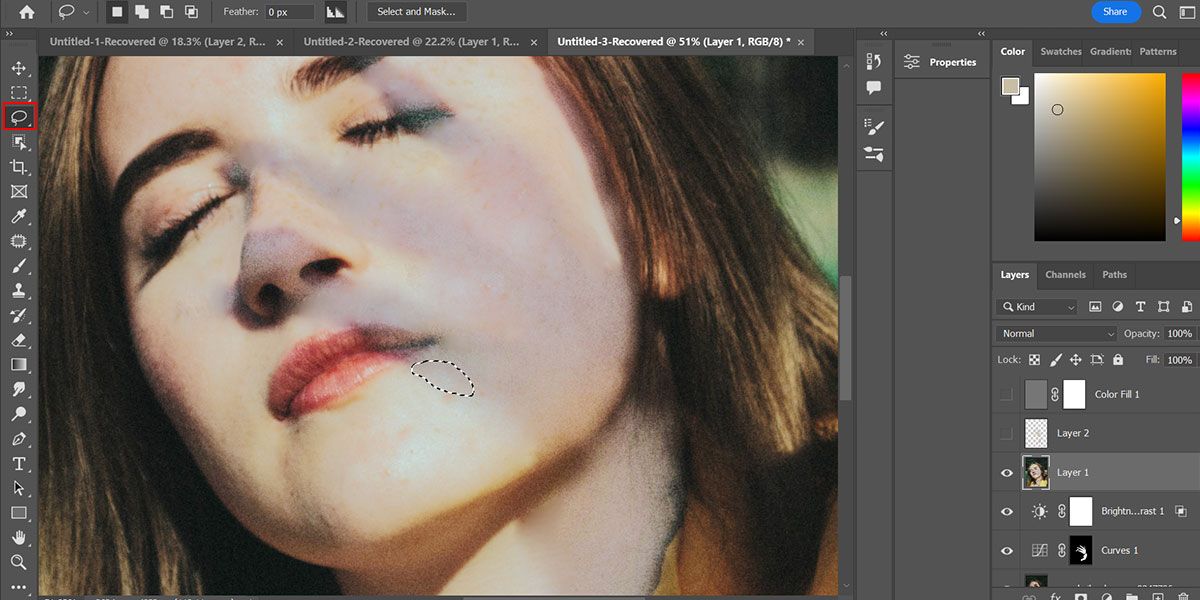
Select the Lasso tool and make small sections near the shadow edges.
-
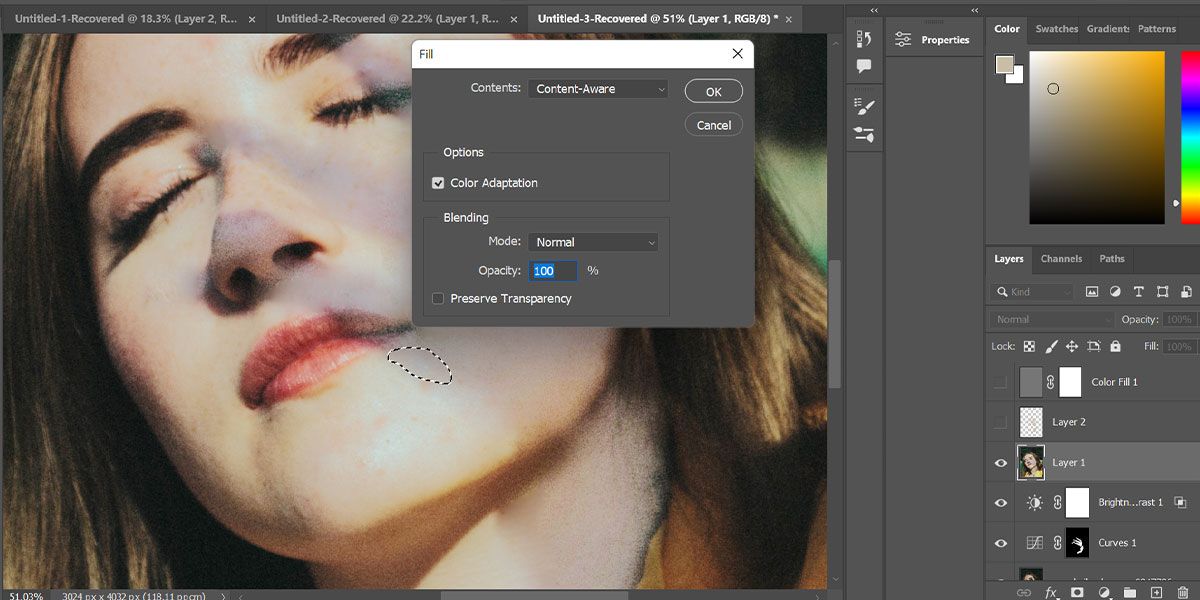
Press Shift + Backspace to activate Content-Aware Fill. Press Enter to proceed. Repeat this method until most of the shadow is removed.
-
Some parts can be difficult to correct with this method. In such a case, use the Clone Stamp tool and set the Flow to 5-10%. You can read more about how to use Photoshop's Clone Stamp tool in our detailed guide.
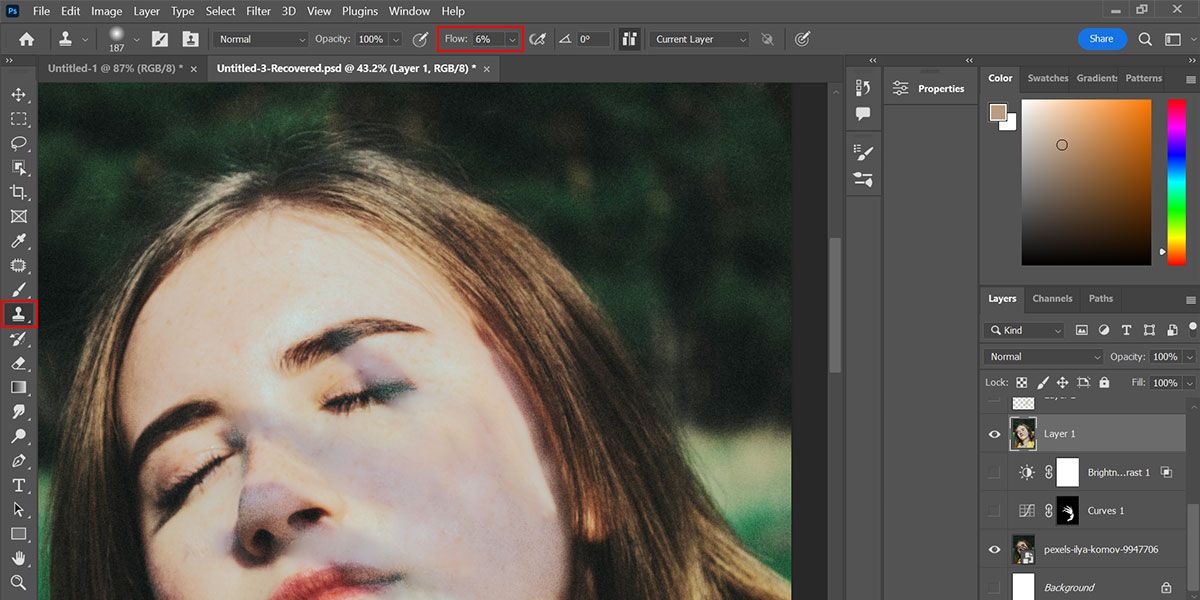
- Press the Alt key and click on an area you want to sample, then click on an area you want to replace.
-
As a final touch, press Shift + Alt + Ctrl + E to create a new layer of all the visible layers and open the Camera Raw Filter once again. You can now make any further minor adjustments such as Texture and Clarity.


Improve Your Portraits by Removing Unwanted Shadows
Unwanted shadows on portraits can be the most challenging thing to eliminate for a photographer. If you are mindful enough, you can avoid this mistake in the shooting phase. However, if luck is not on your side, use this method to effortlessly remove shadows from your images.