
If you’ve ever used the selection tools in Photoshop to remove backgrounds, you may have had to deal with the halos and jagged lines that often appear around your subject. This is because very few automated selections are perfect.
In this tutorial, we’ll show you how to remove the halos using the Smudge tool in Photoshop. Let’s get started.
What Is the Smudge Tool in Photoshop?

The Smudge tool is grouped with the Blur and Sharpen tools in the Photoshop toolbar. It acts very much like the Forward Warp tool in the Liquify filter tools, in that you can move a group of pixels in one or many directions, which results in a smudge effect depending on how heavy-handed you want to be.
But the Smudge tool can also be used very strategically by acting as a pixel-compressor to get rid of halos, jagged edges, and other distortions resulting from using any of the automated selection tools in Photoshop.
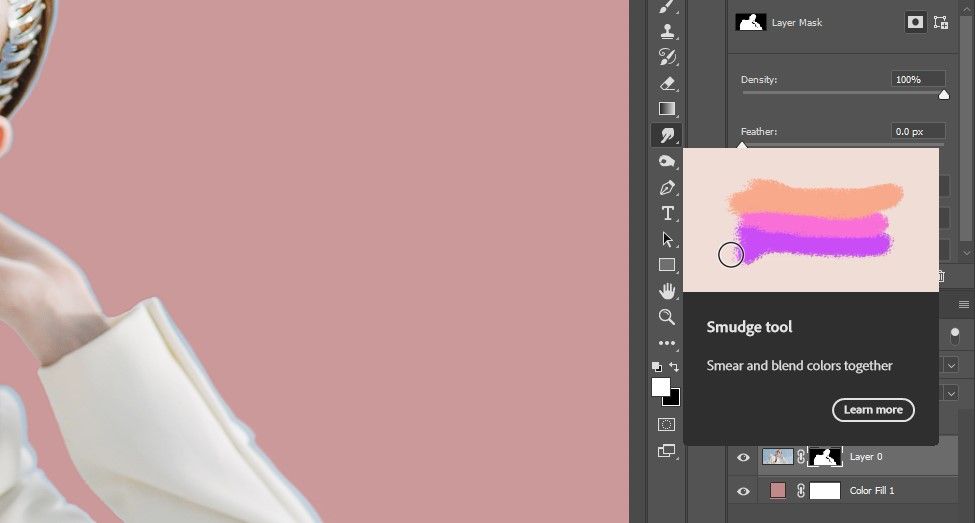
The Smudge Tool Settings in Photoshop
Like the Brush tool, you have access to many of the same settings to fine-tune the Smudge tool.

While the Smudge tool itself can't really be modified at all from the drop-down menu, you do have the option to choose the brush type. Note that you'd likely want to use either a Soft or Hard brush for the purpose of removing halos and jagged edges. It appears that either option performs about the same for our purposes.

You can also change the Blend Mode of the Smudge tool. But we'll be using it in the Normal Mode.

The most important setting is the Strength percentage. For removing halos, it's best to experiment to see what specific percentage would work best with your image, but we've found that for most high-resolution images, around 20% works best.

Lastly is the Sample All Layers option. Since we'll be working on the layer mask itself, it doesn't matter if you check or uncheck this box when using the Smudge tool in the way that we're going to show you. You can safely ignore it.

We won't be using the Finger Painting or Pressure settings for this tutorial.
How to Remove a Halo From a Portrait Using the Smudge Tool
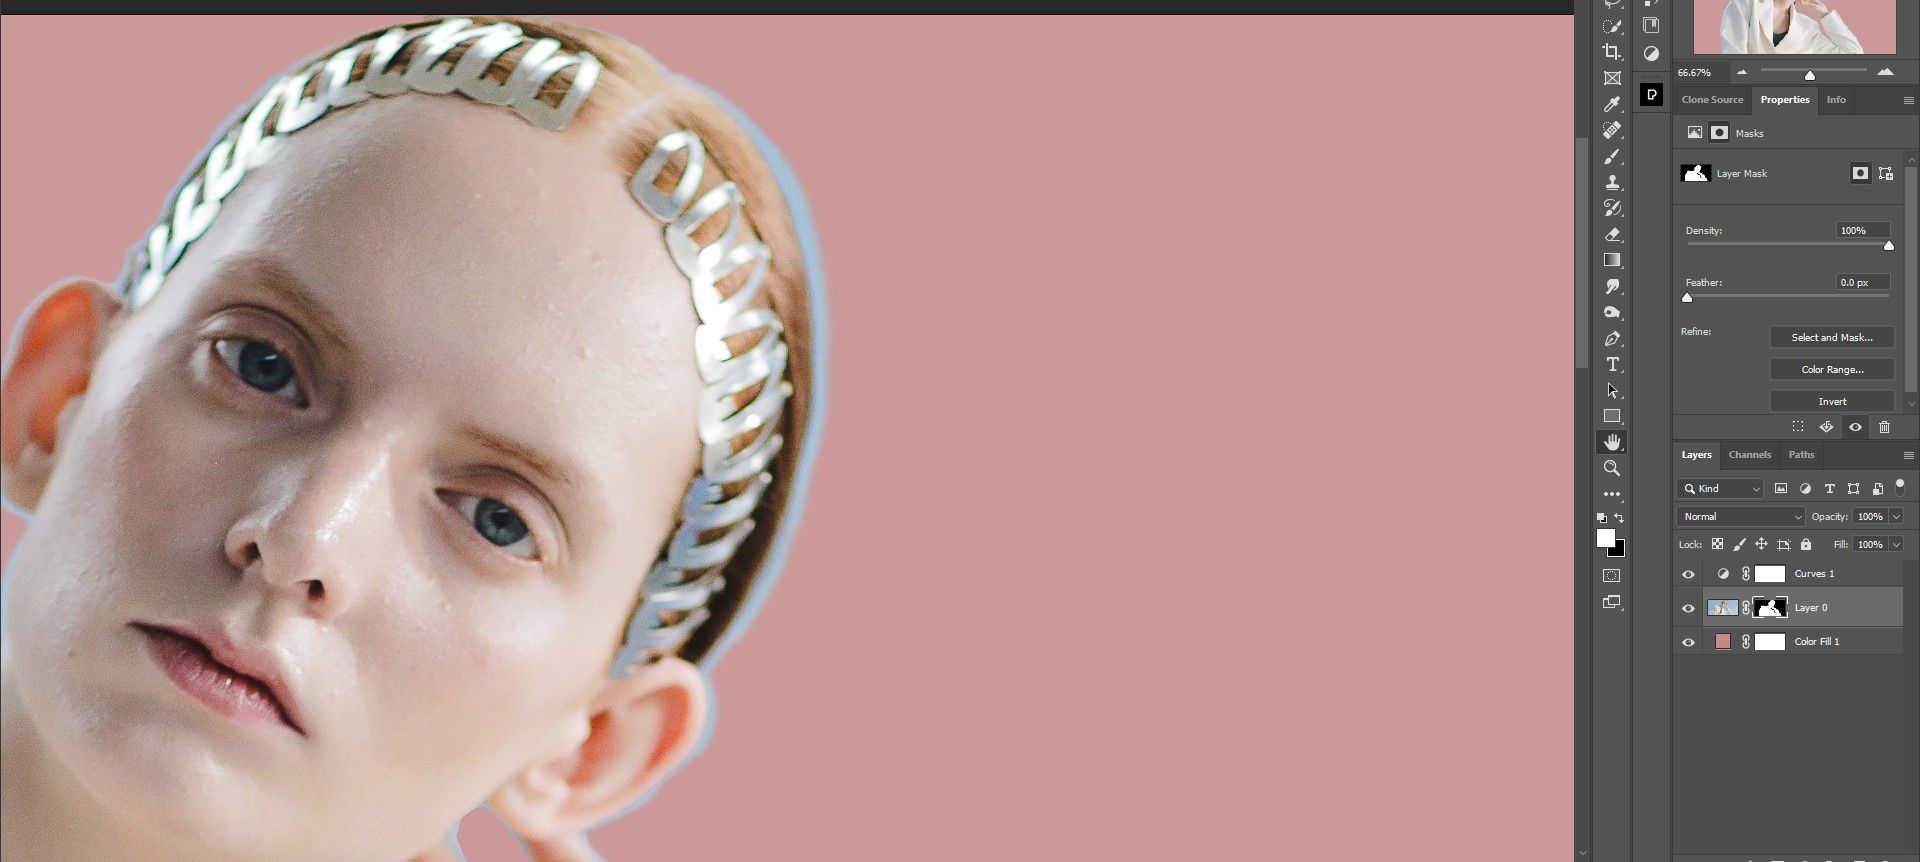
Let's see how the Smudge tool can take care of a halo in Photoshop. We've already removed the background from this portrait which was originally blue. We've added a pinkish Color Fill layer underneath so that we can see the resulting blue halo more easily, along with a Curves layer to brighten the image.
Also, we've exaggerated the haloing effect for this example so that it will be easier to see how the Smudge tool works. If you use the Subject Select tool to remove the background of this image, the haloing isn't this bad. But there are still minor imperfections like jagged lines and missing bits of texture which we will cover in the next example.
-
Click on the Layer Mask of the subject layer. This is extremely important because otherwise, the Smudge tool won't work correctly.

-
Select the Smudge tool.
- Use the bracket keys [ and ] to increase or decrease the brush size. We show you how to use the Brush tool if you need a refresher.
-
Press Ctrl + + to zoom in. You can use the Hand tool (H) as well to navigate within the image.
-
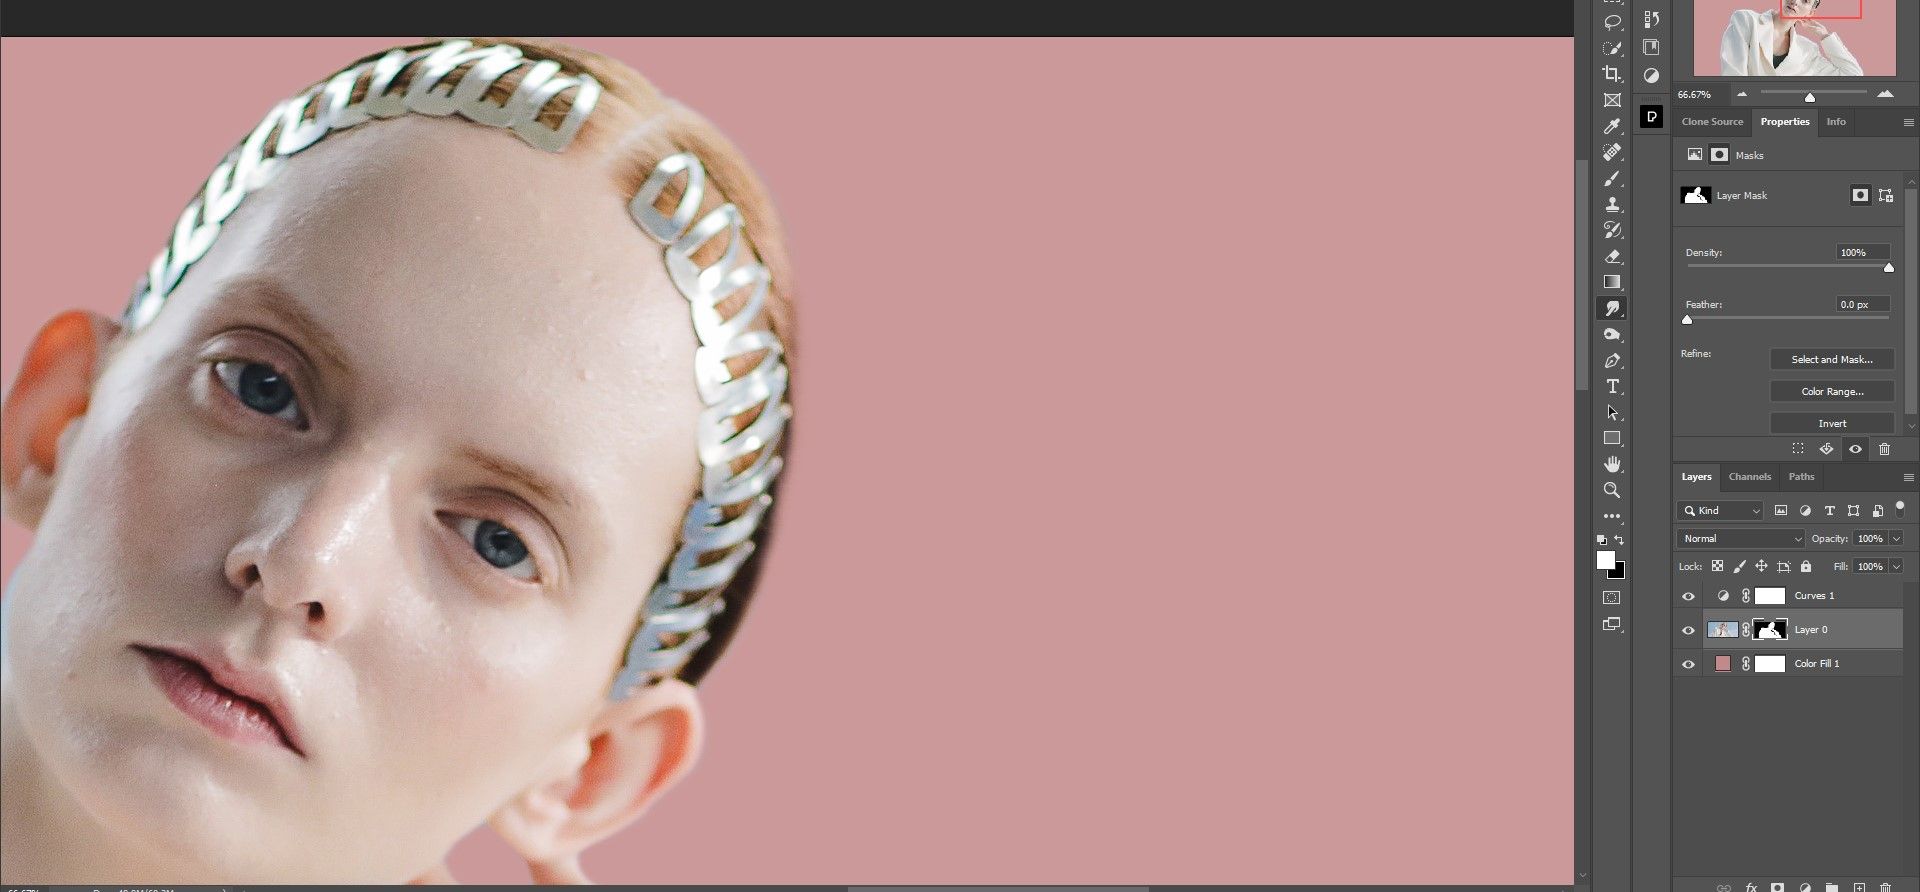
Click back on the Smudge tool and brush the halo in toward the subject's head. Adjust the size of the brush as you go and use the Hand tool as needed.
-
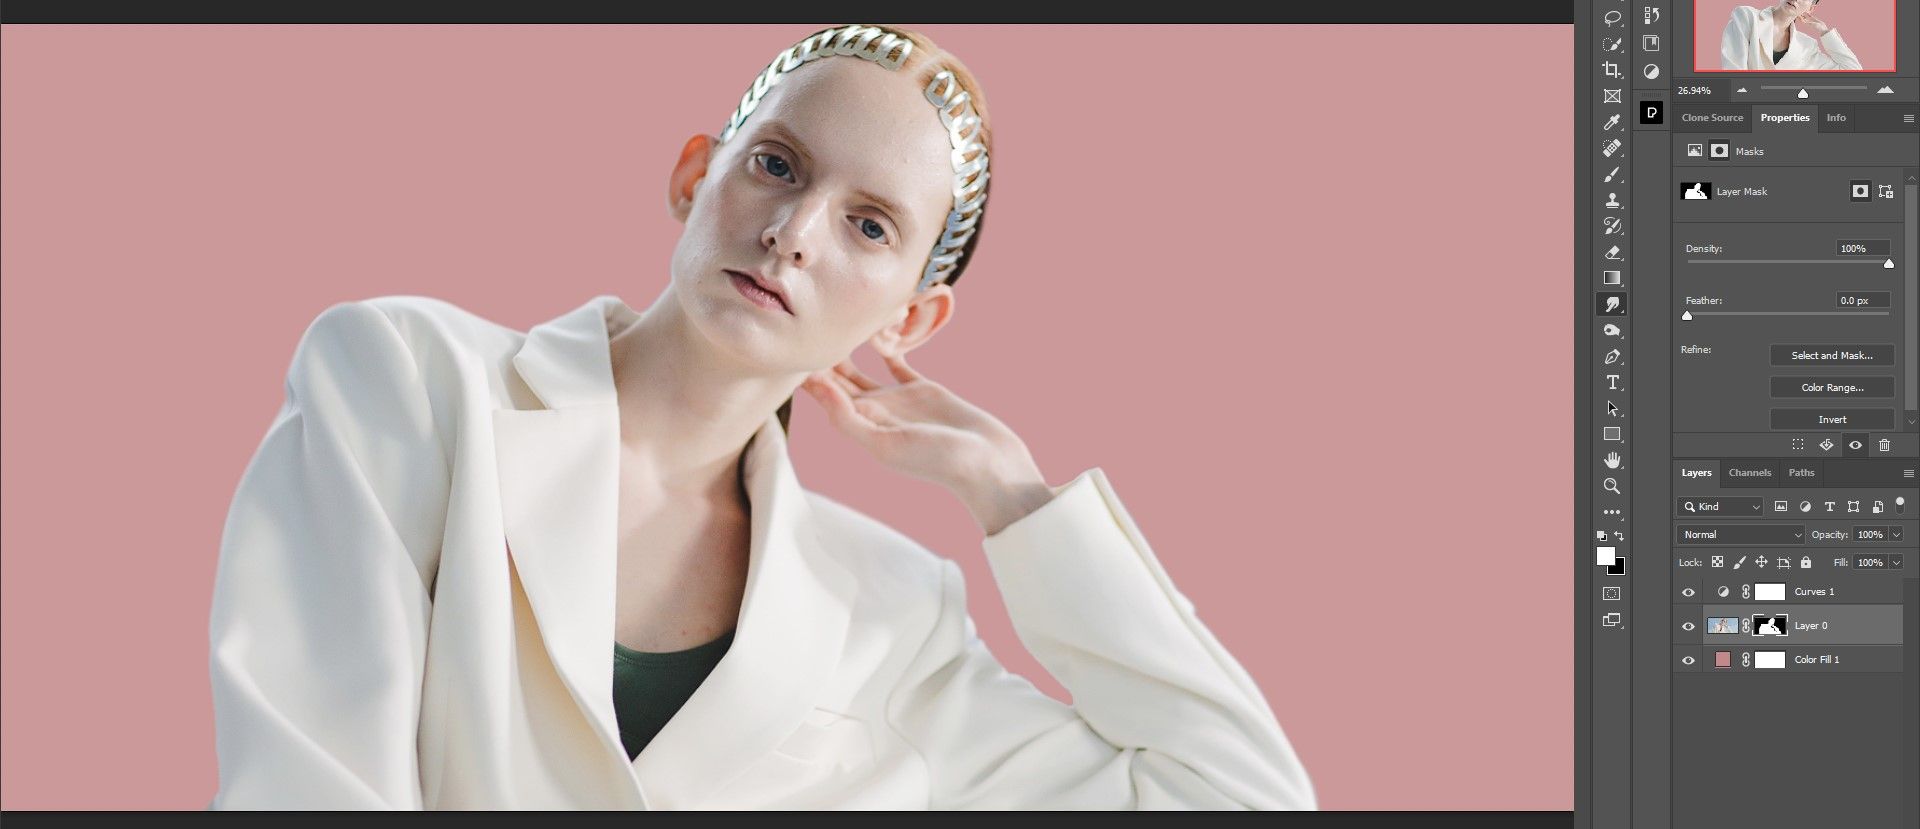
With the halo effect removed from the subject's head, now remove the halo from the rest of the image. Press Ctrl + 0 to zoom out to complete the work.


It's very easy to remove a halo from an image using the Smudge tool. This is under the presumption that you already know how to make selections in Photoshop, but if you need a refresher, check out our guide on everything you need to know about the Subject Select tool in Photoshop.
How to Fix Textures and Hair Using the Smudge Tool

Now, let's replace the background using the Subject Select tool and simply mask it. We'll add a gray Color Fill background so that we can take a look at any issues that the Smudge tool can fix.

You'll notice right away the severe haloing around the woman's hair. And if you zoom in to certain spots, you'll see subtle haloing inside the arm.

There are also jagged edges around the woman, especially on her hand.

Let's take a look at how the Smudge tool handles each of these trouble areas.
Fixing Halos Around Hair

The Smudge tool is probably not on the shortlist for any Photoshop user to address haloing around the hair. But the above shows how the first pass with the Smudge tool looks. Now, let's use the Brush tool to remove the smudged areas.

There are still two issues. The hair doesn't quite look natural around the top and there's discoloration. Let's correct the color by using a Hue/Saturation adjustment layer, inverting it, and painting on the effect.

With most of the color removed from the hair, we could go beyond the scope of this tutorial and paint in new hair to replicate what the woman's hair looked like before. We did this quickly using various methods, including brushing in new hair, just to make the hair look more natural. You'd want to take your time to perfect it.

You can also use third-party plugins like PortraitPro to enhance hair features.
Removing Subtle Halos
Let's remove the halo around the inside of the arm using the simple technique of pushing in the unwanted pixels with the Smudge tool.

The halo has been completely removed. We also removed the rough edges along the outside of the arm.
Fixing Jagged Edges
Let's tackle the jagged edges on the hand using the Smudge tool.

The Smudge tool did a fairly decent job. Fortunately, we can clean it up to perfection using the Clone Stamp tool.

Using a Hard brush, the Clone Stamp tool did a great job finishing up what the Smudge tool couldn't do, complete with a brand new clean edge. We show you how to use the Clone Stamp tool if you need a refresher.
The Smudge Tool Comes in Very Handy
We hope that you'll use the Smudge tool for dealing with halos and other selection issues in Photoshop. And when you combine it with the host of other tools that Photoshop has to offer, you'll no longer have to dread dealing with imperfect selections.