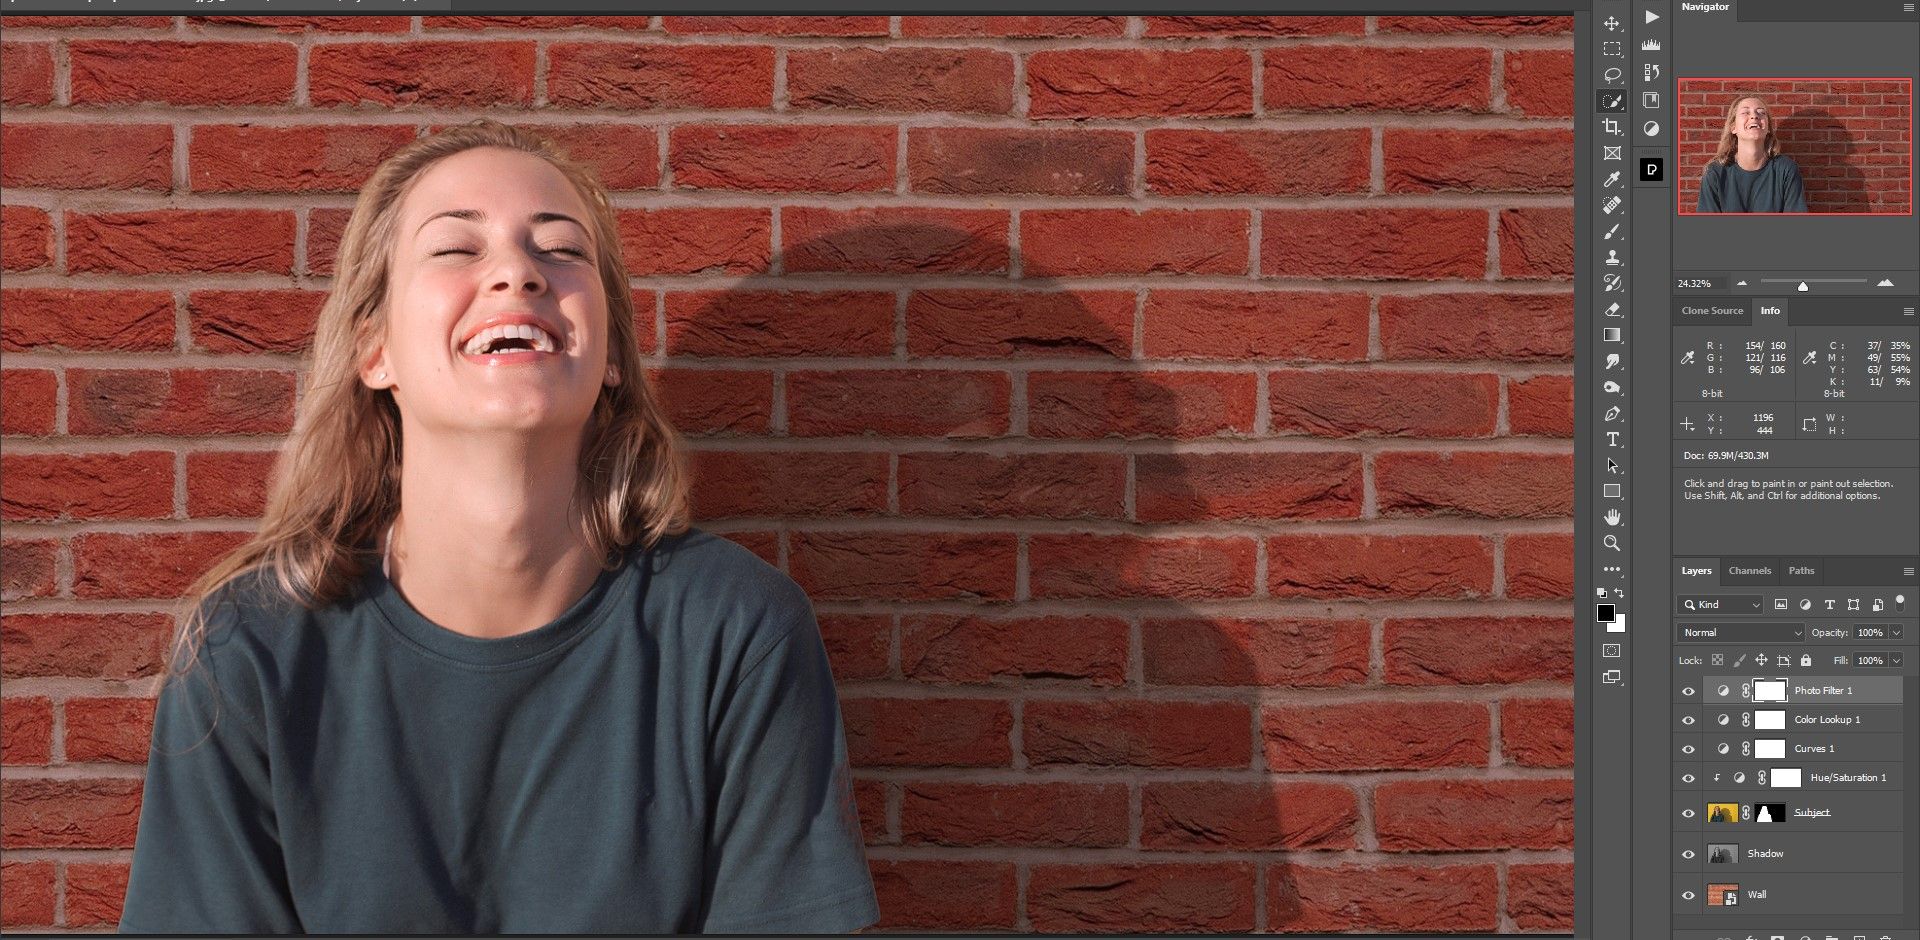
When changing the background of an image, you will lose the shadow of your subject and will probably have to create a new one. No need; there is a way to preserve those shadow details. We'll show you how to use a subject's existing shadow on a new background in Photoshop, creating a realistic composite. Let’s get started.
Why You Should Use Your Subject's Existing Shadow
It’s fairly common to replace backgrounds in portraits. In most cases, a background may have too many distractions or may simply not look nice. But there is a sacrifice; the shadow. You will lose the original and will have to make a new one, which might not look as realistic.
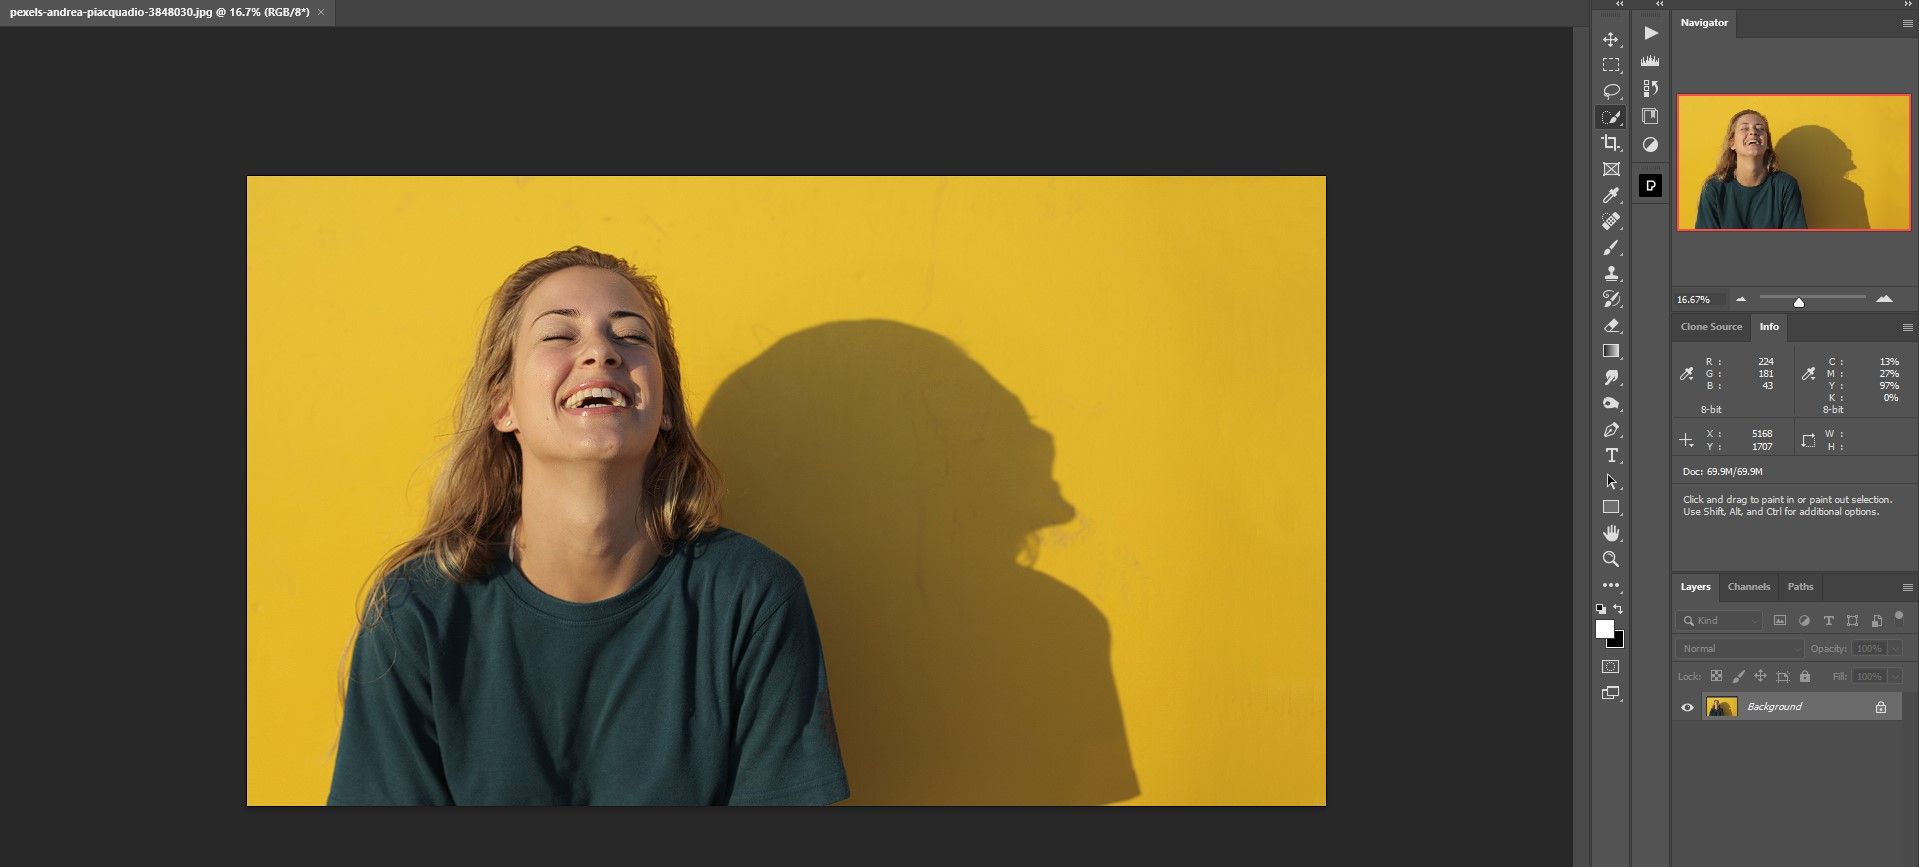
To maintain a realistic look, it’s extremely useful to use the existing shadow details cast by your subject in the composite. In our example, we’ll replace the over-the-top yellow background with a regular brick wall. We’ll keep the shadow details in order to create a very realistic-looking composite.
If you want to follow along with our tutorial, you can download the main portrait image from Pexels, and download the replacement background of the wall from Pexels.
Step 1: Add the New Background
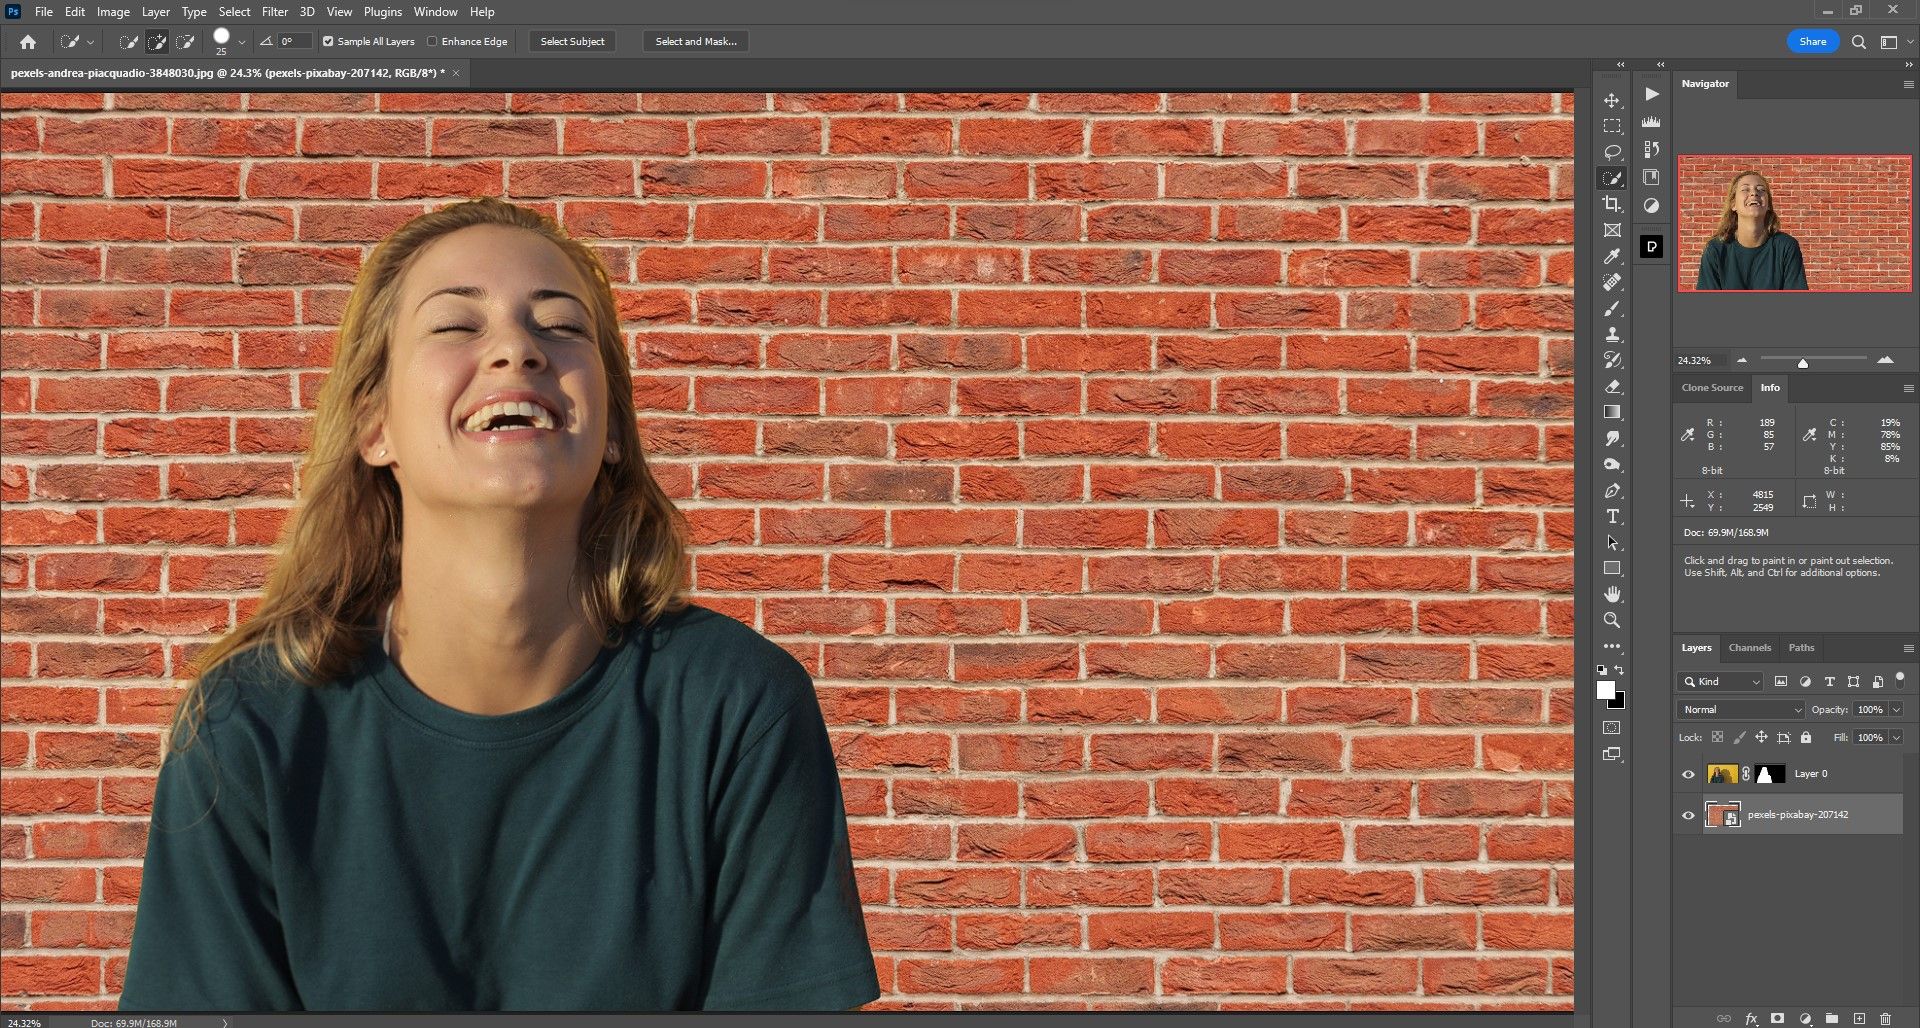
In our first step, we’ll replace the background with the brick wall using the Select Subject tool in Photoshop. We’ll rename the layers and organize them so that future changes could be made if desired.
-
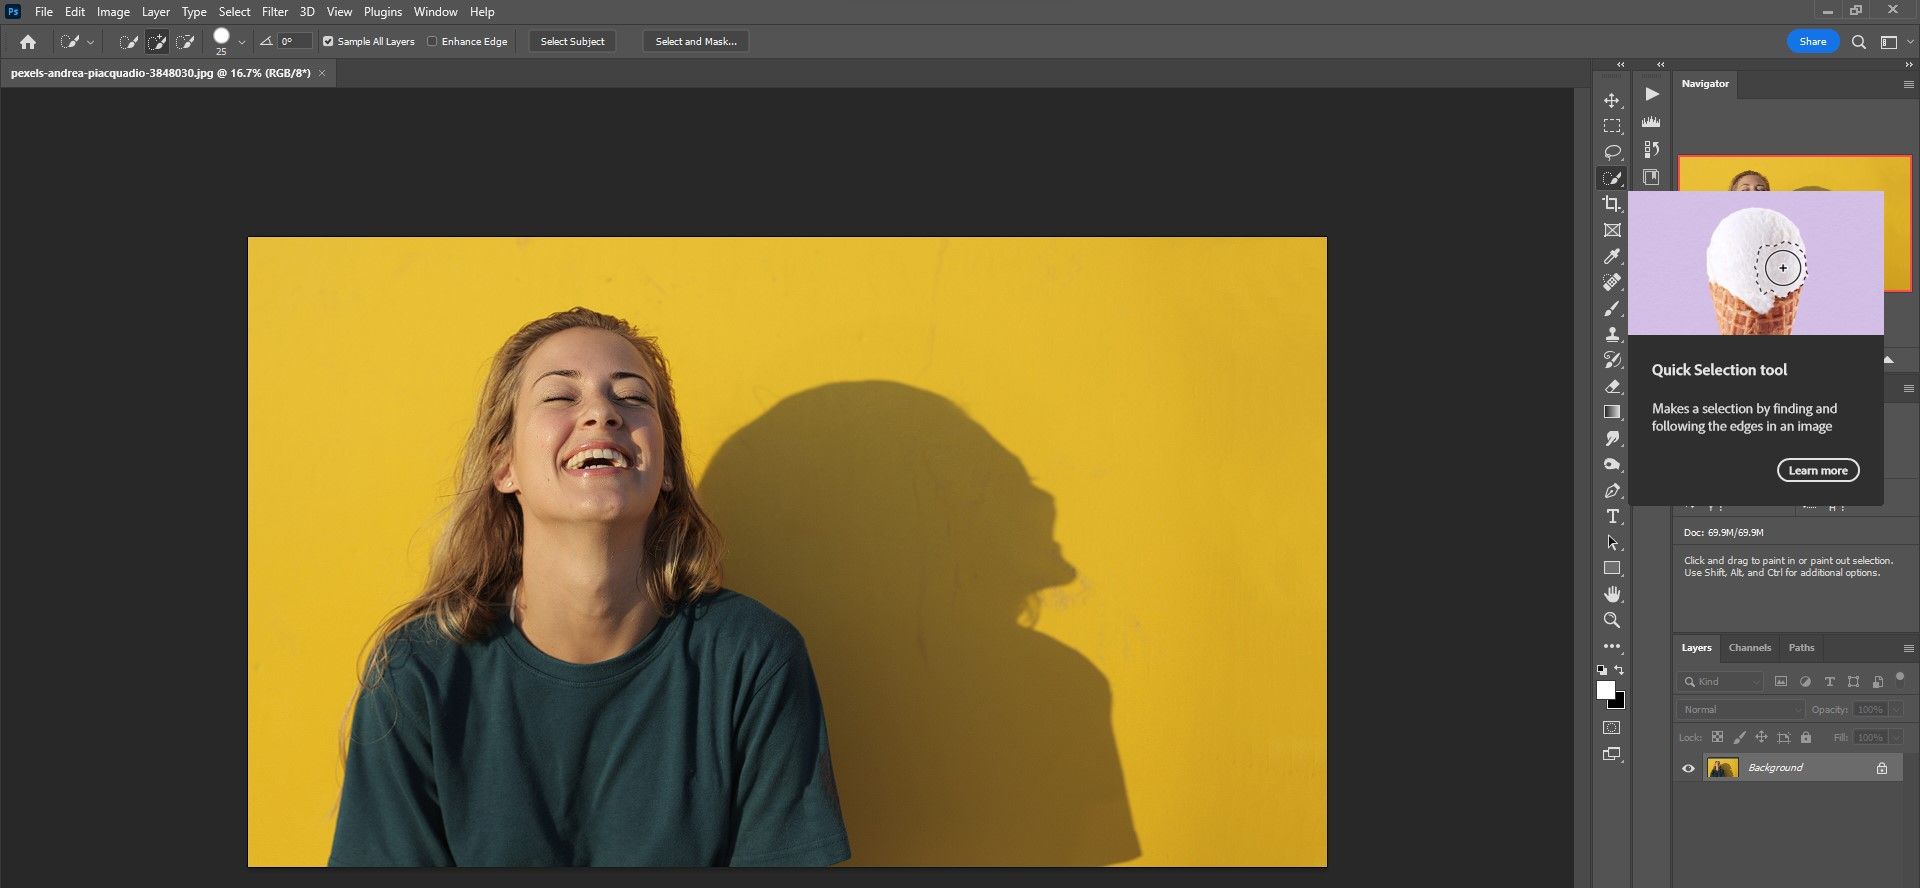
With your portrait loaded into Photoshop, click on the Quick Selection tool.
-
Choose Select Subject at the top.
-
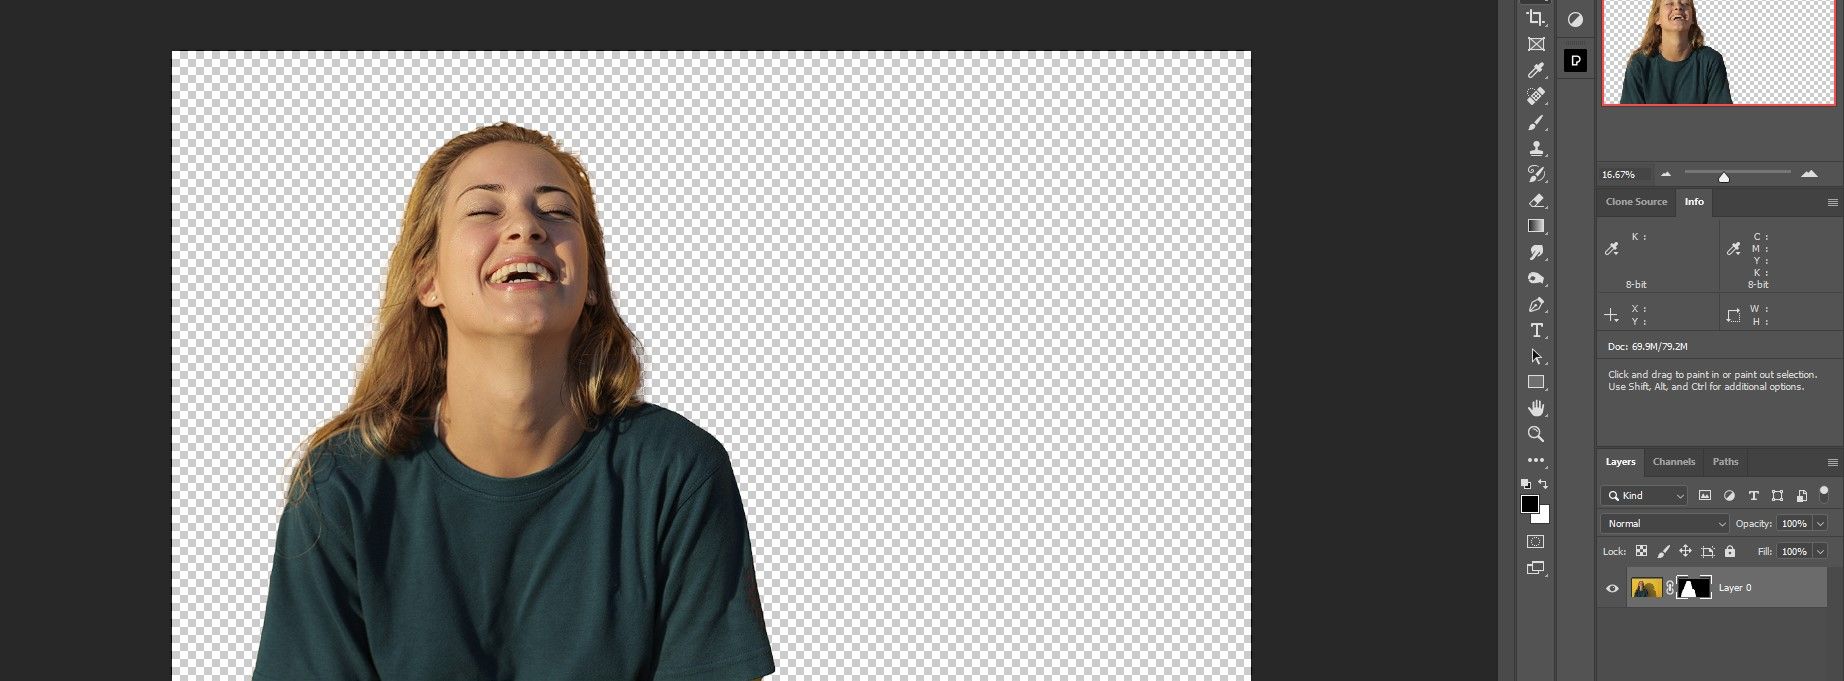
Click on the Mask icon in the bottom right corner. If your subject isn’t selected to your liking, you may have to choose the Select and Mask option to further refine your selection. We cover how to select a subject in Photoshop.
-
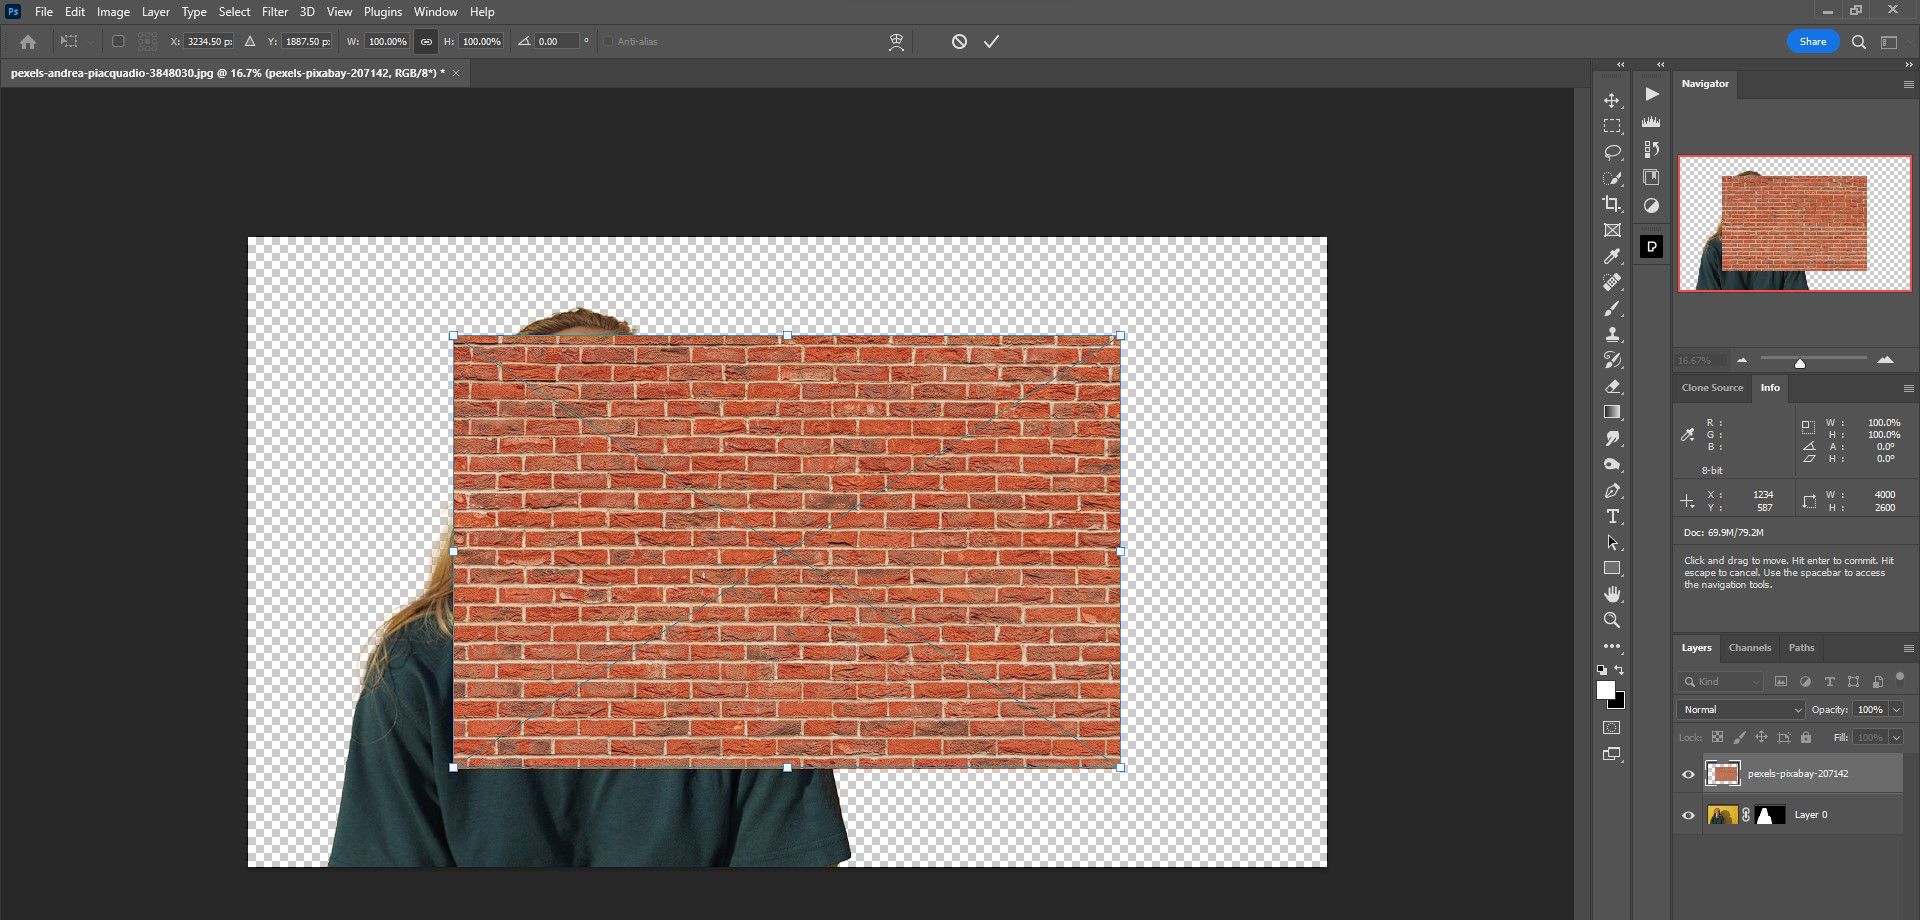
Drag and drop the new background wall into Photoshop.
-
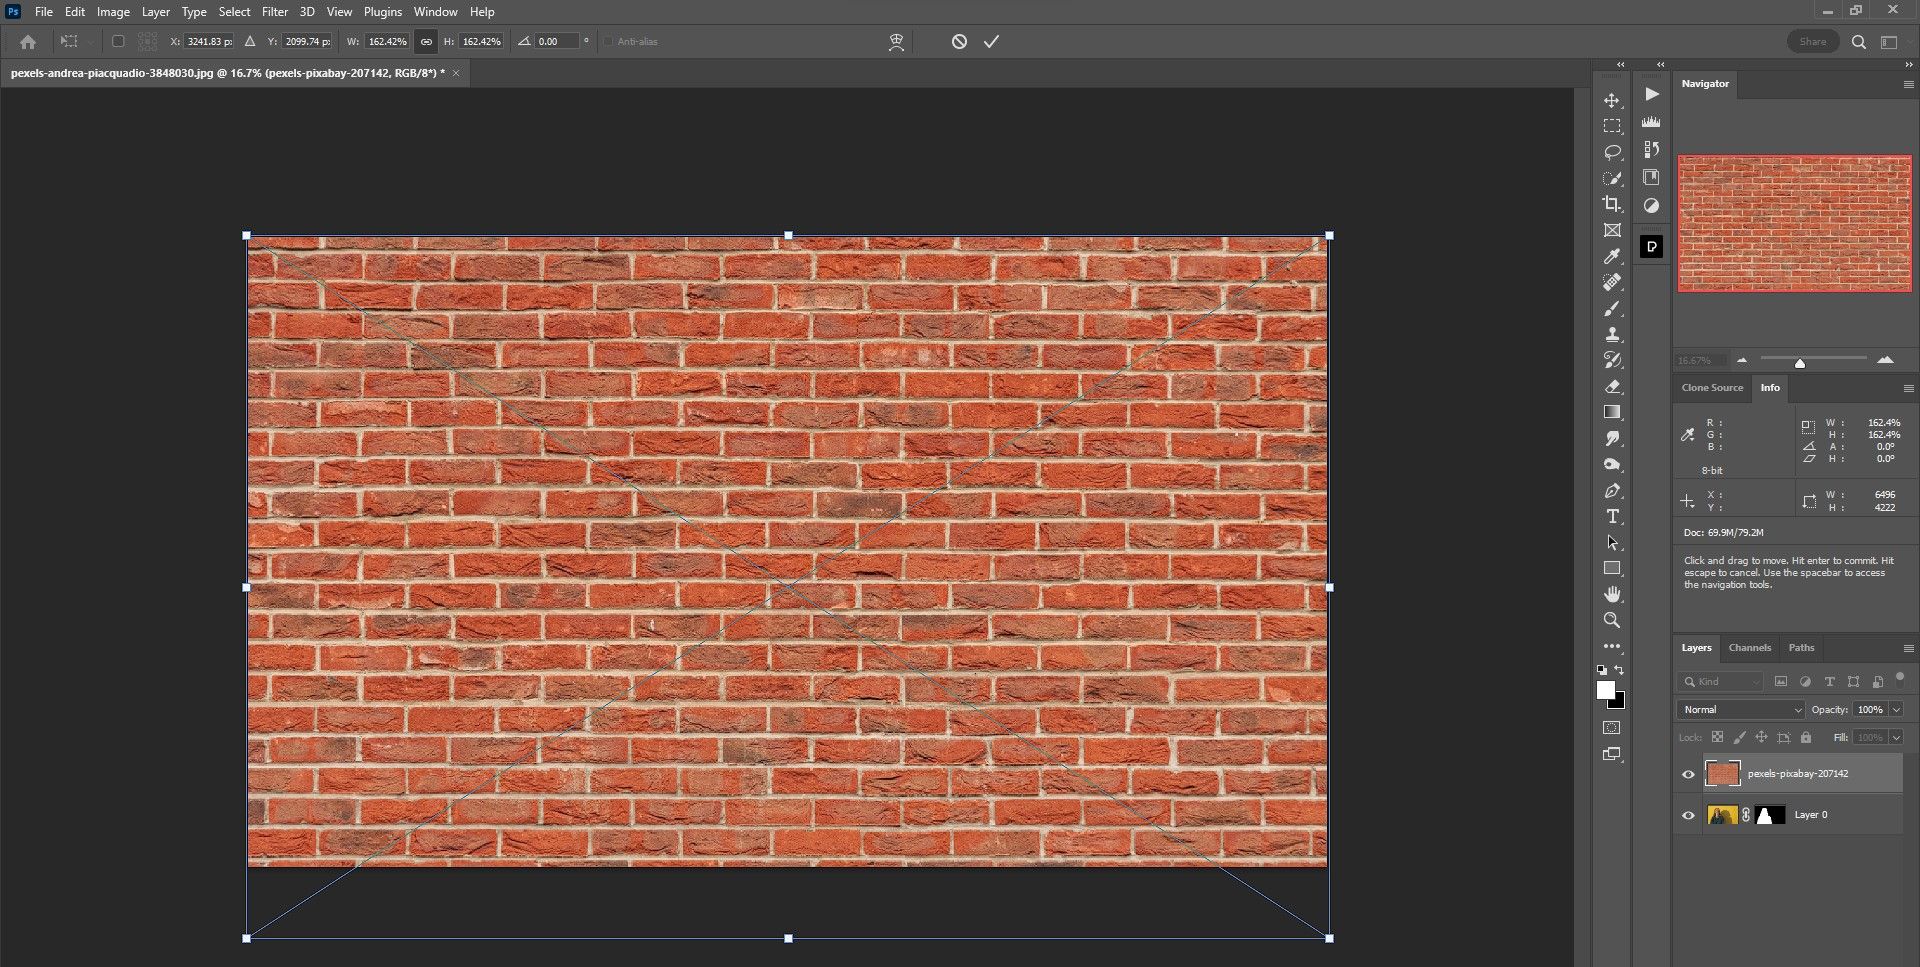
Using the four handles, stretch the wall so that it covers the original image completely. Then press the checkmark or the Enter key.
- Press Ctrl + 0 to fit the image to the screen.
-
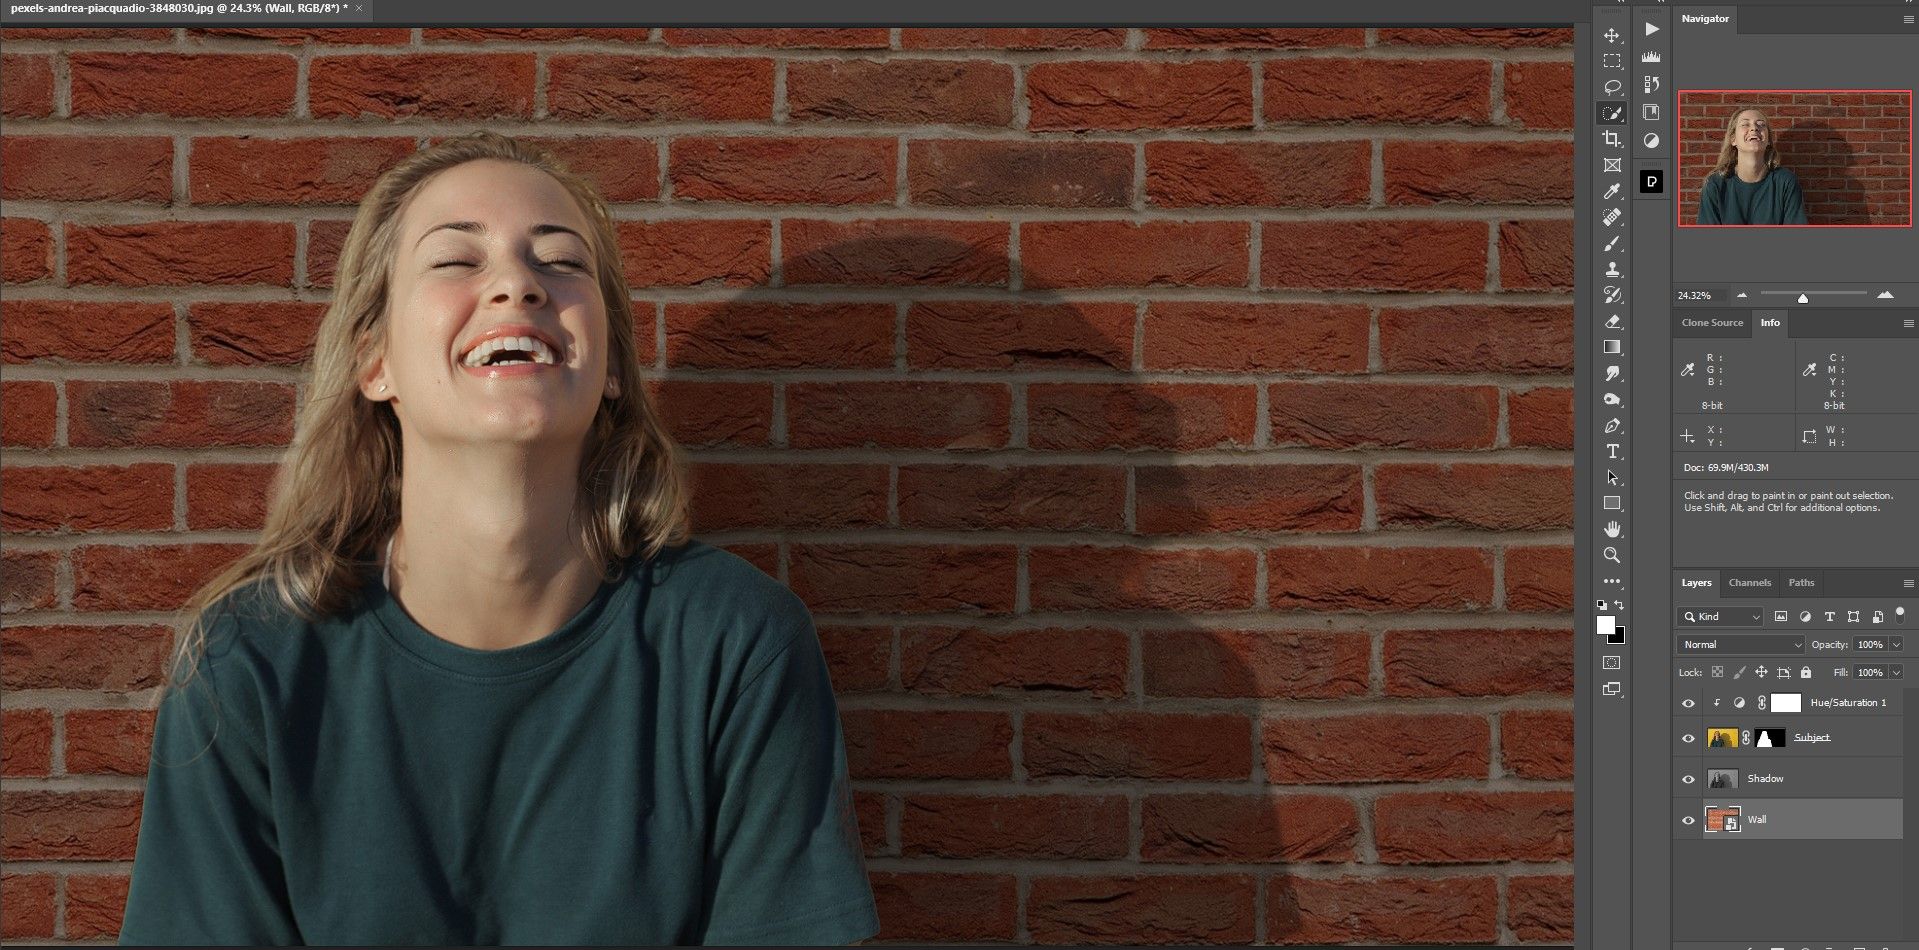
Move the wall layer so that it’s beneath your subject layer as shown.
- Double-click on the top layer and name it "Subject".
-
Double-click on the bottom layer and name it "Wall".
If you’re working with a landscape image, we show you how to replace skies in Photoshop.
Step 2: Recreate the Original Shadow
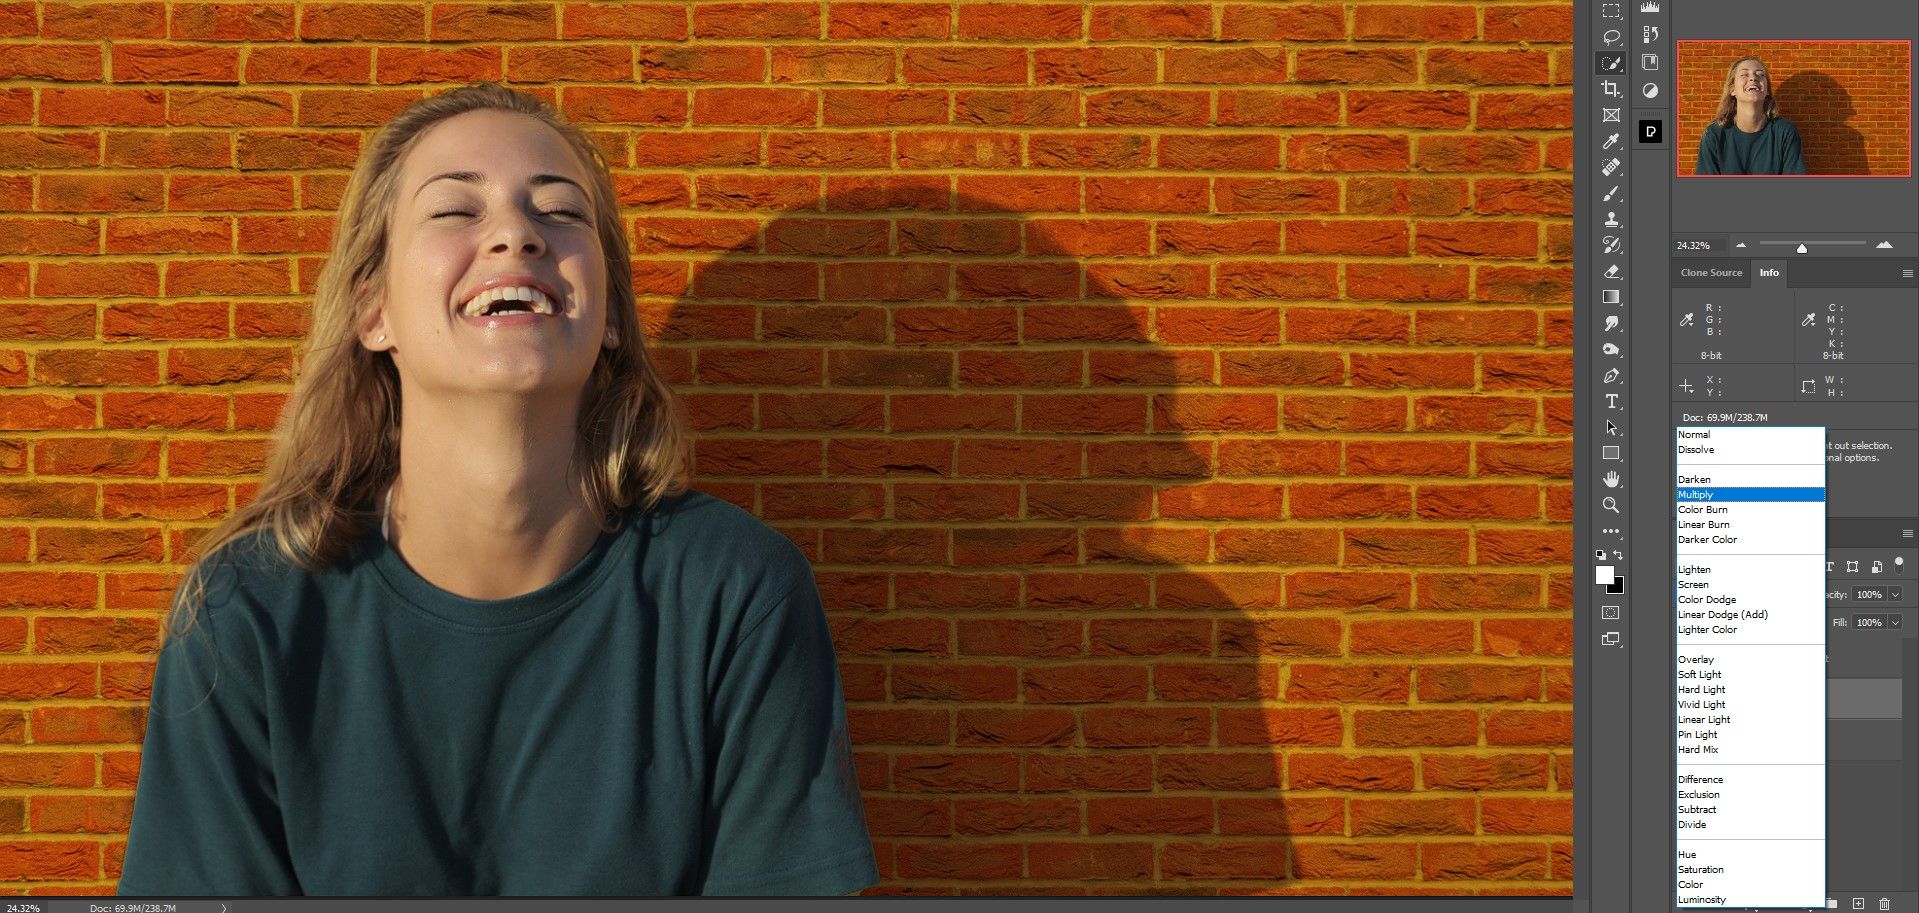
In the second step, we’ll reintroduce the original shadow details from the subject using the Multiply blend mode. We’ll start by duplicating the Subject layer. Additionally, we’ll desaturate the Shadows layer to remove the color cast.
-
Select the Subject layer. Press Ctrl + J to make a copy of it.
-
Drag the Subject Copy layer underneath the Subject layer as shown.
-
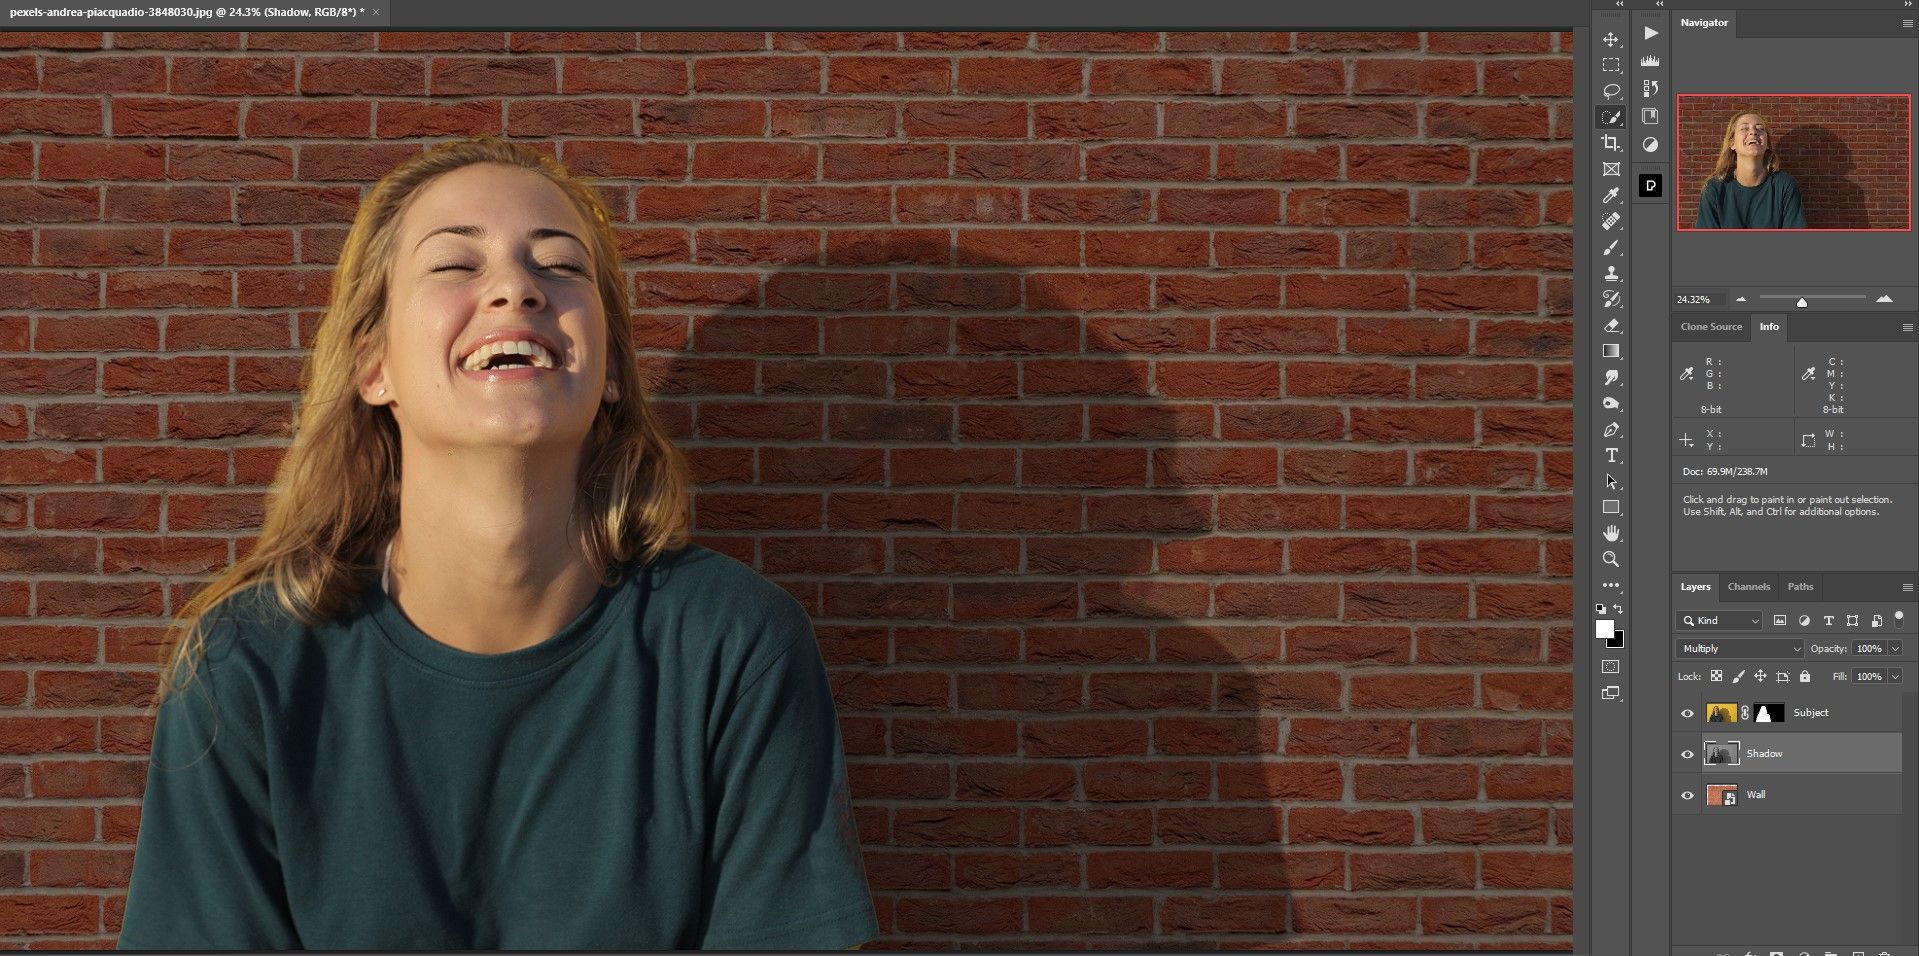
Double-click on the Subject Copy name and change it to "Shadow".
-
Drag the Shadow layer's mask to the trash can icon to delete the mask.
- Choose Delete from the pop-up dialogue box.
-
With the Shadow layer selected, change the blend mode to Multiply.
-
Press Shift + Ctrl + U to desaturate the Shadow layer.
We show you how to add shadows in Photoshop if there were no existing shadows to work with.
Step 3: Fix the Hair and Face
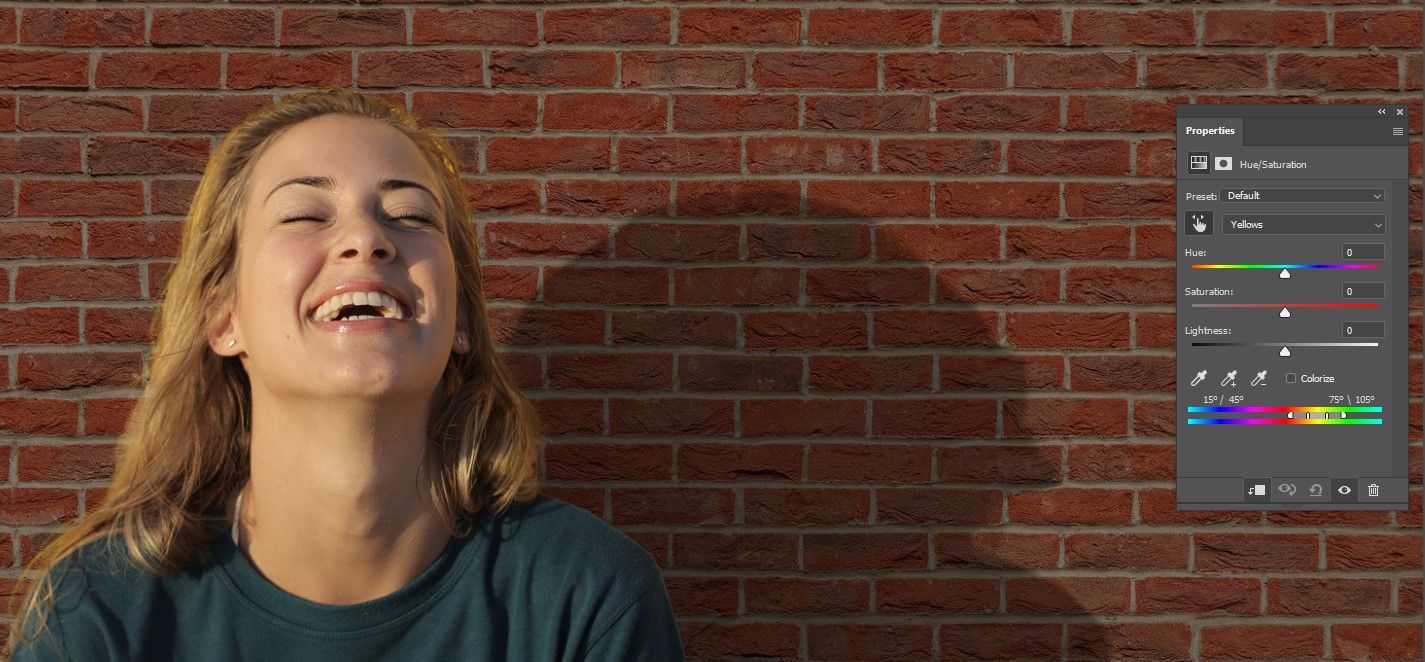
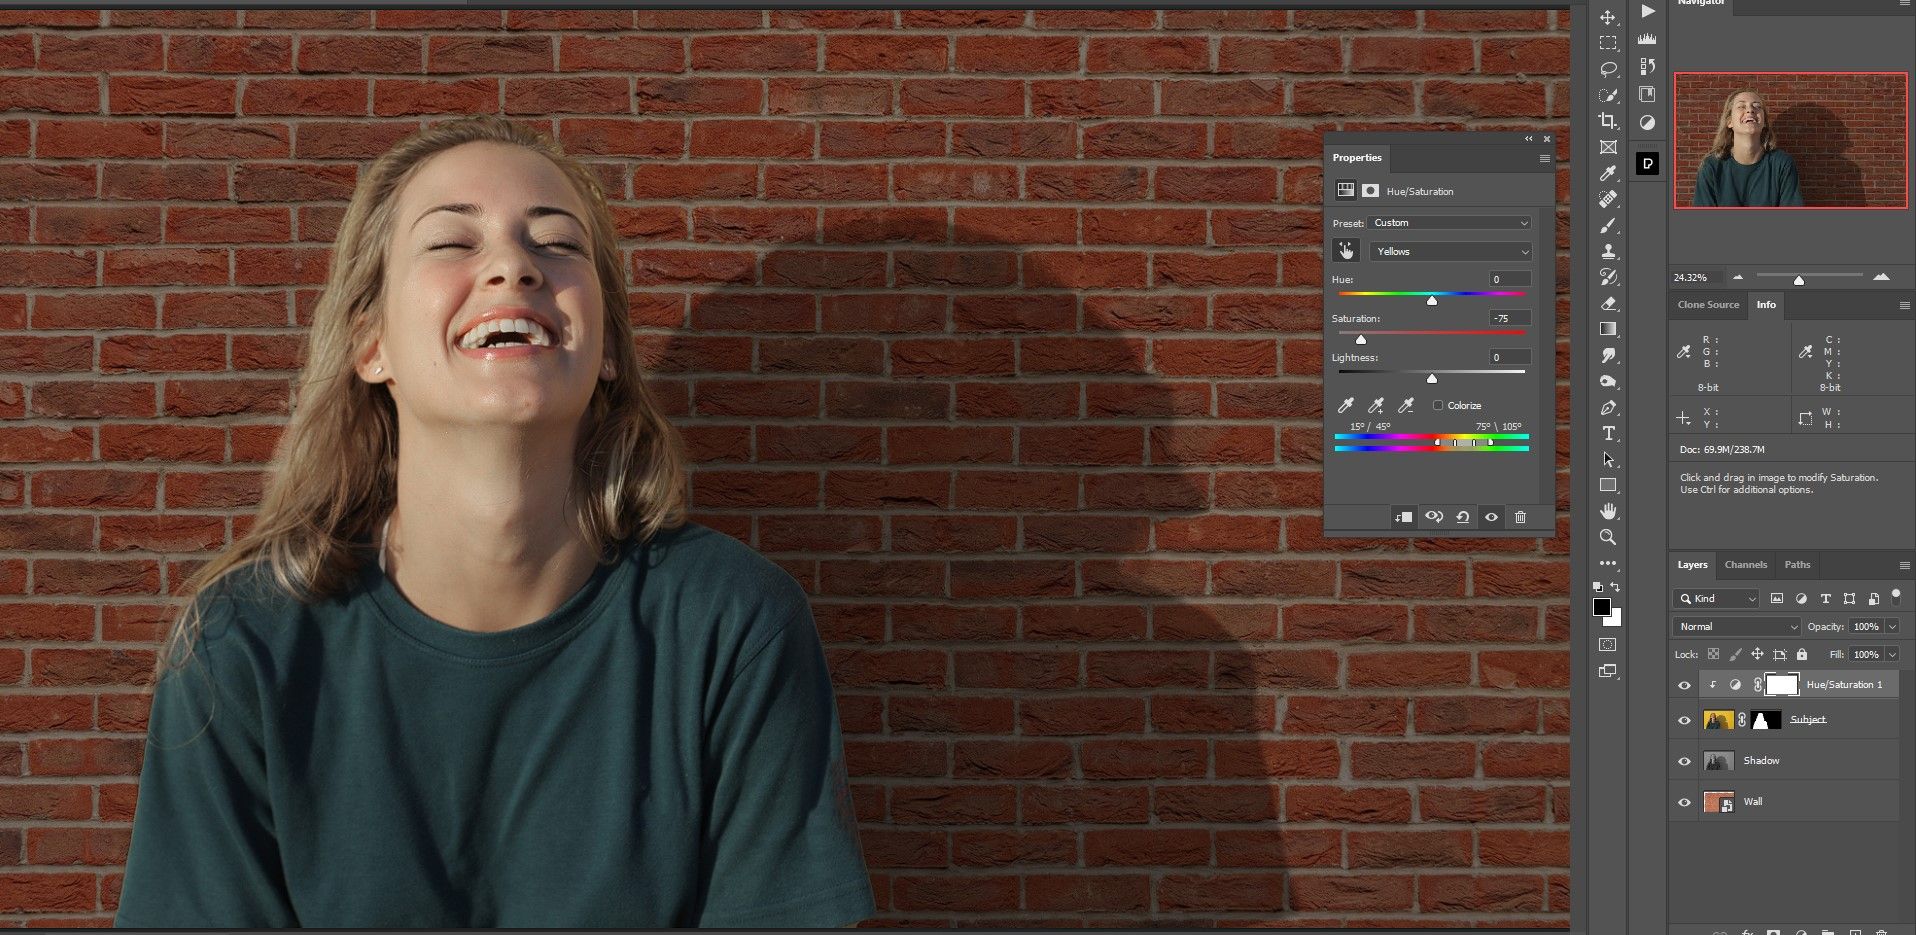
You’ll notice that our subject’s face and hair have maintained some yellow color cast from the original background. We’ll remove this color to make her look more natural.
-
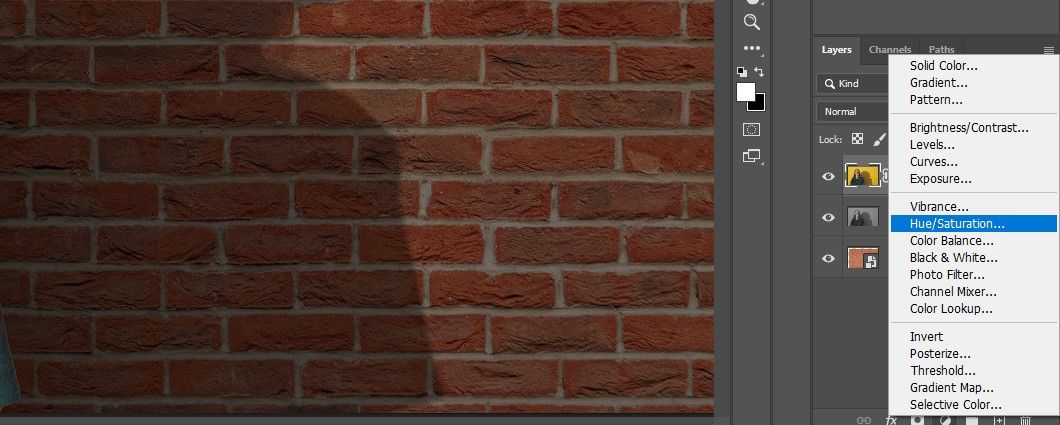
With the Subject layer selected, create a Hue/Saturation adjustment layer.
-
Click on the first icon in the Properties box (the square with the down arrow) to create a Clipping Mask.
-
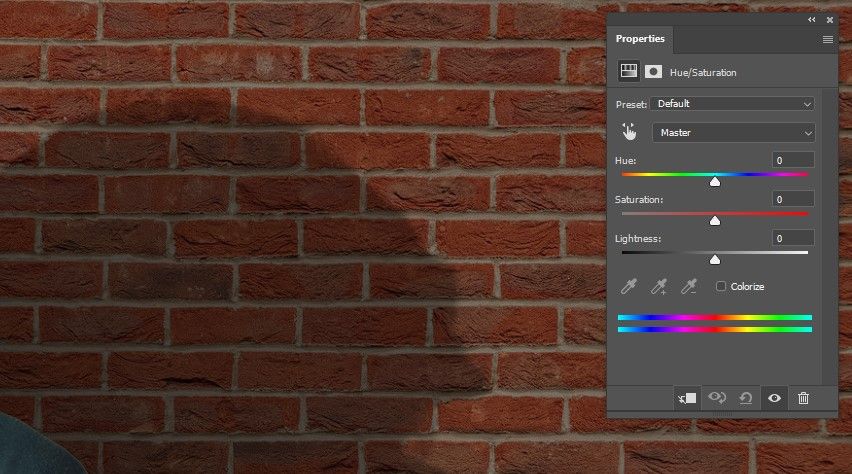
Click on the Color Picker icon next to Master in the Properties box.
-
Click on the woman’s hair where there is yellow. You should see Yellows in the Properties box now.
-
Move the Saturation slider to the value of -75.
If you're looking for a great Photoshop plugin for your portraits, we show you how to use PortraitPro for professional results.
Step 4: Final Adjustments
In the final step, we’ll make the brick wall larger to make the shadow look more realistic. We’ll also add additional adjustment layers to blend the composite layers together.
-
Select the Wall layer. Press Ctrl + T for the Transform tool. Use the handles to increase the size of the wall. You may have to also press Ctrl + 0 to resize the screen as you enlarge the wall.
-
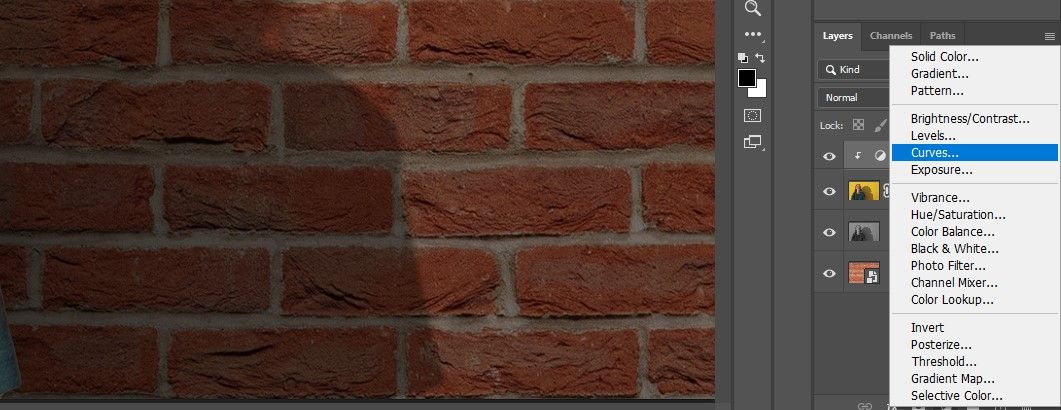
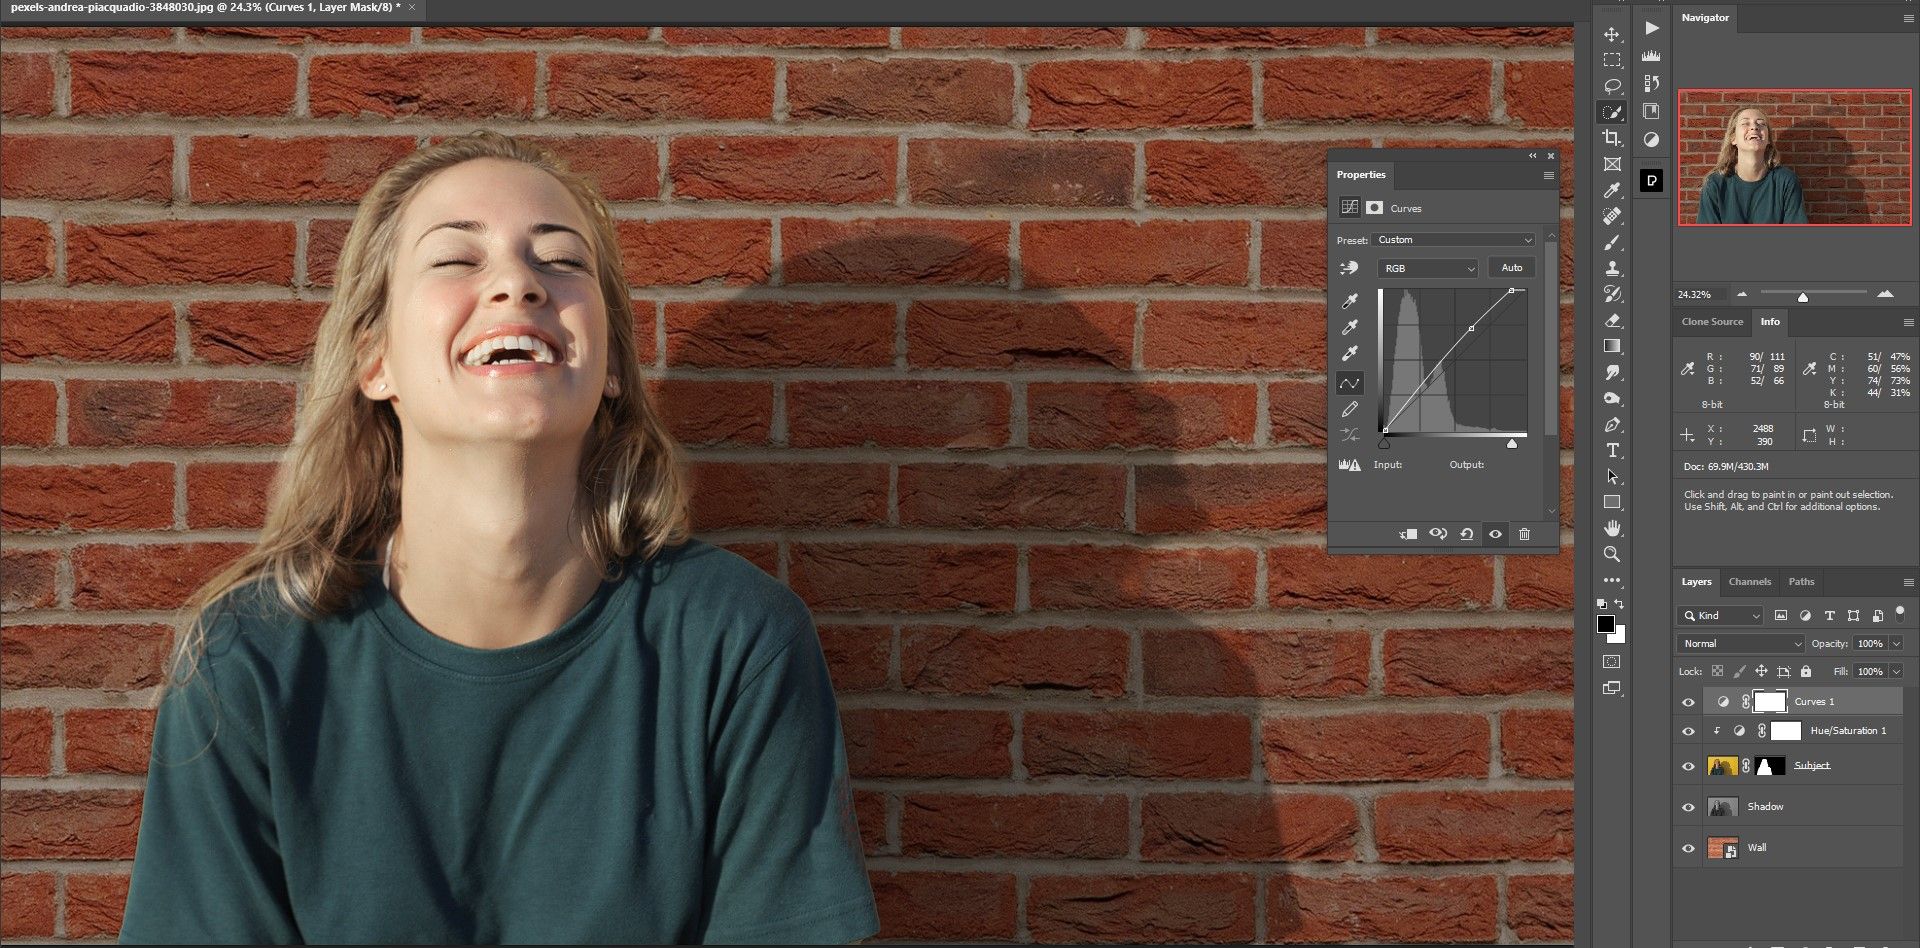
With the Hue/Saturation layer selected, create a Curves adjustment layer on top.
-
Click on Auto to automatically adjust the exposure values.
-
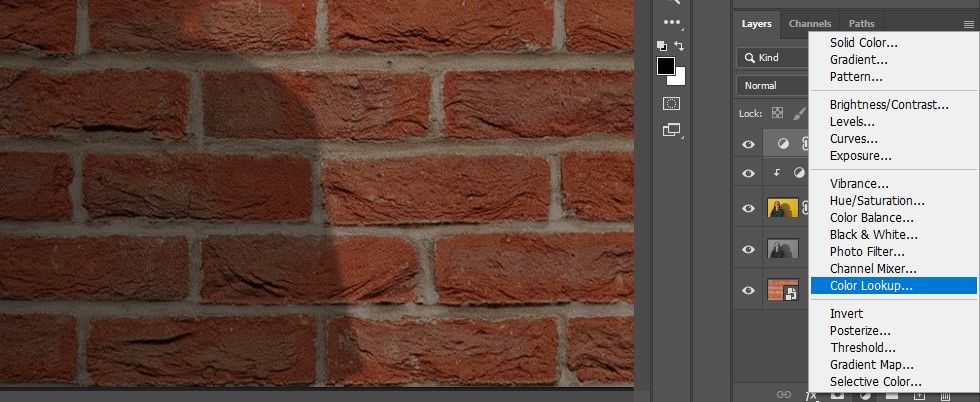
Create a Color Lookup adjustment layer.
-
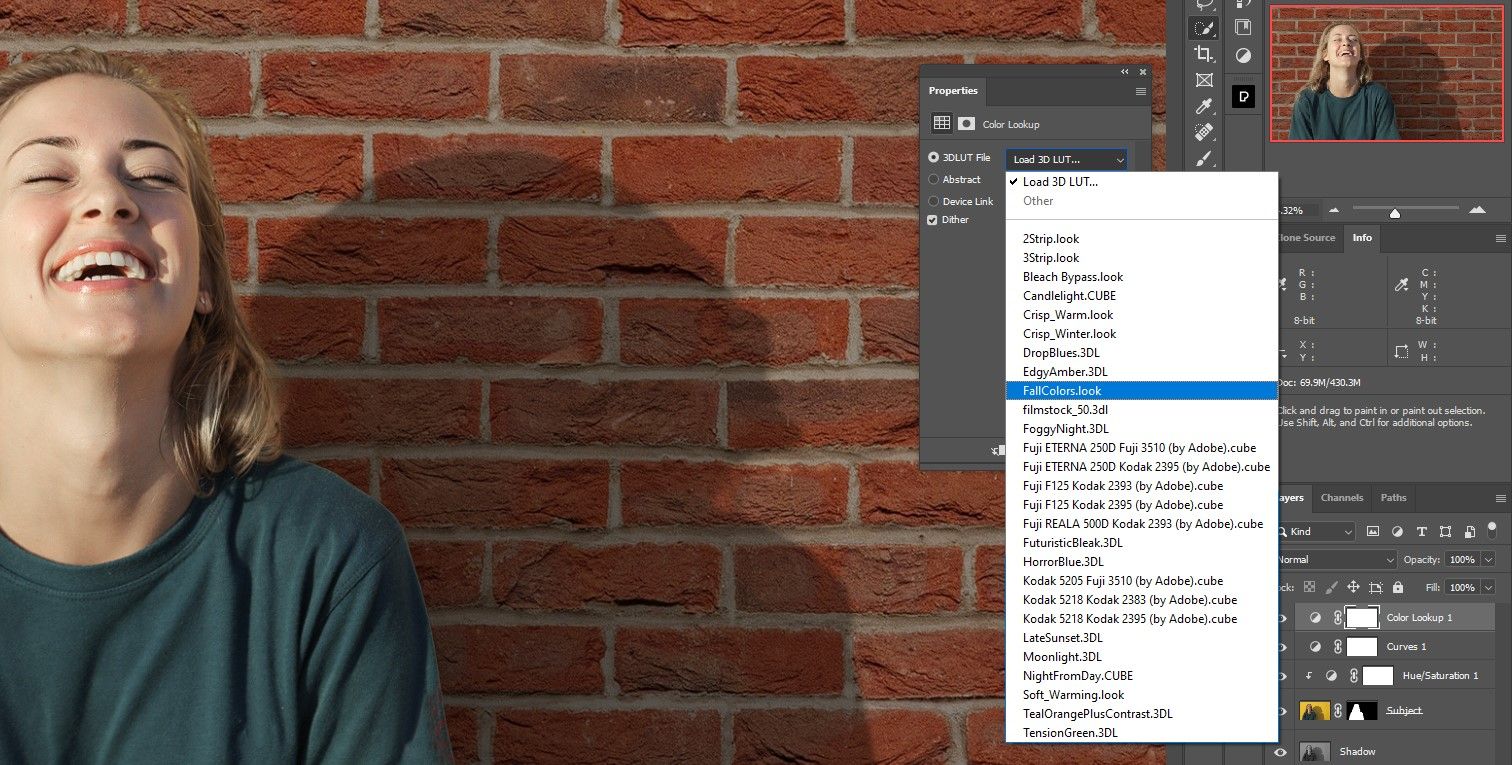
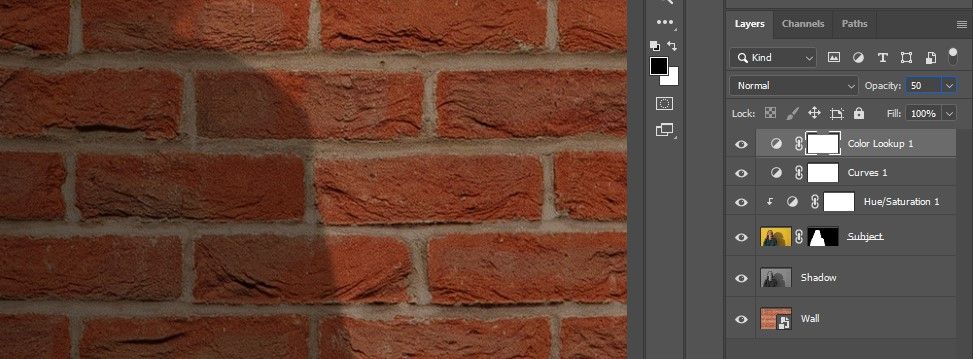
Choose Fall Colors from the drop-down menu.
-
Change the Opacity to 50%.
-
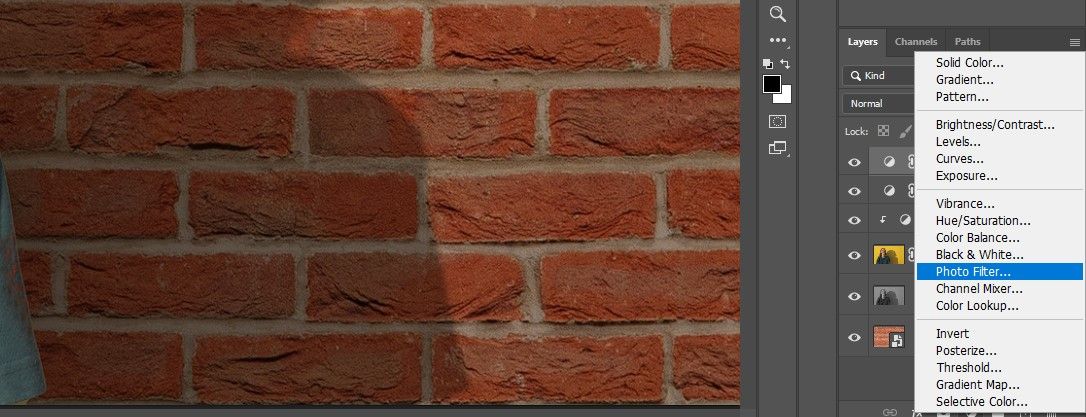
With the Color Lookup layer selected, create a Photo Filter adjustment layer.
-
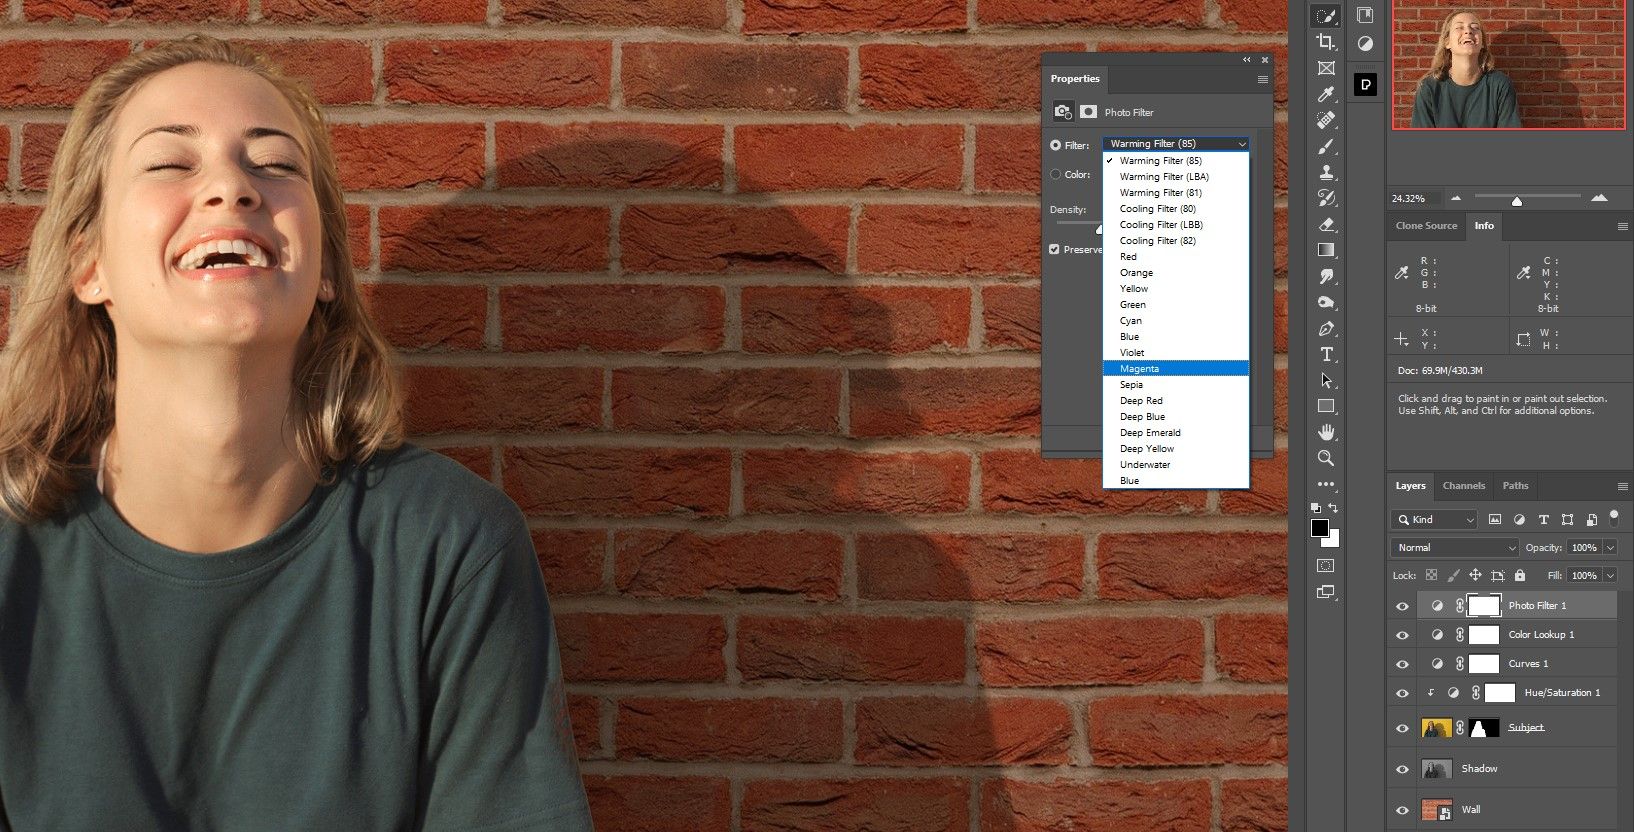
Choose Magenta from the drop-down menu and leave the settings as they are. Make sure the Density is at 25% and that the Preserve Luminosity box remains checked.
Each background replacement may require completely different steps. But for this particular image, adding a new brick wall with our adjustments certainly makes the portrait look a lot better, if not just as realistic.
Original Image:
Finished Composite:
If done correctly, it would be next to impossible to tell that a "fake" background was used.
Photoshop Makes It Easy to Retain Your Subject's Existing Shadow Details
If you followed along with us, you have learned how easy it is to use existing shadow details in a composite image. With just a few easy steps in Photoshop, your creativity is no longer limited to boring backgrounds. You get to choose the best backgrounds for your subjects, without the hassle of creating new shadows.

