If you've ever wanted to use the color gradient from a movie poster or any online picture and apply it to your own image, then this Photoshop tutorial is for you.
We'll show you not only how to extract a color gradient from another photo but also how to apply the gradient to your own images. Let's get started.
What Is a Color Gradient?

A color gradient consists of one or more colors distributed across an image that varies in brightness values. It can be subtle and unintentional or creatively and intentionally dramatic. Either way, all images with one or more colors can be defined as having a color gradient.
We're going to show you how to apply the color gradient of one image to another. You can also create custom color gradients in Photoshop.
The Three Gradient Tools in Photoshop
In order to apply an extracted color gradient to your image, we first need to know what Photoshop tools will help us get the job done. There are three gradient tools in Photoshop that you can use to apply an extracted color gradient:
- Gradient (adjustment layer)
- Gradient Map (adjustment layer)
- Gradient Tool
All three tools have their own specific uses and strengths, and you'll primarily be using the Gradient and Gradient Map tools as adjustment layers to apply color gradients after they're extracted.
The Gradient as an Adjustment Layer
The regular Gradient is found in the Adjustments menu. It functions as a wash that can be applied directly over any existing colors. Think of it as a coat of paint that covers the color information directly underneath.
The Gradient Map as an Adjustment Layer
The Gradient Map is also found in the Adjustments menu. It's very different from the regular Gradient because the colors in each gradient are assigned luminance values from 0 to 255. This results in more subtle effects but can also look more natural.
The Gradient Tool
The Gradient Tool is found in the Photoshop toolbar. While it can be used similarly to the Gradient adjustment layer, its primary strength lies in applying gradients to layer masks. This will make more sense once we demonstrate all three tools in action.
It's also worth noting that you can apply Blend Modes in Photoshop to any of the adjustment layers to fine-tune your results.
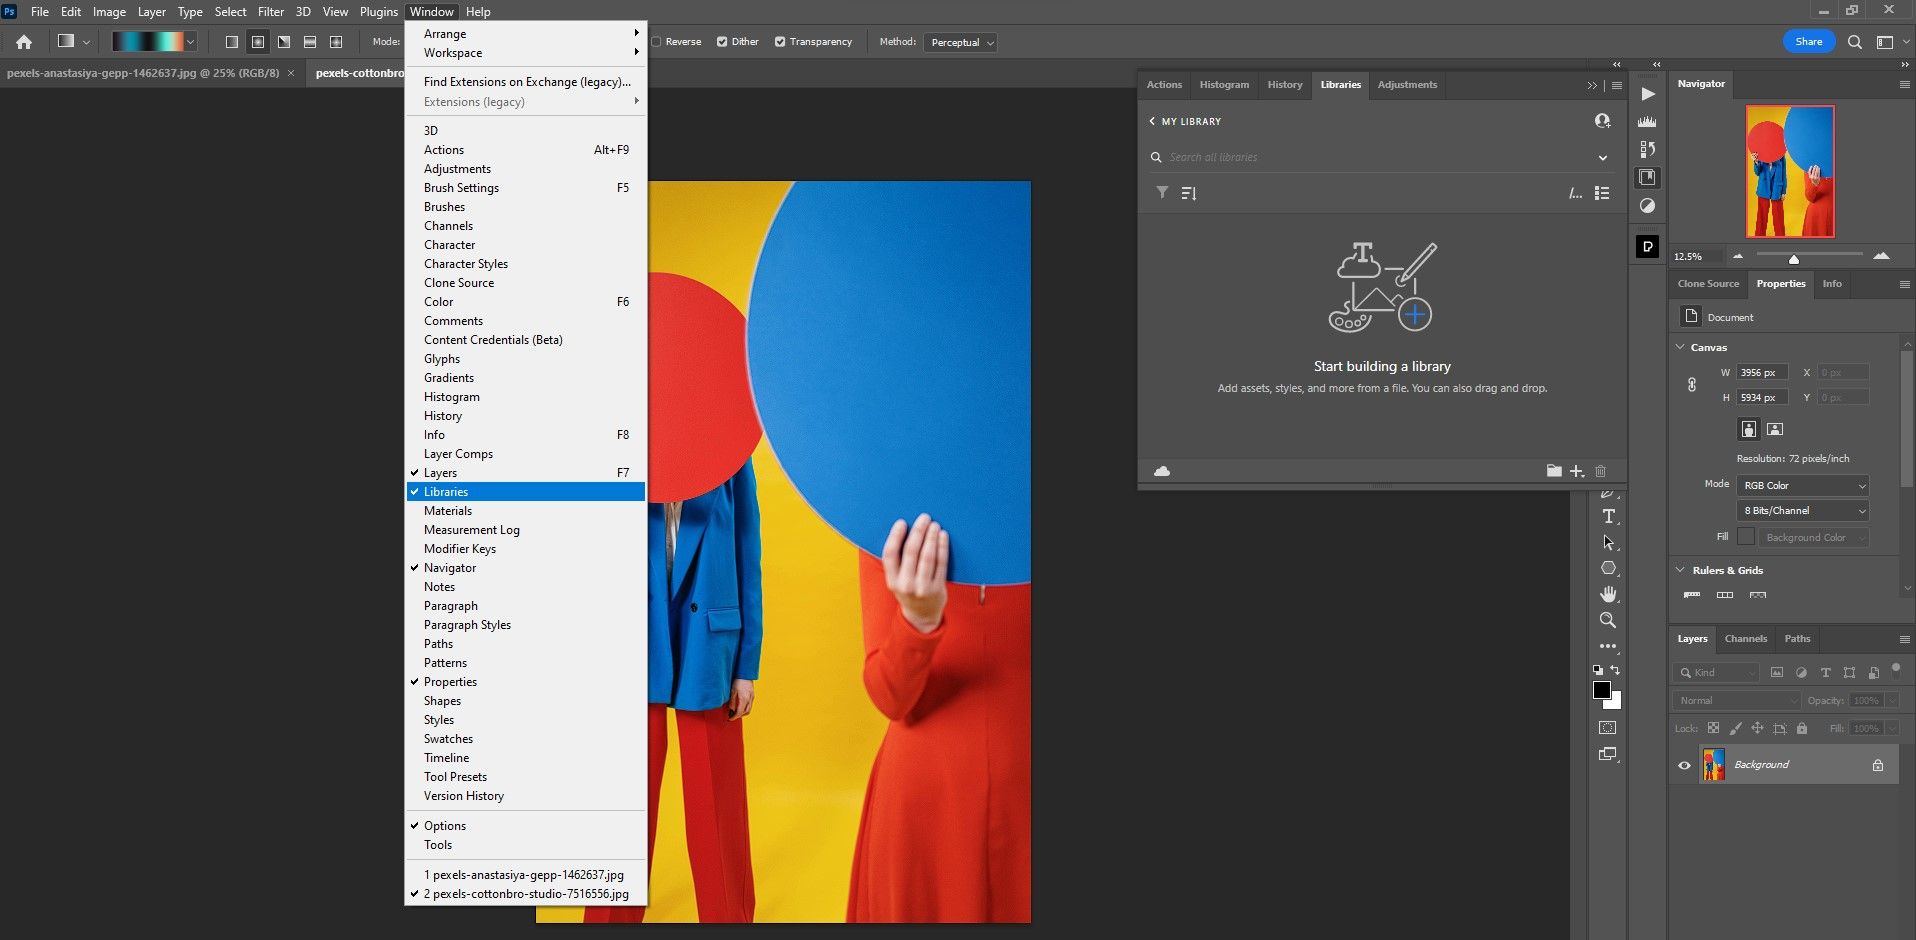
How to Extract a Color Gradient From an Image in Photoshop
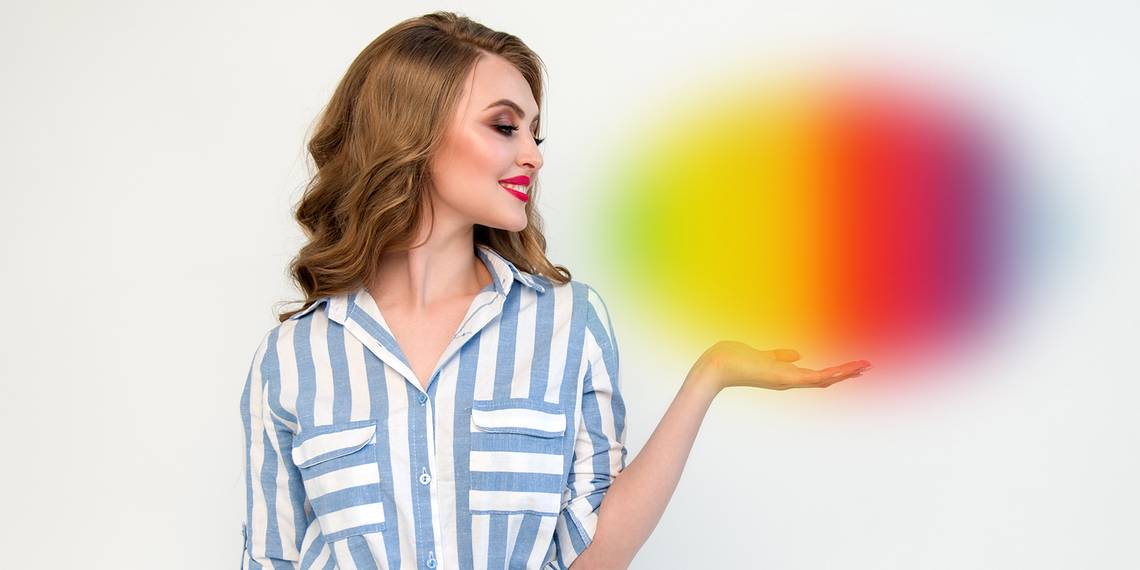
Let's start off with the extraction part of the tutorial. First, we need to open both images in Photoshop; the sample image that you want to extract color from, and the target image that you want to apply the color gradient to.
- Load both images into Photoshop.
-
From the sample image, go to Windows > Libraries.
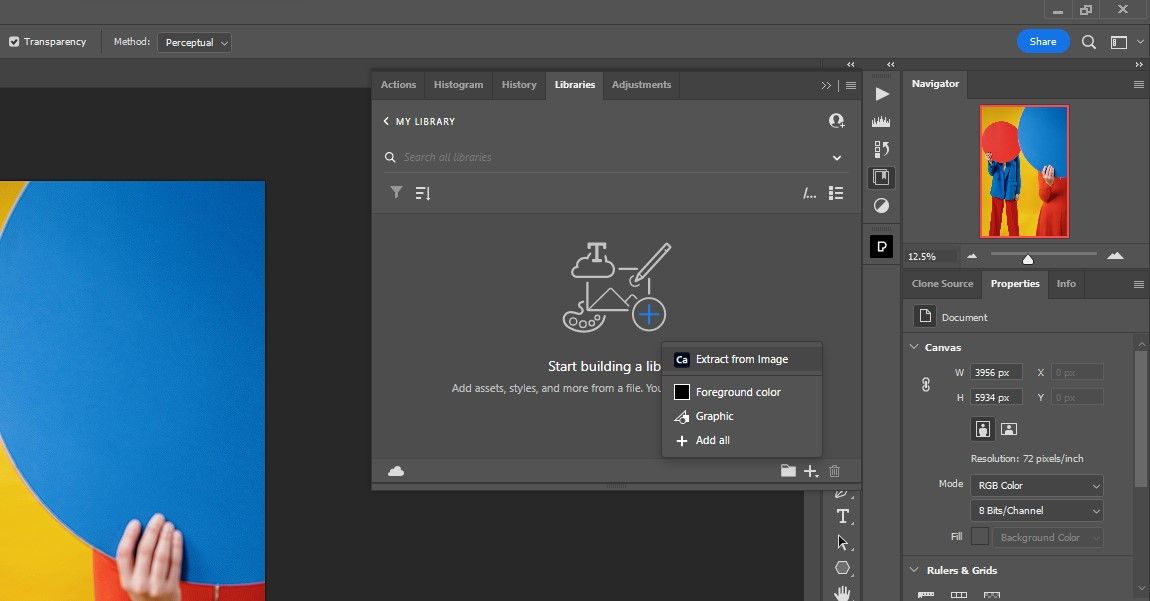
- In the Libraries panel, click on the Add Elements icon (plus sign).
-
Select Extract from Image in the popup menu.
-
Select Gradients from the top of the menu.
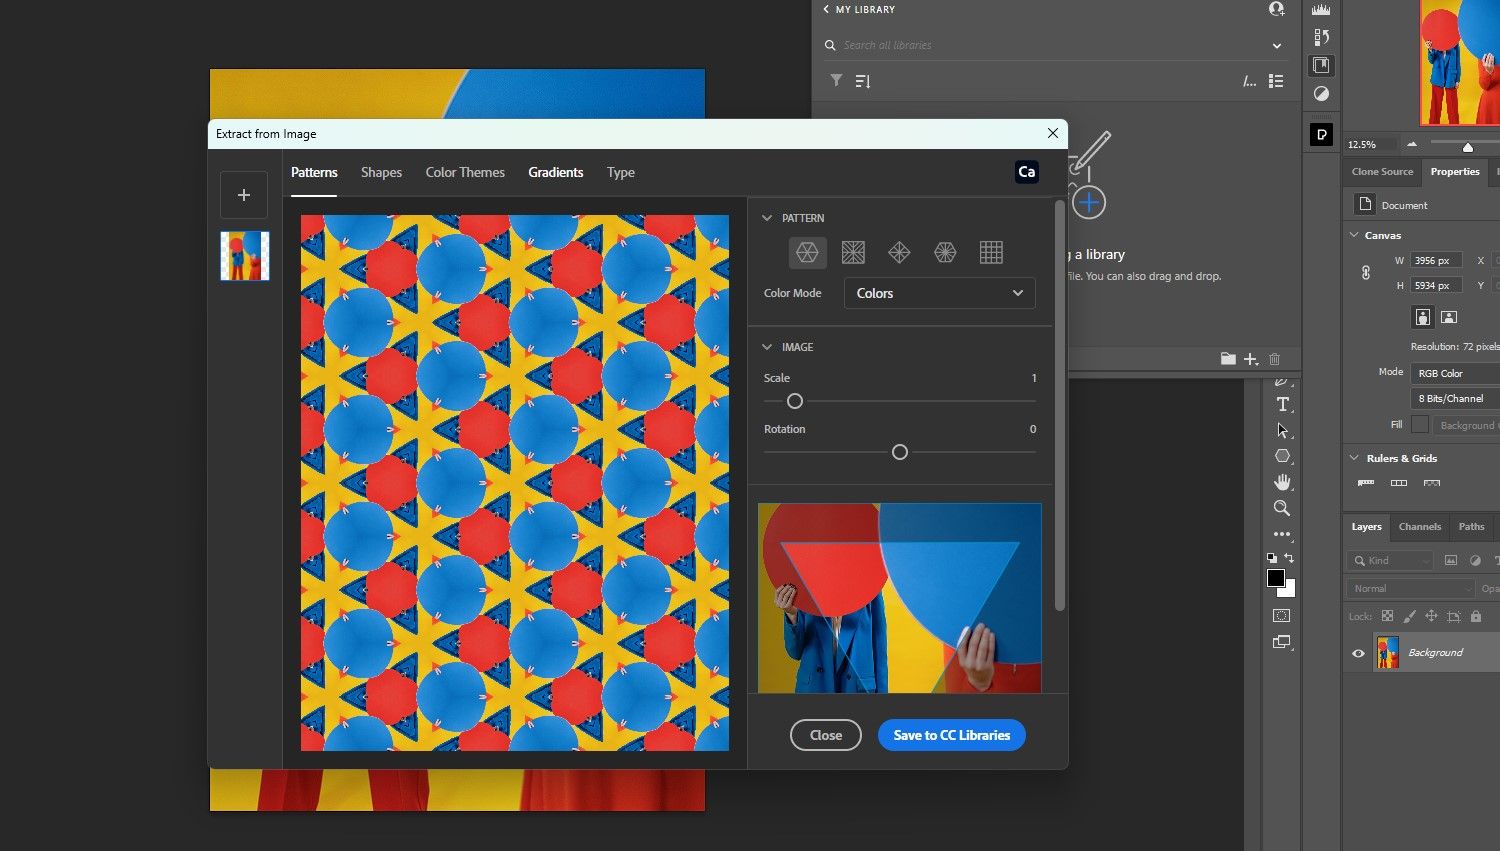
- Use the slider to choose the number of Gradient Stops. For our example, we're going with 3.
-
Move the handles (circles) around to sample the desired colors.
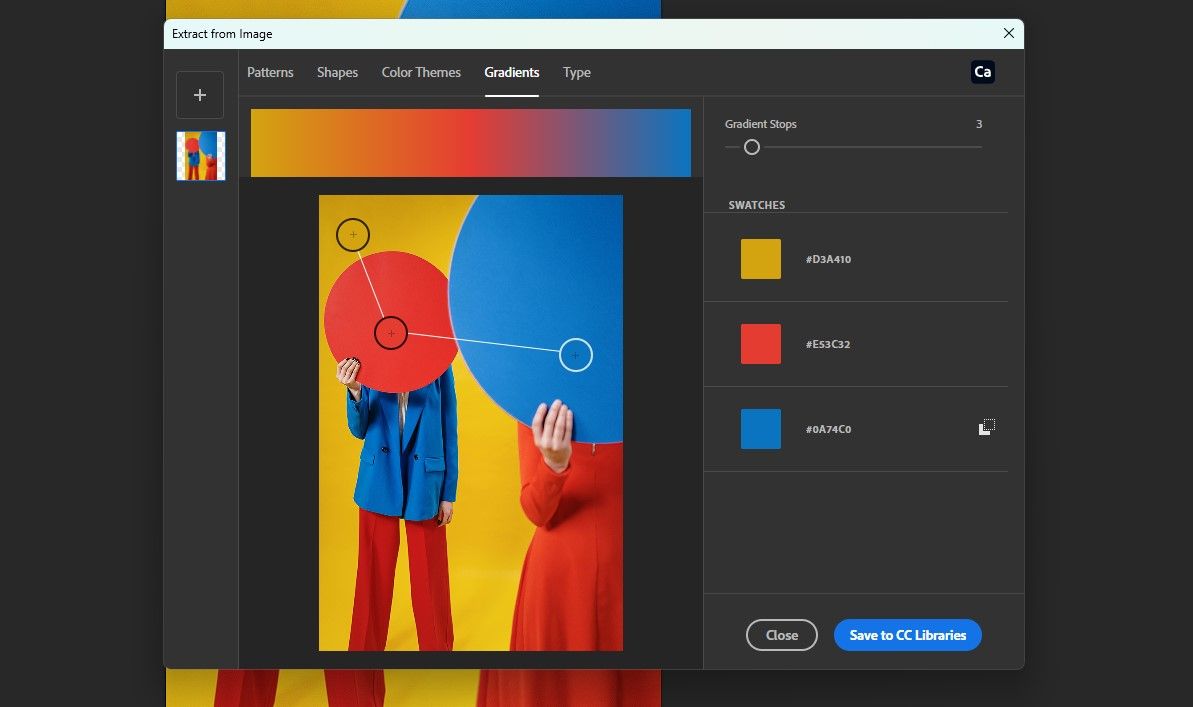
-
Click Save to CC Libraries.


We're done with the sample image. You can close the menu boxes and move to the next step.
How to Apply the Color Gradient to Your Image
The color gradient has now been extracted from the sample image and we're ready to apply it to our image. In this version, we'll use the Gradient adjustment layer to apply the color gradient. Follow the steps below:
- Go to your target image.
-
Open the Libraries menu again.
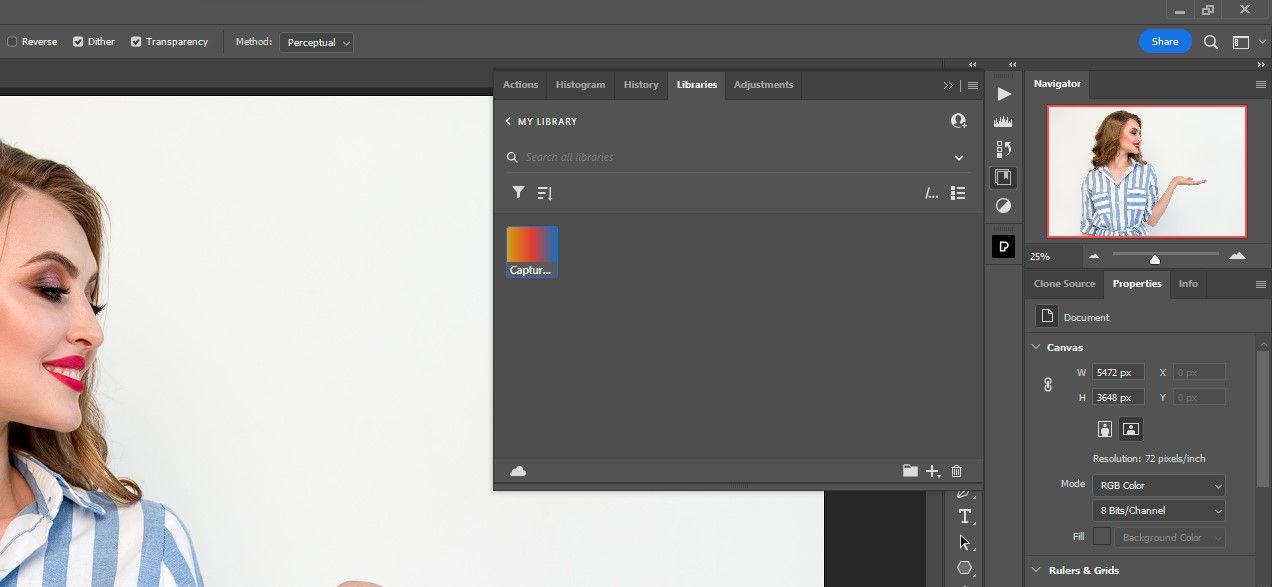
-
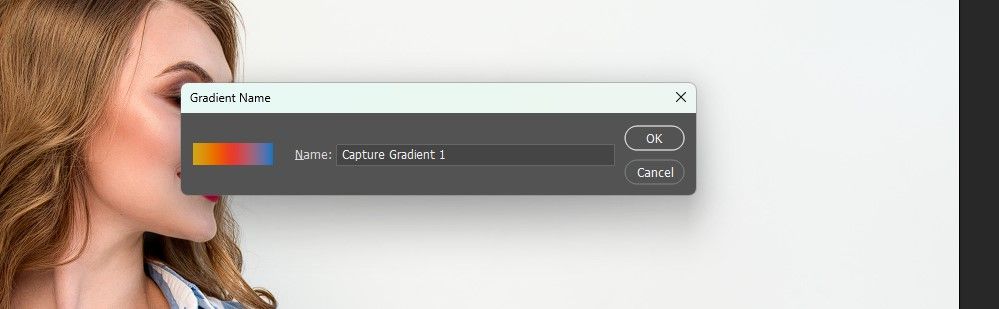
Right-click on the first image in the menu, which should be the extracted color gradient. Choose Create Gradient Preset.
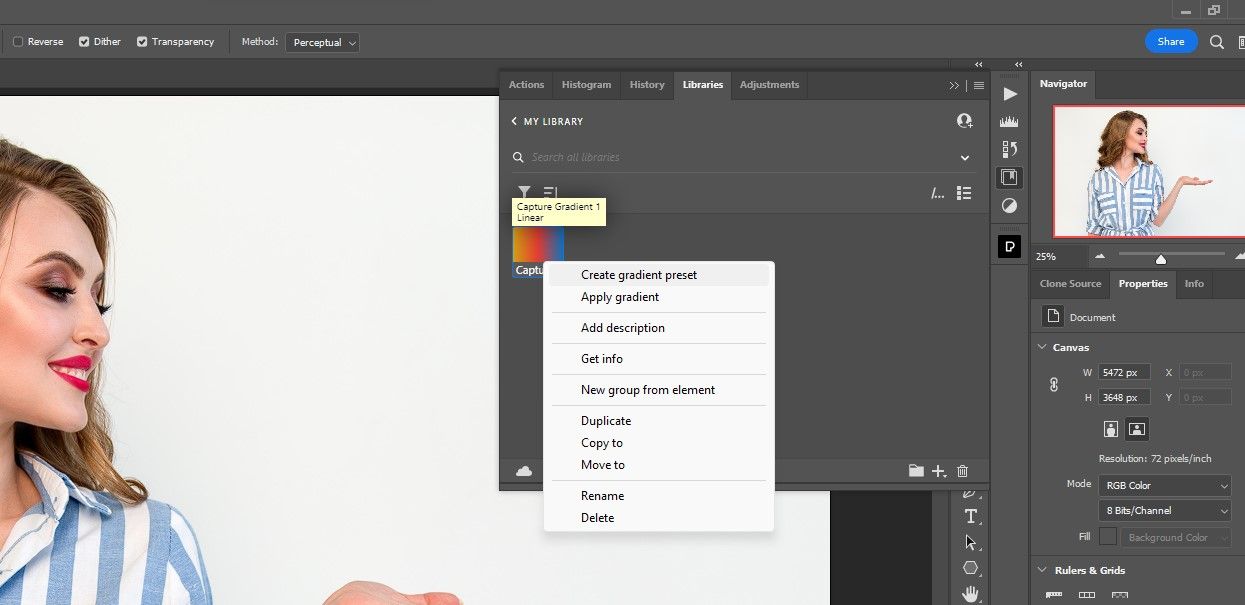
-
Name your gradient and press OK. We kept the default name.
-
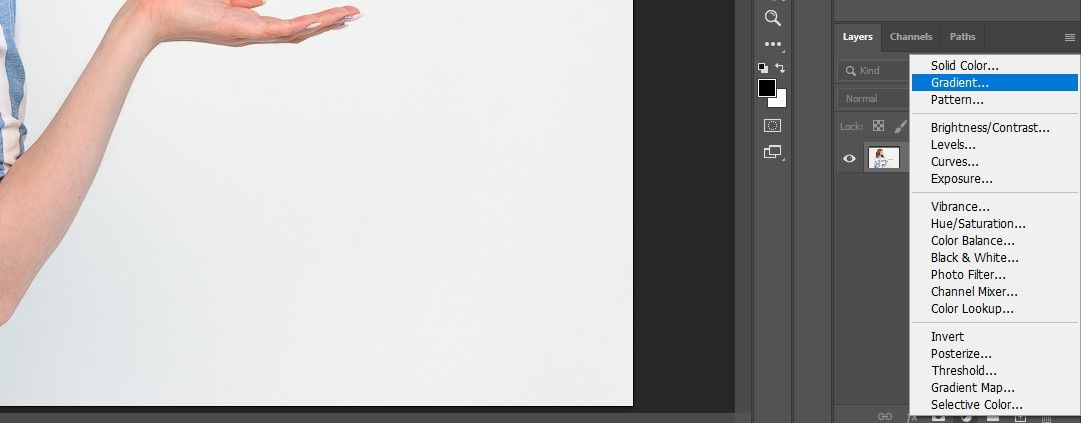
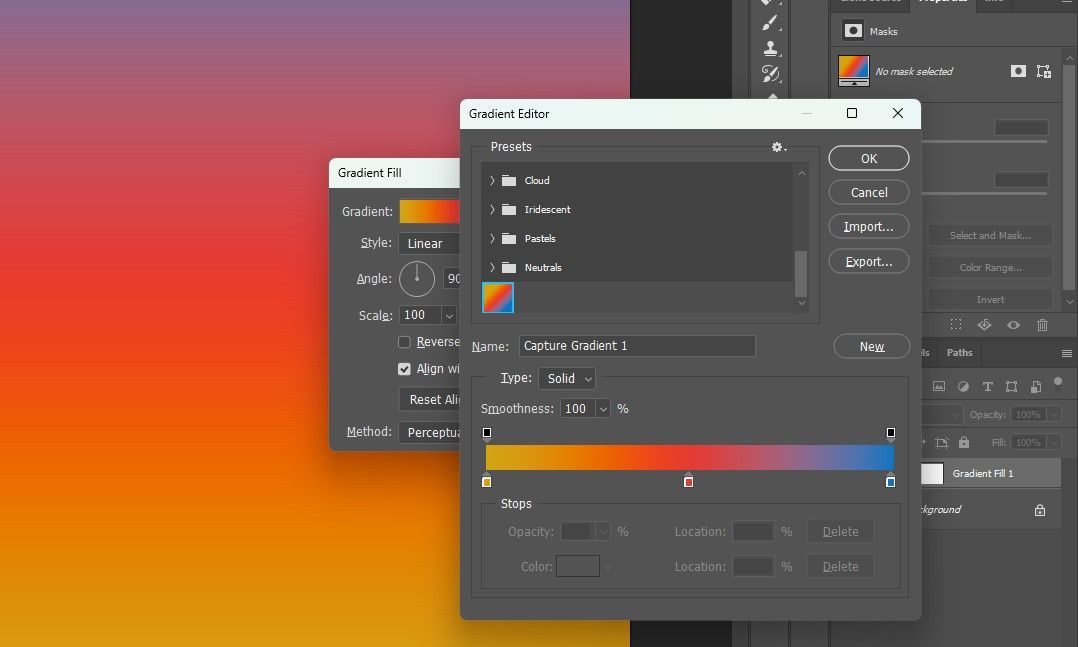
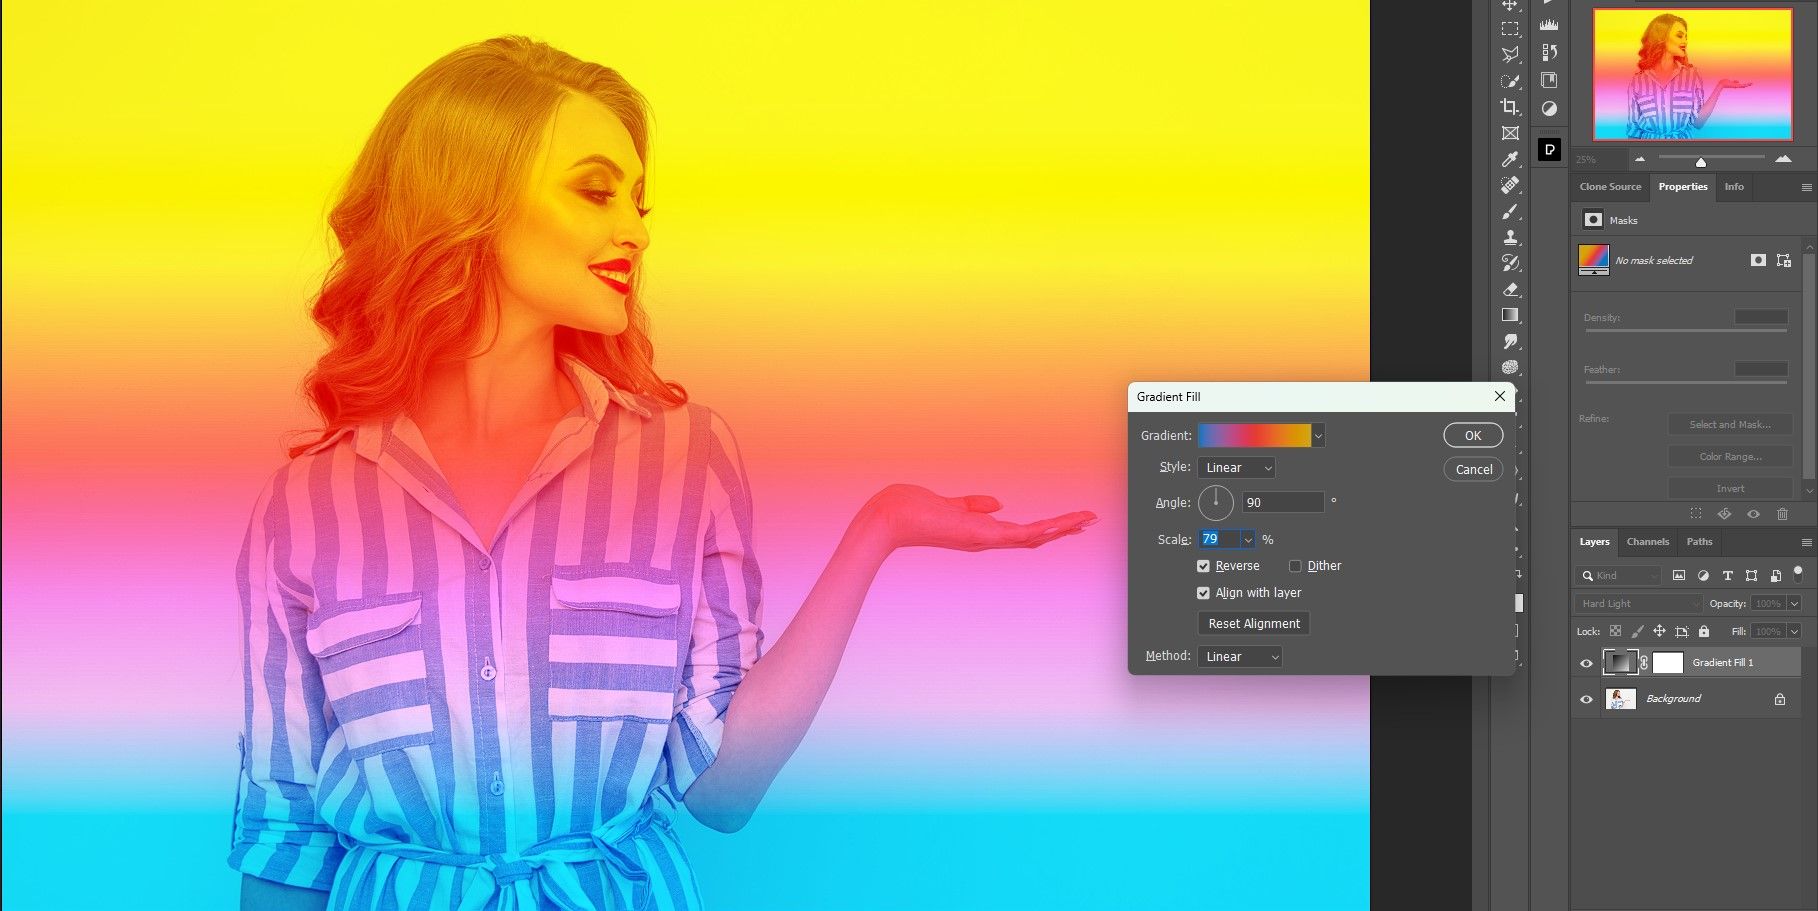
Go to the Adjustments menu at the bottom of Photoshop and choose Gradient.
-
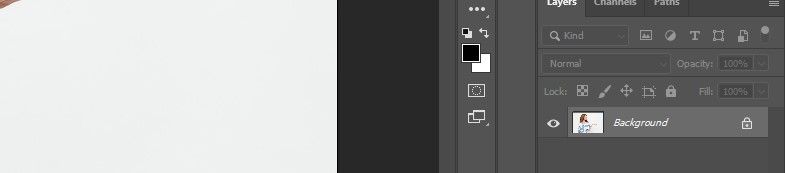
Make sure your Foreground and Background colors are set to Black and White. Press D for the keyboard shortcut if needed. This step is crucial to make the gradient work properly.
-
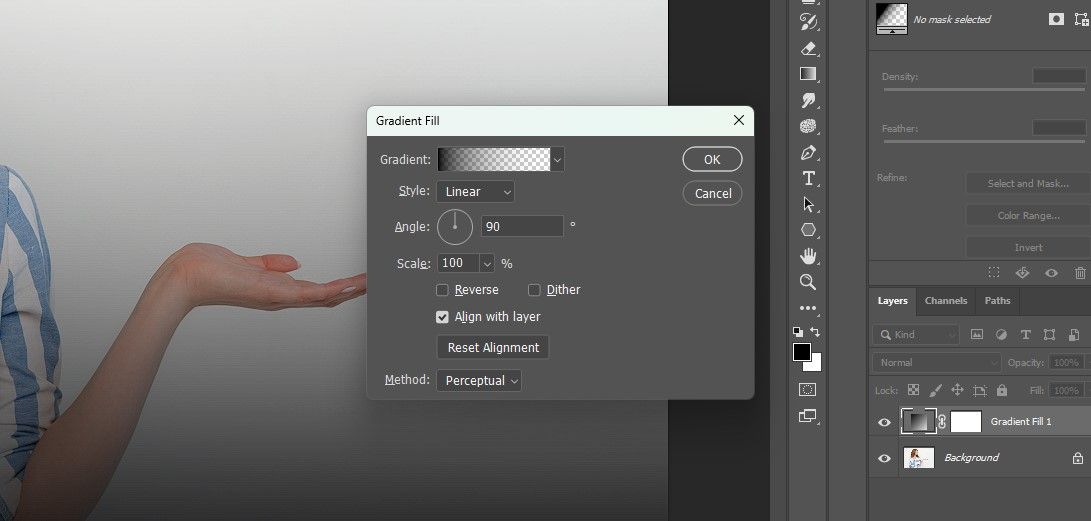
In the Gradient Fill menu, click inside the Gradient box to access additional gradients.
-
Scroll down to the bottom of the menu. You will find the gradient preset that you just created. Click on it once and click OK.
-
Click OK on the Gradient Fill menu box too.
-
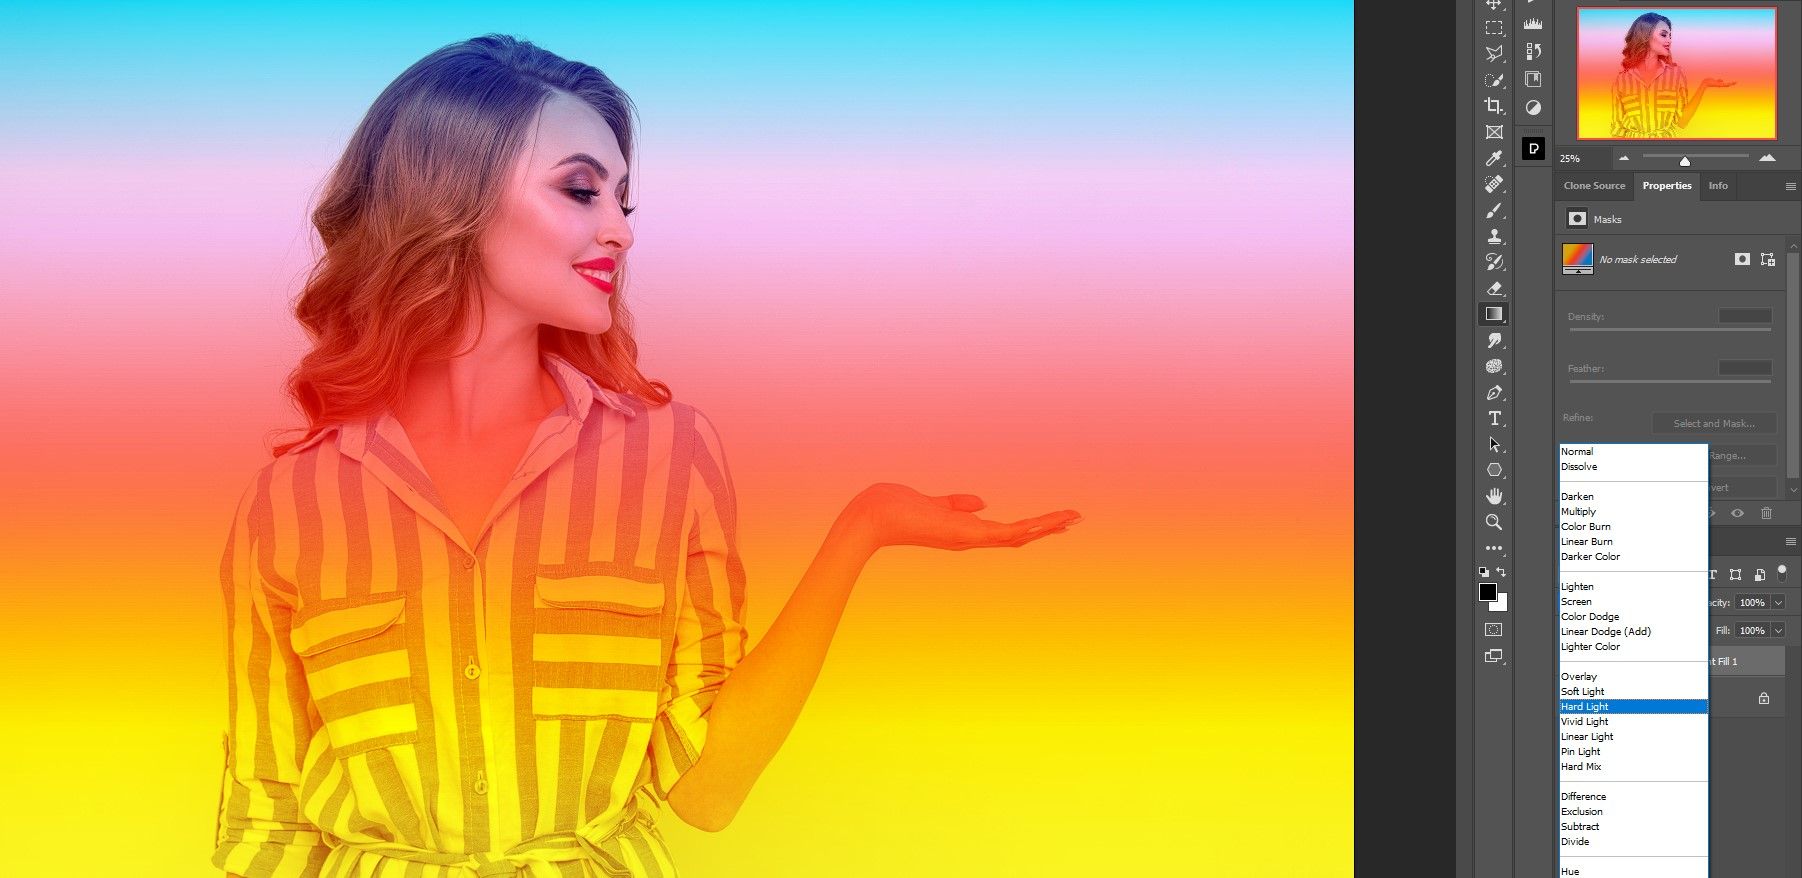
Select a Blend Mode so that you can see your image. For this particular image, we used Hard Light, but each image will be different depending on what you're trying to achieve.
-
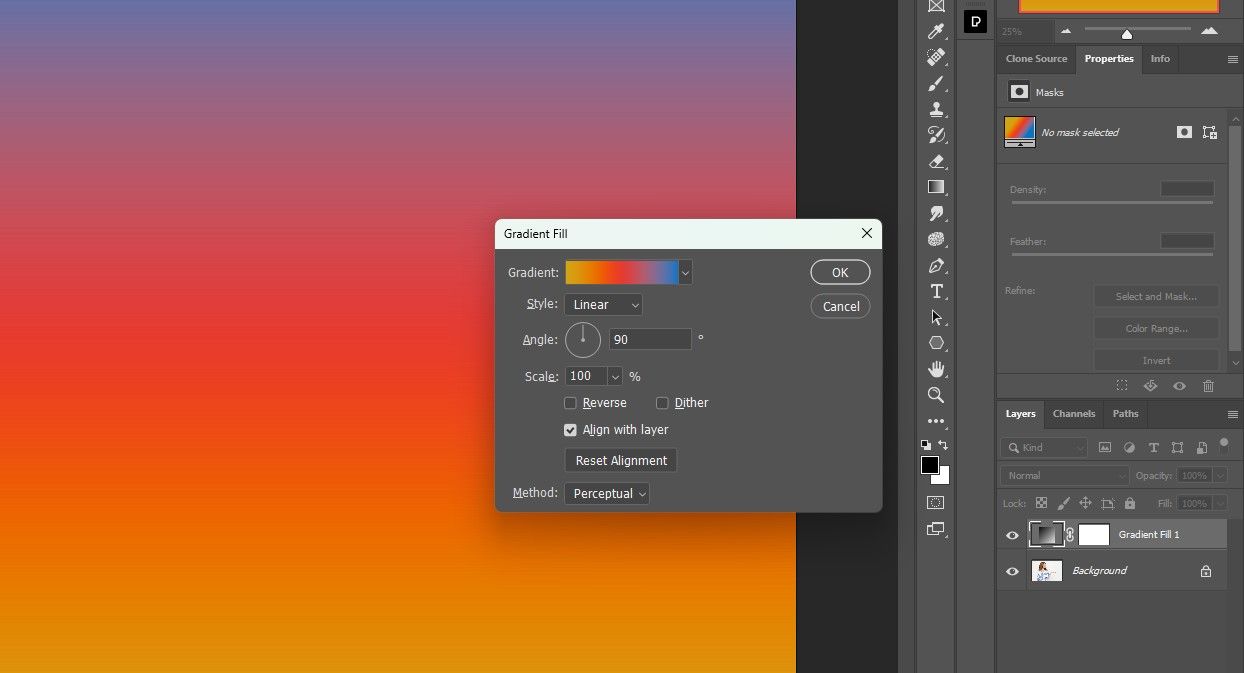
Double-click on the Gradient Fill adjustment layer to access the Gradient Fill menu once again.
-
Use one or more of the options to shape the color gradient on your image. We made changes to the Scale, check-marked Reverse, and changed the Method to Linear. Press OK. These settings will be different for almost every image—experiment!
-
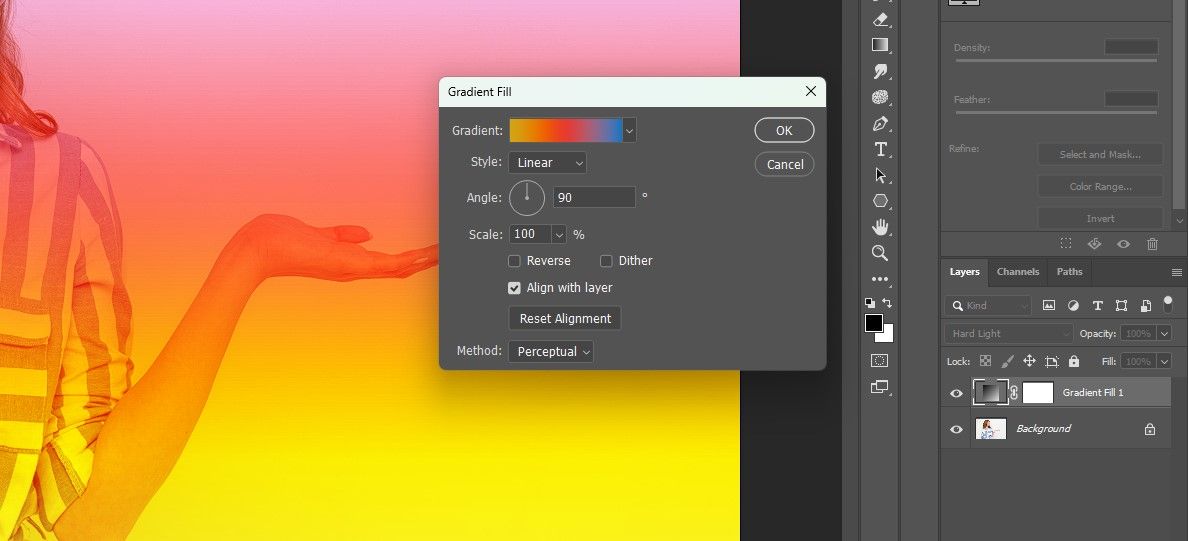
We then adjusted the Opacity to 45% to make it look more natural.
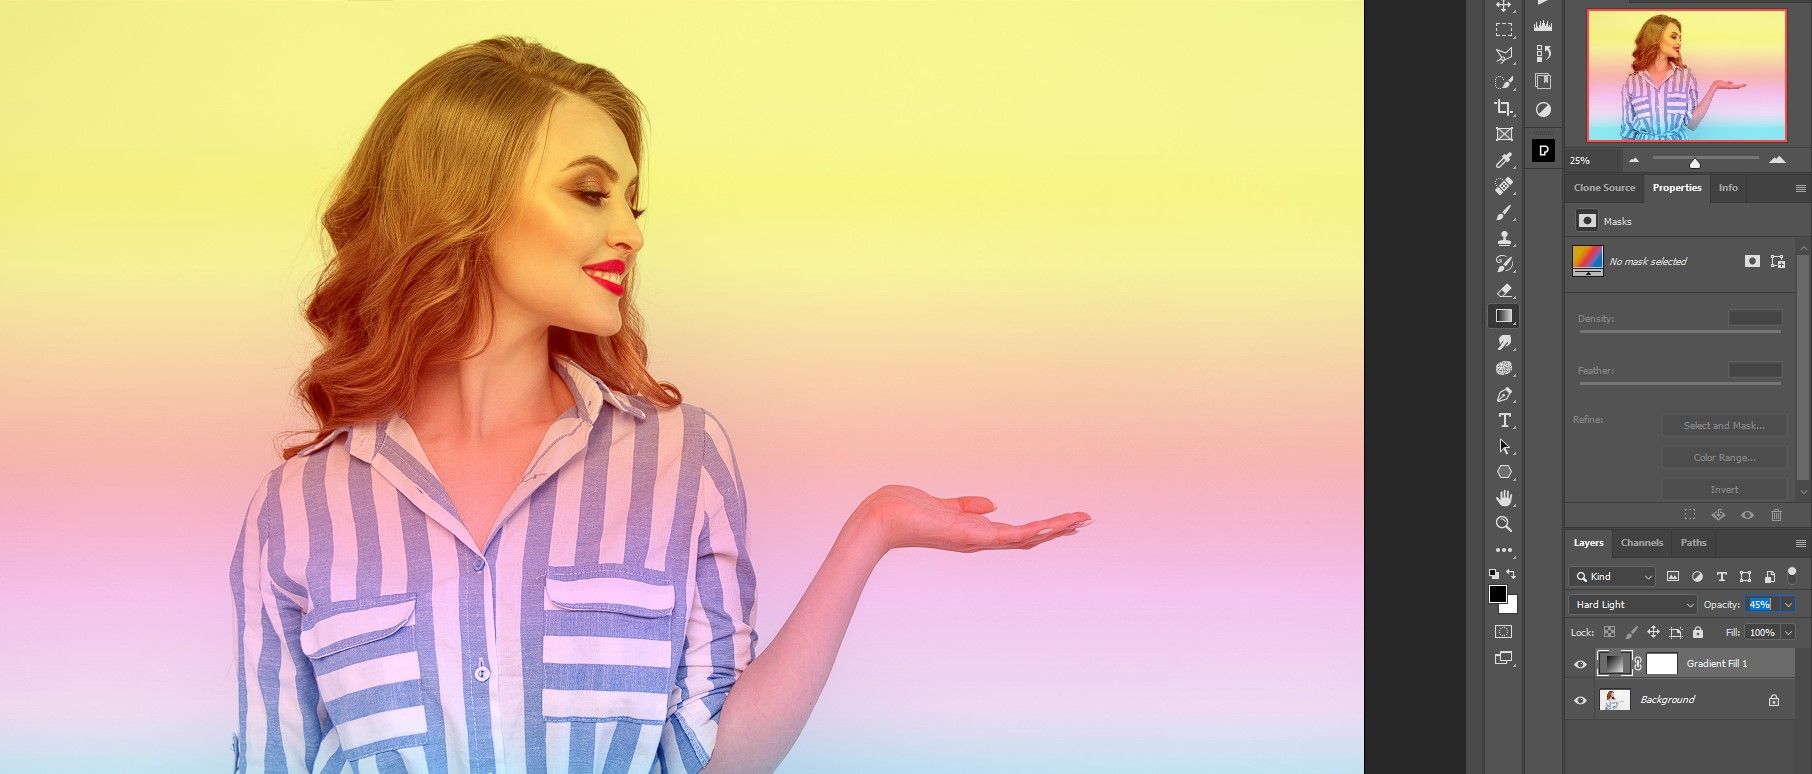


After the final step, you can go back and fine-tune the image thanks to the fact that you're working on an adjustment layer that is non-destructive.
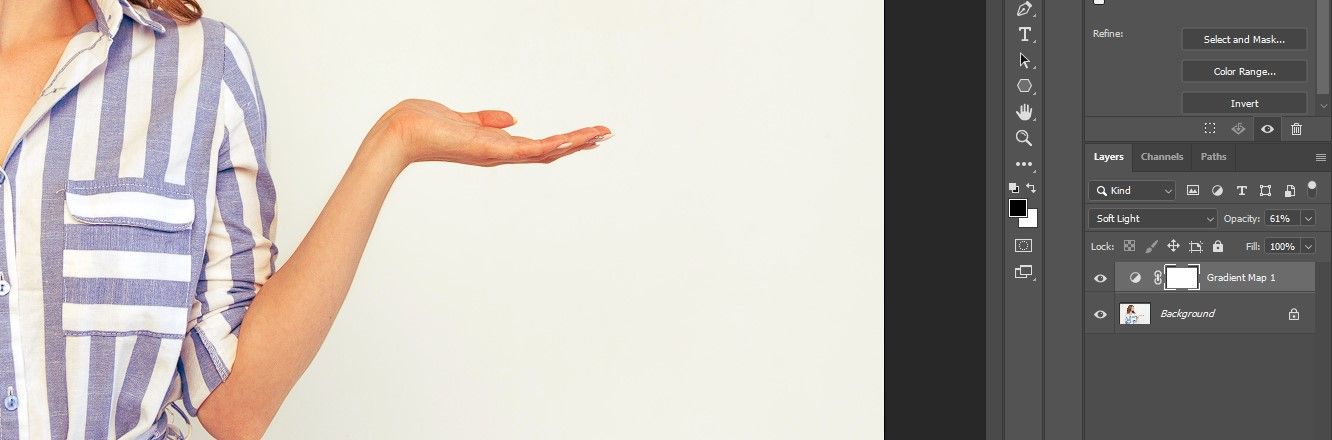
Using the Gradient Map to Apply the Color Gradient
We'll show you what the results would look like had we picked the Gradient Map instead of the Gradient back in step 5. The only difference is that we'd be working with the Gradient Editor menu to shape our color gradient.

As you can see, we were able to convincingly change the model's hair to red. We only shifted the controls on the Gradient Map editor slightly, checked the Reverse box, and changed the Opacity to 61%.

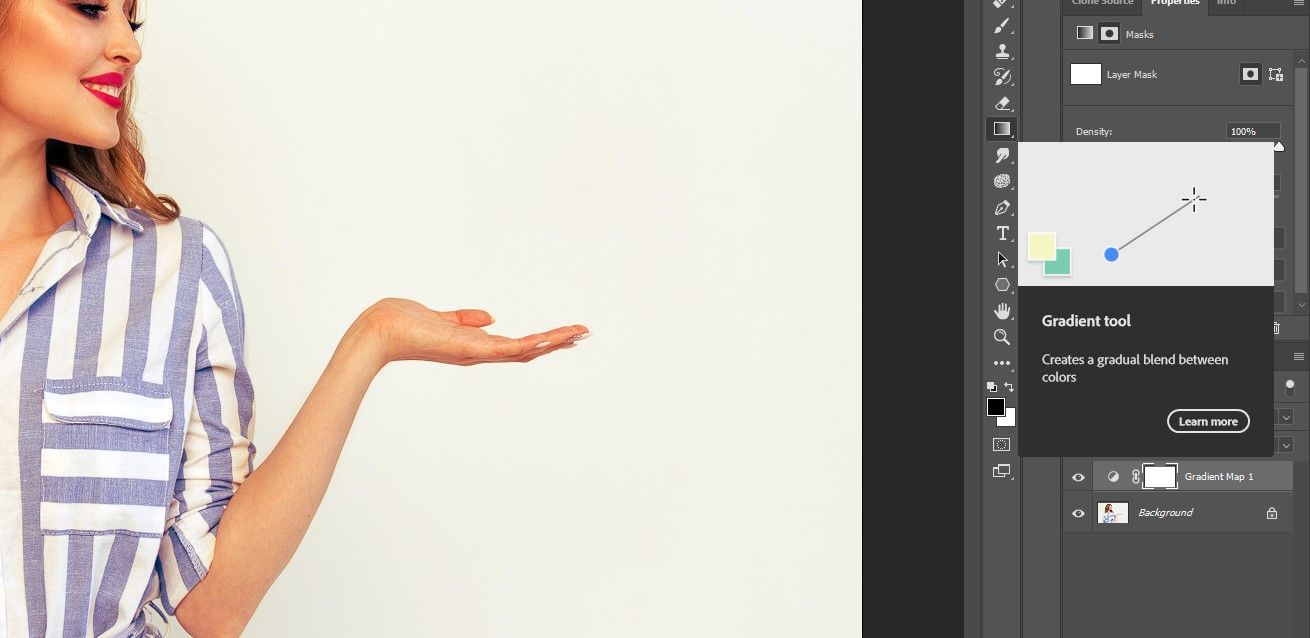
Using the Gradient Tool for the Final Touches
The Gradient Tool isn't meant to apply color gradients directly to the image. It also doesn't have nearly as many controls as the Gradient and Gradient Map tools. The Gradient Tool works best when it's applied directly to the layer mask of a Gradient or Gradient Map adjustment layer, allowing for non-destructive editing.
Let's use the Gradient tool on our previous edit to refine the image even more.
-
Click on the Gradient Map layer mask to make it active.
-
Click on the Gradient Tool from the menu toolbar.
-
Drag the tool across the image to create a gradient. We made a line from the model's head toward her hand.
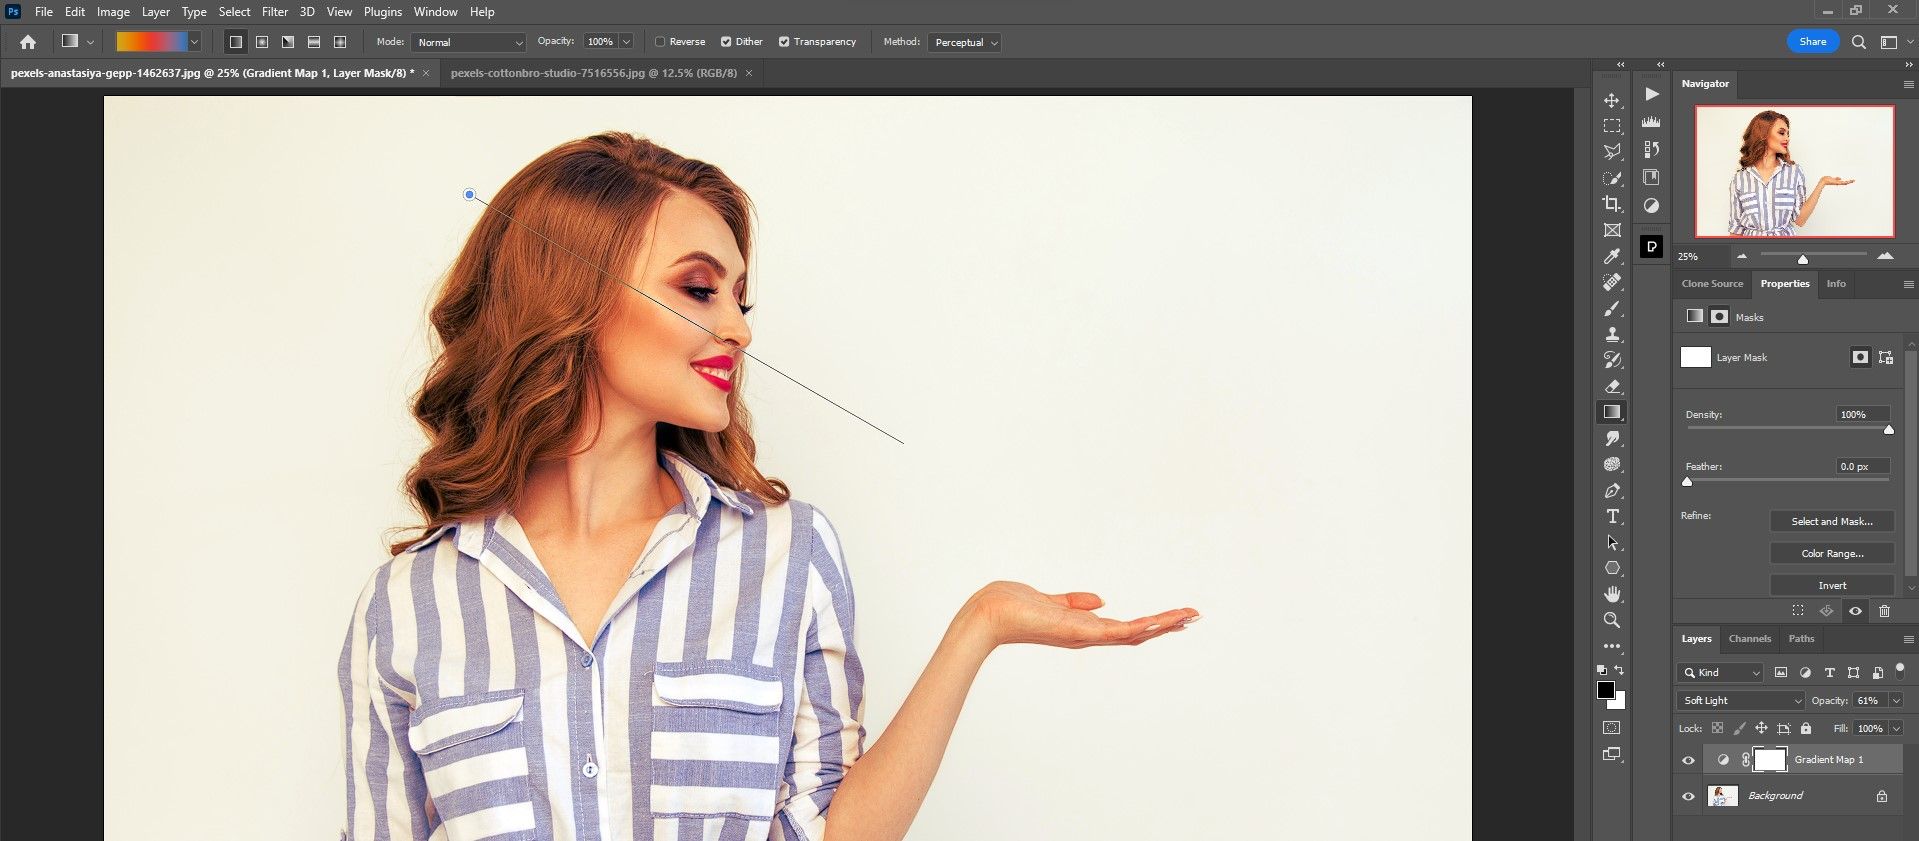


The result is a more refined look than if we were to simply reduce the layer Opacity.

The warmth has been removed from the background and the model's skin tones and hair are more natural looking. You can also use frequency separation in Photoshop to retouch skin.
Source Your Color Gradient From Any Image
Adobe Photoshop CC makes it easy for you to extract a color gradient from any image and apply it to your own. If you come across an image with a color palette you like, refer back to this article to transform your pictures with extracted color gradients.