Have you seen split color effects used and always wondered how you can achieve the same look on your photos? If so, we’re here to teach you about Photoshop’s RGB channels and how to use them to create a split color effect on any photo.
By the end of this article, you’ll be able to create the edgy, retro style that is right on trend.
What Are Photoshop Channels? How to Use Them

You may not have noticed the RGB channels on your Photoshop dashboard, Perhaps you simply didn’t know what they did, so you’ve left them well alone.
RGB stands for red, green, and blue. These are the colored used to create color within computers and light, as opposed to CMYK (cyan, magenta, yellow, and black) which is used for creating colors in print.
When you change the RGB channels, it has an effect on the colors of an image. There are many ways this can be used to your advantage.
Long before Photoshop and digital image making, The Addams Family was filmed in a red and pink room with actors wearing those colors too. Even though the output of the show was in black and white, the red and pink colors gave a lot more contrast in black and white than if they'd used a typically colored set.
To find the Channels panel in Photoshop, if it’s not already open, click Window > Channel.
Once open, you should experiment with the visibility of each RGB channel, by using the eye button on the channel layers to see how it affects your opened photo.
What Is a Split Color Effect?
Now you know a little more about RGB colors, let’s talk about split color effects.
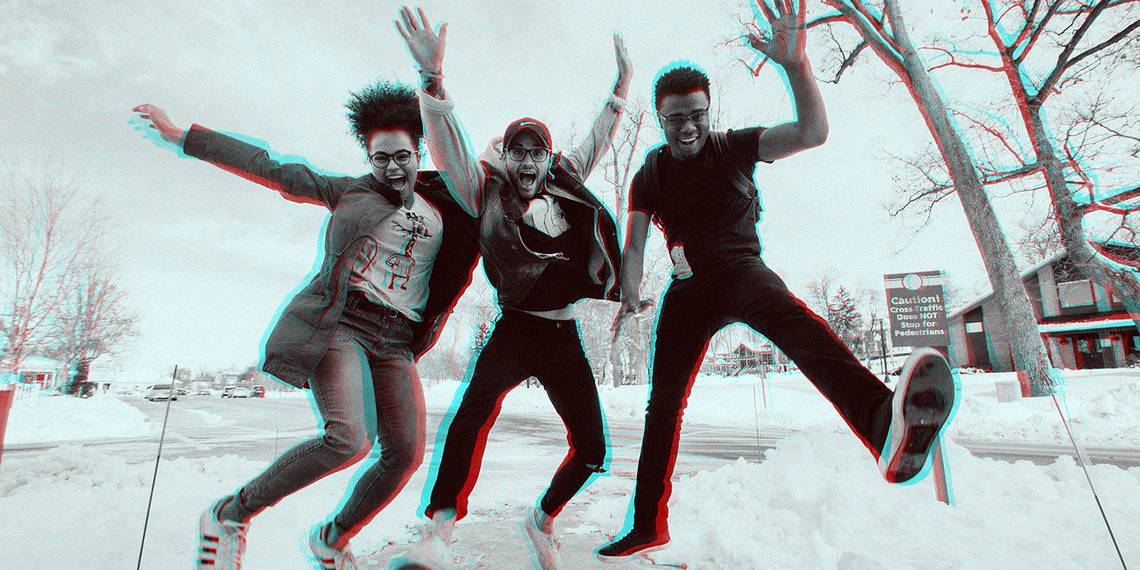
The split color effect simply splits the RGB channels in an image, which creates an effect similar to a 3D picture, with red on one side of the subject and green on the other side of the subject. The effect looks a little glitchy, but since it’s an effect used originally in a photography dark room, it also gives a retro feel without looking out of place in the modern era.
The end result of a split color image will be mostly black and white with movements of red and green which give a sharp neon blast of color over the grayscale image. This effect works to enhance movement in an image or to add some edge to a cool photo.
How to Make a Split Color Effect in Photoshop
To begin with, you’ll need to find an image you want to work with. We suggest a full color image with a human subject, but the choice is yours.
First, open your full color image in Photoshop.

To make the image black and white, click Image > Adjustment > Black & White... If a pop-up window pops up, click OK.

Then duplicate your layer by right-clicking the layer on the layers panel and click Duplicate Layer…
Once duplicated, double-click on the duplicated layer itself and uncheck the channel boxes next to G and B, leaving only R with a check mark. Click OK.
Now comes the fun part.
To create the color split effect, you need to use the liquify filter tool. Open this by clicking Filter > Liquify…
We find that for the best split color result, the faces of the subjects shouldn’t have the effect on them. In the liquify tool, you can use a freeze tool to freeze parts of your image, so they remain unaffected by the liquify movements.

Click the Freeze Mask Tool or use the F shortcut on your keyboard. Change the size of the masking brush by using the square bracket buttons on your keyboard, and then apply the masking brush to the subject’s face or anywhere in the image you don’t want to be affected by the split color effect. The freeze mask shows where you've applied in with a red temporary color.
If you make a mistake with the Freeze Mask Tool, you can use the Thaw Mask Tool (D) below it to remove your freezing.

To add the movement to areas that create the split color effect, you should use the Forward Warp Tool (W) with a relativity large sized brush. We think the large brush works best, but it also depends on your chosen image and your desired effect, so feel free to experiment a little.
With the Forward Warp Tool selected, simply push parts of the image around subtly. Just click and push a few millimeters for each area of the image, focusing mostly on the subjects rather than the background. A bigger brush could be used for the background if desired.
At first, the warping may make your subject look unnatural or like a badly Photoshopped skinny filter. Check and uncheck the Preview checkbox to see the differences in the before and after. Doing this will show you where you need to add more warping.
Once you finish the warping, click OK to see your end result with full split color rather than just the black and white imagery you’ve been working with so far.

You’ll see that the more extreme your warping is, the more obvious the split color shows in the final result. You can experiment with how much or little warping to use to see the different results you'll get.
What Can You Use a Split Color Effect For?
We have only given you one way to use a split color effect here, but there are many more ways you can experiment with the effect and RGB channels. You can push the effect further in different ways by playing with opacity and the layer blending modes.
We think that since the effect gives an edgy, rock vibe, it would work well for a musician’s poster or album cover. Add some grainy noise to the photo and a band logo, and it wouldn’t look out of place. The best thing about the split color effect in Photoshop is that it’s very forgiving and fun, and doesn’t require hours to implement.
You Can Now Use Your New Color Splitting Skills
Now that you have mastered the split color effect and learned about RGB channels, you can experiment even further within Photoshop by using channels, the liquify tool, the freeze mask tool, the layers, and more.
Using RGB channels along with experimenting in black and white imagery are both great skills that can help you with other Photoshop tasks and help you create the best images you can.