If you want to add a little character to a portrait and make it look cool, try creating a paint drip effect in Photoshop. This effect makes the bottom of a picture look as if it’s dripping like paint. It’s a fun way to make a photo unique, and it’s easy to achieve. Let’s show you how.
Step 1: Choose a Suitable Image
For a successful paint drip effect, the best image is one where the bottom of the subject is relatively symmetrical in both shape and color.
If you want to follow along with us, you can download the example image we will use for free from Nappy.co. Once you have your image, open it in Photoshop.
Step 2: Select Your Subject
Go to Select > Subject to select the subject in your image. If you have a more complex image, you can manually select your subject using the Magnetic Lasso Tool (L) or the Lasso Tool (L) in the toolbar. You can adjust your selection using the Subtract option on the Magnetic Lasso Tool.
Copy the selection (Cmd + C for Mac and Ctrl + C for Windows) and open a new layer on the Layers panel. Paste the selection on the new layer (Cmd + V for Mac and Ctrl + V for Windows) and name the new layer “Subject Cutout” by double-clicking the layer's name.

Move the pasted selection to the middle of your artboard.
If you need a refresher on how to use the Subject Select tool in Photoshop, check out this guide.
Step 3: Add a Gradient
Select the Subject Cutout layer. Right-click it and choose Convert to Smart Object. The icon on your layer’s thumbnail will change to show it’s now a Smart Object.
Select the background layer with the original photo on it. Go to Layer > New Fill Layer > Gradient to open a gradient layer. In the dialog popup, name this layer “Gradient Background”. Keep the other settings as their default and select OK.

In the Gradient Fill dialog box, click on the rectangle of gradient color to bring up the Gradient Editor. Choose a color for your gradient for one side and set the other side to black (#000000). To change a color, double-click on a bottom slider tab to open the color picker.

Once you’ve chosen your color gradient, select OK in the Gradient Editor. Then, in the Gradient Fill dialog box, set the Gradient Type dropdown to Radial and select OK.
Step 4: Create a Paint Drip Effect Using the Liquify Tool
Select the Subject Cutout layer. Go to Filter > Liquify.
Under Brush Tool Options, set the Size to at least 200, although you can change the brush size throughout the Liquifying process to make naturally different drip sizes. Set the Density to around 80 and the Pressure to around 60, although you can change these based on your own preferences. And, finally, check the Pin Edges box.

Now to create the paint drips...
Use the Forward Warp Tool (W) to push parts of the image towards the bottom. To make a drip appear longer, repeat the same movement on a particular section until it reaches your desired length. When you’re happy with your drips, select OK.
If you want to explore the Liquify tool some more, you can use it for many things such as creating a split color effect or adding a smile to a portrait.
We could leave the drips on one single layer, but to give your paint-dripping portrait a more rounded result, we can make the drips look like they go all the way around the subject.
Step 5: Create a Rounded View
On the Layers panel, duplicate your Subject Cutout layer by right-clicking the layer and choosing Duplicate Layer. Double-click the layer's title to rename it to “Subject Cutout Front”.
To ensure we don’t lose the liquifying effects, we need to make the Subject Cutout layer a Smart Object again. Select the Subject Cutout layer, right-click, and select Convert to Smart Object.

Select the Subject Cutout layer and open the Hue/Saturation settings (Cmd + U for Mac and Ctrl + U for Windows). Set the Lightness slider to -55 but leave the Hue and Saturation sliders alone. Click OK.

With the Subject Cutout layer still selected, go to Edit > Transform > Flip Horizontal. This will serve as the back of the drip, creating a fully-rounded effect.
You’ll be able to see both of your cutout images now. Using the Move Tool (V), line up the top layer with the back layer to get the bottoms of the images lined up as close as you can.

While you want to see the drips of both images, you should remove duplicates of the subject’s head or extra parts of their arms. To hide these, go to Layer > Layer Mask > Reveal All. Select the mask thumbnail on the Subject Cutout layer and set your color to black (#000000).
Using the Brush Tool (B), brush over any parts of the back image you do not want to see, such as an extra shoulder. If you’re happy with all the flipped and duplicated drips at the bottom, then leave those alone, but you can also mask over any you’re not satisfied with.
Step 6: Add Some Depth
Once you’re happy with everything you see and have hidden unsightly details, it’s time to add some depth to the drips to make them look more realistic.
Stay on the selected mask of the Subject Cutout layer and go to Layer > Layer Style > Inner Glow, or on the Layer panel, click Add New Layer Style > Inner Glow.

In the Layer Style dialog box, set the Blend Mode to Multiply with an Opacity of 50%. Set the color to black (#000000) by double-clicking the color box to open the color picker.
Under Elements, set Technique to Softer and check Center on the Source options. Move the Choke slider to 0, the Size slider to 250px, and set the Range to 50%. Select OK to apply the style. This gives a shadow effect on the back layer of drips.

Then, go to Layer > New Adjustment Layer > Hue/Saturation and click OK when the layer box pops up. On the Hue/Saturation Properties settings, set Hue to 0, Saturation to -10, and Lightness to -20. Then click the clipping mask button at the bottom of the window.
On the Layers Panel, select the Subject Cutout Front layer and choose Add a Layer Style > Bevel & Emboss.

Set the Style to Inner Bevel, Technique to Smooth, Depth to 20%, and select the Up direction button. Set the Size to 90px and Soften to 10px.
Under Shading, set the Angle to 90 degrees and the Altitude to 30 degrees. Set the Highlight Mode to Screen with a white color (#FFFFFF) and set the Opacity to 20px. Set the Shadow Mode to Multiply with a black color (#000000) and set the Opacity to 100%. Select OK.

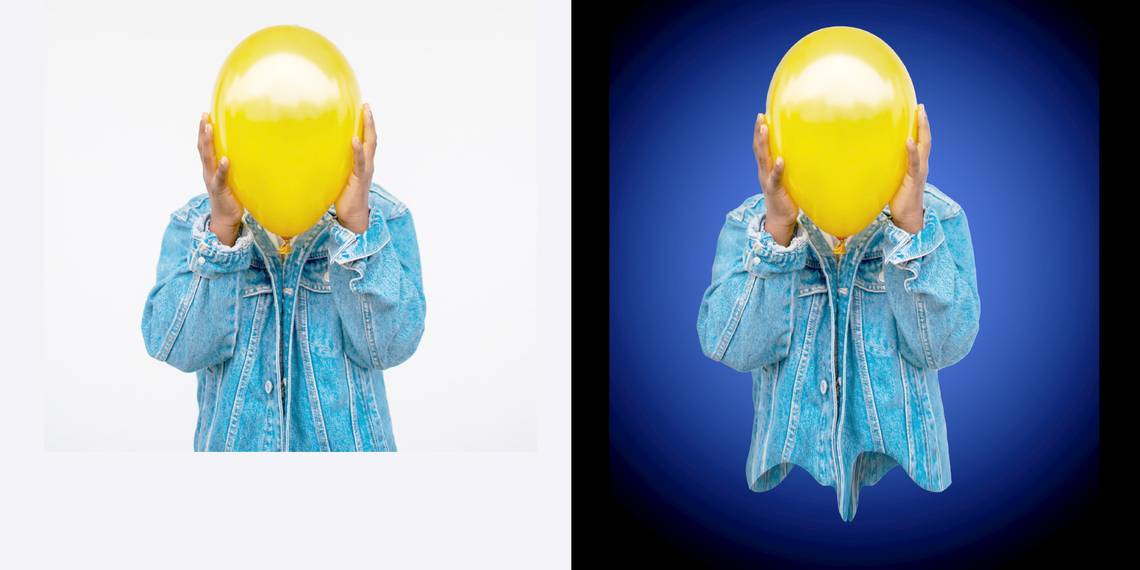
Now you have a portrait with a paint drip effect. These settings were simply a guide if you followed along with our example image, but you can adjust them however you need for your own paint-drip portraits.
If you’re looking for another way to add a fun element to your portraits, you can easily add a glow effect in Photoshop.
Add a Cool Paint Drip Effect to Your Portraits
By following this paint drip effect tutorial, you can easily add an eye-catching element to your portraits in Photoshop. Although there are a lot of steps, they’re not difficult to do. Have fun using the Liquify tool, Layer Styles, masking tools to finish this great look.