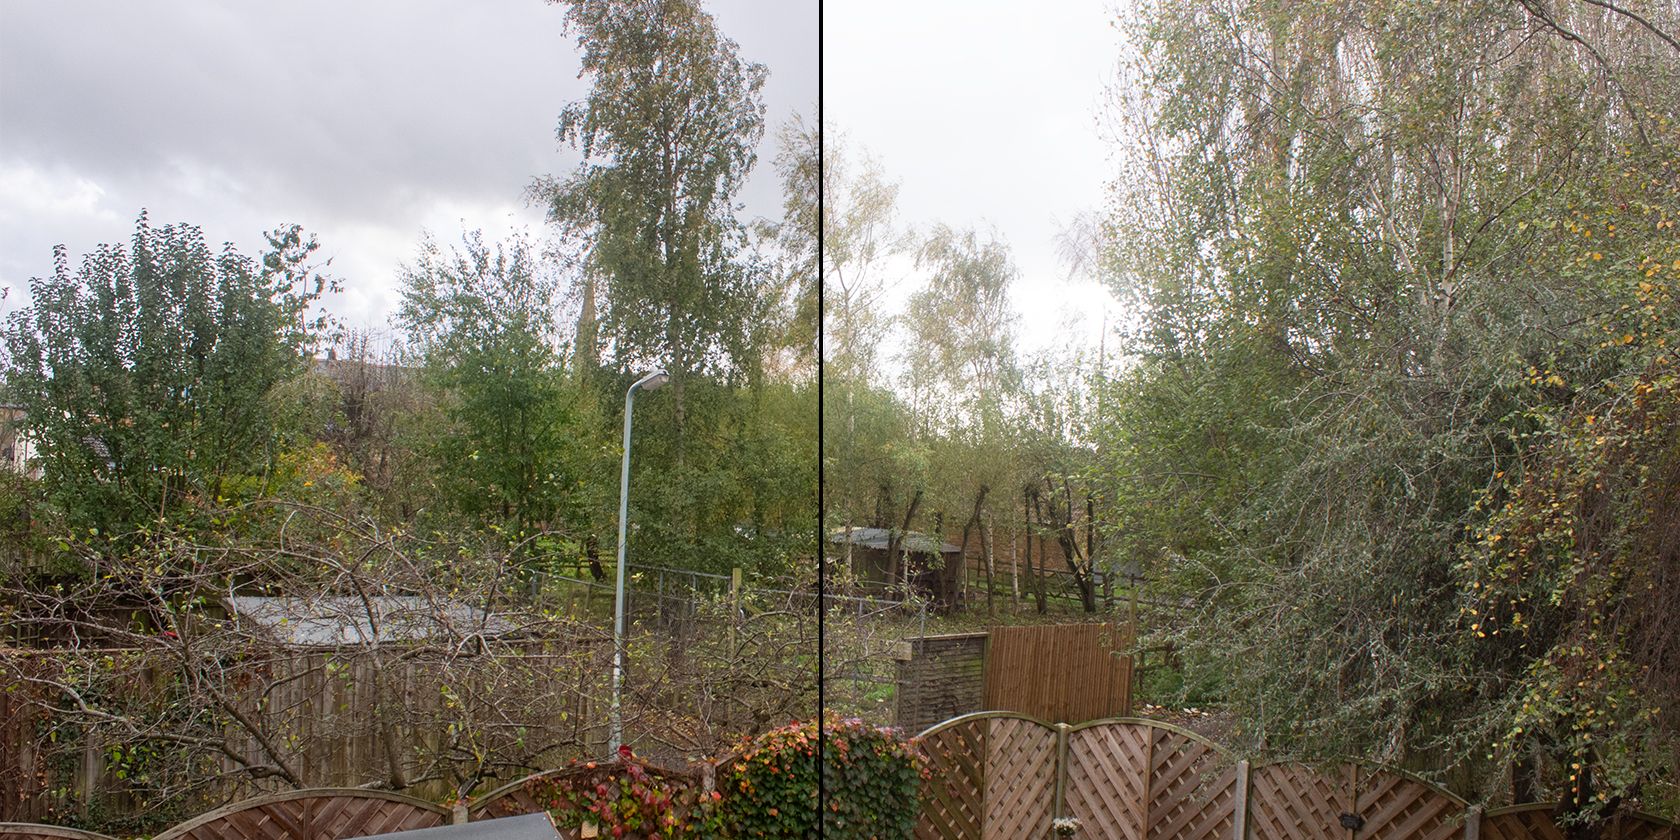
High dynamic range photos are eye-catching, have depth, and are used way more often than you’d think. Your iPhone probably has an automatic HDR setting in the camera, and you can create fake HDRs in Photoshop. But how do you create real HDR images? Let’s find out.
What Do You Need to Create HDRs?
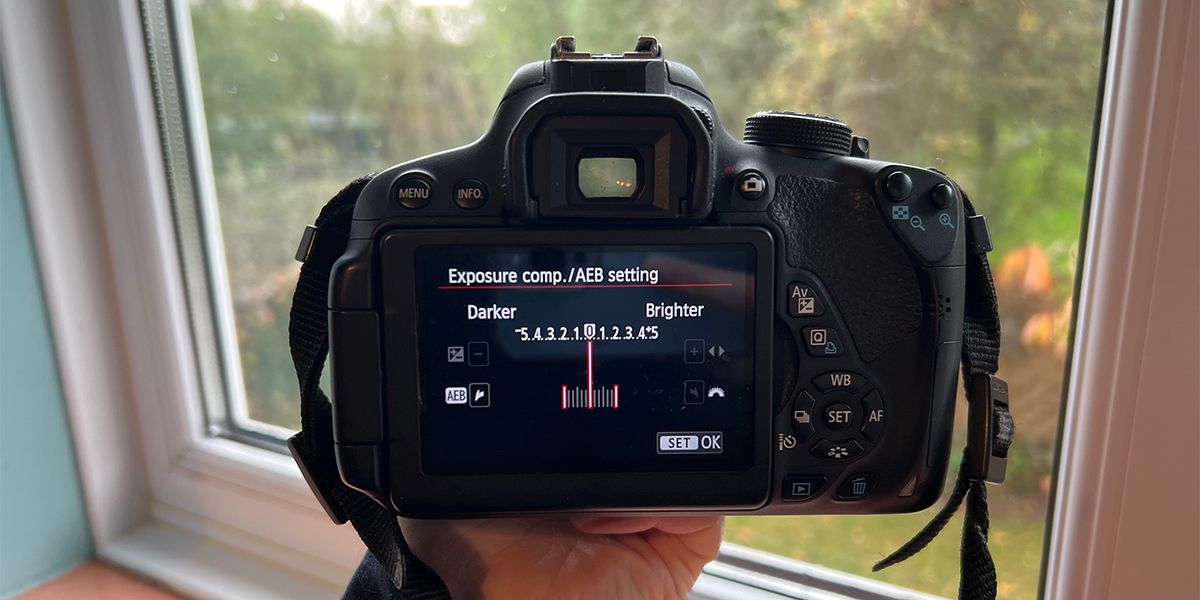
You need to take three or more photos that use exposure bracketing; this setting is in most DSLR cameras. Essentially, you take three or more photos at different exposure levels. And take your photos in RAW format instead of JPEG.
You also need to use software that opens RAW images. We’re using Photoshop. To open RAW images in Photoshop, you need the Camera RAW plugin. This is included in the myriad of Adobe Creative Cloud software.
Now that you’ve got all you need, you can make an HDR using Camera RAW.
How to Create HDR Images in Photoshop
To open RAW images in Photoshop, you need to import them using Camera RAW which is a Photoshop plugin. The Camera RAW plugin works very similarly to Lightroom, so if you’re a Lightroom user, this has a shallow learning curve.
Step 1: Open Your Images in Photoshop
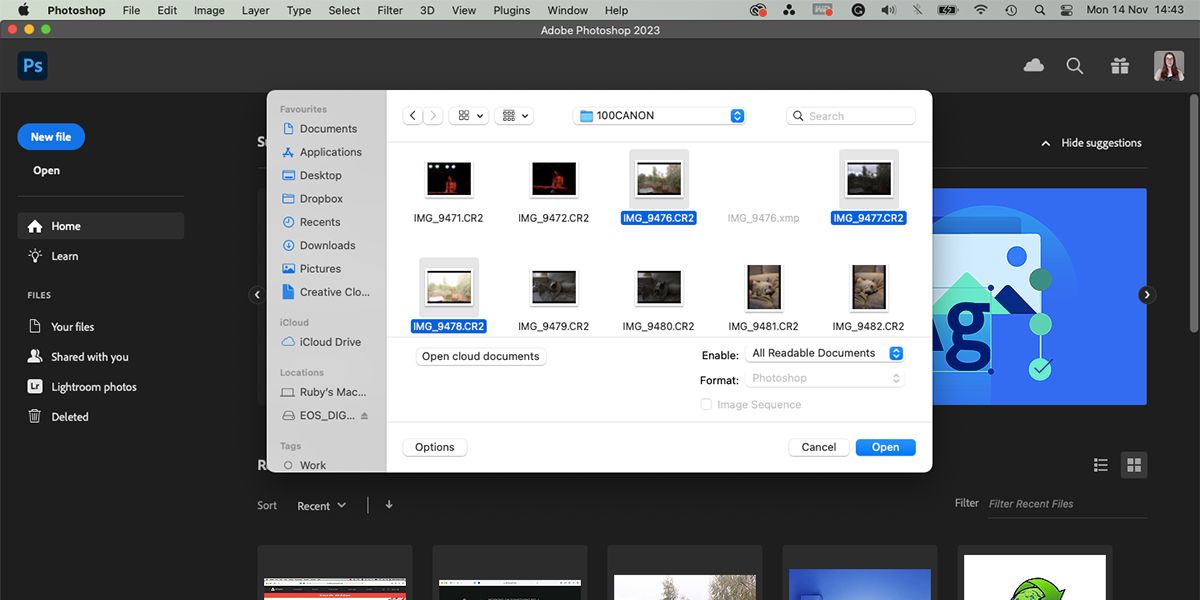
Open Photoshop. From the home page, select Open. Find your RAW images in the dialog box and select those you want to use. RAW format images use the file format CR2, so any image in that format will open with Camera RAW via Photoshop. Once selected, click Open.
Step 2: View the Photos in Camera RAW
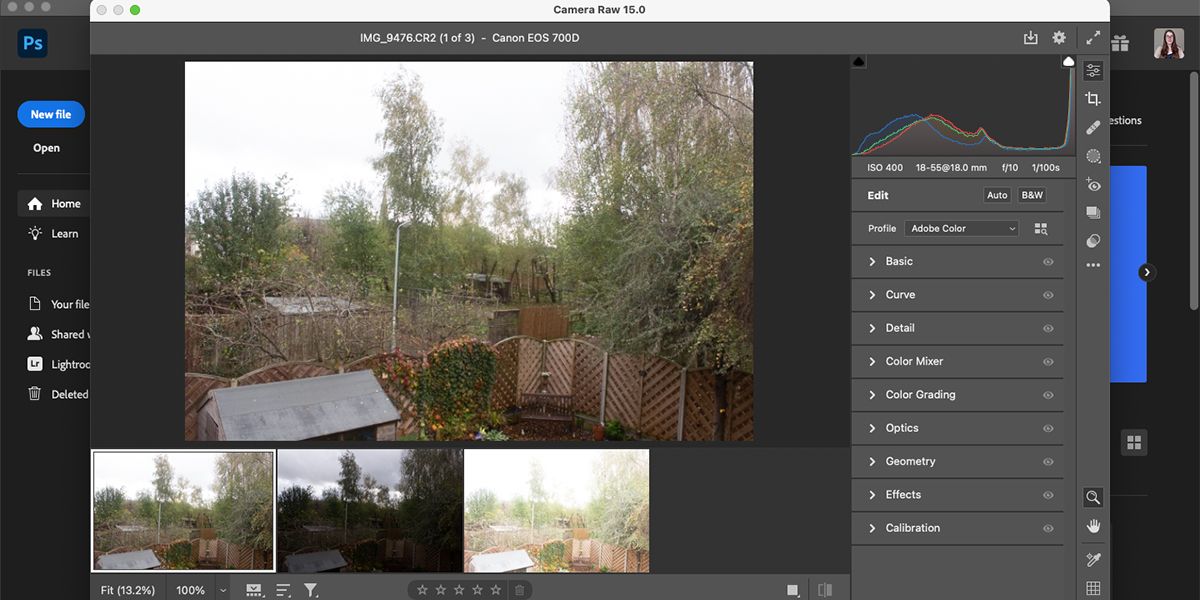
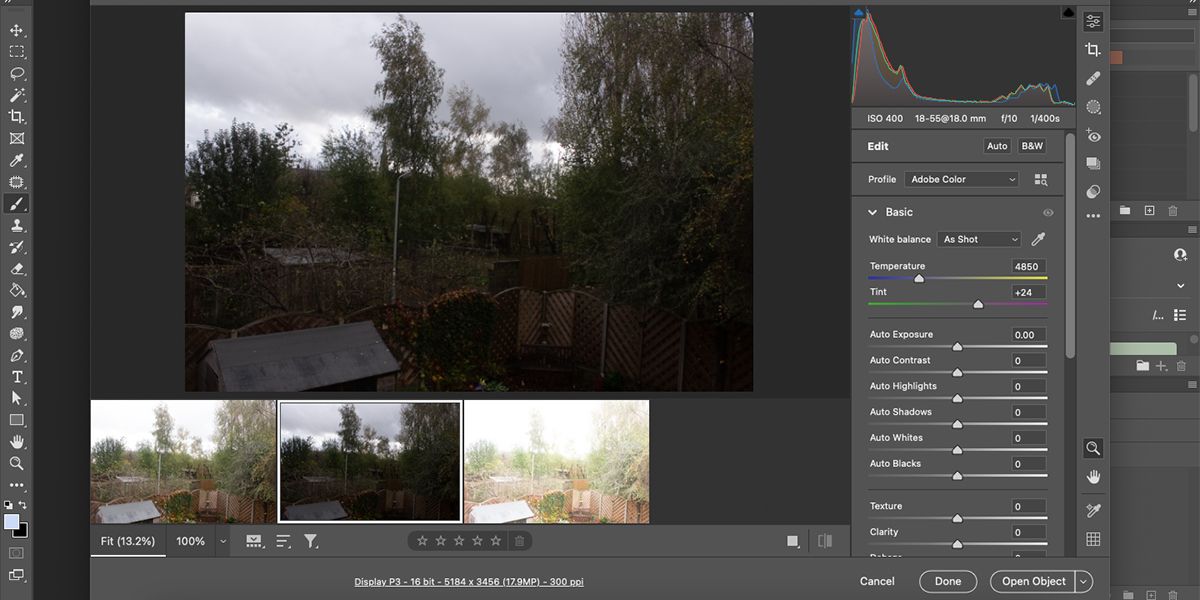
Camera RAW sits as a dialog box inside your Photoshop window, it is not a separate software or app. Whichever photos you selected to open will appear in the filmstrip at the bottom of the Camera RAW window.
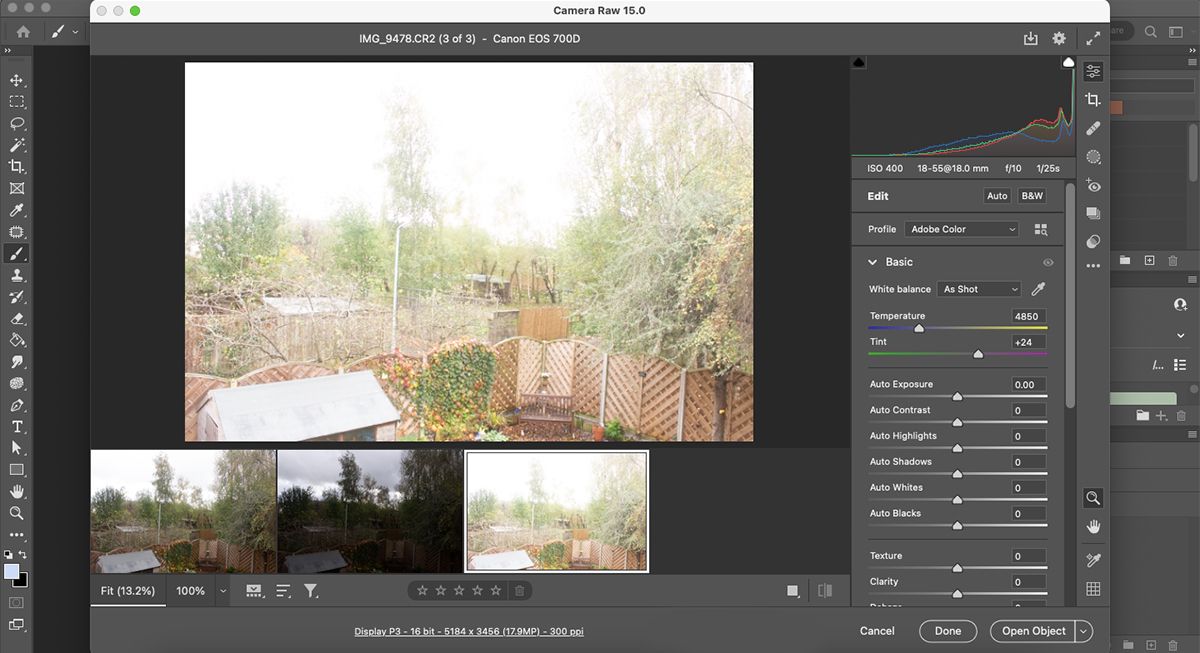
When opening three exposure bracketed photos, the filmstrip displays the images in the following order: the correctly exposed image on the left, then the under-exposed shot, followed by the over-exposed shot on the right.
On the right-hand side of the dialog box, there’s a histogram graph, which you can use to see the darks and lights of each of the variously exposed images. Below the histogram are your other photo settings.
Step 3: Pre-Edit the Photos
This step is optional. You can use the settings below the histogram to edit any of the individual images before making the HDR. You can increase or decrease exposure if you want to add extra drama to your HDR.
It is best to edit the image once you’ve made the HDR, but if there’s anything you want to change beforehand, you can do it now.
Step 4: Make the HDR
Select the image on the left, hold Shift, and then select the image on the right. This will select all the images. With all three—or more, if you have them—images selected, it’s easy to create an HDR.
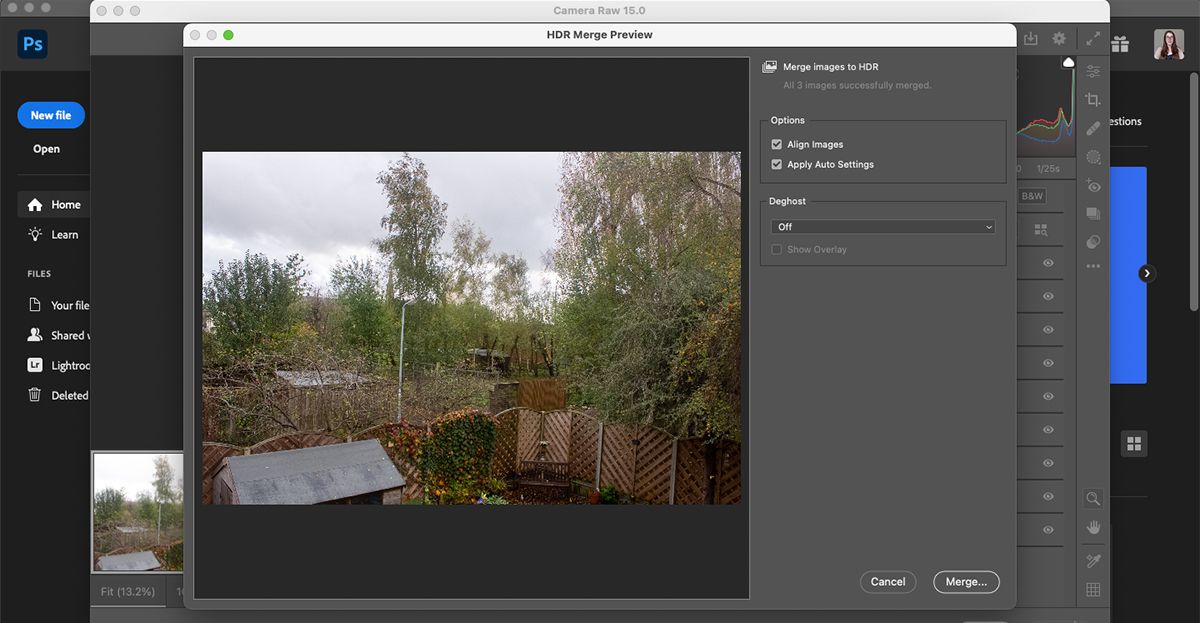
Right-click any of the selected images and choose Merge to HDR. This immediately shows a new dialog box with a preview of the finished HDR. If you’re happy with the preview, select Merge. If you’re unhappy, you can cancel and edit any of your images to see if it helps, then try again.
Step 5: Save Your HDR
After selecting Merge on the preview box, a dialog box will appear to save your HDR on your system. Choose a folder to save it in, rename it, and select Save. Your HDR saves as a DNG format image.
Upon returning to Camera RAW, your finished HDR now sits as a fourth image on the right of the filmstrip. The HDR now contains information from the previous RAW images. This makes it much easier to edit if you want to.
If creating your HDR in this way isn't possible due to not using RAW images, or not having options to apply various exposures to your photos, then you can create a fake HDR image in Photoshop.
Step 6: Return Your HDR to Photoshop
From the Camera RAW dialog box, there are three options: Cancel, Done, and Open. Open then has three more options: Open, Open as Object, and Open as Copy.
Selecting Cancel exits out of Camera RAW and takes you back to an empty Photoshop window. If you edited your HDR after merging, canceling won’t save those edits. Select Done to save the edits and exit out of Camera RAW.
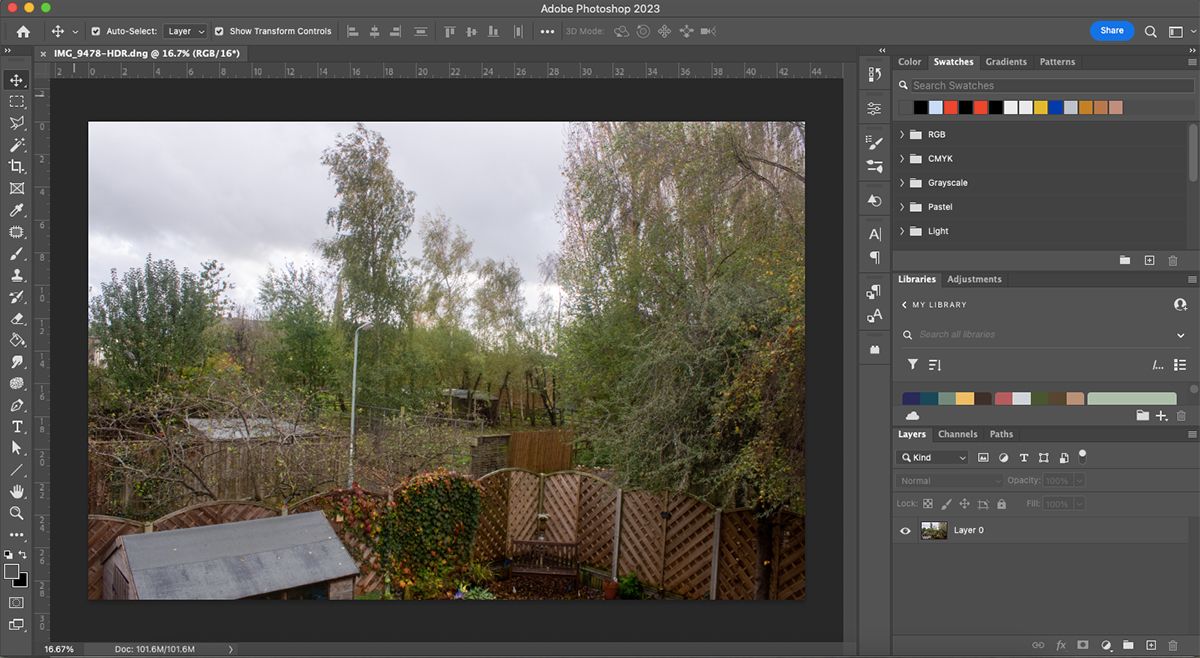
The three Open options allow you to open and edit your HDR in different ways. Open opens the HDR as a normal Photoshop project, allowing you to edit it as such. Open as Object applies a Smart Object to your new HDR, so you can treat it as any other Smart Object.
And Open as Copy opens your HDR as a copy rather than the original, so you can work on the image separately from your saved HDR.
Add High Dynamic Range to Your Photoshop Images
Shooting in RAW allows your images to shine and show off depth and color that can’t be found in JPGs. Creating HDR images from your RAW files adds even more depth.
It’s a simple process that many phones or cameras can automate, but now you know how easy it is to do it manually. You can override the editing settings to get your perfect HDR using Photoshop and Camera RAW.

